Wirelessly Controlled 3D Printed Hand
Primary image

What does it do?
Simply using a hand from an opensource robot called Inmoov and controlling it through the use of a glove and XBees. The full size robot of the hand can be found at InMoov.fr


An icon of Computer Science, [Edsger Dijkstra], published a letter in the Communications of the Association of Computer Machinery (ACM) which the editor gave the title “Go To Statement Considered Harmful“. A rousing debate ensued. A similar criticism of macros, i.e. #define, in C/C++ may not rise to that level but they have their own problems.
Macros are part of the preprocessor for the C/C++ languages which manipulates the source code before the actual translation to machine code. But there are risks when macros generate source code. [Bjarne Stroustrup] in creating C++ worked to reduce the need and usage of the preprocessor, especially the use of macros. In his book, The C++ Programming Language he writes,
Don’t use them if you don’t have to. Almost every macro demonstrates a flaw in the programming language, in the program, or in the programmer.
As C retrofitted capabilities of C++, it also reduced the need for macros, thus improving that language.
With the Arduino using the GNU GCC compilers for C and C++ I want to show new coders a couple of places where the preprocessor can cause trouble for the unwary. I’ll demonstrate how to use language features to achieve the same results more cleanly and safely. Of course, all of this applies equally when you use any of these languages on other systems.
We’re only going to be looking at macros in this article but if you want to read more the details about them or the preprocessor see the GNU GCC Manual section on the preprocessor.
The preprocessor is complex, but described in simplified terms, it reads each line in a compilation unit, i.e. file, scanning for lines where the first non-whitespace character is a hash character (#). There may be whitespace before and after the #. The next token, i.e. a set of characters bounded by whitespace, is the name of the macro. Everything following the name is the argument. A macro has the form:
#define <name> <rest of line>
The simplest macro usage is to create symbols that are used to control the preprocessor or as text substitution in lines of code. A symbol can be created with or without a value. For example:
#define LINUX
#define VERSION 23
The first line defines the symbol LINUX but does not give it a value. The second line defines VERSION with the value 23. This is how constant values were defined pre-C++ and before the enhancements to C.
By convention, macro symbol names use all caps to distinguish them from variable and function names.
Symbols without values can only be used to control the preprocessor. With no value they would simply be a blank in a line of code. They are used in the various forms of the #if preprocessor directives to determine when lines of code are included or excluded.
When a symbol with a value appears in a line of code, the value is substituted in its place. Here is how using a macro with a value looks:
const int version_no = VERSION;
which results in the code
const int version_no = 23;
This type of macro usage doesn’t pose much of a threat that problems will arise. That said, there is little need to use macros to define constants. The language now provides the ability to declare named constants. One reason macros were used previously was to avoid allocating storage for a value that never changes. C++ changed this and constant declarations do not allocate storage. I’ve tested this on the Arduino IDE, and found that C does not appear to allocate storage but I’ve seen mention that C may do this on other systems.
Here is the current way to define constants:
const int version = 23;
enum {start=10, end=12, finish=24};   // an alternative for related integer consts
Another form of macro is the function macro which, when invoked looks like a function call, but it is not. Similar to the symbol macros, function macros were used to avoid the overhead of function calls for simple sequences of code. Another usage was to provide genericity, i.e. code that would work for all data types.
Function macros are used to pass parameters into the text replacement process. This is fraught with danger unless you pay close attention to the details. The use of inline functions is much safer as I’ll show below.
To illustrate here’s an example of a function macro to multiply two values.
#define MULT(lhs, rhs) lhs * rhs
This function macro is used in source code as:
int v_int = MULT(23, 25);
float v_float = MULT(23.2, 23.3);
Consider this use of the macro, its expansion, and its evaluation, which definitely does not produce the expected result:
int s = MULT(a+b, c+d);
// translates to: int s = a + b * c + d;
// evaluates as: a + (b * c) + d
This can be addressed by adding parenthesis to force the proper evaluation order of the resulting code. Adding the parenthesis results in this code:
#define MULT(lhs, rhs) ((lhs) * (rhs))
int s = MULT(a+b, c+d);
// now evaluates as: (a + b) * (c + d)
The parenthesis around lhs force (a + b) to be evaluated before the multiplication is performed.
Another ugly case is:
#define POWER(value) ((value) * (value))
int s = POWER(a++);
// evaluates as: ((a++) * (a++))
Now there are two problems. First, a is incremented twice, and, second, the wrongly incremented version is used for the calculation. Here again it does not produce the desired result.
It’s really easy to make a mistake like this with function macro definitions. You’re better off using an inline function which is not prone to these errors. The inline equivalents are:
inline int mult(const int x, const int y) { return (x * y); }
inline int power(const int x) { return (x * x); }
Now the values of x and y are evaluated before the function is called. The increment or arithmetic operators are no longer evaluated inside the actual function. Remember, an inline function does not produce a function call since it is inserted directly into the surrounding code.
In C, there is a loss of generality using inline over the macro. The inline functions shown only support integers. You can add similar functions for different data types, which the standard libraries do, but the names must reflect the data type. A few cases would be covered by mult_i, mult_f, mult_l, and mult_d for integer, float, long and double, respectively.
This is less of a problem in C++ where there are two solutions. One is to implement separate functions, as in C, but the function names can all be mult relying on C++’s ability to overload function names.
A nicer C++ version is to use template functions. These really are straightforward for simple situations. Consider:
template <typename T>
inline T mult(const T x, const T y) { return (x * y); }
template <typename T>
inline T power(const T x) { return (x * x); }
You use these just like any other function call and the compiler figures out what to do. There is still one minor drawback. The mult cannot mix data types which MULT has no problem doing. You must use an explicit cast to make the types agree.
The code generated by the inline and template versions are going to be the same as the macro version, except they will be correct. You should restrict the use of macros to preprocessing of code, not code generation. It’s safer and once you are used to the techniques it’s easy.
If these problems aren’t enough, take a look at the GNU preprocessor manual section which provides more details and examples of problems.
The previous sections discussed the problems with macros and how to avoid them using C/C++ language constructs. There are a couple of valuable uses of macros that we’ll discuss in this section.
The first is stringification which converts a function macro argument into a C/C++ string. The second is concatenation which combines two arguments into a single string.
A string is created when a # appears before a token. The result is a string: #quit becomes “quit”.
Two arguments are concatenated when ## appears between them: quit ## _command becomes quit_command.
This is useful in building tables of data to use in a program. An illustration:
#define COMMAND(NAME) { #NAME, NAME ## _command }

struct command commands[] =
{
COMMAND (quit),
COMMAND (help),
...
};
expands to the code
struct command
{
char *name;
void (*function) (void);
};

struct command commands[] =
{
{ "quit", quit_command },
{ "help", help_command },
...
};
The C/C++ preprocessor is powerful and dangerous. The standards committees have followed Stroustrup’s lead in adding features that reduce the need to use the preprocessor. There is still a need for it and probably always will be since it is an inherent part of the languages. Be careful when and how you use #define, and use it sparingly.


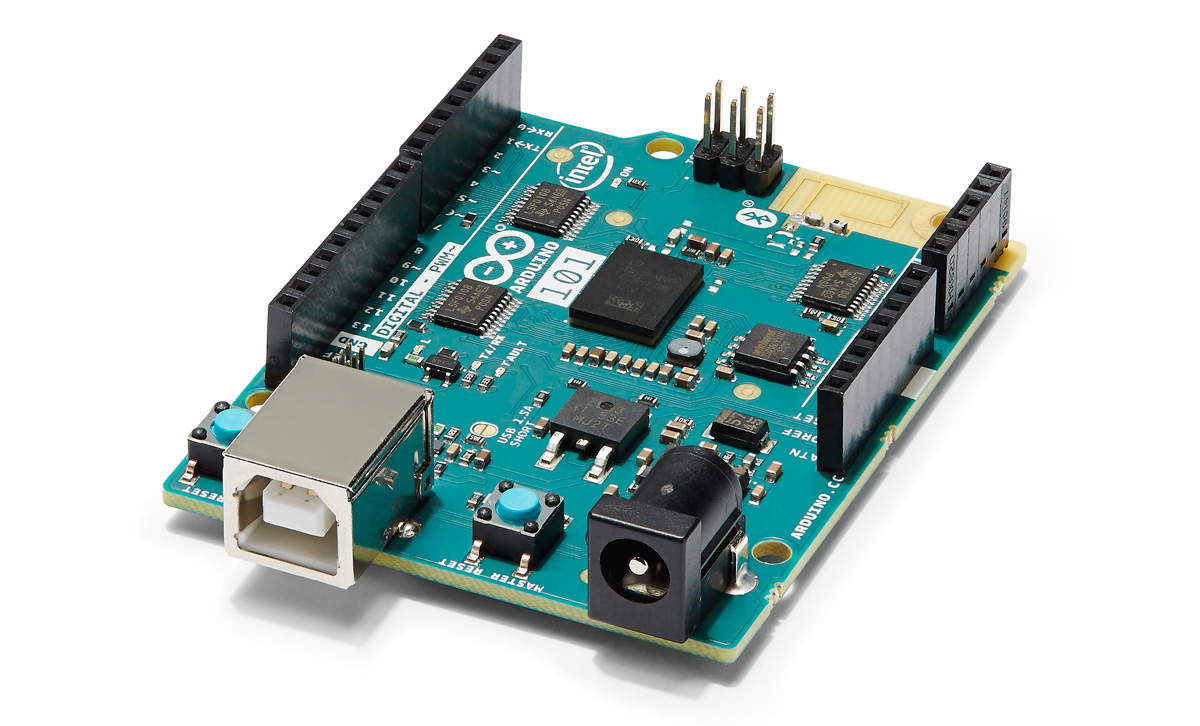
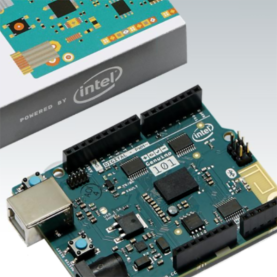
This week, Intel and Arduino are releasing their first product pushed directly on the education market, the Arduino/Genuino 101 board powered by the Intel Curie module.
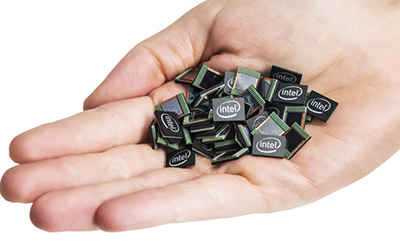
 The Arduino/Genuino 101 is the first development platform for the Intel Curie modules which are a recent development from Intel’s Maker and Innovator group. The button-sized Curie is a single package encapsulating microcontroller, Bluetooth, a 6-DOF IMU, and battery charging circuitry; the requisite hardware for anything marketed as a ‘wearable’. The Curie’s brain is a 32-bit Intel Quark microcontroller with 384kB of Flash 80kB SRAM, giving it about the same storage and RAM as a low-end ARM Cortex microcontroller.
Called a module, it needs a carrier board to interface with this hardware. This is where the Arduino/Genuino 101 comes in. This board – the third such collaboration between Intel and Arduino – provides the same form factor and pinout found in the most popular Arduino offering. While the Curie-based Arduino/Genuino 101 is not replacing the extraordinarily popular Arduino Uno and Leonardo, it is going after the same market – educators and makers – at a similar price, $30 USD or €27. For the same price as an Arduino Uno, the Arduino/Genuino 101 offers Bluetooth, an IMU, and strangely the same USB standard-B receptacle.
Intel has further plans in store for the Curie module; In 2016, Intel, [Mark Burnett] of reality television fame, and United Artists Media group will produce America’s Greatest Makers, a reality show featuring makers developing wearable electronics on TV. No, it’s not Junkyard Wars, but until the MacGyver reboot airs, it’s the closest we’re going to get to people building stuff on TV.
In 2013, Intel and Arduino introduced the Galileo board, a dev board packed with I/Os, Ethernet, PCIe, and an Intel instruction set. This was a massive move away from all ARM, AVR, or PIC dev boards made in recent years, and marked Intel’s first foray into the world of education, making, and an Internet of Things. In 2014, Intel and Arduino released the Edison, a tiny, tiny board designed for the embedded market and entrepreneurs.
 The Arduino 101 and Genuino 101 – different names for the same thing and the first great expression of arduino.cc’s troubles with trademarks and the Arduino vs Arduino war – are targeted specifically at the ‘maker’ market, however ephemeral and hard to define that is. The form of the Arduino 101 follows directly in the footsteps of the Arduino Uno and Leonardo; The 101 has the same footprint, the same pinout, a single USB port as the Leonardo.
Being the ‘maker market Arduino’, this board is designed to bring technology to the classroom. In a conference earlier this week, [Massimo] framed the Arduino 101 as the educational intersection between technology, coding, art, and design. Students who would not otherwise learn microcontroller development will learn to program an Arduino for art and design projects. The Arduino/Genuino 101 is the board that puts the STEAM in STEM education.
Intel has big plans for the Curie module, with a few products in the works already. The Intel Edison has made its way into consumer electronics and wearables, including an electronic ski coach that will tell you when to pizza and when to french fry. The Curie will be available independently of the Arduino/Genuino 101, with both products being released in early 2016.


 Today at the Rome Maker Faire, Intel and Arduino are announcing a new board, the Arduino 101, powered by the Intel Curie module.
The post $30 Gets You the Sensor-Packed, Curie-Powered Arduino 101 appeared first on Make: DIY Projects, How-Tos, Electronics, Crafts and Ideas for Makers.

The low-power Curie from Intel helps developers quickly prototype a device with turn-key access to Bluetooth, a six-axis sensor with gyroscope and accelerometer and the 32-bit SOC Quark micro-controller. It's main focus has been the wearable market and since its introduction at CES 2015, it's has been used in sports bras, creepy robot spiders and to measure wicked-cool bike tricks. Now it's being included in a new Arduino board. The Arduino 101 (internationally it'll be called, Genuino 101) is the first widely available development board for the tiny chip. Priced at a reasonable $30 and using the same open-source platform as the rest of the Arduino line, the 101 is targeted at students and makers looking to add some connectivity to a project.

The low-power Curie from Intel helps developers quickly prototype a device with turn-key access to Bluetooth, a six-axis sensor with gyroscope and accelerometer and the 32-bit SOC Quark micro-controller. It's main focus has been the wearable market and since its introduction at CES 2015, it's has been used in sports bras, creepy robot spiders and to measure wicked-cool bike tricks. Now it's being included in a new Arduino board. The Arduino 101 (internationally it'll be called, Genuino 101) is the first widely available development board for the tiny chip. Priced at a reasonable $30 and using the same open-source platform as the rest of the Arduino line, the 101 is targeted at students and makers looking to add some connectivity to a project.
Source: Intel
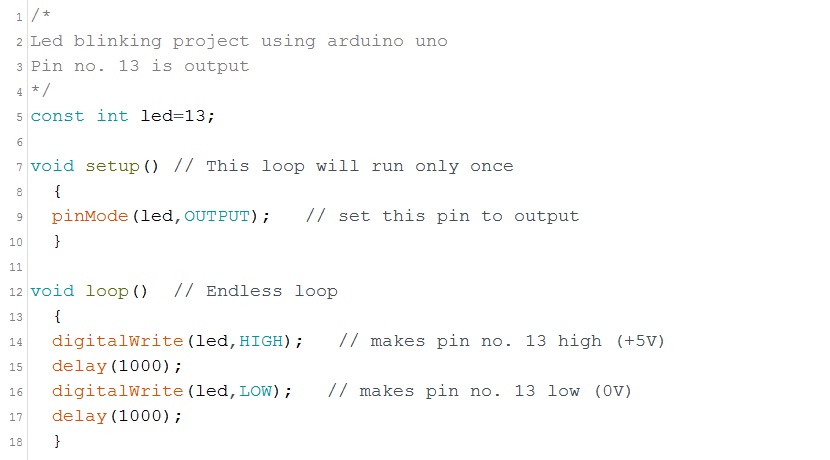 |
| Led Blinking Code |
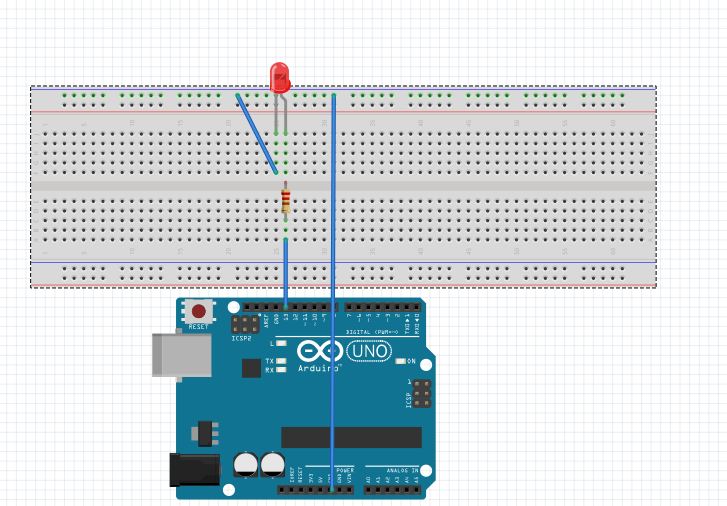 |
| Schematics using Fritzing |
It’s not uncommon to bitbang a protocol with a microcontroller in a pinch. I2C is frequently crunched from scratch, same with simple serial protocols, occasionally complex systems like Ethernet, and a whole host of other communication standards. But VGA gets pretty tricky because of the timing requirements, so it’s less common to bitbang. [Sven] completely threw caution to the wind. He didn’t just bitbang VGA on an Arduino, but he went one step further and configured an array of 7400 logic chips to output a VGA signal.
[Sven]’s project is in two parts. In part one, he discusses choosing a resolution and setting up the timing signal. He proceeds to output a simple(-ish) VGA signal that can be displayed on a monitor using a single gate. At that point only a red image was displayed, but getting signal lock from the monitor is a great proof of concept and [Sven] moved on to more intricate display tricks.
With the next iteration of the project [Sven] talks about adding in more circuitry to handle things like frame counting, geometry, and color. The graphics that are displayed were planned out in a simulator first, then used to design the 7400 chip configuration for that particular graphic display. It made us chuckle that [Sven] reports his monitor managed to survive this latest project!
We don’t remember seeing non-programmable integrated circuits used for VGA generation before. But bitbanging the signal on an Arduino or from an SD card slot is a great test of your ability to calculate and implement precise timings with an embedded system. Give it a try!