Using atmega 8 in Arduino IDE
This post is important since atmega 328p is way more expensive than atmega 8a. We can use arduino IDE with atmega 8 too.
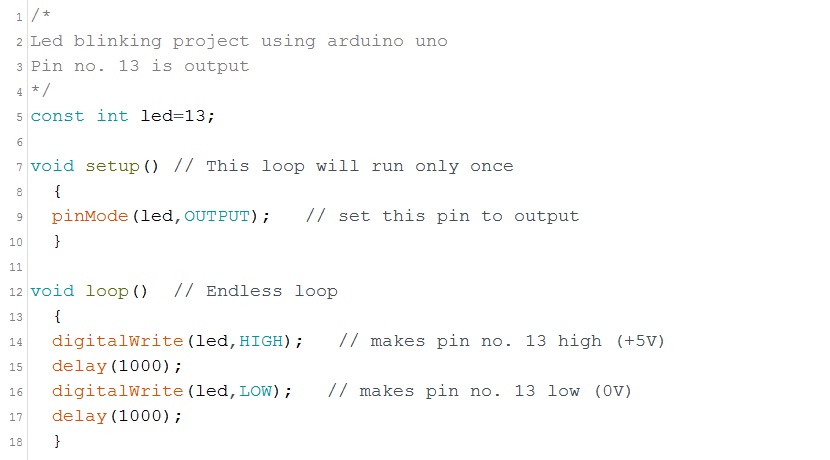
Open arduino IDE and from file menu select Examples>Basics>Blink.
In next instance, code for blinking a led will be displayed on your screen.
Now from Tools>Board>Arduino NG or older
Now, we have to choose microcontroller:
Tools>Processor>Atmega 8
Now, we have to just compile the program.
Also, make some changes in preferences: File>Preferences
Make changes as given above. This make the IDE more user-friendly.
After this, hidden files and folders will appear:
Open arduino IDE and from file menu select Examples>Basics>Blink.
In next instance, code for blinking a led will be displayed on your screen.
Now from Tools>Board>Arduino NG or older
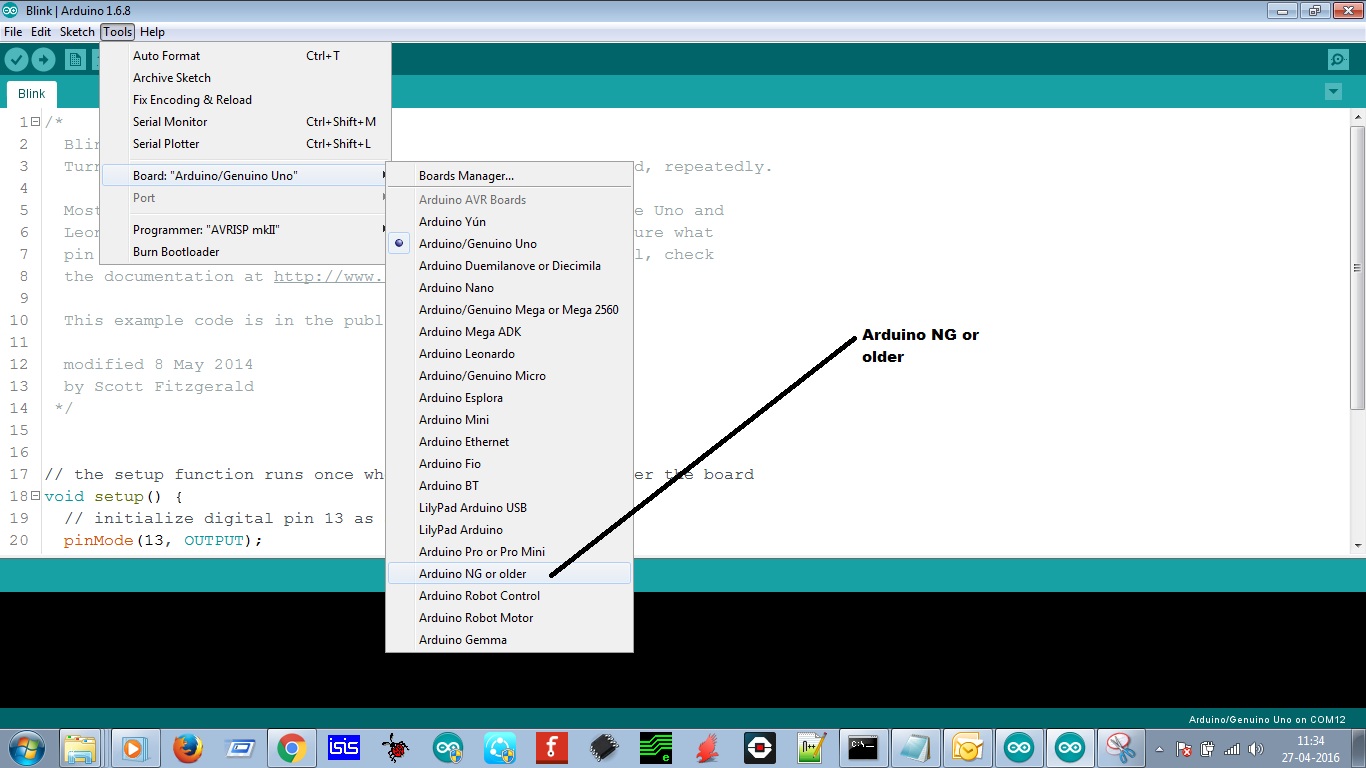 |
| Selecting arduino ng or older |
Now, we have to choose microcontroller:
Tools>Processor>Atmega 8
 |
| Selecting atmega 8 |
Just click on the first icon just below the file menu.
 |
| Compiling the code |
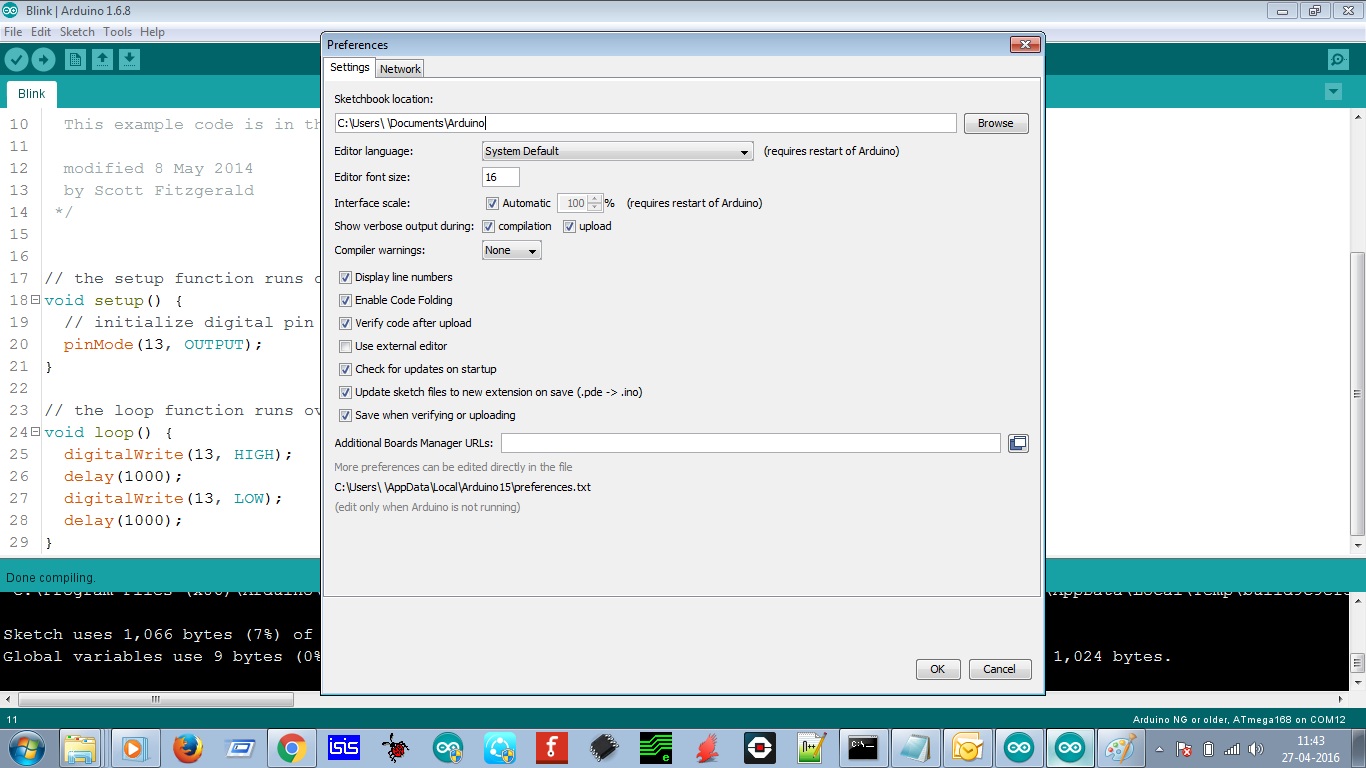 |
| Preferences |
Note: Preferences has nothing to do with programming part. It just makes IDE more user-friendly.
Now, our hex file is generated. One question arises: How to locate the hex file?
First of all, click on view to display hidden files and folders:
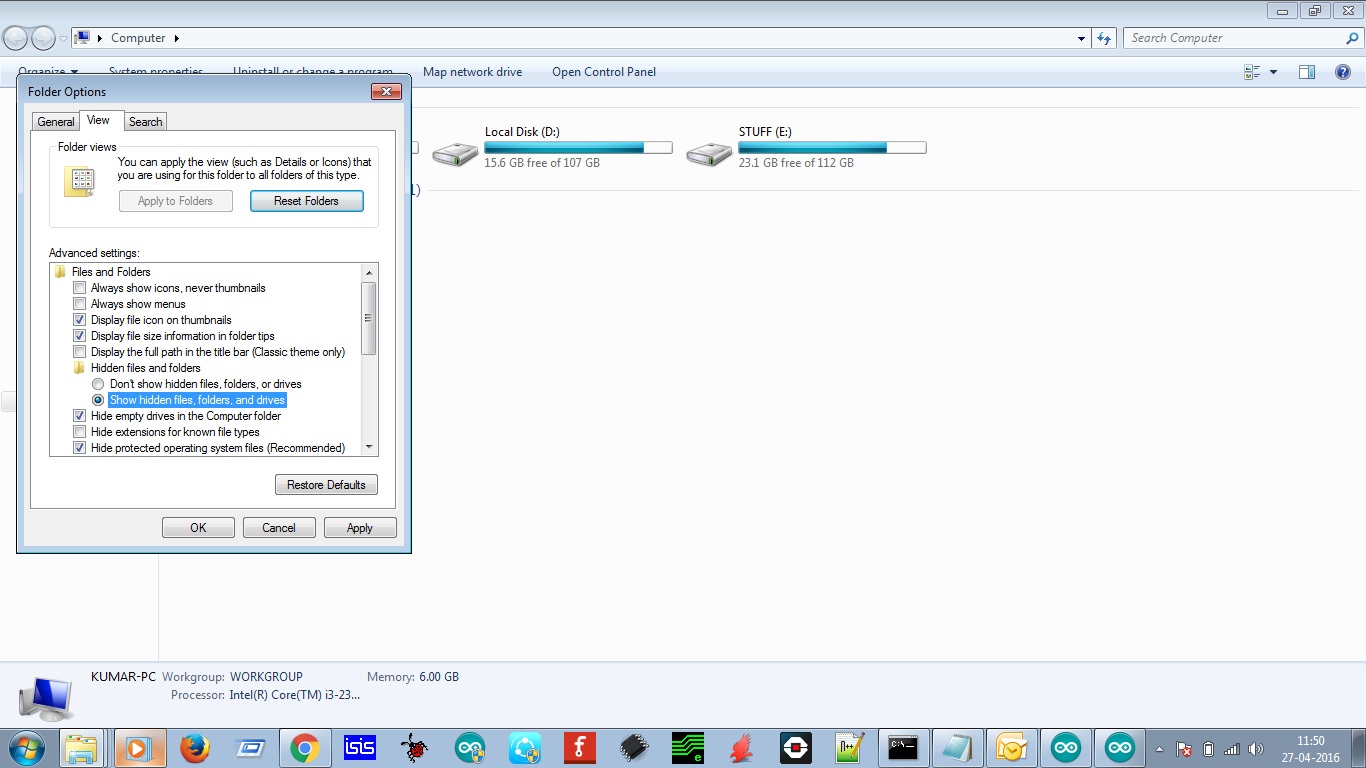 |
| View hidden files and folders |
You can retrieve hex file from the following directory:
C:\Users\user_name\AppData\Local\Temp\build9c9ef3bdfe2fccb480bc6e4bac749e41.tmp
In this folder, resides your hex file. Check the date and time of hex file.
I am using avrdudes for burning the hex file in atmega 8a.
Fuse byes are as follows: Low fuse: 0xE4
High fuse: 0xC6
This setting is for 8-MHz internal oscilltor.
Note: Wrong fuse bytes can damage your microcontroller.
The delay of arduino IDE is not in sync with your coding due to indifference in crystal oscillator.
Thanks for your patience.
Keep supporting !!