Posts with «arduino» label

Sparkpad Sparks Joy for Streamers

The best streamers keep their audience constantly engaged. They might be making quips and doing the funny voices that everyone expects them to do, but they’re also busy reading chat messages aloud and responding, managing different scenes and transitions, and so on. Many streamers use a type of macro keyboard called a stream deck to greatly improve the experience of juggling all those broadcasting balls.

Sure, there are dedicated commercial versions, but they’re kind of expensive. And what’s the fun in that, anyway? A stream deck is a great candidate for DIY because you can highly personalize the one you make yourself. Give it clicky switches, if that’s what your ears and fingers want. Or don’t. It’s your macro keyboard, after all.

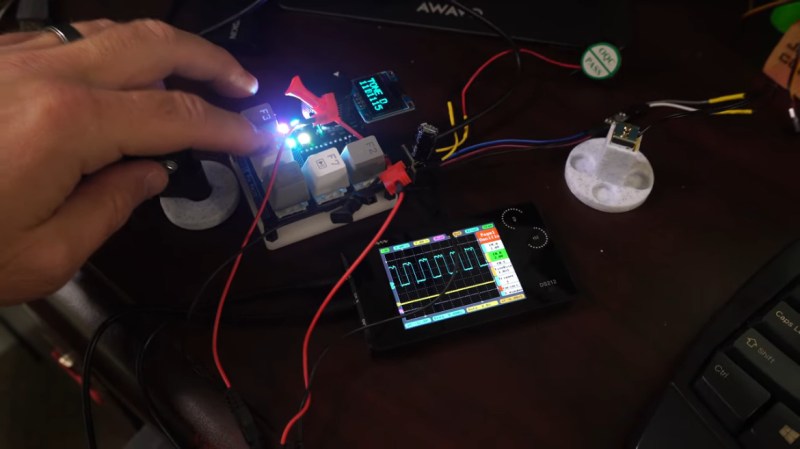
[Patrick Thomas] and [James Wood] teamed up to build the perfect stream deck for [James]’ Twitch channel. We like the way they went about it, which was to start by assessing a macro pad kit and use what they learned from building and testing it to design their ideal stream deck. The current version supports both the Arduino Pro Micro and the ESP32. It has twelve key switches, a rotary encoder, an LED bar graph, and an OLED screen for choosing between the eight different color schemes.

If you’d rather have dynamic screens instead of cool keycaps, you can do it cheaper by making non-touch screens actuate momentaries.

The HackadayPrize2021 is Sponsored by:

RGB LED Matrix Helps Etch-a-Sketch Scratch Out a 21st Century Existence

We never did crack open our Etch-a-Sketch, but we did scrape out a window large enough to really check out the mechanism inside. [MrLangford] is bringing the Etch-a-Sketch into the 21st century while at the same time, bringing an even bigger air of mystery, at least for the normies.

Instead of scraping aluminum powder off of plastic by driving a stylus on an x-y gantry with a pair of knobs, this bad boy uses rotary encoders to move the cursor around and put down squares of colored light. The familiar movements are there — the left knob moves the cursor left and right, and the right knob moves it up and down. But this wouldn’t be a 21st century toy without newfangled features. Push the left encoder down and it cycles through eight color choices, or push the right one down to go through them backwards. We hope one of the colors is setting it back to darkness in case you screw up. And while we’re dreaming up improvements, it would be awesome to add an accelerometer so you could shake it clear like a standard Etch-a-Sketch.

Inside the requisite red enclosure with white knobs are an Arduino Nano and a 16×16 RGB LED matrix. The enclosure is four sheets of 6mm MDF glued together, and we like the use of protoboard to distribute GND and 5 V in the name of keeping the thing slim.

If you’re not much of an artist, here’s a TV-sized Etch-a-Sketch build that can draw by itself.

Get Your Flex On With The FlowIO Platform

Hackaday Prize 2021 entry FlowIO Platform promises to be to pneumatics what Arduino is to Electronics. The modular platform comprises a common controller/valve block, a selection of differently sized pumps, and a few optional connectivity and sensing blocks. With Arduino software support as well as as Javascript and web-GUI, there’s a way to program this no matter what the level of experience the user has.

flowIO exploded view from http://www.softrobotics.io/flowio

This last point is a critical one for the mission [Ali Shtarbanov] from the MIT Media Lab is setting out for this project. He reminds us that in decades gone by, there was a significant barrier to entry for anyone building electronics prototypes. Information about how to get started was also much harder to by before the internet really got into gear.

It’s a similar story for software, with tools like Scratch and Python lowering the barrier to entry and allowing more people to get their toes wet and build some confidence.

But despite some earlier work by projects like the Soft Robotics Toolkit and Programmable-Air, making a start on lowering the bar for pneumatics support for soft robotics, and related applications, the project author still finds areas for further improvement. FlowIO was designed from the ground-up to be wearable. It appears to be much smaller, more portable and supports more air ports and a greater array of sensing and connectivity than previous Open Source work to date.

Creative Commons Hardware

Whilst you can take all the plans (free account signup required) and build yourself a FlowIO rig of your very own, the project author offers another solution. Following on from the Wikipedia model of free sharing and distribution of information, FlowIO offers its hardware for free, for the common good. Supported by donations to the project, more hardware is produced and distributed to those who need it. The only ask is that redundant kits are passed on or returned to base for upgrade, rather than landfill.

The HackadayPrize2021 is Sponsored by:

DIY Handheld Game Puts its Brains on a Removable Cart

Over the years we’ve seen plenty of homebrew handheld game systems that combine an AVR microcontroller, a few buttons, and an small OLED display. We’ve even seen some of them turned into commercial products, such as the Arduboy. They’re simple, cheap, and with the right software, a lot of fun. But being based on an MCU, most of them share the same limitation of only being able to hold a single game at any one time.

But not the Game Card, by [Dylan Turner]. This handheld was specifically designed so that games could be easily swapped out using physical cartridges. But rather than trying to get the system’s microcontroller to boot code from an external flash chip, the system relocates the MCU to the removable cartridge. That might seem a bit overkill, but given how cheap the ATTINY84A on each cartridge is, it’s not exactly going to break the bank.

With the microcontroller on the cartridge, the only hardware that stays behind on the Game Card is the SSD1306 128×64 OLED display, buttons, and the battery. That means the handheld is effectively non-functional unless a game is slotted in, but that could be said of most early cartridge-based game systems as well. On the other hand, it also opens up the possibility of producing cartridges with more powerful microcontrollers down the line.

Using a different microcontroller for each game is a neat hack, but it’s not the only solution to the problem. We previously saw a community effort to add expandable storage to the Arduboy in the form of a DIY cartridge, which ultimately led to the development of an official flash chip upgrade for the handheld.

Touchscreen Makes For A Neat Wavetable Synth

A popular tool in chiptune software like LSDJ allows the user to draw a waveform and use it as the basis for a wavetable synth. It’s fun and it can produce some great bleeps and bloops. [Kevin] has created a similar tool using an Arduino and a touchscreen.

You can draw the waveform! That’s neat.

The build is based on the Arduino Uno, the humble mainstay of the Arduino line. It’s hooked up to an ILI9488 color touchscreen display, which acts as the primary user interface. Using a stylus, or presumably a finger, the user can draw directly on the screen to specify the desired waveform for the synth to produce. The Arduino reads the step-by-step amplitude values of the drawn waveform and uses them to synthesize audio according to MIDI messages received over its serial port. Audio output is via PWM, as is common in low-cost microcontroller projects.

It’s a fun build and we’re sure [Kevin] learned plenty about wavetable synthesis along the way. We’ve seen his work on other Arduino synthesis projects before, too! Video after the break.

USB Mouse Hack for Pachyderm Protection

When most of us think of seismometers, our minds conjure up images of broken buildings, buckled roads, and search and rescue teams digging through rubble. But when [Subir Bhaduri] his team were challenged with solving real world problems as frugally as possible as part of the 2020 Frugal Science course, he thought of farmers in rural India for whom losing crops due to raiding elephants is a reality. Such raids can and have caused loss of life for humans and elephants alike. How could he apply scientific means to prevent such conflicts, and do it on the cheap?

Whether inspiration came from using a computer mouse with the cursor speed turned up to “orbital velocity” is debatable, but [Subir] set forth to find out if such sensitivity could be leveraged for the seismic detection of the aforementioned elephants. His proof of concept is a fantastically frugal low cost seismograph using an optical mouse and some cheap PVC pipe and fittings.

We invite you to watch the video below the break to find out how it works. You’ll be impressed as we were by [Subir]’s practical application of engineering principles. And keep your eyes open for the beautiful magnetic damper hack. It’s a real treat!

If pontificating pesky pachyderms p-waves piques your interest, perhaps you’ll appreciate previous projects which produce data with piezo pickups and plumbing parts.

Arduino Finds Treasure

A beach is always a relaxing summer vacation destination, a great place to hang out with a drink and a book or take a swim in the ocean. For those who need a more active beach-going activity with an electronics twist, though, metal detecting is always a popular choice too. And, of course, with an Arduino and some know-how it’s possible to build a metal detector that has every feature you could want from even a commercial offering.

This build comes to us from [mircemk] who built this metal detector around an Arduino Nano and uses a method called induction balance detection to find metal. Similar to how radar works, one coil sends out a signal and the other listens for reflections back from metal objects underground. Building the coils and determining their resonant frequency is the most important part of this build, and once that is figured out the rest of the system can be refined and hidden treasure can easily be unearthed.

One of the more interesting features of this build is its ability to discriminate between ferrous and non-ferrous metals, and it can detect large metal objects at distances of more than 50 cm. There are improvements to come as well, since [mircemk] plans to increase power to the transmission coil which would improve the range of the device. For some of [mircemk]’s other metal detectors, be sure to check out this one which uses a smartphone to help in the metal detection process.

Homebrew ROM Reader Saves Data from a Vintage Minicomputer

Have you ever heard of a Centurion minicomputer? If not, don’t feel bad — we hadn’t either, until [David Lovett] stumbled upon a semi-complete version of the 1980-ish mini in all its wood-trimmed, dust-encased glory. And what does a hacker do with such an acquisition but attempt to get it going again?

Of course, getting a machine from the Reagan administration running is not without its risks, including the chance of losing whatever is on the machine’s many ROM chips forever. When finding a commercial ROM reader supporting the various chips proved difficult, [David] decided to build his own. The work was eased considerably by the fact that he had managed to read one chip in a commercial reader, giving him a baseline to compare his circuit against. The hardware is straightforward — a 12-bit counter built from a trio of cascaded 74LS161s to step through addresses, plus an Arduino Nano to provide clock pulses and to read the data out to the serial port.

The circuit gave the same results as the known good read, meaning results would be valid for the rest of the chips. The breadboard setup made supporting multiple ROM pinouts easy, even for the chips that take -9 volts. What exactly the data on the ROMs mean, if anything, remains a mystery, but at least it’s backed up now.

Before anyone notes the obvious, yes, [David] could have used a 555 to clock the reader — perhaps even this one. We’d actually have loved that, but we get it — sometimes you just need to throw an Arduino at a job and be done with it.

Hack a Day 11 Aug 06:00

This Old Mouse: Building a USB Adapter for a Vintage Depraz Mouse

When [John Floren] obtained a vintage Depraz mouse, he started out being content to just have such a great piece of history in his possession. But if you’re like him, you know it’s not enough to just have something. What would it be like to use it?

To find out, [John] embarked on a mission to build a USB adapter for his not so new peripheral.
Originally used in very early terminals with a Unix GUI, the Depraz mouse utilizes an unusual male DE9 connector rather than the more familiar female DB9 used in RS232 serial mice. Further deviating from the norm, he found that the quadrature encoders were connected directly to the DE9 connector.

Armed with an Arduino Pro Mini and some buggy sample code, he got to work. The aforementioned buggy code was scrapped and a fresh sketch for the Arduino Pro Mini gave the Depraz mouse the USB interface it lacked. [John] also found that he wasn’t the first hardware hacker to have modified the mouse for their use. Be sure to read to the end the article to find out about the vintage surprise lurking in the mouse shell itself! A demonstration of the mouse in action can be seen in the video below the break.

Looking for a fun mouse hack? Perhaps you’d like to use your more modern USB mouse on a retro computer, or try your hand at recreating an early Apple mouse for use in modern computers.

RAMPS Rebuild Keeps Robox 3D Printer Out of Junk Bin

A 3D printer is a wonderful invention, but it needs maintenance like every machine that runs for long hours. [Rob Ward] had a well-used Robox 3D printer that was in need of some repairs, but getting the necessary replacement parts shipped to Australia was cost-prohibitive. Rather than see a beloved printer be scrapped as e-waste, he decided to rebuild it using components that he could more easily source. Unfortunately the proprietary software and design of the Robox made this a bit difficult, so it was decided a brain transplant was the best path forward.

Step one was to deduce how the motors worked. A spare RAMPS 1.4 board and Arduino Mega2560 made short work of the limit switches and XYZ motors. This was largely accomplished by splicing into the PCBs themselves. The Bowden filament driver motor had a filament detector and an optical travel sensor that required a bit of extra tuning, but now the challenging task was next: extruding.

The printer’s new custom hotend.

With a cheap CR10 hot end from an online auction house, [Rob] began modifying the filament feed to feed in a different direction than the Robox was designed for (the filament comes in at a 90-degree angle on the stock Robox). A fan was needed to cool the filament feed line. Initial results were mixed with lots of blockages and clogs in the filament. A better hot end and a machined aluminum bracket for a smoother path made more reliable prints.

The original bed heater was an excellent heater but it was a 240 VAC heater. Reluctant to having high voltages running through his hacked system, he switched them out for 12 VDC adhesive pads. A MOSFET and MOSFET buffer allowed the bed to reach a temperature workable for PLA. [Rob] upgraded to a GT2560 running Marlin 2.x.x.

With a reliable machine, [Rob] stepped back to admire his work. However, the conversion to the feed being perpendicular to the bed surface had reduced his overall build height. With some modeling in OpenSCAD and some clever use of a standard silicone sock, he had a solution that fed the wire into the back of the hot end, allowing to reclaim some of the build height.

It was a long twelves months of work but the write-up is a joy to read. He’s included STL and SCAD files for the replacement parts on the printer. If you’re interested in seeing more machines rebuilt, why not take a look at this knitting machine gifted with a new brain.