TICO Robot Plays Tic-Tac-Toe by Drawing on a Tiny Whiteboard

Tic-tac-toe (or “Noughts and Crosses”) is a game simple enough to implement in any computer system: indeed it’s often used in beginner’s programming courses. A more challenging project, and arguably more interesting and useful, is to make some kind of hardware that can play it in real life. [mircemk] built a simple yet elegant machine that can play tic-tac-toe against a human player in a way that looks quite similar to the way humans play against one another: by drawing.
The robot’s design and programming were developed at PlayRobotics, who named the project TICO. The mechanical parts are available as STL files, to be printed by any 3D printer, and a comprehensive manual explains how to assemble and program the whole thing. Since it’s all open source, anyone can build it from scratch and modify it to their liking. The pictures show the original design by PlayRobotics, while the video (embedded after the break) shows [mircemk]’s version, which includes a wooden frame that gives it a bit more presence.
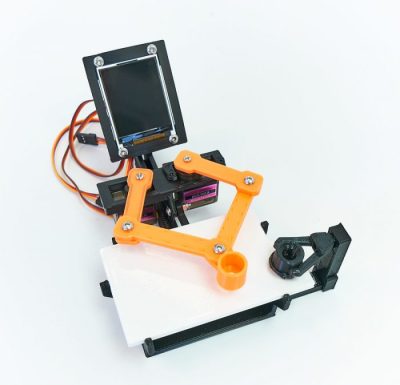 The electronic components are an Arduino with an OLED screen and a buzzer, plus three servos to operate the mechanical parts. Lacking a 3D printer, [mircemk] cut the plastic parts from a 3 mm sheet of PVC, which seems to have worked surprisingly well. The game board consists of a small whiteboard on which the robot and the human can draw their O’s and X’s.
The mechanical structure of the robot looks a bit like a tiny human using both arms to draw with an enormous marker. When starting a game, the robot clears the whiteboard using a little eraser, then draws the standard 3×3 grid and makes its first move. The human then draws their move and uses a remote control to tell the robot what they did (no machine vision here), after which the game continues until there is either a winner or the game results in a draw.
Although it looks like the program’s playing strategy may need some fine-tuning, the mechanical part is well-designed and the arms’ motions are quick and steady. We love the celebratory “cheering” at the end of a game, which TICO does whether it won or not.
The robot’s basic design is inspired by the Plotclock, which uses a similar setup to draw the time. We’ve seen other tic-tac-toe ‘bots before, as well as some clever electronic implementations of the game.