15 Fantastic Project Enclosures
 Fight the drab tyranny of the beige box with these inspiring ideas for project enclosures
The post 15 Fantastic Project Enclosures appeared first on Make: DIY Projects and Ideas for Makers.


Fight the drab tyranny of the beige box with these inspiring ideas for project enclosures
The post 15 Fantastic Project Enclosures appeared first on Make: DIY Projects and Ideas for Makers.
No longer content with adding value to the thermostat in the hallway or making your fridge smarter than it should be, IoT vendors are pushing into the inner sanctum of homes, the holy of holies – the bathroom. Sure, you can spend big bucks on an electronically controlled valve to turn your shower into a remote-controlled spa that shares your bathing habits with the cloud, but if you’re on a more modest budget and have the hacker spirit, you might want to check out this DIY automated shower valve with IoT features.
When we last ran into [TVMiller], he was opening gates using Jedi mind tricks, and before that he was shrinking a floating golf green to a manageable size. Such hacks work up a sweat, and while a clean hacker is a happy hacker, all that pesky valve-twisting and temperature-fiddling is so annoying. So with a few parts acquired from the waste stream, like an acrylic box, some salvaged servos, popsicle sticks, and a hell of a lot of caulk, [TVMiller] hacked together a feature-packed controller for his existing shower valves. An Arduino MKR1000 reads the water temperature and controls the servos that allow him to start the shower from his phone. Time and temperature data are sent to the cloud using ThingSpeak. You can see the whole thing in action in the mildly-NSFW video after the break.
Admittedly, this is a pretty janky setup, but it falls under the universal hacker disclaimer of “it’s just a prototype.” Still, we like the idea of retrofitting standard shower valves, and the popsicle-stick parallelograms for increasing leverage is a neat trick. We’ll be watching to see where this goes next.


This is a really easy project that can be done in about an hour. It is more of a virtual reality experience rather than a game. An accelerometer/gyro goes onto an Arduino board and transmits the angular motion of the board via bluetooth to a (extremely amateur game) I made in Unity for Android phones. This only works for Android phones and your phone must be compatible with Google Cardboard.
We’ve never seen someone build a plotter out of buzzwords, but [roxen] did a really good job of it. The idea is simple, place the plotter over a sheet of paper, open a website, draw, and watch the plotter go. Check out the video below the break.
The user draws in an HTML5 Canvas object which is read by a Java Web Server. From there it gets converted to serial commands for an Arduino which controls the steppers with two EasyDrivers.
The build itself is really nice. It perfectly meets the mechanical requirements of a pen plotter without a lot of fluff. The overall frame is T-shaped, for the x- and y-axis. The movements are produced by two steppers and acetal rack and pinion sets. The pen is lifted up and down by a hobby servo.
We like the use of rubber end caps to hold the frame fixed with friction against the table and a single ball bearing to to contact the table in the direction of its movement. This has the added benefit of being a 3-point contact that automatically squares the assembly to the same plane the paper is in. Any twisting of the frame will have little effect on its drawing ability since it’s end-effector is a ballpoint pen.
We really enjoyed this project, and think it would be fun to play around with. You could hack it to take text input, and output the handwriting you would have if you were replaced by a unconvincing robot copy of yourself.
Thanks for the tip [Daniel R.]!


Hernando Barragán is the grandfather of Arduino of whom you’ve never heard. And after years now of being basically silent on the issue of attribution, he’s decided to get some of his grudges off his chest and clear the air around Wiring and Arduino. It’s a long read, and at times a little bitter, but if you’ve been following the development of the Arduino vs Arduino debacle, it’s an important piece in the puzzle.
Wiring, in case you don’t know, is where digitalWrite() and company come from. Maybe even more importantly, Wiring basically incubated the idea of building a microcontroller-based hardware controller platform that was simple enough to program that it could be used by artists. Indeed, it was intended to be the physical counterpart to Processing, a visual programming language for art. We’ve always wondered about the relationship between Wiring and Arduino, and it’s good to hear the Wiring side of the story. (We actually interviewed Barragán earlier this year, and he asked that we hold off until he published his side of things on the web.)
The short version is that Arduino was basically a fork of the Wiring software, re-branded and running on a physical platform that borrowed a lot from the Wiring boards. Whether or not this is legal or even moral is not an issue — Wiring was developed fully open-source, both software and hardware, so it was Massimo Banzi’s to copy as much as anyone else’s. But given that Arduino started off as essentially a re-branded Wiring (with code ported to a trivially different microcontroller), you’d be forgiven for thinking that somewhat more acknowledgement than “derives from Wiring” was appropriate.

The story of Arduino, from Barragán’s perspective, is actually a classic tragedy: student comes up with a really big idea, and one of his professors takes credit for it and runs with it.
This story begins in 2003 as Barragán was a Masters student at the Interaction Design Institute Ivrea (IDII) in Italy. He was advised and heavily influenced by Casey Reas, one of the two authors of Processing.
 At the same time, Massimo Banzi is teaching a class in essentially microcontrollers-for-designers at Ivrea using a PIC-based board called the Programma2003 and a curious language that you’ve never heard of, “JAL: Just Another Language“. At the time, there was no GCC support for the PIC, so the choices for open-source development were few. Worse, most of the design students are using Macs, and JAL only compiles on Windows. It wasn’t user friendly.
Barragán’s thesis is a must-read if you want to know where Arduino comes from. The summary is everything you know now: it’d be revolutionary if one could make a hardware / software platform that were easy enough that artists and non-microcontroller-nerds could get into. This is exactly the revolution that was underway in the computer graphics front, powered by Processing. Make it open source and freely available, and you’ll take over the world. So he turned to the Atmel AVR chips, which had the GCC open-source toolchain behind it.
 So by 2004, Barragán had a few prototypes of Wiring boards out, and he and his fellow students were using them informally for projects. The GUI will look ridiculously familiar if you’ve used Processing or Arduino. Since the students were already familiar with Processing, it made a lot of sense to just clone it — with Casey Reas’ blessing of course. Barragán wrote a little program that maybe you’ve heard of:
 Blink.
Now Barragán needed a faculty advisor at Ivrea, and his interests clearly aligned best with Massimo Banzi. So with his thesis work well underway and Reas’ backing, Barragán took on Banzi as his advisor. With Banzi and three other faculty members, the Wiring platform got its first real test-run, the “Strangely Familiar” workshop and show (PDF). It was a stunning success — in the space of only four weeks students actually made stuff.

Barragán graduated in 2004 and moved back to Colombia. The success of “Strangely Familiar” lead Massimo Banzi to drop Programma2003 like a hot potato and teach his physical design classes using Wiring.
 Work began on the Arduino project, according to Banzi, because he wanted a board that was cheaper to make than the Wiring board. So he replaced the ATmega128 microcontroller for a cheaper, smaller version, and chopped off everything that wasn’t “essential” from the Wiring board, like the power LED. This became the “Wiring Lite” board — and eventually the first Arduino prototype.
It is not the case that Arduino doesn’t acknowledge Wiring at all. They do. There are a few sentences in the first paragraph of the Credits section of the website, as mentioned above. That and $4.50 will buy you a Grande, Quad, Nonfat, One-Pump, No-Whip, Mocha, but how much more can one ask for?
The Arduino project has been marketed with extreme savvy, something that cannot be said of Wiring. Banzi hooked up with influential people in the US, eventually friend-of-a-friending himself into contact with Dale Dougherty, who invented not just “Web 2.0” but also the “Maker Movement” and Make Magazine. Arduino and Make was a match made in heaven, and the rest is history.
But as mentioned at the top of the article, this is a classic tale of woe. Banzi had better connections and more marketing drive and skill. He pushed the exact same project — rebranded — a lot harder, better, and further than Barragán did, or probably could. Arduino is a household name simply for that reason. If Massimo Banzi hadn’t been behind the wheel, it’s unlikely that you’d be complaining about how many Wiring-based projects we feature.
And, being open-source software and hardware, Barragán gave away the shop. He probably (naïvely) expected to get more credit from his former advisor, or even get invited along on the ride. He asks why Arduino forked Wiring instead of continuing to work with him, and the answer is absolutely clear — Arduino was taking it for their own. And they could. It’s not nice, but that’s business.
Still, we feel Barragán’s pain. So we’re glad, after a decade of silence, that Barragán is speaking out on behalf of himself and Wiring, because it sets the record straight and because his project really was “Arduino” before there was an Arduino.


 Pump up your look using drone motors and pneumatic air muscles to give your wearables a hint of animation with soft robotics.
The post Inflate Your Wearables Using Drone Motors and Pneumatic Air Muscles appeared first on Make: DIY Projects and Ideas for Makers.
 Nick Squires details his time spent using his maker skills to produce an interactive art installation and performance.
The post Go Behind the Scenes of Installing an Interactive LED Art Exhibit appeared first on Make: DIY Projects and Ideas for Makers.

This week we’re happy to introduce a new Genuino Reseller from Canada with Julie Gendron of RobotShop!
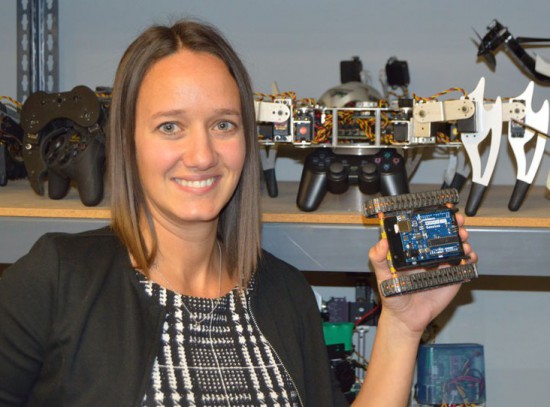
- Tell us a bit more about RobotShop
At RobotShop, we specialize in personal and professional robot technology and offer a wide range of robotic products and services in this sector. We have offices in USA, Canada and France. Our vision is to be the world leading source for personal and professional robot technology that help increase the pleasure, knowledge, liberty and security of individuals. We are also committed to promoting and advocating the interest and necessity of robotics use towards positive ends, allowing humanity to attain a better world.
- What’s your company’s super power
Putting robotics at your service!
- What’s your favourite Arduino or Genuino project?
We enjoy Arduino robots and projects from beginners that are starting in robotics. For example this Arduino robot from a beginner on the Let’s Make Robots Blog and forum. We like it because it represents the Arduino and Genuino brand well with a simple and fun “do it yourself” / hobbyist project. This is the meaning of Arduino; for anyone to be able to build a robot or interactive project easily. This is why we help the way we can, by providing Arduino tutorials that can help beginners as well as more advanced Arduino users.
Contacts
RobotShop Store Website Canada – Facebook – Twitter – Google+

Driven by the sudden longing for a personal Delta Robot I found myself building one.
 Super Ventilagon is the fan based gaming console that employs the Hall effect to play the super addictive Super Hexagon game.
The post Arduino and LEDs Transform Your Fan into a Video Game Display appeared first on Make: DIY Projects and Ideas for Makers.