Posts with «arduino» label

Wood Stove Runs on Arduino Power

Ahh, sweet scope creep! Usually it’s the death of a nice, simple little hack. But once in a hundred times, a small hack doesn’t get buried under the extra features, but instead absorbs them in stride and blossoms into a beautiful system. [rockfishon]’s Arduino-powered wood stove controller is one of these beautiful exceptions. (OK, we’d admit that it could use a fancier faceplate.)

He started off simply enough, wanting to connect a thermocouple to an Arduino, read out the value, and issue an alarm when the temperature got too high. But who could stop there? Just one air-baffle servo away from a closed-loop heating control system? So [rockfishon] added a display and a few more buttons and has a system that will keep his wood-burning stove running at exactly the right temperature, even overnight when nobody’s around to tend it. As a bonus, everything is logged for later analysis.

The code is relatively straightforward, and can be found in this Gist. If you’d like to build your own, you’ll need an Arduino Mega and can then get the control board made for you at OSHPark. Judging from the comments on the Hackaday.io project page, a couple people have already tried this out. We’ve seen other wood-stove monitoring hacks before, but this is the first we’ve seen that closes the control loop. Very cool.


Filed under: home hacks
Hack a Day 07 Mar 03:01

Arduino RF Network Analyzer

What do you get when you combine a direct digital synthesis (DDS) chip, a power detector, and an Arduino? [Brett Killion] did make that combination and wound up with a practical network analyzer.

The project uses an Analog Devices AD9851 DDS chip clocked at 180 MHz which will output a sine wave at any frequency from 0 Hz and 72 MHz. A Butterworth low pass filter processes the DDS signal and then feeds a two-transistor amplifier. The circuit will output about 0dBm into 50 ohms. The power detector is an Analog Devices AD8307 along with a 50-ohm input load. There is no filtering on the power detector so it can measure from very low frequencies to 500MHz.

[Brett] uses a Python program to process the data from the Arduino. For example, here’s a plot of a 10 MHz crystal from the software:

If you want to know more about DDS, our own [Bil Herd] has you covered (see the video, below). We’ve also seen similar antenna analyzers that are about the same thing.


Filed under: Android Hacks, tool hacks

Fail of the Week: Battery Pack Jack Wired Backwards

Last Saturday I had a team of teenage hackers over to build Arduino line-following robots from a kit. Everything went well with the mechanical assembly and putting all the wires on the correct pins. The first test was to check that the motors were moving in the proper direction. I’d written an Arduino program to test this. The first boy’s robot worked fine except for swapping one set of motor leads. That was anticipated because you cannot be totally sure ahead of time which way the motors are going to run.

The motor’s on the second robot didn’t turn at all. As I checked the wiring I smelled the dreaded hot electronics smell but I didn’t see any smoke. I quickly pulled the battery jack from the Arduino and – WOW! – the wires were hot. That didn’t bode well. I checked and the batteries were in the right way. A comparison with another pack showed the wires going into the pack were positioned properly. I plugged in another pack but the motors still didn’t run.

I got my multimeter, checked the voltage on the jack, and it was -5.97 V from center connector to the barrel. The other pack read 6.2 V. I had a spare board and pack so swapped those and the robot worked fine. Clearly the reverse polarity had zapped the motor control ICs. After that everyone had a good time running the robots on a course I’d laid out and went home pleased with their robots.

After they left I used the ohmmeter to check the battery pack and found the wiring was backwards, as you can see in the feature photo. A close inspection showed the wire with a white line, typically indicating positive, indeed went to the positive battery terminal. I shaved the barrel connector down to the wires and the white line wire was connected to the outside of the barrel. FAIL!

This is a particularly bad fail on the part of the battery pack supplier because how hard is it to mess up two wires? You can’t really fault the robot kit vendor because who would expect a battery pack to be bad? The vendor is sending me a new battery pack and board so I’m satisfied. Why did I have an extra board and pack, actually an entire kit? For this exact reason; something was bound to go wrong. Although what I had imagined was for one of the students to break a mechanical part or change wiring and zap something. Instead, we were faced with a self-destructing kit. Prudence paid off.


Filed under: Arduino Hacks, Fail of the Week, Hackaday Columns

An even cheaper Wi-Fi board


For a few cents more than the ESP12F you get it with a programmer daughter board, a RGB led, a button and a photoresistor.
This is ideal for small robot with networking abilities.
Can be programmed with Arduino IDE as a NodeMCU v1.0 .

Let's Make Robots 05 Mar 23:19
arduino  esp8266  wi-fi  

Teensy 3.1 Controlled VFO

[Tom Hall], along with many hams around the world, have been hacking the Silicon Labs Si5351 to create VFOs (variable frequency oscillators) to control receivers and transmitters. You can see the results of his work in a video after the break.

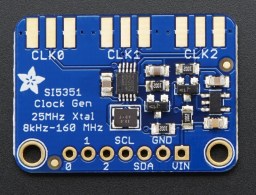
[Tom] used a Teensy 3.1 Arduino compatible board, to control the Si5351 mounted on an Adafruit breakout board. An LCD display shows the current frequency and provides a simple interface display for changing the output. A dial encoder allows for direct adjustment of the frequency. The ham frequency band and the frequency increment for each encoder step are controlled by a joystick. When you get into the 10 meter band you definitely want to be able to jump by kHz increments, at least, since the band ranges from 28 mHz to 29.7 mHz.

So what is the Si5351? The data sheets calls it an I2C-Programmable Any-Frequency CMOS Clock Generator + VCXO. Phew! Let’s break that down a bit. The chip can be controlled from a microprocessor over an I2C bus. The purpose of the chip is to generate clock outputs from 8 kHz to 160 kHz. Not quite any frequency but a pretty good range. The VCXO means voltage controlled crystal oscillator. The crystal is 25 mHz and provides a very stable frequency source for the chip. In addition, the Si5351 will generate three separate clock outputs.

[Tom] walks through the code for his VFO and provides it via GitHub. An interesting project with a lot of the details explained for someone who wants to do their own hacks. His work is based on work done by others that we’ve published before, which is what hacking is all about.


Filed under: Arduino Hacks, radio hacks

Hold This Smart Business Card to See Your Heart Beat

You can get a lot of quick info from a business card — name, job title, contact info — and now you can also see your heart beat.

Read more on MAKE

The post Hold This Smart Business Card to See Your Heart Beat appeared first on Make: DIY Projects and Ideas for Makers.

At last! A SIL-Duino!

There are some standard components that have been so continuously refined as to have become if not perfect then about as good as they’re going to get. Take the Arduino Uno for instance, and compare it with its ancestor from a decade ago. They are ostensibly the same board and they are compatible with each other, yet the Uno and its modern clones have more processing power, memory and storage, a USB interface rather than serial, and a host of small component changes to make them better and cheaper.

You’d think that just another Arduino clone couldn’t bring much to the table then. And you’d be right in a broad sense, just what is there left to improve?

[Clovis Fritzen] has an idea for an Arduino clone that’s worth a second look. It’s not an amazing hardware mod that’ll set the Arduino world on fire, instead it’s a very simple design feature. He’s created an Arduino that mounts vertically on a single row of pins. Why might you find that attractive, you ask? A SIL vertical Arduino takes up a lot less breadboard space than one of the existing DIL Arduinos. A simple idea, yet one that is very useful if you find yourself running out of breadboard.

[Clovis] took the circuit of an Arduino Uno and simplified it by removing the USB interface, so this board has to be programmed through its ICSP header. And he’s made it a through-hole board for easy construction by those wary of SMD soldering. The resulting board files can all be found on GitHub.

Every now and then along comes a hack so simple, obvious, and useful that it makes you wonder just why you didn’t think of it yourself. Many of us will have used a DIL Arduino and probably found ourselves running out of breadboard space. This board probably won’t change the world, but it could at least make life easier in a small way for some of us who tinker with microcontrollers.

This is just the latest of many Arduino clones to find its way onto these pages. In 2013 we asked why the world needed more when featuring one made as a PCB design exercise. There’s even a Hackaday version called the HaDuino developed by [Brian Benchoff]. But while it’s true that Yet Another Vanilla Arduino Clone brings nothing to the table, that should not preclude people from taking the Arduino and hacking it. Every once in a while something useful like this project will come from it, and that can only be a benefit to our community.


Filed under: Arduino Hacks
Hack a Day 05 Mar 12:01

15 Fantastic Project Enclosures

Fight the drab tyranny of the beige box with these inspiring ideas for project enclosures

Read more on MAKE

The post 15 Fantastic Project Enclosures appeared first on Make: DIY Projects and Ideas for Makers.

Start Your Day the Arduino Way with this IoT Shower Controller

No longer content with adding value to the thermostat in the hallway or making your fridge smarter than it should be, IoT vendors are pushing into the inner sanctum of homes, the holy of holies – the bathroom. Sure, you can spend big bucks on an electronically controlled valve to turn your shower into a remote-controlled spa that shares your bathing habits with the cloud, but if you’re on a more modest budget and have the hacker spirit, you might want to check out this DIY automated shower valve with IoT features.

When we last ran into [TVMiller], he was opening gates using Jedi mind tricks, and before that he was shrinking a floating golf green to a manageable size. Such hacks work up a sweat, and while a clean hacker is a happy hacker, all that pesky valve-twisting and temperature-fiddling is so annoying. So with a few parts acquired from the waste stream, like an acrylic box, some salvaged servos, popsicle sticks, and a hell of a lot of caulk, [TVMiller] hacked together a feature-packed controller for his existing shower valves. An Arduino MKR1000 reads the water temperature and controls the servos that allow him to start the shower from his phone. Time and temperature data are sent to the cloud using ThingSpeak. You can see the whole thing in action in the mildly-NSFW video after the break.

Admittedly, this is a pretty janky setup, but it falls under the universal hacker disclaimer of “it’s just a prototype.” Still, we like the idea of retrofitting standard shower valves, and the popsicle-stick parallelograms for increasing leverage is a neat trick. We’ll be watching to see where this goes next.


Filed under: green hacks, home hacks

DIY Virtual Reality Skateboard

This is a really easy project that can be done in about an hour. It is more of a virtual reality experience rather than a game. An accelerometer/gyro goes onto an Arduino board and transmits the angular motion of the board via bluetooth to a (extremely amateur game) I made in Unity for Android phones. This only works for Android phones and your phone must be compatible with Google Cardboard.

read more