Posts with «arduino» label

AV Remote Control Teams Arduino with – Visual Basic?

A large installed base of powered speakers from a defunct manufacturer and a dwindling supply of working remote controls. Sounds like nightmare fuel for an AV professional – unless you take matters into your own hands and replace the IR remotes with an Arduino and custom software.

From the sound of it, [Steve]’s crew was working on AV gear for a corporate conference room – powered speakers and an LCD projector. It was the speakers that were giving them trouble, or rather the easily broken or lost remotes. Before the last one gave up the ghost, [Steve] captured the IR codes for each button using an Arduino and the IRRemote library. With codes in hand, it was pretty straightforward to get the Nano to send them with an IR LED. But what makes this project unique is that the custom GUI that controls the Arduino was written in the language that everyone loves to hate, Visual Basic. It’s a dirty little secret that lots of corporate shops still depend on VB, and it’s good to see a little love for the much-maligned language for a change. Plus it got the job done.

Want to dive deeper into IR? Maybe this primer on cloning IR remotes with an Arduino will help. And for another project where VB shines, check out this voice controlled RGB LED lamp.


Filed under: Arduino Hacks
Hack a Day 15 May 18:00

Turn body movement into music with Arduino

Calvin Cherry has created a wearable instrument programmed to respond to body movement. The Maker, who is a grad student at the University of Wisconsin-Madison, calls his device “Music from Motion,” or “mFM.” It consists of small electronic sensors Velcro-ed onto his wrists and ankles that, with every move, alter a synthesized track playing on a loop over a set of speakers.

Various motions correspond to different sounds. For instance, increasing the pace with his left foot adds more drum. Picking up the movement with his right foot throws in a cymbal. When he rotates his right hand, it makes the track a bit woozier through an audio mixing process called flanging. When he moves his left hand, it prompts a wah-wah effect.

And what would a musician be without his or her fans? Cherry points out that there are specific triggers, including an audio clip of a roaring crowd whenever he claps his hands. According to a recent article, there’s a monitor that displays real-time information on the music — an interface he devised with Pure Data.

At the heart of the project lies a Raspberry Pi and Arduinos. An Arduino on the sensor receives data relating to how quickly the body parts are accelerating, and wirelessly sends that information over radio to a small device housed inside a LEGO case. That receiver features a Raspberry Pi that translates the acceleration data into an output — the changes in the audio itself.

Cherry hopes to make mFM open-source in the near future, so he could see what other Makers are able to do with it. You can read all about the project here.

(Photo: Saiyna Bashir / The Capital Times)

Turn your SNES gamepad into a USB controller

If you grew up in the ‘90s, chances are you have an old SNES controller lying around somewhere. Well, thanks to a recent project from CompSci Studio, it may be time to blow off the dust and transform it into a modern-day USB gamepad using Arduino.

By following the instructions detailed in the video below, you’ll be able to use the retro controller to play arcade games like Super Meat Boy and Fez on either your Mac or PC. To get started, you’ll need an Uno, five jumper cables, and a simple Arduino sketch that creates an HID compliant joystick out of the SNES device.

Build an IoT Rover with Arduino Mega and FONA

For his end of the year project at the University of Valencia, Maker Jorge Crespo built an Internet-connected, GPS-enabled rover using an Arduino Mega, an Adafruit FONA 808 module, and a PIC18F45K20 microcontroller.

Other hardware includes IR sensors for obstacle avoidance, a dual H-bridge motor controller, an LCD screen, DC/DC converters, and an 11.1V, 5Ah LiPo battery. The bot is managed through a web-based interface, allowing its user to select between auto or manual commands, as well as track its location on a map.

The project can be found on GitHub.

Hackaday Prize Entry: ForEx Display is A Well Executed Hack

[Stefan] works in a place where knowing the exact state of the foreign-exchange market is important to the money making schemes of the operation. Checking an app or a website was too slow and broke him out of his workflow. OS desktop widgets have more or less departed this earth for the moment. The only solution then, was to build a widget for his actual desk.

The brains of the device is a ESP8266 board, some peripherals and a small backlit TFT display. The device can run off battery or from a wall wart. [Stefan] even added some nice features not typically found in hacks like this, such as a photocell that detects the light level and dims the screen accordingly.

The software uses an interesting approach to get the latest times and timezones. Rather than use a chart or service made for the task, he uses an open weather API to do the task. Pretty clever.

The case is 3D printed and sanded. To get the nice finish shown in the picture [Stefan] spray-painted the case afterwards. All put together the device looks great and gives him the desktop widget he desired.

The HackadayPrize2016 is Sponsored by:

Filed under: clock hacks
Hack a Day 13 May 06:01

Two college students build a hilarious animatronic face

Let’s start off by saying that, if you’re a senior engineering student just weeks away from graduation, it takes some serious guts to create an animatronic face of your school’s president. We should also add that it’s pretty hilarious.

Geoffrey Toombs and James Schopfer are the two University of Texas at San Antonio undergrads behind the Disney Audio-Animatronics-inspired project, which uses a plastic mask, an Erector set, an Arduino Mega with an MP3 shield, and some computer speakers. The face — consisting of eyes, a nose, a mouth and a formidable mustache — is driven by a set of servos. An even cooler feature of the robot is that the mouth is synchronized to an audio clip.

The audio was a sample taken from a YouTube video using various softwares to turn the video file into an audio file and then cutting to the proper length. The original YouTube address of the video I wanted was copied and pasted on the Zamzar.com website so the video could be downloaded and manipulated. The program, Audacity, was used to turn the video file into an audio file and it allowed the audio to be clipped and saved an an MP3. This MP3 audio file was then saved to a microSD card. The card was then placed into the MP3 shield, and the shield is then carefully attached to the Arduino Mega, being careful to not bend the pins.

Code was written for the eye movements. It was decided that he would roll his eyes and wiggle his nose after the mouth movement. This wasn’t really necessary but it let me use the eyes that I spent so much time making and gave a little humor to the project.

While this particular project mimicked the university’s president, the Makers note that any face or picture could be used. A friend? A colleague? A principal? The possibilities are endless. Future upgrades may include a smaller speaker hidden inside the head, a web camera built into an eye, steppers for more precise and fluid movement, IR sensors and more motors for tracking, blinking eyelids, and potentially Skype integration.

Reading an IR Thermometer the Hard Way

[Derryn Harvie] from the MakeHackVoid maker space hacked a $10 IR Thermometer and made it talk USB. Sounds easy? Read on.

He opened it up in the hope of finding, and tapping into, a serial bus. But he couldn’t find one, and the main controller was a COB blob – hidden under unmarked black epoxy. Normally this is a dead-end.  (We’ve seen some interesting approaches to decapping epoxy blobs, and even ICs with lasers.)

But [Derryn] went his own way – intercepting the data going from the micro-controller to the LCD display, and reverse engineering it using another microcontroller. He scraped off the solder mask over the tracks leading to the LCD display, and used an oscilloscope to identify the common drive lines. He then used a function generator to excite each of the LCD common lines and the segments lines to build a complete matrix identifying all the combinations that drove the segments. With all the information decoded, wires were soldered so he could hook up an Arduino, and the cut tracks repaired.

Since the LCD was a multiplexed display, the bias voltages were at four levels. Luckily, he could extract most of the LCD information by reading just eight of the segment drive lines, using up all of the analog inputs on the Arduino. Perhaps a different microcontroller with more ADC inputs would have allowed him to display more LCD functions. Well, he can always upgrade his upgrade later. If you have a similar hack to implement, then [Derryn]’s code could be useful to get started.

Thanks, [csirac2] for sending us this tip from MakeHackVoid.


Filed under: hardware

And this week’s Instagram giveaway winner is…

Jerome Calvo, who took this sweet pic during Arduino Day in Berkeley, is this week’s winner of our Instagram giveaway. He’ll be taking home an Arduino MKR1000 and an Arduino t-shirt!

Starting at a young age with @arduino.cc #arduinod16 #genuinod16

A photo posted by Jerome Calvo (@caljer) on

There’s still a few weeks left to share your pics for a chance to win. Here’s how:

– Follow our official Arduino.cc account on Instagram

– Share your images on your account on Instagram using hashtag #ArduinoD16 and #GenuinoD16 and mention us with the tag @Arduino.cc

– Every Thursday, from April 7th to May 26th, we are going to choose one of your pics (posted starting April 2nd) and announce the winner of an Arduino or a Genuino MKR1000 and one of our t-shirt or mug  on the blog. That’s a total of of eight lucky people! Easy enough, right?

Arduino is headed to Maker Faire Bay Area!

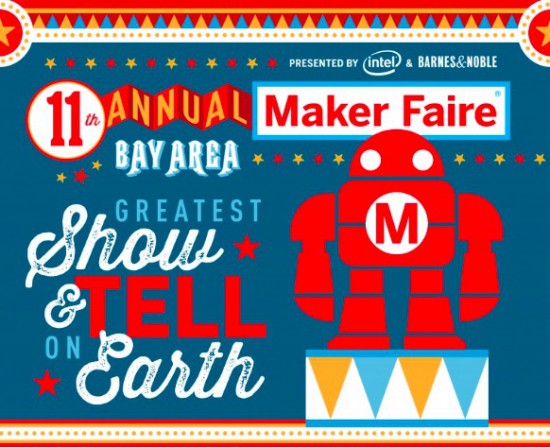
Maker Faire is a three-day, family-friendly event that has been celebrating the DIY Movement for the last 10 years. The ‘Greatest Show & Tell on Earth’ is designed for creative, innovative people of all ages and backgrounds, who like to tinker and love to make things.

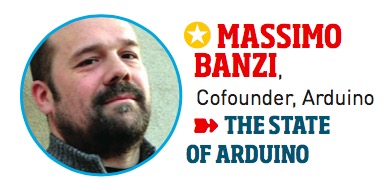
In just a few days, the Arduino team will be in attendance for the 11th annual Maker Faire Bay Area as a Goldsmith Sponsor. Those heading to the San Mateo on May 20th-22nd will want to swing by our booth (#2321) and join us for some inspiring talks, especially the highly-anticipated State of Arduino by Massimo Banzi on Saturday at 12:30pm.

We’ve been preparing a series of demos to showcase the family of Arduino tools for the Internet of Things through our Arduino Create platform. Those who come by our booth will have the chance to experience the following firsthand:

  • Cloud Sensor Station | “Make Sense of Your Data”
    The Cloud Sensor Station is equipped with four different sensors: gas detection, light intensity, motion detection (infrared) and temperature/humidity. These four sensors send values to the Arduino Cloud so that you can see real-time results of the collected data from everywhere.
  • Yún Camera | “Lights! Camera! Facebook!”
    The Yún Camera captures photos at the press of a button and then automatically uploads them onto Facebook. (We’re sensing plenty of selfies in our near future!)
  • Yún Message | “Leave a Message and I’ll Show It Back”
    The Yún Message is a smart desk, developed in collaboration with Opendesk, that displays custom messages on an LED matrix. This piece of smart furniture lets users share a reminder or note through a webpage. Come and leave a note or… do it online!
  • Twitter Printer | “The IoTweet!”
    This connected thermal printer running on MKR1000 will automatically print tweets from all over the world with the #PrintArduino hashtag. (Look forward to seeing what you come up with!)

Additionally, we’ll be showcasing our Creative Technologies in the Classroom (CTC) program, which is a collaborative learning curriculum designed for schools that wish to incorporate emerging technologies into their existing technology classes.

Whether you’re a teacher or student, come and discover how to explore electronics through a series of hands-on coding projects that’ll provide you with the foundations of programming, electronics and mechanics.

Aside from some of our latest products and projects, we’ll also play host to several members of our growing open-source ecosystem and partners like Intel, ARM and Atmel, to name just a few.

Have a question about Arduino? Looking to get started but don’t know how? Beginners, or even experienced users, will have the chance to get their questions answered inside our booth. We’ve set aside an area where you can speak to our team of experts, from your recent invention to one of our boards. What’s more, you’ll even be able to take home an assortment of Arduino SWAG: stickers, pins and other cool giveaways!

Can’t wait to see everyone soon! In the meantime, stay tuned as we’ll be posting a confirmed agenda of scheduled talks in the next few days. For everything else, check out Maker Faire’s official site!

Draw images and words in falling water

The Base42 team, which is part of the hacking community Tecnoateneu Vilablareixhas created a stunning water curtain with the help of 3D printing and Arduino. The installation, currently on display at the Temps de Flors flower show in Girona, uses 128 3D-printed nozzles and 64 3D-printed valves to dispense water in floral patterns.

The water curtain employs four Arduino Nanos to control the valves, which work in pairs to draw the flowers, words or other images. Meanwhile, an Arduino Mega provides a Wi-Fi connection to issue commands.

In terms of its mechanics, a tank at the base holds 500 liters of water, while a pump pushes that water to the top of the system at a rate of 80 liters per minute. From there, the water passes down through the 3D-printed nozzles, forming what appears as a 3m x 2m fluid screen. To create different patterns in the curtain, the nozzles can quickly adjust the direction of the water to one of two nozzles in a pair.