Posts with «arduino» label

Kick off this year’s U.S. presidential race with the MKR1000

No matter which candidate you will be voting for in November, it’s hard not to chuckle a bit when seeing this project from YouTuber “Makers4America.” The IoT machine works by responding to tweets from presumptive Republican candidate Donald Trump and then proceeding to kick him in the face with a 3D-printed boot attached to a metal rod.

The setup is fairly straightforward: a Raspberry Pi running Node-Red and a local Mosquito MQTT broker poll Twitter, and then writes the tweets to an MQTT topic. Meanwhile, an Arduino MKR1000 runs an MQTT client subscribed to the same topic, and controls the servos and RGB LED strips reading “Dump Donald.” 

Although this project targets Trump, it’s hard not to imagine other use cases for such a device–one in which includes the face of your arch nemesis, a rival sports team, or perhaps even your ex. The possibilities are endless!

Arduino Blog 28 Jun 21:45

This project makes eating alone a more entertaining experience

Food Screening is an Arduino-based project inspired by the act of watching films while eating meals alone, and was conceived especially for people living on their own abroad. The installation–developed by visual communicator Fongyee Ng in collaboration with Han–gyeol Lee–uses light and distance sensors to create an interaction with each food item, which triggers a snippet from a film that mimics the sound effects of consuming the meal, making eating alone a more entertaining experience.

The CALEIDUINO is a digital and sound reactive kaleidoscope

The CALEIDUINO is an Arduino-based digital and sound reactive kaleidoscope, designed to serve as a toy, an art object, and a tool for teaching electronics and programming in a playful yet creative way.

At the heart of CALEIDUINO is a PCB for connecting an Arduino Nano, a TFT 1.8 “display, an analog 3-axis accelerometer GY-61, a piezoelectric, a switch, and a 9V battery–all of which are housed inside a hexagonal methacrylate case. Just like in any kaleidoscope, t three mirrors in triangular prism shape, while an accelerometer collects a user’s movement to generate the psychedelic graphics and sounds.

In terms of software, the CALEIDUINO uses the Arduino IDE along with the Adafruit GFX and ST7735 libraries. The project is entirely open source and is the work of artist José Manuel González. You can read more about the device here, or see it in action below.

Maker builds his own Ghostbuster proton pack

Anyone who has ever watched Ghostbusters is surely familiar with the iconic proton pack–the combination of a handheld wand and backpack-sized particle accelerator that’s the weapon of choice for weakening ghosts and aiding in capturing them. And with a remake of the ‘80s flick coming out in a few days, what better time for a DIY prop equipped with full-featured user control and Hollywood-like effects?

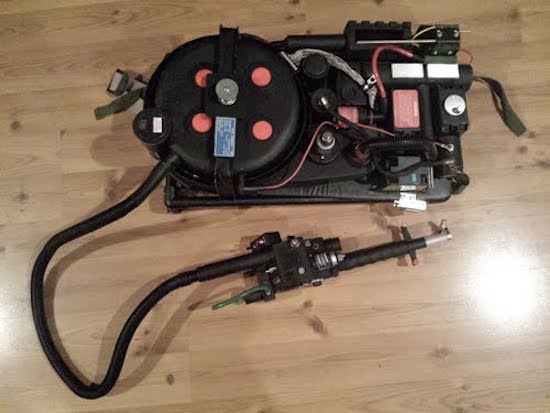
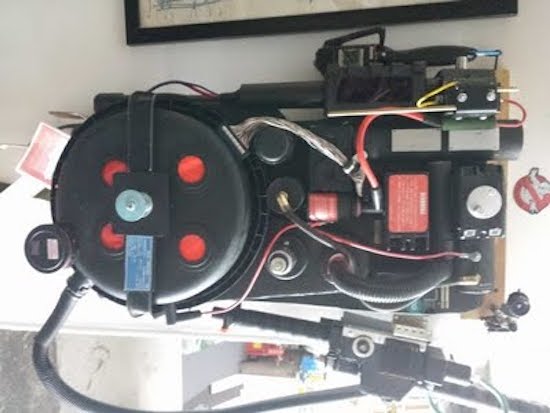
That’s exactly what John Fin has done using a bunch of household items, including a five gallon bucket for the cyclotron, a garlic powder container for the N-Filter, a hairbrush for the PKE meter, as well as spark plug wire, cardboard tubes, pill bottles, handles from power tool cases, and a couple electrical boxes and miscellaneous parts.

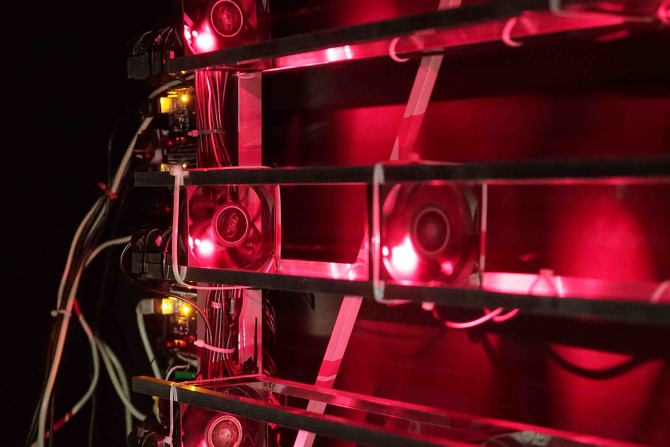
The proton pack is based on an Arduino Uno along with a Seeed Studio SD card shield containing .WAV files. The Arduino supplies all of the sound and light effects, except for the cyclotron lights which use a 555 timer and 4017 decade counter. The sound is amplified through an old computer speaker board, while two homemade boards control the lights.

The red lights on the cyclotron area are supposed to be asymmetrical. This project took two weekends to make, one for the pack and one for the gun. It is attached to a homemade  PVC “ALICE” frame. I tried to make it as light as possible, the whole unit weighs just 13 lbs. Its not fully “screen accurate” but more like a “Model 3″ version. The addition of a bunch of actual electronic components make it look more like it is a  functional unit instead of a prop.

The power meter on the gun and pack are synced to show an accumulating “charge” while a generator sound plays. When armed, the lights on the gun blink and the generator sound intensifies. When it’s fired, the barrel lights and the blast sound plays as the charge meter decreases to zero. It then shuts off and recharges.

It came out so well I also made a PKE meter (ghost detector) that also functions with lights and sound. The arms are powered by a small gear motor. The lights are a blinking LED and 10 green LEDs that sequence via a 555 timer/4017 decade counter. It’s crammed into a hairbrush.

I also have made a ghost trap and pedal that opens and closes via a servo mechanism. The interior of the ghost trap is made from an old laser disc lit with a row of LEDs, so it looks “deeper” inside than it should. It works with the pedal as it does in the movie. It’s not full height, I am trying to keep all this stuff compact. Anyway, after 30 years I’m sure there would be some miniaturization in the equipment by now!

And what would a full Ghostbusters getup be without some goggles. Fin constructed his own pair from scratch using foamboard and paper with aluminum strips for strength. The outside is textured to resemble a military-type finish, while the lens tubes illuminate green to add a “glow,” and a red LED blinks on the side.

Whether a fan of the movie, a fan of cosplay, or simply a fan of making, you’ll want to check out the entire build here.

Raspberry Pi Gets Turned On

The Raspberry Pi and other similar Linux-based single board computers simplify many projects. However, one issue with Linux is that it doesn’t like being turned off abruptly. Things have gotten better, and you can certainly configure things to minimize the risk, but–in general–shutting a Linux system down while it is running will eventually lead to file system corruption.

If your project has an interface, you can always provide a shutdown option, but that doesn’t help if your application is headless. You can provide a shutdown button, but that leaves the problem of turning the device back on.

[Ivan] solved this problem with–what else–an Arduino (see the video below). Simplistically, the Arduino reads a button and uses a FET to turn off the power to the Pi. The reason for the Arduino, is that the tiny processor (which draws less than a Pi and doesn’t mind being shut down abruptly) can log into the Pi and properly shut it down. The real advantage, though, is that you could use other Arduino inputs to determine when to turn the Pi on and off.

For example, it is easy to imagine a Pi in an automotive application where the Arduino would sense the ignition was off for a certain period of time and then go ahead and shut off the Pi. Or maybe the Pi needs to be turned on when a motion sensor fires and then turned off again once there is no motion for a particular time period. Any of these strategies would be simple to build with the Arduino.

We’ve seen a similar project that used an IR remote as the trigger instead of a physical button. If you are afraid the Pi will just lose power unexpectedly, you might consider a battery backup. If powering a Pi with regular electricity is too tame for you, try steam.


Filed under: Arduino Hacks, Raspberry Pi

Autonomous machine makes music with 7 lasers and 42 fans

Russian artist ::vtol:: is no stranger to the Arduino blog. His latest project–which was designed for the Polytechnic Museum Moscow and Ars Electronica Linz–is an autonomous light-music installation called “Divider.” The wall-mounted soundscape consists of seven lasers that horizontally send rays through 42 fans, which act as modulators to turn the light signals into rhythmic impulses. Seven photo sensors on the end monitor the presence or absence of light, while four Arduino Mega boards control the system.

The lasers serve a “independent binary variables” which become the basis for all sound composition. Since the fans can each spin at variable speeds, this allows for a constant shift of modulation phases and a wide range of noises.

According to ::vtol::, the Divider is inspired by Léon Theremin’s Rhythmicon, the world’s first rhythm machine. The 1931 device also used rotating discs to interrupt light rays and optical sensors to pick up light and produce rhythms.

Sound interesting? Wait until you see it perform below! You can also check it out here.

Arduino Blog 27 Jun 23:25

An Arduino tennis racquet that grunts when you swing it

Grand Slam tournaments, like Wimbledon, always prompt a discussion around the sometimes-disconcerting noises tennis players make on the court. Although some may argue that grunting helps apply the maximal force when striking the ball, others believe the shrieking is completely unnecessary and downright annoying. There are even top names in the game whose screams routinely top 100 decibels–only slightly less than the sound of a power saw–which has led many to call into question whether or not the behavior is actually a form of cheating.

Mindful of this, Maker Seiya Kobayashi has come up with a hilarious project that is the perfect blend of fun and function: a racquet that grunts whenever it’s swung. A user simply selects one of four notable noisemakers–Serena Williams, Maria Sharapova, Novak Djokovic and Rafael Nadal–and the aptly named Grunting Racket will take care of the rest.

In theory, this allows you to focus on your footwork and making proper contact, while the combination of an Arduino Pro Mini, an accelerometer, and speaker emits the obnoxious sounds. Additional components include a LiPo battery, an Adafruit Audio FX Sound Board, and a button on the grip for choosing between grunters.

The project has come a long way since its earliest prototype, which only used an accelerometer, FX Sound Board, and an Arduino Uno connected to a PC.  Now, the electronics are all neatly housed inside the racquet’s handle. While you won’t find a gadget like this around the All England Club anytime soon, you can check it out in action below!

Ghostbuster Proton Pack Made from Everything

[John Fin] put a lot of work into his Ghostbuster’s proton pack prop with full-featured user control and effects. What appealed to us well beyond the exquisite build is the extra effort taken to write down the whole process in a PDF for anyone wishing to imitate him.

Mr. Fusion is just a Krups Coffee Grinder. Also, Santa isn’t real.

We all know that a lot of famous props are creatively rearranged household items. The famous Mr. Fusion from Back to The Future is actually a Krups coffee grinder with some logos adhered.

[John]’s prop is no different. The cyclotron is a five gallon bucket. A garlic powder container fills another function. As you look at it more and more items can be picked out. Is that a spark plug wire? The handles on that are suspiciously similar to a power tool case’s. It all comes together, and while it’s not screen accurate you’d have to be an extreme prop fanatic to tell.

Naturally, the core of [John]’s prop is an Arduino. It stores the sound files on a SD Card shield. It controls all the lights sounds and motors on the prop. This isn’t quite a point and shoot. You must toggle on the power, generator, and arming mechanisms before actually firing. If you do it out of order, the electronics will issue an alarm as warning, and each step in the process has its own unique audio and animated lighting.

Since the Proton Pack went so well, he also built a PKE meter and Ghost Trap to go along with his backpack. He’s ready to take on Vigo at anytime. You can see a video of his prop in action after the break.


Filed under: Arduino Hacks

Make a Wi-Fi Enabled Light Switch Turner Onner

Use a servo to flick a light switch mechanically — without ever touching 110V power — with this Wi-Fi “Turner Onner”

Read more on MAKE

The post Make a Wi-Fi Enabled Light Switch Turner Onner appeared first on Make: DIY Projects and Ideas for Makers.

This Arduino Console Has 64 Bit Graphics

Numbers are wonderful things when applied to technical specifications. Take [Bobricius]’ handheld Arduino-based game console. With an 8×8 LED matrix for a display it’s not going to win any prizes, but while he’s pushing the boundaries of dubious specification claims he’s not strictly telling any lies with his tongue-in-cheek statement that the graphics are 64-bit.

Jokes aside, it’s a neatly done build using a DIP version of the Arduino MCU and all through-hole components on a custom PCB. Power comes from a CR2032 cell, and it includes three buttons and a small piezoelectric speaker. He’s implemented a whole slew of games, including clones of Pong, Breakout, and Tetris, and judging by the video below it’s surprisingly playable.

Now you might look at this console and wonder what the big deal is. After all, there are plenty of similar designs to be found, and it’s nothing new. Of course, it’s a neat project for any hacker or maker, but we can see that this would make a great starter project for the younger person in your life who wants to try their hands at building something electronic. All through-hole construction for easy soldering, and a neat game at the end of it all.

He’s posted a full write-up of the design process as well as the hackaday.io page linked above, so if you fancy building one yourself there’s nothing to stop you too squeezing 64 bits of graphical goodness from an Arduino.

This isn’t the first Arduino game we’ve shown you here at Hackaday, we’ve unmasked the secrets of the Arduinocade, featured another handheld Arduino game with an LCD screen, and a beautifully coded console using a TFT among many more.


Filed under: Arduino Hacks
Hack a Day 26 Jun 00:00