Posts with «arduino» label

Turn an old microscope into a live cell imaging device

Microscopes are common pieces of equipment in laboratories (or even high school science classes for that matter), but making movies of living cells usually requires more expensive and specialized tools… until now. With a 3D-printed mount for a smartphone and an Arduino, researchers at Sweden’s Uppsala University have been able to retrofit ordinary microscopes to take time-lapse sequences.

To accomplish this, an Arduino was used to control a shutter for the smartphone to minimize light exposure when capturing intermittent images, while a heating unit was employed to maintain a constant temperature for the tiny organisms.

The control unit was built using an Arduino Nano, a Bluetooth communication module, a power transistor, and a voltage regulator. The control unit was connected to a standard computer power supply unit and then used to provide power at the appropriate voltages to the other components of system, i.e. the heating element (12V), the fan (12V), the temperature sensors (5V) and finally the shutter’s servo motor (5V). The control unit was used to operate the shutter’s servo motor via Bluetooth, and also to control the temperature inside the incubator by adjusting the power supplied to the heating element.

In the future, this modular and affordable system, called ATLIS, could increase the accessibility of time-lapse microscopy for the wider research community. The total cost for all of its components (excluding the phone and microscope) was only $277, a mere fraction of the price for commercially available equipment.

You can read more about the project on Phys.org and find the team’s full study here.

(Photo: Linda Koffmar / Phys.org)

Control this Rock ‘em Sock ‘em Robots match with your tweets

Los Angeles-based interactive agency Friendly Vengeance is putting up its dukes to “Knock Out Injustice” with the five-day social media fundraising campaign “KO Bots” to benefit L.A. Kitchen.

A pair of Rock ‘em Sock ‘em Robots are ingeniously employed for this charity boxing match, in which the action is entirely decided by Twitter. Participants tweet @KO_Bots with the hashtags #RedBot or #BlueBot to prompt the robot of that color to take a symbolic swing at issues including ageism, food waste and recidivism, then watch the impact of their post by following along in real-time online.

Punches are thrown using a set of servo motors connected to an Arduino Mega capable of reading simple inputs (such as a tweet) and generating an output (in this case, a punch). Friendly Vengeance CEO Steve Tiseo tell us:

To detect a popped up head, we attached a photoresistor below the chin and set a threshold for determining when the bot is “knocked out.” A Python script searches for #RedBot and #BlueBot, and then sends integers to the Arduino to randomize punches via USB serial communication. If a bot’s knocked out, it sends a number back to the Python script to tally a KO on the site.

After playing, users receive a thank you tweet and a link to make a donation. To learn more about the project and its cause, head over to the KO Bots page. The fight will be streaming from December 19 to December 23.

Control a Rock ‘em Sock ‘em Robots match with tweets

Los Angeles-based interactive agency Friendly Vengeance is putting up its dukes to “Knock Out Injustice” with the five-day social media fundraising campaign “KO Bots” to benefit L.A. Kitchen.

A pair of Rock ‘em Sock ‘em Robots are ingeniously employed for this charity boxing match, in which the action is entirely decided by Twitter. Participants tweet @KO_Bots with the hashtags #RedBot or #BlueBot to prompt the robot of that color to take a symbolic swing at issues including ageism, food waste and recidivism, then watch the impact of their post by following along in real-time online.

Punches are thrown using a set of servo motors connected to an Arduino Mega capable of reading simple inputs (such as a tweet) and generating an output (in this case, a punch). Friendly Vengeance CEO Steve Tiseo tell us:

To detect a popped up head, we attached a photoresistor below the chin and set a threshold for determining when the bot is “knocked out.” A Python script searches for #RedBot and #BlueBot, and then sends integers to the Arduino to randomize punches via USB serial communication. If a bot’s knocked out, it sends a number back to the Python script to tally a KO on the site.

After playing, users receive a thank you tweet and a link to make a donation. To learn more about the project and its cause, head over to the KO Bots page. The fight will be streaming from December 19 to December 23, though tweets can be sent to the robots at any time during the event.

An Arduino-powered Christmas card game controller

Last December, to wish their clients a Merry Christmas, UK-based agency Kerve Creative decided to do something a bit different than just the traditional holiday card. Instead, they created an interactive one with Arduino that transforms into a fully-functional game controller.

The card invited recipients with a “little ditty” to play the retro-style Hacky Xmas game. After plugging it into your computer’s USB port and pressing either the Mac or PC button (PC may’ve needed to wait for the drivers to update), they could then use the controller to help Santa hack down a Christmas tree, while dodging falling decorations and collecting as many points as they could.

To make things even more merry, the highest scores also won a special prize from the Kerve team which included a lumberjack hat and a bottle of champagne.

You can read more about the awesome project here.

A four-factor lockbox

If you really don’t want someone messing with your valuables, a programmable box may be just what you need!

Locking mechanisms generally work using one method—a key, for example—to keep them secure, or perhaps two in certain circumstances. This box, designed as a final project for an electrical and computer engineering class at Cornell, instead makes the user go through four steps to get to the “treasures” inside.

Once the user has input the correct code, set potentiometers to the correct position, knocked on the box in the correct sequence, and finally scanned his or her fingerprint, a solenoid unlatches the box’s. It seems like a great project for an ECE class. On the other hand, the unit is wooden, so if you did forget the authentication procedure, it wouldn’t be too hard to manufacture a literal back door!

A cool idea nevertheless, and certainly something that could help protect your snacks or other items from a sneaky roommate. You can see more about this lockbox on the Cornell-hosted project page.

Dad builds an Arduino Hot Wheels drag strip for son

If you want to eliminate arguments about which toy car is fastest, we’ve got just the project for you.

When one’s kid has a birthday, most people go to the store and buy a gift. Phil Tucker instead decided to build something unique for his two-year-old, an automated Hot Wheels drag strip with an electronic start gate and timer. Like many other gravity race setups, when released, the cars roll to the bottom of a slope.

Tucker’s design, however, releases the cars automatically using a servo and hinge at the press of a button. It then detects the winner using infrared LEDs and light dependent resistors, displaying the results on a miniature marquee. The entire system is controlled by an Arduino Uno.

You can find more on this DIY drag strip here, and see it in action below!

A Beacon Suitable for Tracking Santa’s sleigh?

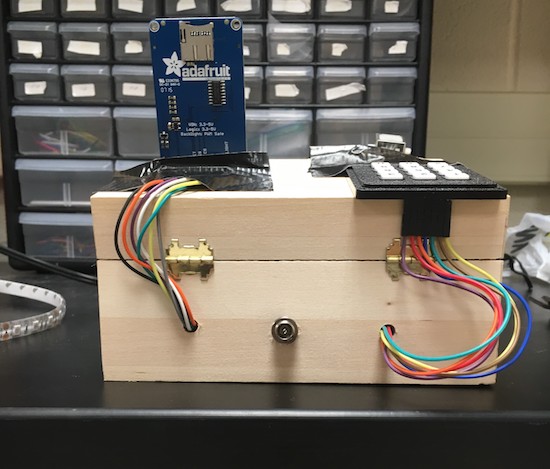
High-altitude ballooning is becoming a popular activity for many universities, schools and hacker spaces. The balloons, which can climb up to 40 km in the stratosphere, usually have recovery parachutes to help get the payload, with its precious data, back to solid ground safely. But when you live in areas where the balloon is likely to be flying over the sea most of the time, recovery of the payload becomes tricky business. [Paul Clark] and his team from Durham University’s Centre for Advanced Instrumentation are working on building a small, autonomous glider – essentially a flying hard drive – to navigate from 30 km up in the stratosphere to a drop zone somewhere near a major road. An important element of such a system is the locator beacon to help find it. They have now shared their design for an “Iridium 9603 Beacon” — a small Arduino-compatible unit which can transmit its location and other data from anywhere via the Iridium satellite network.

The beacon uses the Short Burst Data service which sends email to a designated mail box with its date, time, location, altitude, speed, heading, temperature, pressure and battery voltage. To do all of this, it incorporates a SAMD21G18 M0 processor; FGPMMOPA6H GPS module; MPL3115A2 altitude sensor; Iridium 9603 Short Burst Data module + antenna and an LTC3225 supercapacitor charger. Including the batteries and antenna, the whole thing weighs in at 72.6 g, making it perfectly suited for high altitude ballooning. The whole package is powered by three ‘AAA’ Energizer Ultimate Lithium batteries which ought to be able to withstand the -56° C encountered during the flight. The supercapacitors are required to provide the high current needed when the beacon transmits data.

The team have tested individual components up to 35 km on a balloon flight from NASA’s Columbia Scientific Balloon Facility and the first production unit will be flown on a much smaller balloon, launched from the UK around Christmas. The GitHub repository contains detailed information about the project along with the EagleCAD hardware files and the Arduino code. Now, if only Santa carried this on his Sleigh, it would be easy for NORAD to track his progress in real time.


Filed under: gps hacks, hardware

Track planets with a laser!

If you’d like to observe certain celestial elements, you could do research and search the sky manually. Or just create a system to do it for you!

This is exactly what Subham Paul has done using an Arduino Mega, a GPS module, and 3.5-turn-pan and 180-degree-tilt servos. The real-time tracking device can predict the position of planets, calculated using Kepler’s Laws.

Data about the celestial body is input into his setup and then precisely pointed it out in the sky with a laser. All of this, of course, is dependent on where the user currently resides, which is taken care of via the GPS module as well as an optional MPU-9250.

As you could imagine, this is naturally an involved project in concept and implementation. You can find an introduction and links to further build steps here.


12 dazzling holiday light displays with Arduino

There’s nothing like a dazzling display of lights to help get you into the holiday spirit. Every year, enthusiasts share the magic of the season by decorating their homes with artfully strung, animated bulbs, while some Makers take their projects to the next level using open-source hardware.

2016 did not disappoint. A quick Google search revealed a bunch of Arduino-controlled LED shows that you’ll want to see!

Did you deck out your house? Share it below! Also, don’t forget to enter your Internet of Holiday Things projects in our latest contest here.

The NRF24L01 Wireless Motor Speed Control System with Arduino

Let's Make Robots 19 Dec 07:26
arduino  avr  nrf24l01