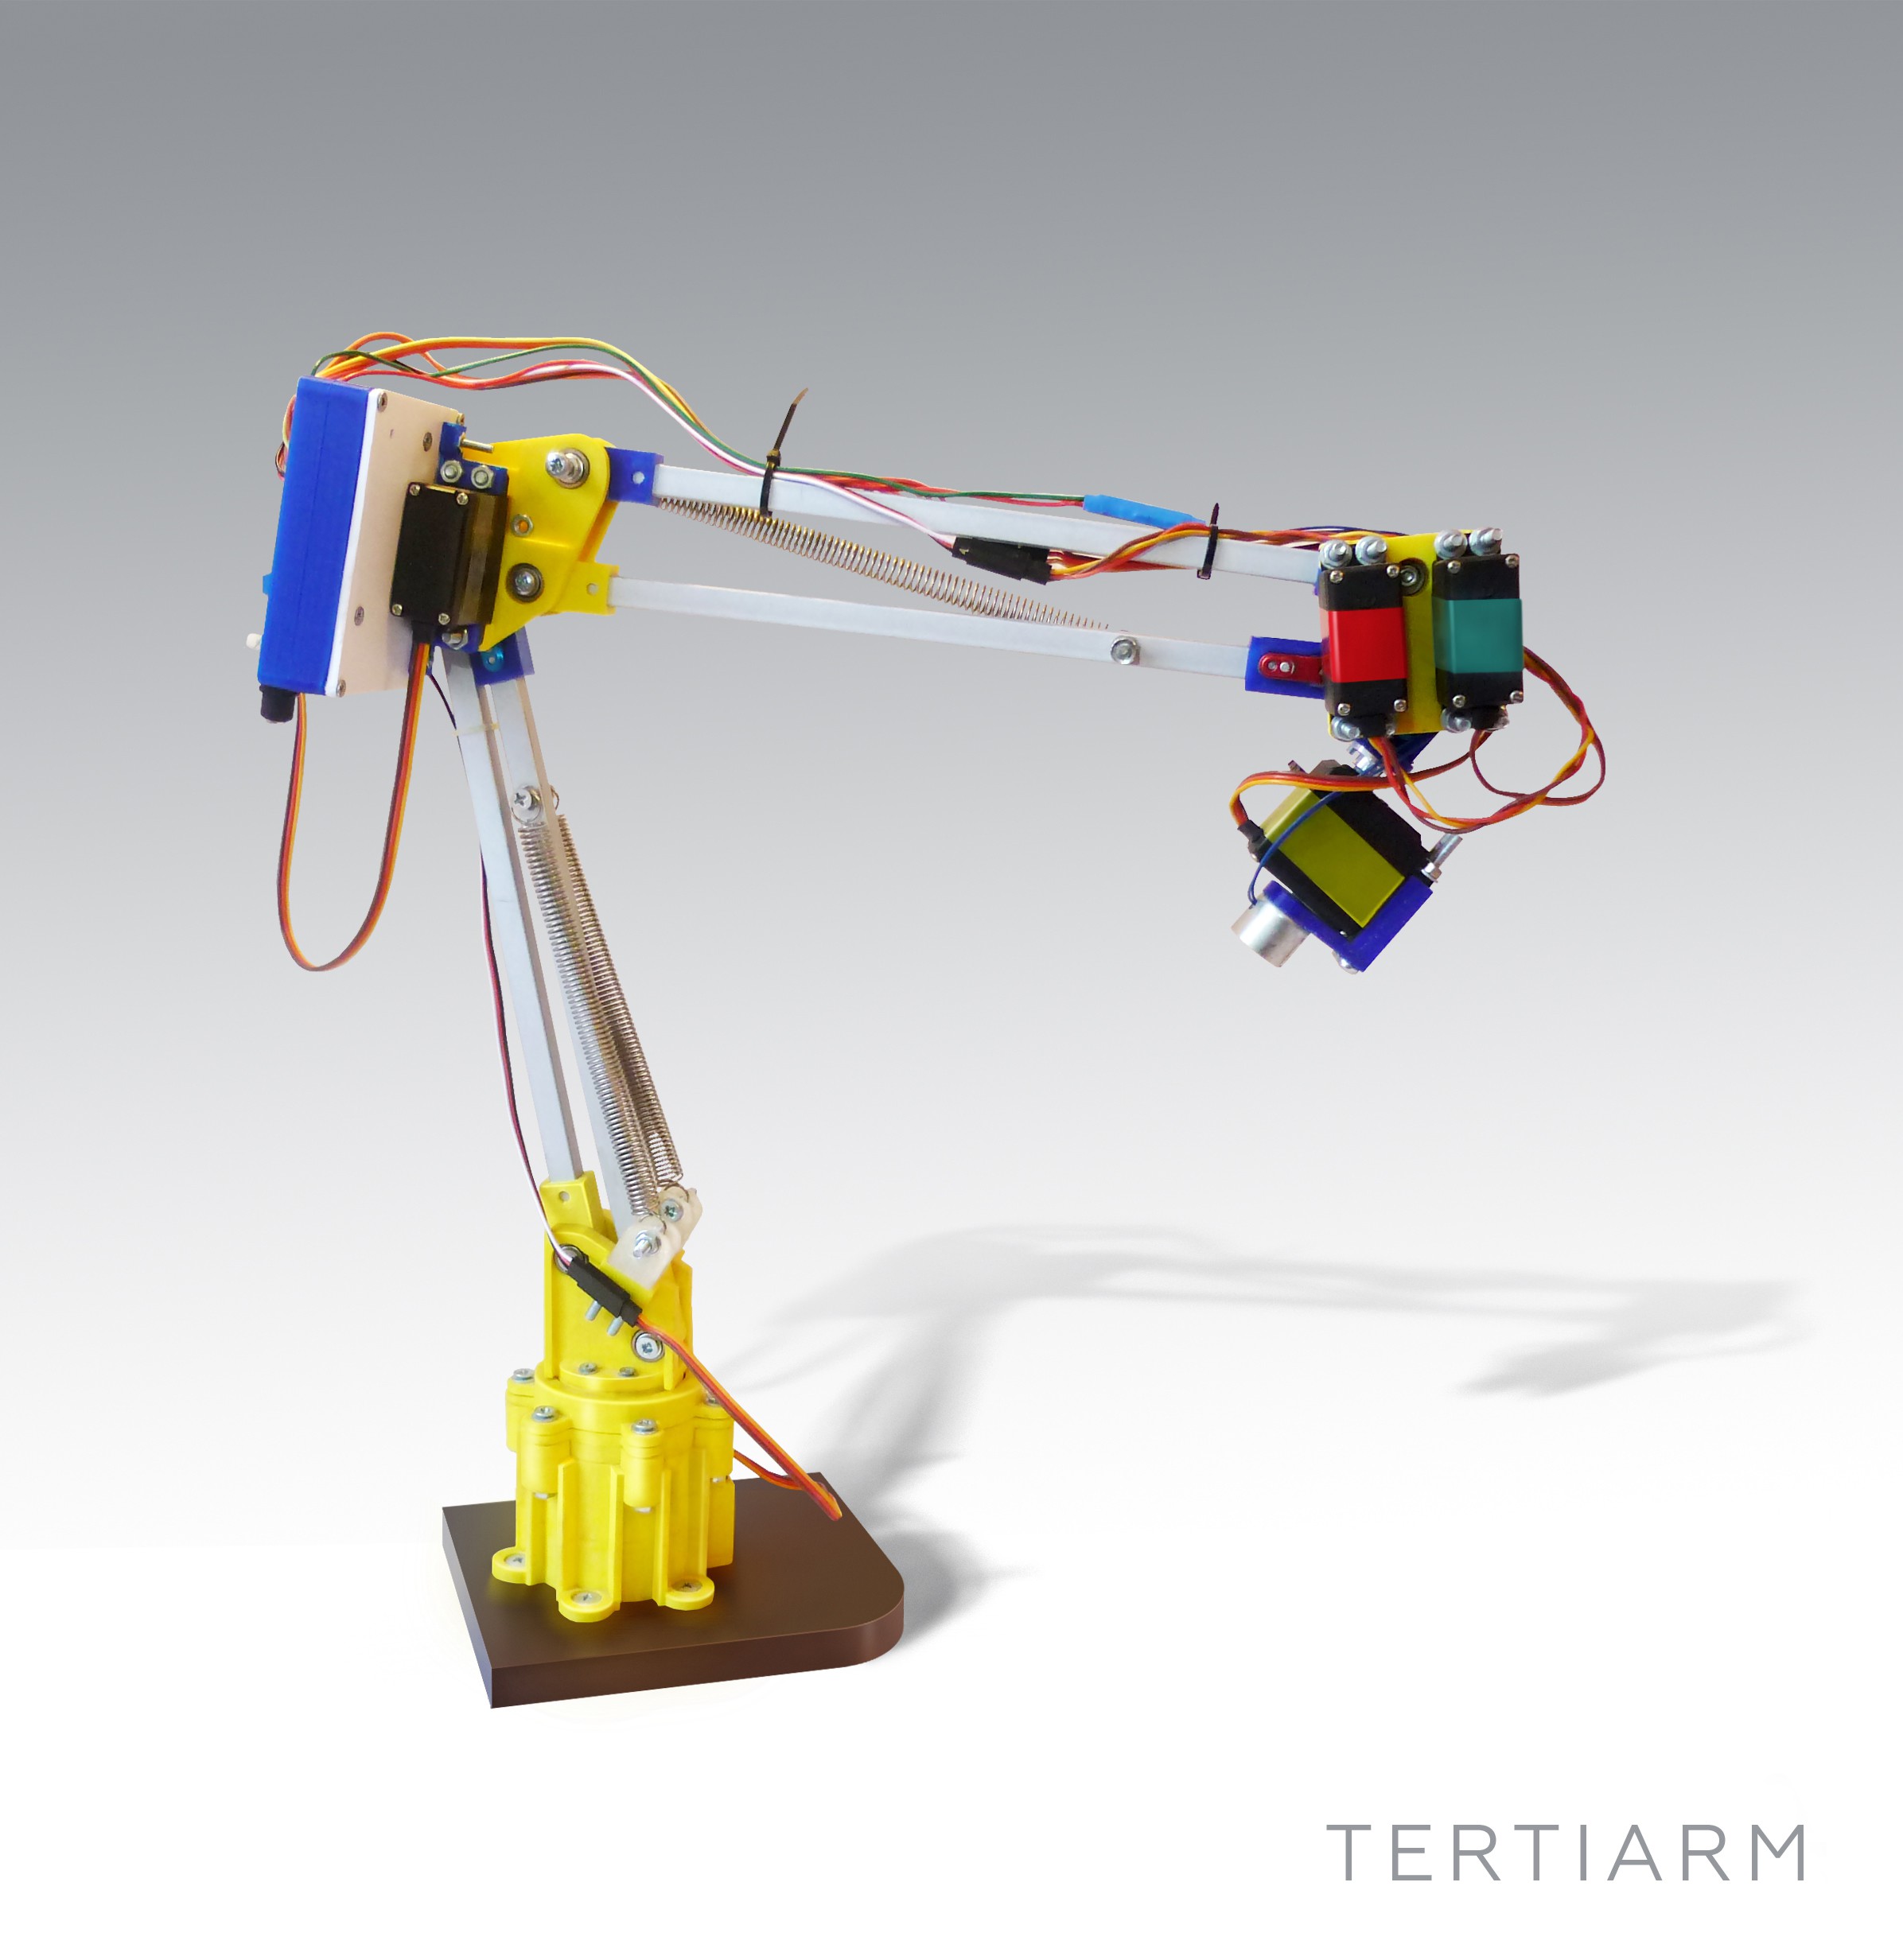
Tertiarm - low cost, 3d printed robot arm based on Ikea lamp
Primary image

What does it do?
Move things, push buttons, etc.
Cost to build
Embedded video
Finished project
Complete


 Ever used a drive-in movie speaker? Build your own and listen to your tunes in retro style.
The post Revive Old Drive-In Speakers with a Modern LED Twist appeared first on Make: DIY Projects and Ideas for Makers.
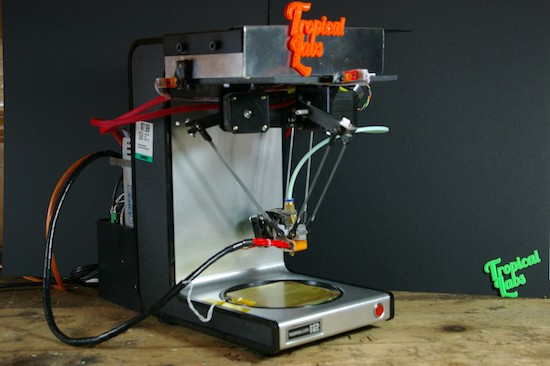
Heavy duty coffee makers are good for, well, making coffee. On the other hand, if you were to look at the frame without the preconception of what it can do, you might notice that there is space on top where equipment could be attached, and space on the bottom with a built-in heating pad on which to place an object… in other words, a perfect 3D printer frame!
Tropical Labs realized this, and turned the ordinary household appliance into a delta printer with three steppers for motion and another to feed the printing media. An Arduino Mega serves as the brains of the operation along with a popular RAMPS 1.4 shield.
Frame aside, it’s a neat mechanism, and definitely worth checking out. You can see more about the project on Hackaday.io.
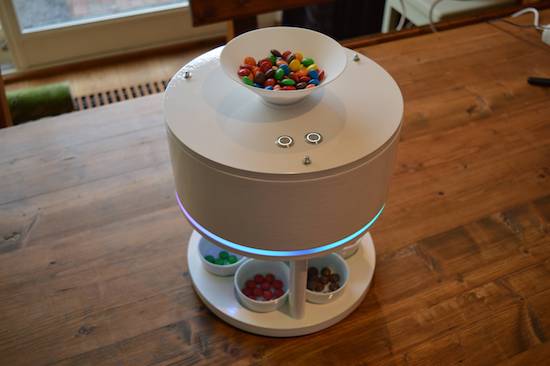
If you have OCD, then the worst thing someone could do is give you a bowl of multi-coloured M&M’s or Skittles — or Gems if you’re in the part of the world where this was written. The candies just won’t taste good until you’ve managed to sort them in to separate coloured heaps. And if you’re a hacker, you’ll obviously build a sorting machine to do the job for you.
Use our search box and you’ll find a long list of coverage describing all manner and kinds of sorting machines. And while all of them do their designated job, 19 year old [Willem Pennings]’s m&m and Skittle Sorting Machine is the bees knees. It’s one of the best builds we’ve seen to date, looking more like a Scandinavian Appliance than a DIY hack. He’s ratcheted up a 100k views on Youtube, 900k views on imgur and almost 2.5k comments on reddit, all within a day of posting the build details on his blog.
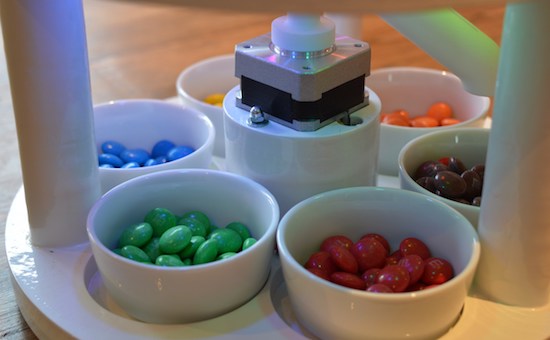
As quite often happens, his work is based on an earlier design, but he ends up adding lots of improvements to his version. It’s got a hopper at the top for loading either m&m’s or Skittles and six bowls at the bottom to receive the color sorted candies. The user interface is just two buttons — one to select between the two candy types and another to start the sorting. The hardware is all 3D printed and laser cut. But he’s put in extra effort to clean the laser cut pieces and paint them white to give it that neat, appliance look. The white, 3D printed parts add to the appeal.
Rotating the input funnel to prevent the candies from clogging the feed pipes is an ace idea. A WS2812 LED is placed above each bowl, lighting up the bowl where the next candy will be ejected and at the same time, a WS2812 strip around the periphery of the main body lights up with the color of the detected candy, making it a treat, literally, to watch this thing in action. His blog post has more details about the build, and the video after the break shows the awesome machine in action.
And if you’re interested in checking out how this sorter compares with some of the others, check out these builds — Skittles sorting machine sorts Skittles and keeps the band happy, Anti-Entropy Machine Satiates M&M OCD, Only Eat Red Skittles? We’ve Got You Covered, and Hate Blue M&M’s? Sort Them Using the Power of an iPhone! As we mentioned earlier, candy sorting machines are top priority for hackers.
[via r/electronics]


Inspired by a YouTube video of another candy sorter, Willem Pennings decided to build his own version.
After nearly eight months of work, he now has a device that can separate M&Ms or Skittles into their respective color dishes. Control is accomplished via a pair of Arduino Nano boards along with two EasyDrivers and an RGB sensor. These actuate a small servo for mixing the candies, and a stepper motor to properly position the candy tube.
Besides designing the controls for the machine, everything is modeled beautifully in the NX10 CAD package. The results, as seen in the video, look extremely polished–and it’s quite soothing to watch these candies drop into their little bowls in automated fashion!
You can find more details on Pennings’ project page and check out the video that inspired him here.
IoT, web apps, and connected devices are all becoming increasingly popular. But, the market still resembles a wild west apothecary, and no single IoT ecosystem or architecture seems to be the one bottle of snake oil we’ll all end up using. As such, we hackers are keen to build our own devices, instead of risking being locked into an IoT system that could become obsolete at any time. But, building an IoT device and interface takes a wide range of skills, and those who are lacking skill in the dark art of programming might have trouble creating a control app for their shiny new connected-thing.
Enter Involt, which is a framework for building hardware control interfaces using HTML and CSS. The framework is built on Node-Webkit, which means the conventions should be familiar to those with a bit of web development background. Hardware interactions (on Arduinos) are handled with simple CSS classes. For example, a button might contain a CSS class which changes an Arduino pin from high to low.
Involt can take that CSS and convert it into a function, which is then sent to the Arduino via serial or Bluetooth communication. For more advanced functionality, Javascript (or really any other language) can be used to define what functions are generated — and, in turn, sent to the Arduino. But, all that is needed for the basic functionality necessary for many IoT devices (which might only need to be turned on and off, or set to a certain value) is a bit of HTML and CSS knowledge. You’ll create both the interface and the underlying hardware interactions all within an HTML layout with CSS styling and functionality.
While Involt isn’t the only framework to simplify hardware interaction (it’s not even the only Node.js based method), the simplicity is definitely laudable. For those who are just getting started with these sorts of devices, Involt can absolutely make the process faster and less painful. And, even for those who are experienced in this arena, the speed and efficiency of prototyping with Involt is sure to be useful.


 Can you hack your dog? Kind of. But you have to use hot dogs.
The post Hack Your Dog with Arduino-Driven Hot Dogs appeared first on Make: DIY Projects and Ideas for Makers.

Carlos Rodriguez–who not only happens to be an Arduino team member but also a Masters student at Malmö University’s K3 school–has shared with us a project that he and a group of his interaction design classmates have created.
For the outsider, The Hunt is an Arduino-based light board; a piece of decoration in a tasteful home. Its six carefully crafted boxes are sources of light that shine when attached to the board. But what’s hiding in plain sight is a whole new world. The intrinsic light and shadow patterns hide an exciting game of strategy, hunt, and kill.

The Hunt is inspired by board games such as Quoridor, Chess, and Ludo. It is a two-player game, where each player has three tokens–two hunters and one beast–and the goal is for a hunter to catch the opponent’s beast. At each turn, a player moves one token–up, down, left or right– but the catch is: if moving a hunter, their beast will also have to move but in the opposite direction. The main strategy of the game is then to find out how to catch the opponent’s beast without sacrificing your own.
You can find more photos and information on this interactive project here. Shout out to Ana Barbosa, Andrea Serra, and Dennis Bücker as well for their impressive work!
Christmas light displays winking and flashing in sync to music are a surefire way to rack up views on YouTube and annoy your neighbours. Inspired by one such video, [Akshay James] set up his own display and catalogued the process in this handy tutorial to get you started on your own for the next holiday season.
[James], using the digital audio workstation Studio One, took the MIDI data for the song ‘Carol of the Bells’ and used that as the light controller data for the project’s Arduino brain. Studio One sends out the song’s MIDI data, handled via the Hairless MIDI to serial bridge, to the Arduino which in turn sets the corresponding bit to on or off. That gets passed along to three 74HC595 shift registers — and their three respective relay boards — which finally trigger the relay for the string of lights.
From there, it’s a matter of wiring up the Arduino shift register boards, relays, and connecting the lights. Oh, and be sure to mount a speaker outdoors so passers-by can enjoy the music:
Be sure to set up a secondary power source for the relays, as drawing the power from the Arduino is likely to cause big problems. If your preferred digital audio workstation doesn’t have a virtual MIDI instrument, [James] used loopMIDI for the desired effect. He has also provided the code he used to save you some trouble if you’re building this during an invariably hectic holiday season.
Of course, you could always plug your lights into an IoT power bar and have fun that way.

