

The Rick and Morty Alarm will make sure you’re always on time
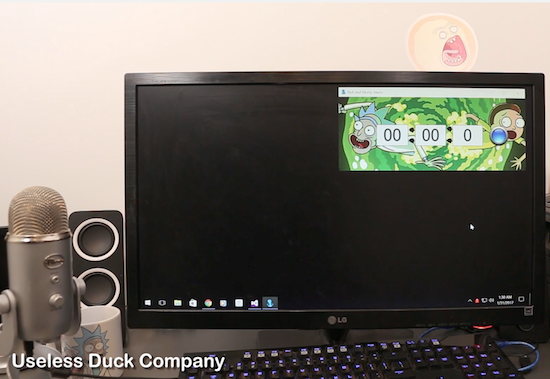
Mike, CEO of the Useless Duck Company, recently got sidetracked playing computer games. After receiving a notification on his phone, he realized that he had lost track of the time and was late to a very important meeting. Being the Maker that he is, he decided to invent a system that would prevent this from happening again. Introducing the Rick and Morty Alarm.
Now Mike just has to enter how much time he has remaining (in hours, minutes and/or seconds), and he’ll receive an alert in the form of a Screaming Sun when it’s time to leave.
The alarm consists of a Windows Forms application that sends a serial signal to an Arduino Uno, triggering a stepper motor. He also designed and 3D-printed the mechanism that raises the TV show character’s cutout. Meanwhile, the loud yelling noise is played through his computer speakers.
Since this worked so well for his desktop, Mike say he created a mobile app to help him wake up in morning. Check it out below!


