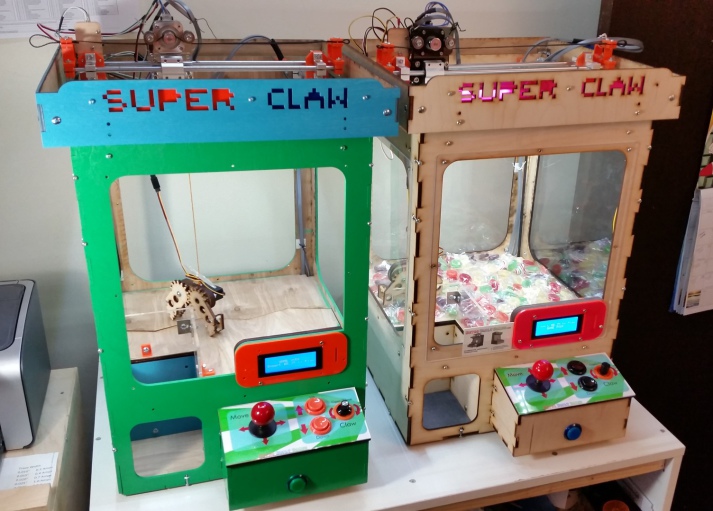
Depending on your point-of-view, you may see claw machines as an interesting device that can normally be ignored, or perhaps magnet for quarters that you must satisfy until you capture the stuffed animal that’s “so easy to get.” Maybe these gantry-crane gadgets would be a bit more fun if you could play them at home to your heart’s content. If that sounds appealing, then Ryan Bates of Retro Built Games has the perfect solution with his “Super Claw” machine.
This project, though on version four, is not currently for sale as a kit, but he is now selling his stepper driver board for the device, which links up to an Arduino Mega via an IDC cable. This takes advantage of the brick of I/O opposite the USB and power connector on the Mega to clean up wiring significantly.
[Alberto Piganti], aka [pighixxx] has been making circuit diagram art for a few years now, and has just come out with a book that’s available on Kickstarter. He sent us a copy to review, and we spent an hour or so with a refreshing beverage and a binder full of beautiful circuit diagrams. It doesn’t get better than that!
[pighixxx] started out making very pretty and functional pinout diagrams for a number of microcontrollers, and then branched out to modules and development boards like the Arduino and ESP8266. They’re great, and we’ll admit to having a printout of his SMD ATMega328 and the ESP-12 on our wall. His graphical style has been widely copied, which truly is the sincerest form of flattery.
But after pinouts, what’s next? Fully elaborated circuit diagrams, done in the same style, of course. “ABC: Basic Connections” started out life as a compendium of frequently used sub-circuits in Arduino projects. But you can take “Arduino” with a grain of salt — these are all useful for generic microcontroller-based projects. So whether you want to drive a 12 V solenoid from a low-voltage microcontroller, drive many LEDs with shift registers, or decode a rotary encoder, there is a circuit snippet here for you.
One of the things that we like most about the graphics in “ABC” is that they’re not dumbed down — they’re fundamentally just well-done circuit diagrams, but with graphic touches and extra detail where it actually helps to clarify things. This is a middle ground between the kind of schematic you use in a PCB layout program and the kind of diagram you get from Fritzing. In the former, every part has a symbol but multifunction parts like microcontrollers are just represented as squares bristling with pin numbers. In the latter, wiring up an IC is easy because the parts and pins are represented graphically, but you quickly run out of colors for the different wires, and the “breadboard” turns into a rat’s nest with a circuit of any complexity.
“ABC” takes the middle road, using standard circuit diagram style overall, but also the nice graphic representations of the ICs and modules that [pighixxx] is good at. Is a 2N2222 pinned EBC or BCE? You don’t have to look that up, because it’s sketched out for you here. We’d guess that this attractive, but information-rich, style is a great fit for the target audience — people with some electronics experience who do not yet have their favorite transistor symbol tattooed on their forearm. [pighixxx]’s diagrams are simple, easy to understand, easy to use, and pretty to boot.
There is a planned online counterpart to the book, with further elaborations of all of the circuit setups. They’re not finished yet, but they have a lot more of the flavor of the Fritzing-style, this-wire-goes-to-that-hole diagrams. This style does work better in an online format than in a physical book, because you can build up the rat’s nest in bite-sized steps, none of which are too overwhelming. But honestly, for an advanced beginner or intermediate electronics hacker, the book can be treated as stand-alone. The web content may help the rank newbie when they get stuck.
Tee-hee.
The breadth of circuits in “ABC” is fairly wide, covering most of the microcontroller-interfacing problems that we’ve ever encountered. None of the circuits are revolutionary — they’re the tried-and-true, correct solutions to the various problems, rather than anything too hacky or clever. We weren’t surprised by any of the circuits, but we didn’t find anything that we wouldn’t use ourselves either. These are basic connections after all, and a darn solid collection of them.
To sum up, “ABC” is an attractive book in a handy binder format that would make a great collection of solutions for anyone who’s just getting started in the whole “Arduino” scene but who gets hung up on interfacing the chips with the real world. It’s a handy reference for the pinouts of a number of frequently used parts, combined with the resistors, flyback diodes, level-shifting circuits, and whatever else that you’d need to make them work. It’s what we wish our simple circuit diagrams looked like. We like it.
Phone screens keep getting bigger. Computer screens keep getting bigger. Why not a large trackpad to use as a mouse? [MaddyMaxey] had that thought and with a few components and some sewing skills created a trackpad in a tablecloth.
The electronics in this project are right off the shelf. A Flora board for the brains and 4 capacitive touch boards. If you haven’t seen the Flora, it is a circular-shaped Arduino made for sewing into things. The real interesting part is the construction. If you haven’t worked with conductive fabric and thread, this will be a real eye-opener. [Maddy’s] blog has a lot of information about her explorations into merging fabric and electronics and also covers things like selecting conductive thread.
As an optional feature, [MaddyMaxey] added vibration motors that provide haptic feedback to her touchpad. We were hoping for a video, but there doesn’t seem to be one. The code is just the example program for the capacitive sensor boards, although you can see in a screenshot the additions for the haptic motors.
Are you a Bitcoin miner or trader, but find yourself lacking the compulsive need to check exchange rates like the drug-fuelled daytraders of Wall Street? Fear not – you too can adorn your home or office with a Bitcoin Price Ticker! The post is in Italian but you can read a translated version here.
It’s a straightforward enough build – an Arduino compatible board with an onboard ESP8266 is hooked up with an HD44780-compatible LCD. It’s then a simple matter of scraping the Bitcoin price from the web and displaying it on the LCD. It’s a combination of all the maker staples, tied together with some off-the-shelf libraries – it’s quick, and it works.
What makes the build extra nice is the use of custom characters on the LCD. The HD44780 is a character based display, and this project appears to use a screen with two lines of sixteen characters each. However, a custom character set has been implemented in the display which uses several “characters” on the screen to create a single number. It’s a great way to make the display more legible from a distance, as the numbers are much larger, and the Bitcoin logo has been faithfully recreated as well. It’s small touches like this that can really set a project apart. We’d love to see this expanded to display other financial market information and finished off in a nice case.
This weekend at the Bay Area Maker Faire, Arduino in conjunction with SiFive, a fabless provider of the Open Source RISC-V micros, introduced the Arduino Cinque. This is a board running one of the fastest microcontrollers available, and as an added bonus, this board includes Espressif’s ESP32, another wonderchip that features WiFi and Bluetooth alongside a very, very powerful SoC.
Details on the Arduino Cinque are slim at the moment, but from what we’ve seen so far, the Cinque is an impressively powerful board featuring the RISC-V FE310 SoC from SiFive, an ESP32, and an STM32F103. The STM32 appears to be dedicated to providing the board with USB to UART translation, something the first RISC-V compatible Arduino solved with an FTDI chip. Using an FTDI chip is, of course, a questionable design decision when building a capital ‘O’ Open microcontroller platform, and we’re glad SiFive and Arduino found a better solution. It’s unknown if this STM32 can be used alongside the FE310 and ESP32 at this point.
We’ve taken a look at SiFive’s FE310 SoC, and it is an extremely capable chip. It was released first at the HiFive1, and our hands-on testing revealed this is a chip that outperforms the current performance champ of the Arduino world, the Teensy 3.6. Of course, with any new architecture, there will be a few problems porting the vast number of libraries over to the FE310, but SiFive has included an Arduino compatible SDK. It’s promising, and we can’t wait to see SiFive’s work in more boards.
The Arduino has inspired many a creative projects that can be beneficial to humanity. The Arduino Hamster Wheel Pedometer by [John Mueller] on the other hand is a creation that is meant for the cute furry rodent pets. When [John Mueller]’s daughter wanted to keep track of her hamster’s night-time strolls, her maker-dad saw it as an opportunity to get her involved in technology. The project consists of a hamster-wheel with a magnet that triggers a reed switch on completing a revolution. The entire assembly is custom-made and [John Mueller] does an excellent job documenting the build with a lot of clear images.
The wheel is affixed to a shaft with a ball bearing at one end and the entire thing is mounted on the side of the cage so that it can be removed with ease for maintenance. The reed switch is embedded in the wooden mounting block such that the connecting cables pass from inside the assembly. This prevents the hamster from coming in contact with the cabling or damaging it in any way. An LCD and the Arduino Uno are placed outside the cage and are used to display the revolutions of the wheel as well as the equivalent miles travelled.
The code for the Arduino is also supplied for anyone who wants to replicate the project and the video below shows the working of the project. The project could also be extended to count calories burned as well as running speed. This project is a prime example of how technology can be used to assist and is similar to the IoT Hamster Wheels that tweets every movement of the Hamster Life.
A self-balancing robot is a great way to get introduced to control theory and robotics in general. The ability for a robot to sense its position and its current set of circumstances and then to make a proportional response to accomplish its goal is key to all robotics. While hobby robots might use cheap servos or brushed motors, for any more advanced balancing robot you might want to reach for a brushless DC motor and a new fully open-source controller.
The main problem with brushless DC motors is that they don’t perform very well at low velocities. To combat this downside, there are a large number of specialized controllers on the market that can help mitigate their behavior. Until now, all of these controllers have been locked down and proprietary. SmoothControl is looking to create a fully open source design for these motors, and they look like they have a pretty good start. The controller is designed to run on the ubiquitous ATmega32U4 with an open source 3-phase driver board. They are currently using these boards with two specific motors but plan to also support more motors as the project grows.
We’ve seen projects before that detail why brushless motors are difficult to deal with, so an open source driver for brushless DC motors that does the work for us seems appealing. There are lots of applications for brushless DC motors outside of robots where a controller like this could be useful as well, such as driving an airplane’s propeller.
There’s an old joke where you ask someone what’s the most important thing about comedy. When they get to about the word “important,” you interrupt them and say, “Timing!” Perhaps the same thing can be said for photography. [Ted Kinsman’s] students at the Rochester Institute of Technology would probably agree. They built an Arduino-based rig to do inexpensive stop action photography.
As Arduino projects go, it isn’t very sophisticated. The circuit contains a sound detection module and an optoisolator. The code would easily fit on a piece of notebook paper. When a loud sound occurs, the Arduino triggers the flash. Simple enough, but the resulting pictures are amazing. It also looks like a lot of fun to destroy perfectly good things in the name of art.
If you are interested in photography, there are enough photos of their setup to give you some ideas about lighting, reflectors, and camera angles. If you are not a photography fan, you still should check out the post to see more of the pictures the students took.
Interestingly, [Dr. Harold Edgerton] at MIT pioneered this technique starting back in 1937 and you’ve probably seen some of his famous photographs like the bullet through the apple or the milk drop crown. He used the same techniques to take photographs of the atomic bomb tests in the 1950s and 1960s.
You don’t have to use sound as a trigger, by the way. We’ve seen lasers do the trick. And while the Rochester group’s build was simple, we’ve seen some even more bare-bones.