Craft A Minecraft Creeper Robot
 bring a creeper to life with your own bot
The post Craft A Minecraft Creeper Robot appeared first on Make: DIY Projects and Ideas for Makers.


bring a creeper to life with your own bot
The post Craft A Minecraft Creeper Robot appeared first on Make: DIY Projects and Ideas for Makers.
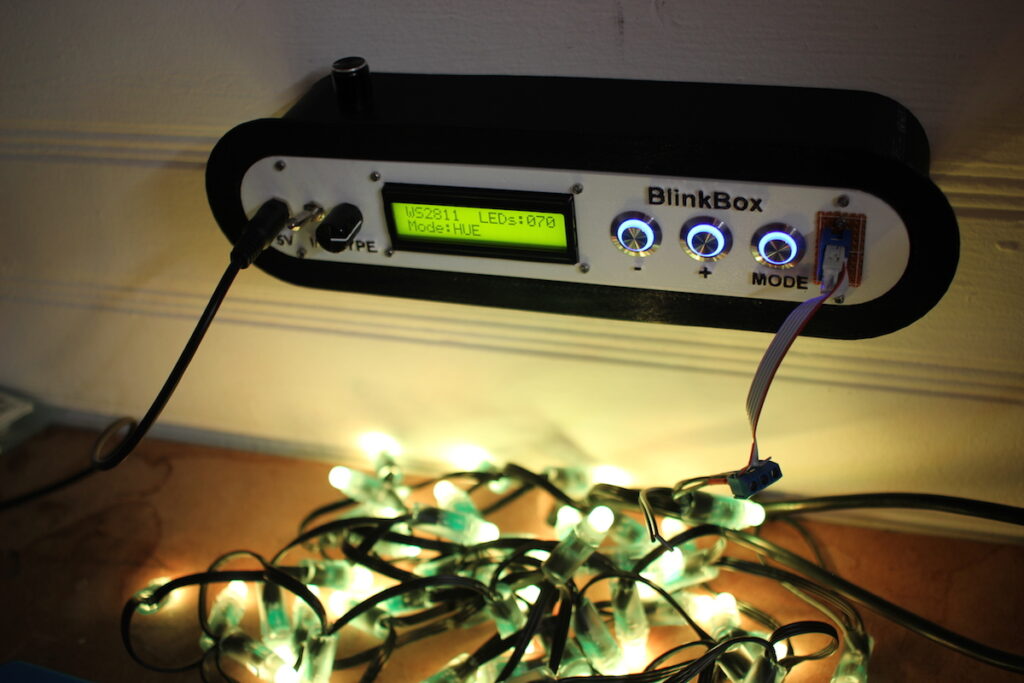
Programmable LEDs are amazing pieces of hardware, allowing hackers to add a rainbow of colors to projects at reasonable prices. Troubleshooting these devices, however, can be a pain, so Devon Bray developed the “BlinkBox” to help with this task.
The resulting Arduino-based tester can work with multiple types of LEDs, and is able to cycle through each individual LED module in a string, and change the animation pattern as needed. He had previously done this kind of testing on a breadboard, but his new iteration is much more permanent and professional looking.
You can find CAD and code for it on GitHub if you’d like to build your own!

If you love electronics as well as plants, what better way to combine the two than with a smart hydroponic system? Students at the Juan de Lanuza School decided to do just that, creating a portable hydroponic assembly that’s automatically controlled with the help of an Arduino Mega.
The system uses six lengths of PVC pipe to house plants and pass a nutrient rich liquid solution through their roots. The control assembly measures elements such as temperature, humidity, and pH, then adjusts the lighting, water pump, and nutrient feeder to accommodate for conditions.
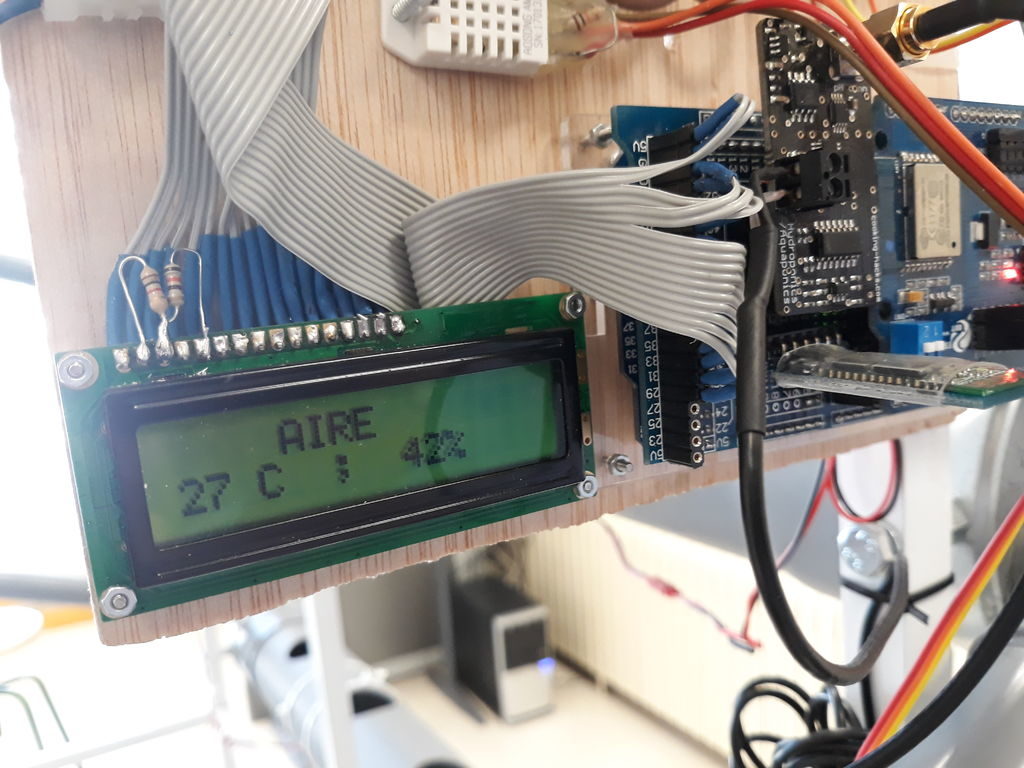
The device transmits data to ThinkSpeak for human monitoring, and also features a smartphone app for visualization. Build details are available here in English, or you can see a video of the setup in Spanish below.
 Cheap second-hand hardware is usually a fertile ground for hacking, and it looks like these digital classroom aids are no exception. [is0-mick] writes in to tell us how he managed to hack one of these devices, a Smart Reponse XE, into an Arduboy compatible game system. As it turns out, this particular gadget is powered by an ATmega128RFA, which is essentially an Arduino-compatible AVR microcontroller with a 2.4GHz RF transceiver tacked on. This makes it an extremely interesting platform for hacking, especially since they are going for as little as $3 USD on eBay.
There’s no USB-Serial converter built into the Smart Response XE, so you’ll need to provide your own external programmer to flash the device. But luckily there’s a labeled ISP connector right on the board which makes it pretty straightforward to get everything wired up.
Of course, getting the hardware working was slightly more complicated than just flashing an Arduino Sketch onto the thing. [is0-mick] has provided his bootloader and modified libraries to get the device’s QWERTY keyboard and ST7586S controlled 384×160 LCD working.
Playing games is fun, but when his friend [en4rab] sent him the Smart Response XE to fiddle with, the goal was actually to turn them into cheap 2.4 GHz analyzers similar to what was done with the IM-ME. It seems they’re well on their way, and [is0-mick] invites anyone who might be interested in filling in some of the blanks on the RF side to get involved.
With mobile phones now ubiquitous for the masses in much of the world for over two decades, something a lot of readers will be familiar with is a drawer full of their past devices. Alongside the older smartphone you’ll have a couple of feature phones, and probably at the bottom a Nokia candybar or a Motorola flip phone. There have been various attempts over the years to make use of the computing power the more recent ones contain through using their smartphone operating systems, but the older devices remain relatively useless.
[Vishwasnavada] has a neat plan though, using an ancient phone as a remote trigger device, by interfacing it with an Arduino. There are many ways this could be achieved depending on the model of the phone in question, but one thing common to nearly all devices is a vibration motor. Removing the motor and taking its power line to a GPIO allows the Arduino to sense when the phone is ringing. The idea then is that a call can be placed to the phone which is not picked up, but because it triggers the vibration motor it can be used to make the microcontroller do something remotely. A hack with limited capabilities then, but one that is cheap and simple, uses a recycled device, and should work almost anywhere populated on the planet given the global reach of 2G networks.
This isn’t the first respin of a classic Nokia we’ve brought you, they will also talk data.
[Kerry Wong] comes across the coolest hardware, and always manages to do something interesting with it. His widget du jour is an old demo board for a digital RF attenuator chip, which can pad a signal in discrete steps according to the settings of some DIP switches. [Kerry]’s goal: forget the finger switch-flipping and bring the attenuator under Arduino control.
As usual with his videos, [Kerry] gives us a great rundown on the theory behind the hardware he’s working with. The chip in question is an interesting beast, an HMC624LP4E from Hittite, a company that was rolled into Analog Devices in 2014. The now-obsolete device is a monolithic microwave integrated circuit (MMIC) built on a gallium arsenide substrate rather than silicon, and attenuates DC to 6-GHz signals in 64 steps down to -31.5 dBm. After a functional check of the board using the DIP switches, he whipped up a quick Arduino project to control the chip with its built-in serial interface. It’s just a prototype for now, but spinning the encoder is a lot handier than flipping switches, and once this is boxed up it’ll make a great addition to [Kerry]’s RF bench.
If this video puts you in an RF state of mind, check out some of [Kerry]’s other videos, like this one about temperature-compensated crystal oscillators, or the mysteries of microwave electronics.
As if you already weren’t agonizing over whether or not you should build your own arcade cabinet, add this one to the list of compelling reasons why you should dedicate an unreasonable amount of physical space to playing games you’ve probably already got emulated on your phone. [Rodrigo] writes in to show off his project to add some flair to the lighted buttons on his arcade controller. (Google Translate)
 The wiring for this project is about as easy as you’d expect: the buttons connect to the digital inputs on the Arduino, and the LEDs on the digital outputs. When the Arduino code sees the button getting pressed, it brings the corresponding LED pin high and starts a fade out timer using the SoftPWM library by [Brett Hagman].
It’s worth noting that the actual USB interface is being done with a stand-alone controller, so the Arduino here is being used purely to drive the lighting effects. The more critical reader might argue that you could do both with a single microcontroller, but [Rodrigo] was in a classic “Use what you’ve got” situation, and already had a USB controller on hand.
Of course, fancy lit arcade buttons won’t do you much good without something to put them in. Luckily we’ve covered some fantastic looking arcade cabinets to get you inspired.
Every scrap of power is precious when it comes to power harvesting, and working with such designs usually means getting cozy with a microcontroller’s low-power tricks and sleep modes. But in the case of the Ultra Low Power Energy Harvester design by [bobricius], the attached microcontroller doesn’t need to worry about managing power at all — as long as it can finish its job fast enough.
The idea is to use solar energy to fill a capacitor, then turn on the microcontroller and let it run normally until the power runs out. As a result, a microcontroller may only have a runtime in the range of dozens of microseconds, but that’s just fine if it’s enough time to, for example, read a sensor and transmit a packet. In early tests, [bobricius] was able to reliably transmit a 16-bit value wirelessly every 30 minutes using a small array of photodiodes as the power supply. That’s the other interesting thing; [bobricius] uses an array of BPW34 photodiodes to gather solar power. The datasheet describes them as silicon photodiodes, but they can be effectively used as tiny plastic-enclosed solar cells. They are readily available and can be arranged in a variety of configurations, while also being fairly durable.
Charging a capacitor then running a load for a short amount of time is one of the simplest ways to manage solar energy, and it requires no unusual components or fancy charge controllers. As long as the load doesn’t mind a short runtime, it can be an effective way to turn even indoor light into a figuratively free power source.
The SPINES (Self-Powered IoT Node for Environmental Sensing) Mote is a wireless IoT environmental sensor, but don’t let the neatly packed single PCB fool you into thinking it’s not hackable. [Macro Yau] specifically designed SPINES to be highly modular in order to make designing an energy harvesting sensor node an easier task. The way [Macro] sees it, there are two big hurdles to development: one is the energy harvesting itself, and the other is the software required to manage the use of every precious joule of that harvested energy.
[Macro] designed the single board SPINES Mote in a way that the energy harvesting portion can be used independently, and easily integrated into other designs. In addition, an Arduino library is being developed to make it easy for the power management to be done behind the scenes, allowing a developer to concentrate on the application itself. A solar-powered wireless sensor node is one thing, but helping people get their ideas up and running faster in the process is wonderful to see.