Keep track your weekly tasks with Arduino and arcade buttons
All of us have daily tasks we need to perform, but what if you often forget whether you’ve done something, or simply need to give your child a little extra motivation? One great way would be Simon Prickett’s Arduino Task Tracker, inspired by Simone Giertz’s Every Day Calendar.
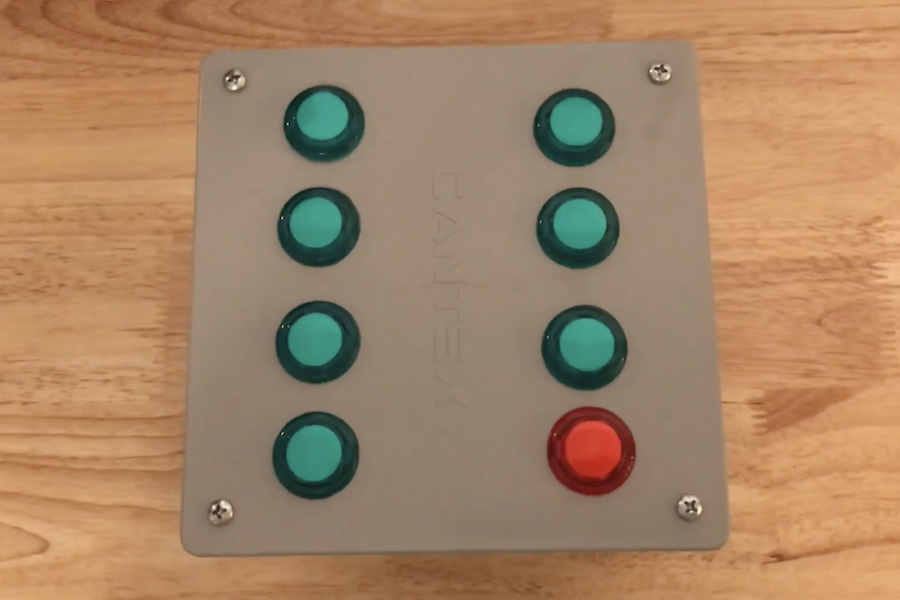
Prickett’s clean-looking device is built into an electrical junction box, which holds the guts, including an Arduino Uno inside. It also exposes eight arcade-style LED buttons on top.
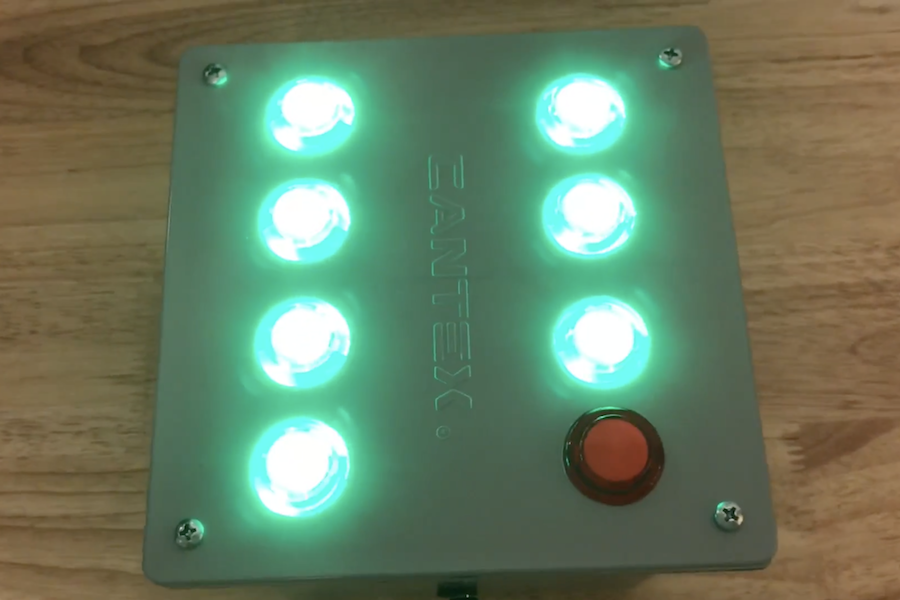
After you, or in this case Prickett’s son, complete a chore, press one of the seven green buttons. Once they are all lit, the Arduino Task Tracker produces a “victory roll” sequence. The eighth red button is then used to start the week over again.
Sound like something you’d like to recreate? Code and more info for the project can be found GitHub.