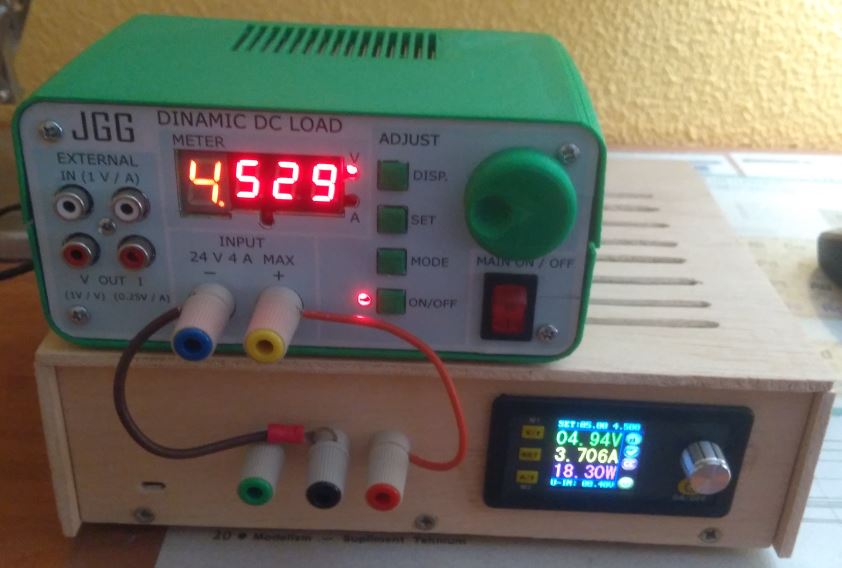
As seen here, Juan had some problems with his power supply, and while he wanted to “simply” build another one, he didn’t let the power supply go to waste. Instead he converted it into an adjustable dummy load based on the design by Dave Jones’ shown below.
This device, however, is no mere duplication of Jones’ and adds an Arduino for control, allowing for voltage, current, power, and temperature monitoring. The enclosure was designed in Fusion 360 and 3D-printed, and the front panel overlay in Inkscape.
Other interesting tricks include using a readily available DC motor for input instead of an encoder, along with an array of 7-segment displays that don’t quite all match, but act as functional outputs nonetheless.
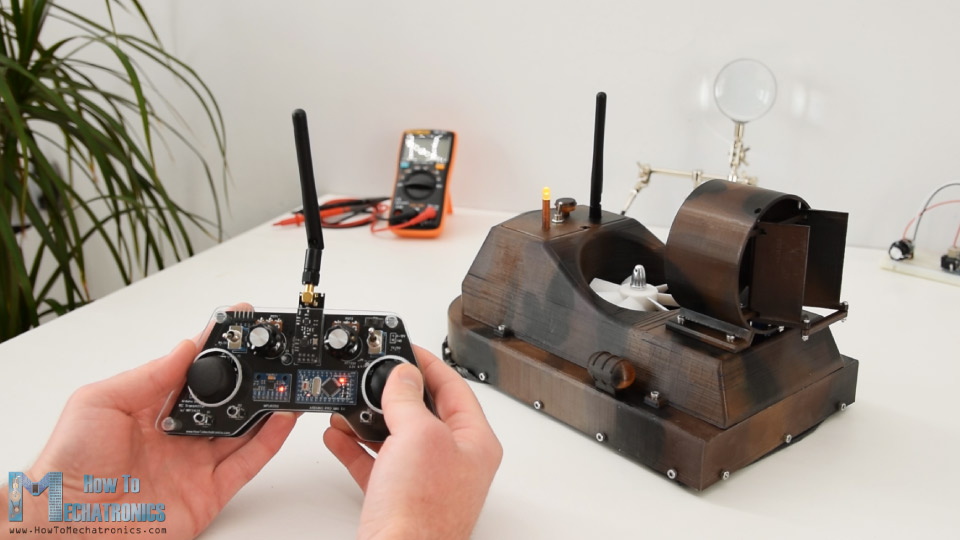
If you’ve ever considered building your own RC hovercraft, be sure to check out the latest project from “How To Mechatronics.”
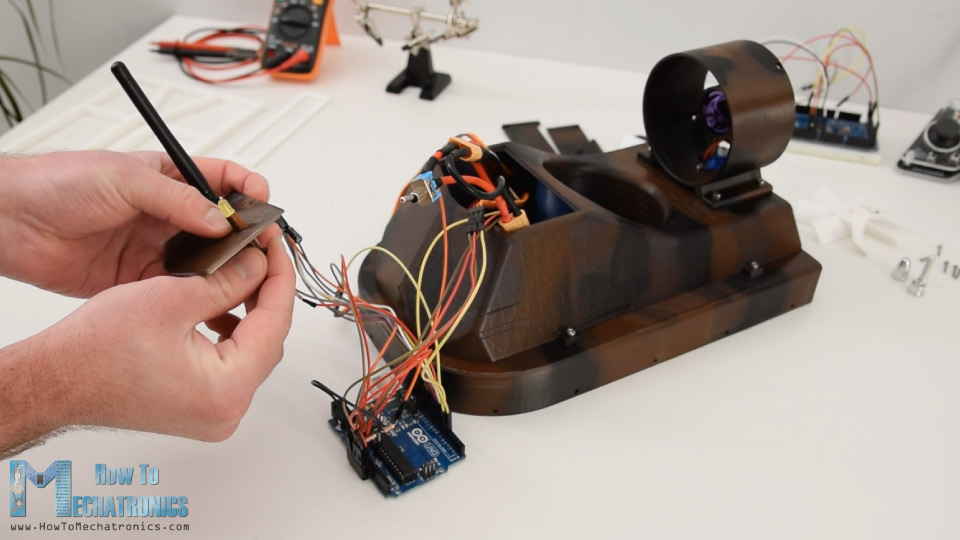
The build shows how to assemble one using a variety of 3D-printed parts, a pair of brushless DC motors for hover airflow and forward motion, and a servo for steering.
An Arduino Uno along with an nRF24L01 module are employed for control, and as demonstrated in the video below, it slides across a basketball court with the greatest of ease!
More info is available on How To Mechatronics’ write-up, including CAD/3D printing files, a parts list, and Arduino code.
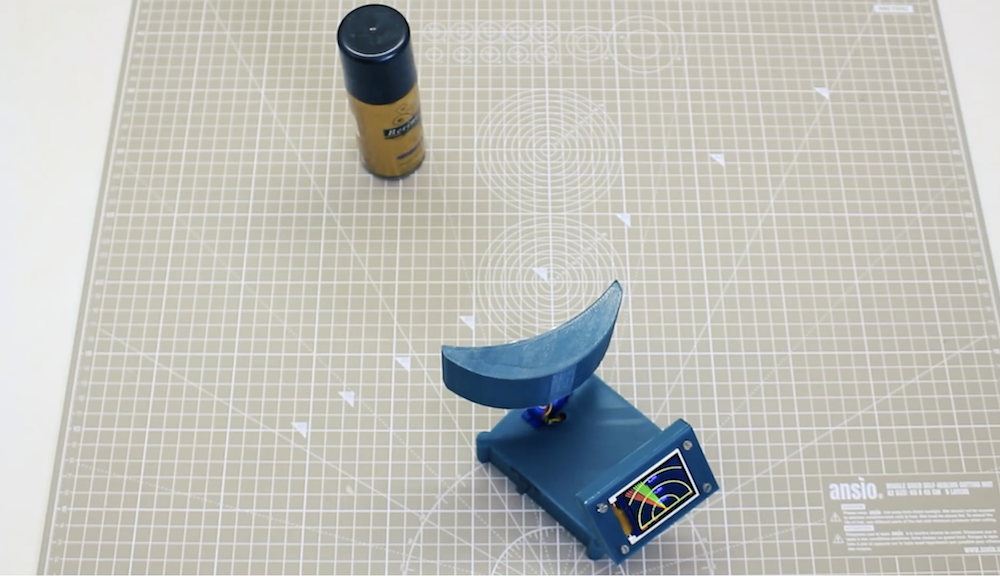
Ultrasonic sensors, which emit a high frequency sound wave then listen for its return to determine an object’s distance, are useful in a wide variety of robotics projects. If you’d like a visualization of how the sensor views an area, this “radar” from Mr Innovative presents a fun option.
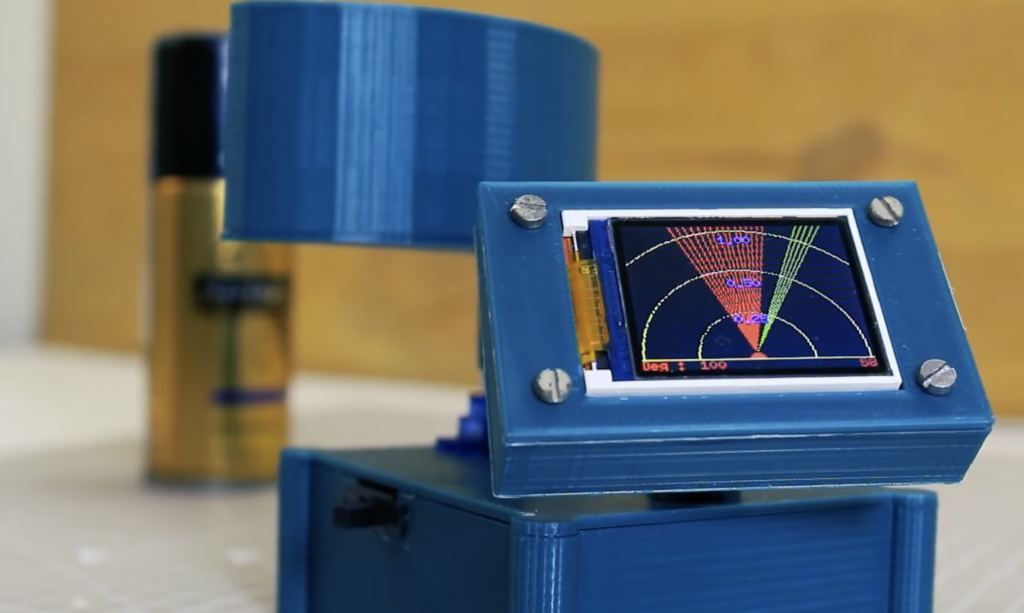
The 3D-printed console features a small SG90 servo to pan the sensor over a space, picking up obstacles in its path. The readings are then transmitted to an Arduino Nano, which displays object info on a TFT screen set up to look reminiscent of a radar screen.
I have made a mini compact radar with display for that I have used HC-SR04 ultrasonic sensor, this sensor emit ultrasonic sound which came back to sensor after reflecting from an object, all the data visualization is displayed on 1.8″ ST7735 display, if any object detect by radar it’ll show in display in red line.
The build could function either as a great teaching tool, or perhaps the basis for a panning robot sensor. Print files can be found here, and code is available on GitHub.
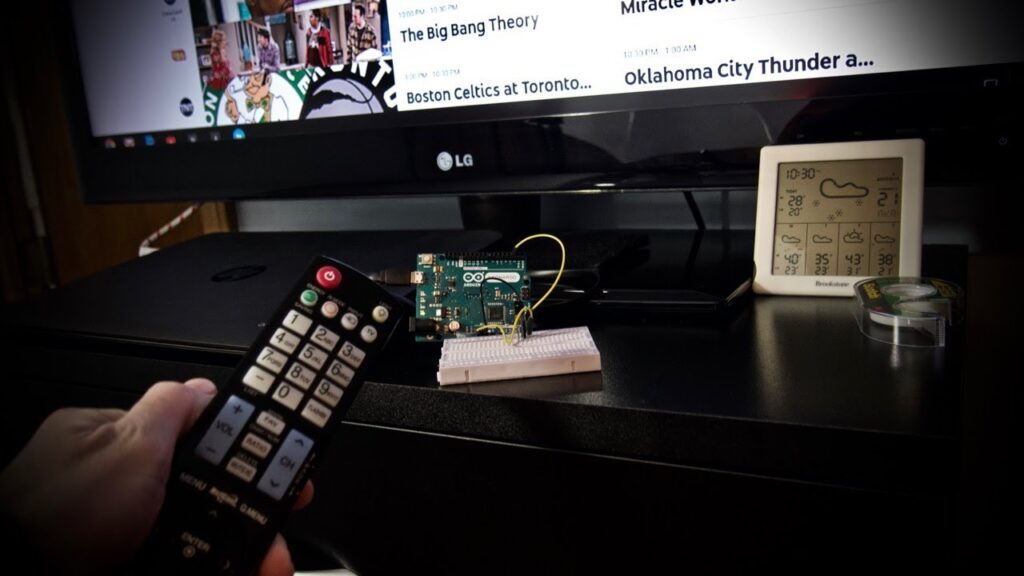
While channel surfing might increasingly seem to be a thing of the past, Kevin Darrah demonstrates that it’s possible to control your streaming computer with a traditional TV remote.
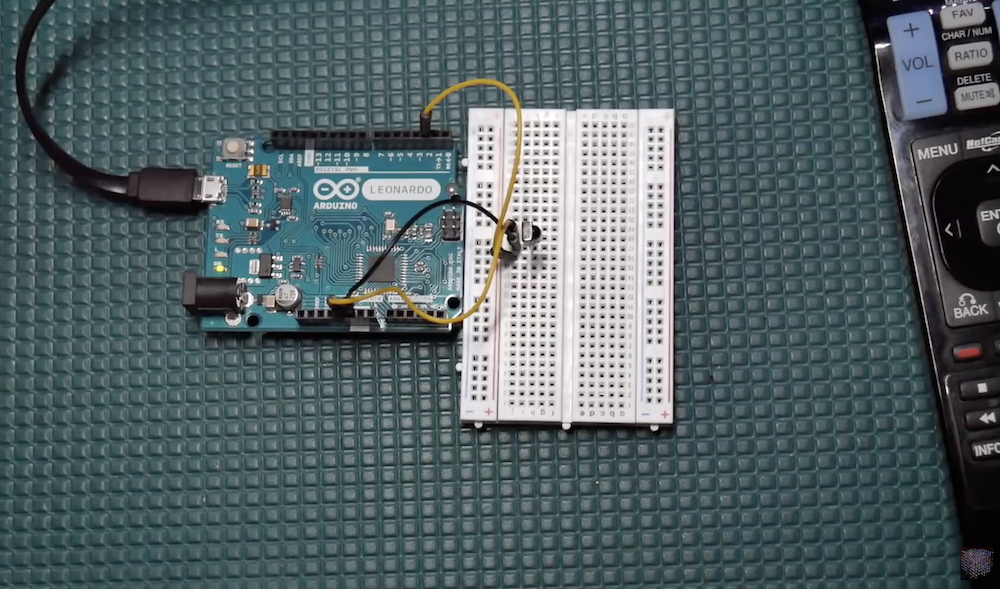
His simple solution reads IR signals with an IR detector module, which can then be passed along and translated into USB keypresses for computer control.
You can see his experimental Arduino Leonardo setup in the video below, which takes advantage of the board’s ATmega32U4 chip to emulate USD keyboard functions directly.
Fun project here that could have a lot of uses – basically a TV remote to USB translator, so could think of a lot of ways to use something like this. For me, I just wanted an easy way to channel surf using the same TV remote that came with the TV. For this, I just read in the IR codes form the remote, then map them to key-strokes to do different things. I could see the up/down left/right keys being used to drive the mouse around… lol, that might be my next project!
The bulk of the clip, however, is around a discussion on decoding IR signals and the programming involved (code available here), starting at about 6:00 in.
Sometimes it’s necessary to make do with whatever parts one has on hand, but the results of squashing a square peg into a round hole are not always as elegant as [Juan Gg]’s programmable DC load with rotary encoder. [Juan] took a design for a programmable DC load and made it his own in quite a few different ways, including a slick 3D-printed enclosure and color faceplate.
The first thing to catch one’s eye might be that leftmost seven-segment digit. There is a simple reason it doesn’t match its neighbors: [Juan] had to use what he had available, and that meant a mismatched digit. Fortunately, 3D printing one’s own enclosure meant it could be gracefully worked into the design, instead of getting a Dremel or utility knife involved. The next is a bit less obvious: the display lacked a decimal point in the second digit position, so an LED tucked in underneath does the job. Finally, the knob on the right could reasonably be thought to be a rotary encoder, but it’s actually connected to a small DC motor. By biasing the motor with a small DC voltage applied to one lead and reading the resulting voltage from the other, the knob’s speed and direction can be detected, doing a serviceable job as rotary encoder substitute.
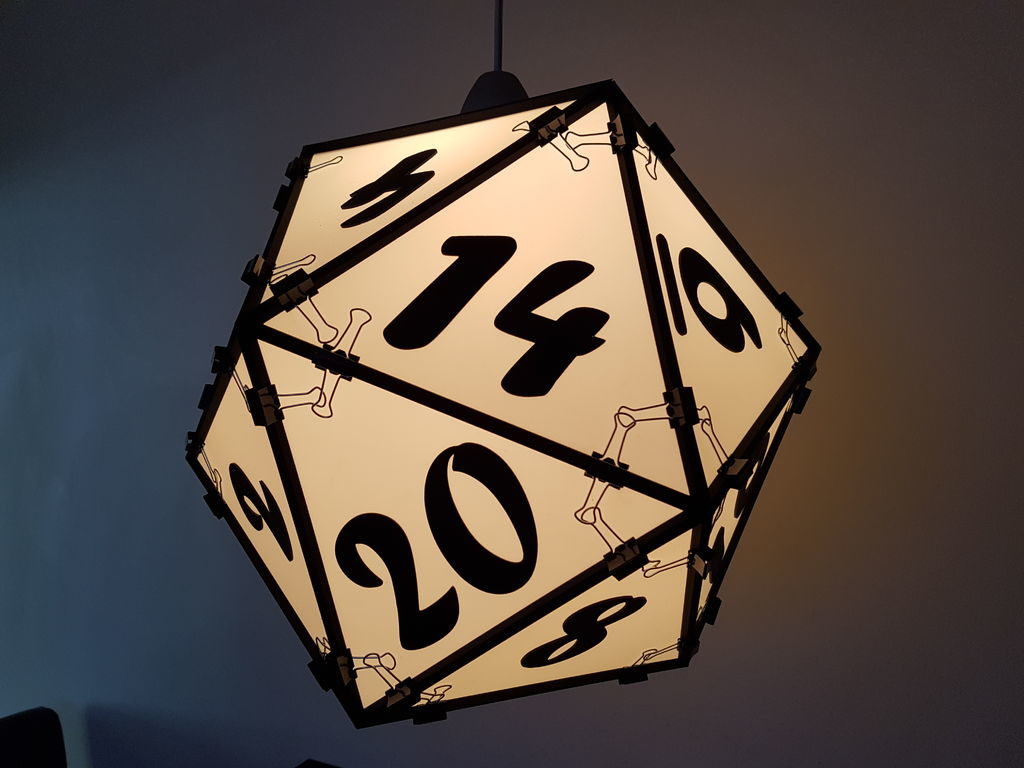
Regular icosahedrons are 20-sided polyhedrons formed out of equilateral triangles. As such, the geometry behind making one is slightly complicated, but the results in the case of this large light-up device appear to have been well worth it.
The project’s write-up does go over how to actually model these faces in CAD but also provides the 3D print files if you’d like to skip to building your own. Two versions were made, including a device that illuminates RGBW LEDs under Arduino Nano control, and a second icosahedron large enough to be used as a lamp shade!
A demo/explanation is seen in the first clip below, along with a better look at the electronics in the breadboard video.
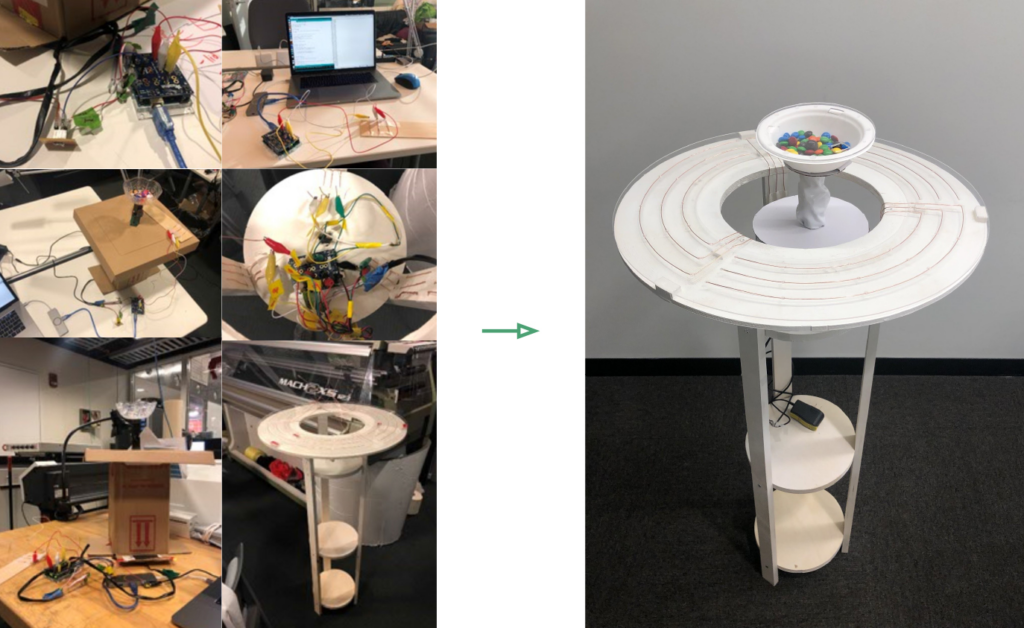
Depending on your personality, you may tend to dominate a discussion, or metaphorically slink back into the corner, waiting for a turn to speak that never comes. MIT Tangible Media Group’s SociaBowl, however, aims to change this as “a dynamic table centerpiece to mediate group conversations.”
SociaBowl takes the form of a circular standing table, with a rather curious servo-actuated bowl in the center. Copper wires embedded in the table’s acrylic surface, along with a capacitive touch shield pick up user inputs.
An Arduino Uno then translates into bowl motion, which can mean a reward for thoughtful speakers when the bowl is filled with candy, or in another implementation, the possibility of water inside spilling if one chats for too long.
[Edward], creator of the Cave Pearl project, an underwater data logger, needed a way to measure temperature with a microcontroller. Normally, this problem is most easily solved by throwing a temperature sensor on the I2C bus — these sensors are cheap and readily available. This isn’t about connecting a temperature sensor in your Arduino. This build is about using the temperature sensor in your clock.
The ATMega328p, the chip at the heart of all your Arduino Uno clones, has within it a watchdog timer that clicks over at a rate of 110 kHz. This watchdog timer is somewhat sensitive to temperature, and by measuring this temperature sensor you can get some idea of the temperature of the epoxy blob that is a modern microcontroller. The trick is calibrating the watchdog timer, which was done with a homemade ‘calibration box’ in a freezer consisting of two very heavy ceramic pots with a bag of rice between them to add thermal mass (you can’t do this with water because you’re putting it in a freezer and antique crocks are somewhat valuable).
By repeatedly taking the microcontroller through a couple of freeze-thaw cycles, [Edward] was able to calibrate this watchdog timer to a resolution of about 0.0025°C, which is more than enough for just about any sensor application. Discussions of accuracy and precision notwithstanding, it’s pretty good.
This technique measures the temperature of the microcontroller with an accuracy of 0.005°C or better, and it’s using it with just the interrupt timer. That’s not to say this is the only way to measure the temperature of an ATMega; some of these chips have temperature sensors built right into them, and we’ve seen projects that use this before. However, this documented feature that’s clearly in the datasheet seems not to be used by many people.
Interactive video games take many forms, but for the most part, each player has a separate controller that manipulates an onscreen character, vehicle, or other singular element. What if, as in real life, multiple players have to work together with physical objects to control a sailing ship?
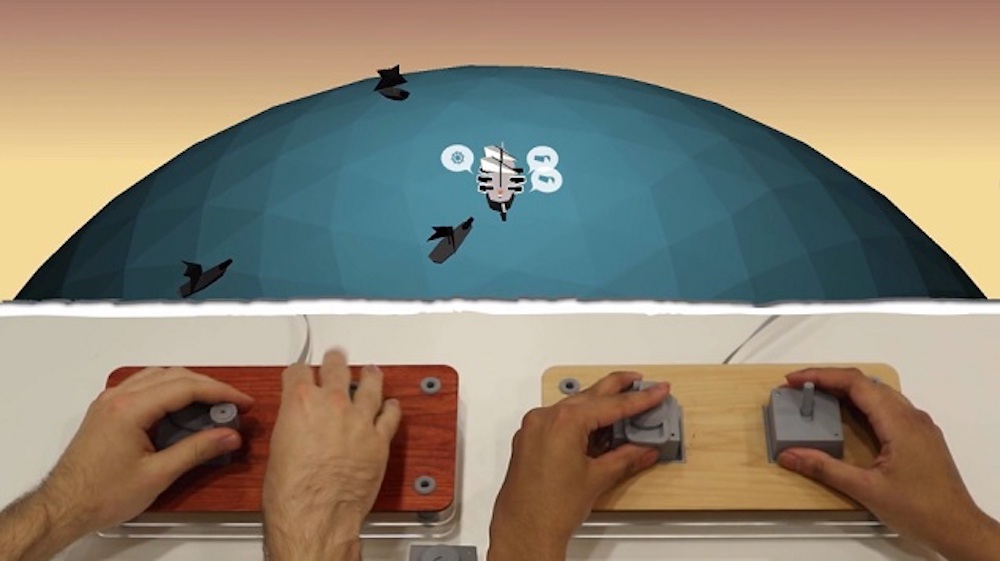
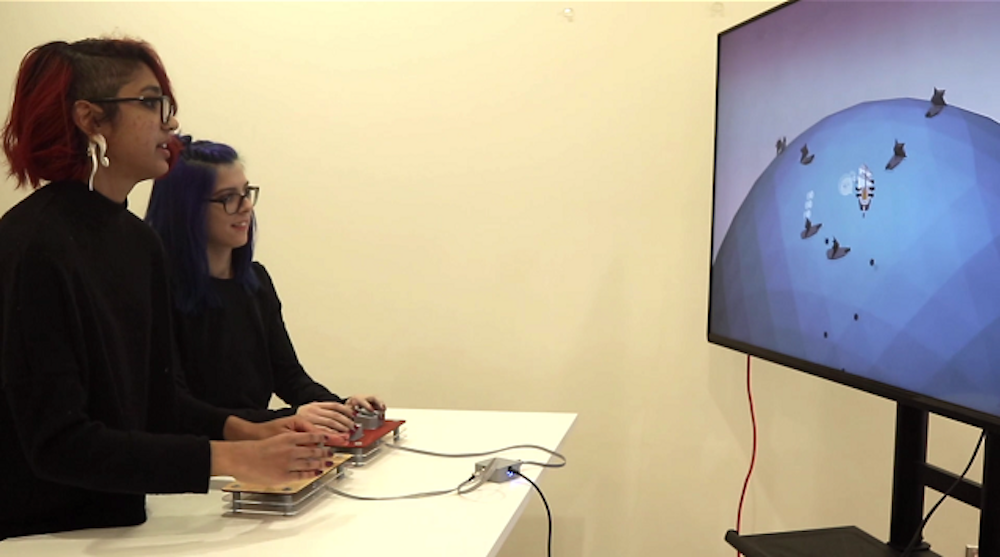
That’s the idea behind HOT SWAP: All Hands On Deck by Peter Gyory and Celment Zheng. In it, two players guide various parts of a ship using five different control elements. What makes this really interesting is that each player’s input device has room for two of these control elements, which must be swapped for actions such as steering and to load cannons. Input information is passed to the game via an Arduino Micro.
It’s like if we took a regular game controller, popped off all of the inputs, and made it so you could only use a couple of them at a time. There are two controllers, with each consisting of two input slots. Each controller controls one side of the ship, port or starboard. There are five actions total in the game, each executed with a dedicated physical input: a crank to raise and lower the sails, a wheel for turning the rudder, a hatch for loading the cannons, a wick for firing the cannons, and a flame button for dousing the fire.
There is only one of each input, which makes them a shared resource that players must trade back and forth as they play. There is this old Milton Bradley kids board game from the ’90s called Perfection where players must fit shapes into holes before a timer is up and the board shakes to make everything pop out. HOT SWAP is like if Perfection had a screen attached and had a goal outside of putting shapes into slots.
All of the code is done with JavaScript and the library Three.js, which we bundle into a desktop application using Github’s Electron. The brain of the controller is an Arduino Micro, which mostly just passes data along.
The inputs are created with the Mechamagnets technique that Clement has been developing through his research; all 3D-printed in PLA with neodymium magnets embedded in them. The actual “hot swapping” is facilitated by pogo pins that line up with our custom PCBs for each input. Also, lots of chocolate croissants.
More details on the build are available via this interview as well as in the video below.
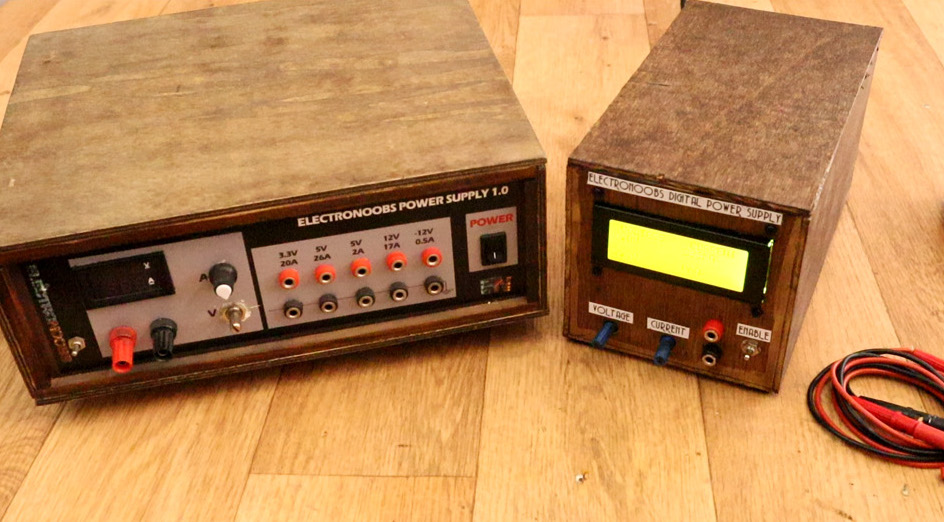
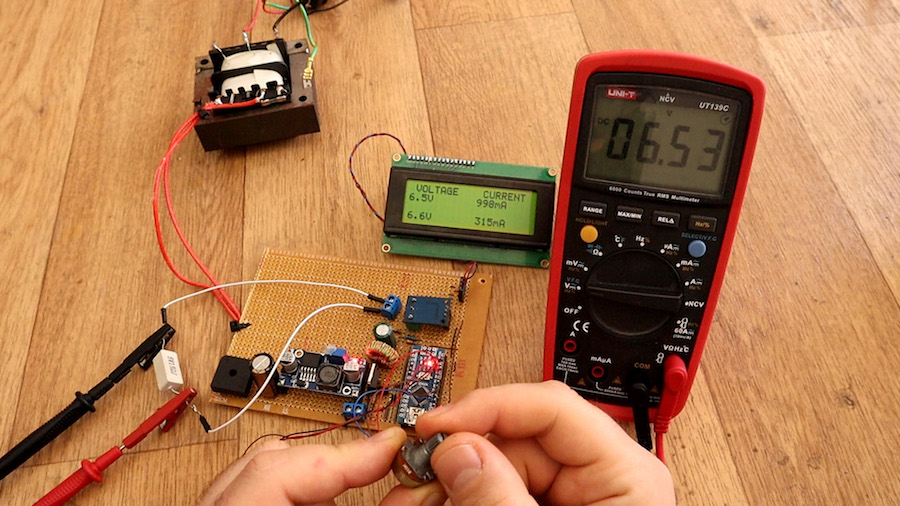
If you want a DC power supply that works well, there are a number of places to buy such a device. If, however, you want to learn how one operates, and perhaps build your own, the video below by YouTuber Electronoobs will show you how to accomplish this feat.
His project uses a transformer to step power down from the 230VAC available in Spain, along with a rectifier to produce DC current, and a capacitor to keep the output steady. An Arduino Nano produces a PWM signal that controls a MOSFET on the buck converter circuit, tuning the output voltage and current as needed based on user inputs.
Details can be found on Electronoobs’ website here, though you’ll want to use extreme caution when dealing with mains power. Also, the design will need to be modified if your country uses something other than 230VAC.


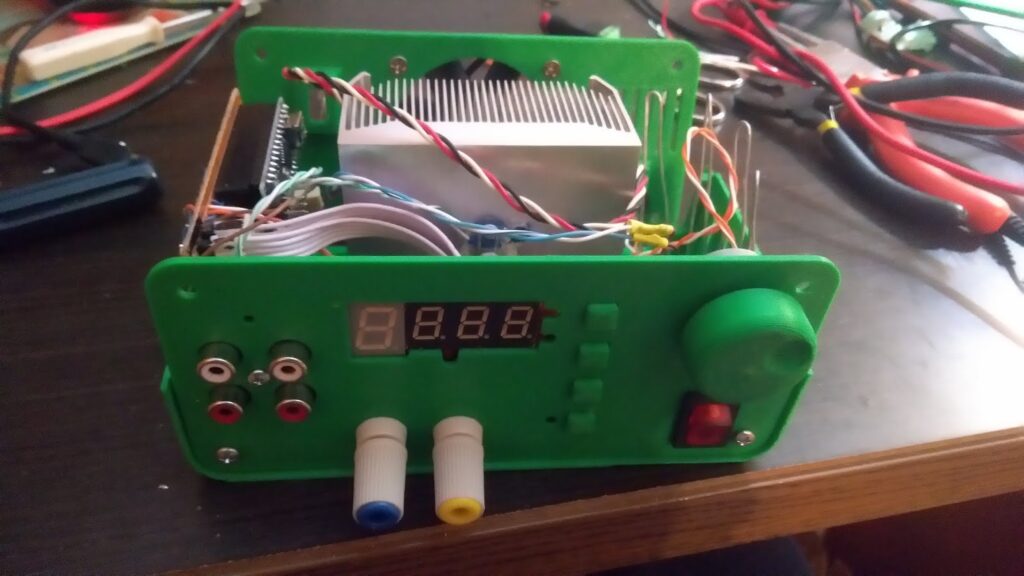
 The first thing to catch one’s eye might be that leftmost seven-segment digit. There is a simple reason it doesn’t match its neighbors: [Juan] had to use what he had available, and that meant a mismatched digit. Fortunately, 3D printing one’s own enclosure meant it could be gracefully worked into the design, instead of getting a Dremel or utility knife involved. The next is a bit less obvious: the display lacked a decimal point in the second digit position, so an LED tucked in underneath does the job. Finally, the knob on the right could reasonably be thought to be a rotary encoder, but it’s actually connected to a small DC motor. By biasing the motor with a small DC voltage applied to one lead and reading the resulting voltage from the other, the knob’s speed and direction can be detected, doing a serviceable job as rotary encoder substitute.