Posts with «arduino pro mini» label

A spider quadrobot built with Prusa and Arduino Pro Mini

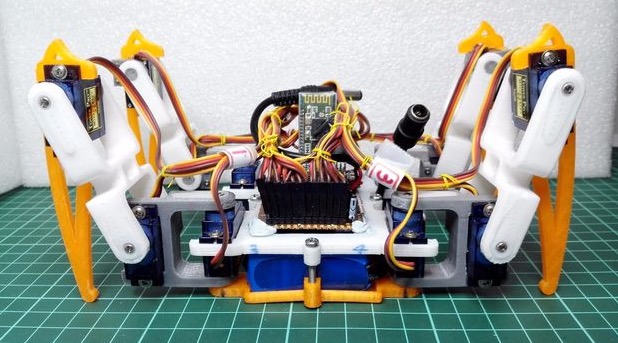
It takes 14 steps, a Prusa i3 3D printer and a lot of soldering to build Spider Robot v3.0, a quad robot running on Arduino Pro Mini.  That’s what told us  RegisHsu, a maker who shared his project’s tutorial on Instructables and the 3d printable files on Thingiverse.

It took 12 months of work to build the robot and it reached the fourth generation of  design, that you can explore on his blog  if you are interested in its history:

This is my first project for the 4 legs robot and it took me about 1 year development.
It is a robot that relies on calculations to position servos and pre-programmed sequences of legs. I’m doing this is because of it could be fun and educational for 3D design/printing and robot control.

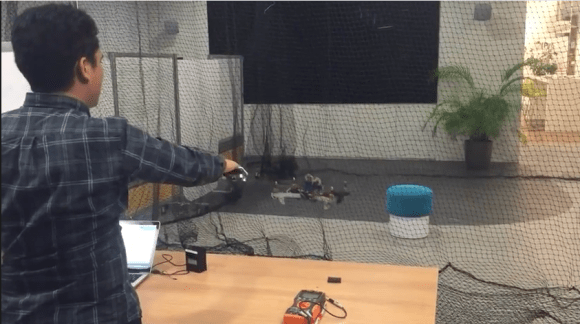
The robot allows cool customizations like adding IR detection:

A Tweeting Vending Machine

[Sigurd] manage to obtain an old vending machine from his dorm. The only problem was that the micocontroller on the main board was broken. He and his friend decided they could most likely get the machine back into working order, but they also knew they could probably give it a few upgrades.

This system uses two Arduino Pro Minis and an Electric Imp to cram in all of the new features. One Arduino is connected to the machine’s original main board. The Arduino interfaces with some of the shift registers, relays, and voltage regulators. This microcontroller also lights up the buttons on the machine as long as that particular beverage is not empty. It controls the seven segment LED display, as well as reading the coin validator.

The team had to reverse engineer the original coin validator in order to figure out how the machine detected and counted the coins. Once they figured out how to read the state of the coins, they also built a custom driver board to drive the solenoids.

A second Arduino is used to read NFC and RFID cards using a Mifare RC522 reader. The system uses its own credit system, so a user can be issued a card with a certain amount of pre-paid credit. It will then deduct credit appropriately once a beverage is vended. The two Arduinos communicate via Serial.

The team also wanted this machine to have the ability to communicate with the outside world. In this case, that meant sending cheeky tweets. They originally used a Raspberry Pi for this, but found that the SD card kept getting corrupted. They eventually switched to an Electric Imp, which worked well. The Arduino sends a status update to the Imp every minute. If the status changes, for example if a beverage was dispensed, then the Imp will send a tweet to let the world know. It will also send a tweet to the maintenance person if there is a jam or if a particular slot becomes empty.


Filed under: Arduino Hacks

Dial is a Simple and Effective Wireless Media Controller

[Patrick] was looking for an easier way to control music and movies on his computer from across the room. There is a huge amount of remote control products that could be purchased to do this, but as a hacker [Patrick] wanted to make something himself. He calls his creation, “Dial” and it’s a simple but elegant solution to the problem.

Dial looks like a small cylindrical container that sits on a flat surface. It’s actually split into a top and bottom cylinder. The bottom acts as a base and stays stationary while the top acts as a dial and a push button. The case was designed in SOLIDWORKS and printed on a 3D printer.

The Dial runs on an Arduino Pro mini with a Bluetooth module. The original prototype used Bluetooth 2.0 and required a recharge after about a day. The latest version uses the Bluetooth low energy spec and can reportedly last several weeks on a single charge. Once the LiPo battery dies, it can be recharged easily once plugged into a USB port.

The mechanical component of the dial is actually an off-the-shelf rotary encoder. The encoder included a built-in push button to make things easier. The firmware is able to detect rotation in either direction, a button press, a double press, and a press-and-hold. This gives five different possible functions.

[Patrick] wrote two pieces of software to handle interaction with the Dial. The first is a C program to deal with the Bluetooth communication. The second is actually a set of Apple scripts to actually handle interaction between the Dial and the various media programs on his computer. This allows the user to more easily write their own scripts for whatever software they want. While this may have read like a product review, the Dial is actually open source!


Filed under: Arduino Hacks, peripherals hacks

Controlling a Quadcopter with Gestures

[grassjelly] has been hard at work building a wearable device that uses gestures to control quadcopter motion. The goal of the project is to design a controller that allows the user to intuitively control the motion of a quadcopter. Based on the demonstration video below, we’d say they hit the nail on the head. The controller runs off an Arduino Pro Mini-5v powered by two small coin cell batteries. It contains an accelerometer and an ultrasonic distance sensor.

The controller allows the quadcopter to mimic the orientation of the user’s hand. The user holds their hand out in front of them, parallel to the floor. When the hand is tilted in any direction, the quadcopter copies the motion and will tilt the same way. The amount of pitch and roll is limited by software, likely preventing the user from over-correcting and crashing the machine. The user can also raise or lower their hand to control the altitude of the copter.

[grassjelly] has made all of the code and schematics available via github.


Filed under: Arduino Hacks, drone hacks

Mood Lighting with LEDs and an Arduino

Regular candles can be awfully boring at times. They can only produce one color and the flicker is so… predictable. They can’t even be controlled by an infrared remote control, not to mention the obvious fire hazard. Now, however, [Jose] has come up with an LED candle that solves all of these problems. (Original link to the project in Spanish.)

The heart of the project is an Arduino Pro Mini, which is especially suited for this project because of its size. [Jose] put the small form-factor microcontroller in the base of a homemade wax enclosure and wired it to a Neopixel WS2812b LED strip. The strip can produce any color, and has some programmed patterns including flicker, fade, rainbow, and fire.

The artificial candle is controlled with an infrared remote control, and all of the code for the project is available on the project site if you want to build your own. [Jose] has been featured here before for his innovative Arduino-driven RGB lighting projects, and this is another great project which builds on that theme!


Filed under: Arduino Hacks

POV Display Does it on the Cheap

[Sholto] hacked together this ultra low-budget spinning display. He calls it a zoetrope, but we think it’s actually an LED based Persistence Of Vision (POV) affair. We’ve seen plenty of POV devices in the past, but this one proves that a hack doesn’t have to be expensive or pretty to work!

The major parts of the POV display were things that [Sholto] had lying around. A couple of candy tins, a simple brushed hobby motor, an Arduino Pro Mini, 7 green LEDs, and an old hall effect sensor were all that were required. Fancy displays might use commercial slip rings to transfer power, but [Sholto] made it work on the cheap!

The two tins provide a base for the display and the negative supply for the Arduino. The tins are soldered together and insulated from the motor, which is hot glued into the lower tin. A paper clip contacts the inside of the lid, making the entire assembly a slip ring for the negative side of the Arduino’s power supply. Some copper braid rubbing on the motor’s metal case forms the positive side.

[Sholto] chose his resistors to slightly overdrive his green LEDs. This makes the display appear brighter in POV use. During normal operation, the LEDs won’t be driven long enough to cause damage. If the software locks up with LEDs on though, all bets are off!

[Sholto] includes software for a pretty darn cool looking “saw wave” demo, and a simple numeric display. With a bit more work this could make a pretty cool POV clock, at least for as long as the motor brushes hold up!

[via Instructables]


Filed under: led hacks