Posts with «servo» label

Self-Playing Kalimba V2 Thanks to Readers Like You

Would you like to know the great thing about this community we have here? All the spitballing that goes on every day in the comments, the IO chat rooms, and in the discussion threads of thousands of projects. One of our favorite things about the Hackaday universe is that we help each other out, and because of that, our collective curiosity pushes so many designs forward.

[Gurpreet] knows what we’re talking about. He’s back with version two of his self-playing kalimba, driven as strongly as ever by the dulcet tones of the Avatar theme. Now the robo-kalimba is rocking two full octaves, and thanks to your comments and suggestions, has relocated the servos where they can’t be picked up by the soundboard.

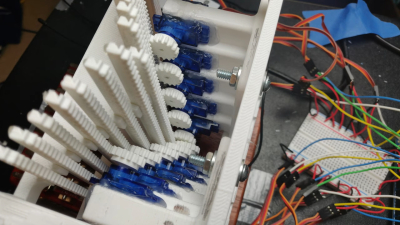
We gasped when we saw the new mechanism — a total of 15 rack and pinion linear actuators that make the kalimba look like a tiny mechanical pipe organ. Now the servos float, fixed into a three-part frame that straddles the sound box. [Gurpreet] melted servo horns to down to their hubs rather than trying to print something that fits the servos’ sockets.

Thumb your way past the break to check out the build video. [Gurpreet] doesn’t shy away from showing what went wrong and how he fixed it, or from sharing the 3D printering sanity checks along the way that kept him going.

Plucking kalimba tines is a difficult problem to solve because they’re stiff, but with timbre sensitive to many degrees of pressure. A slightly easier alternative? Make a toy player piano.

Mechanical 7-segment display made with micro servos and an Arduino Mega

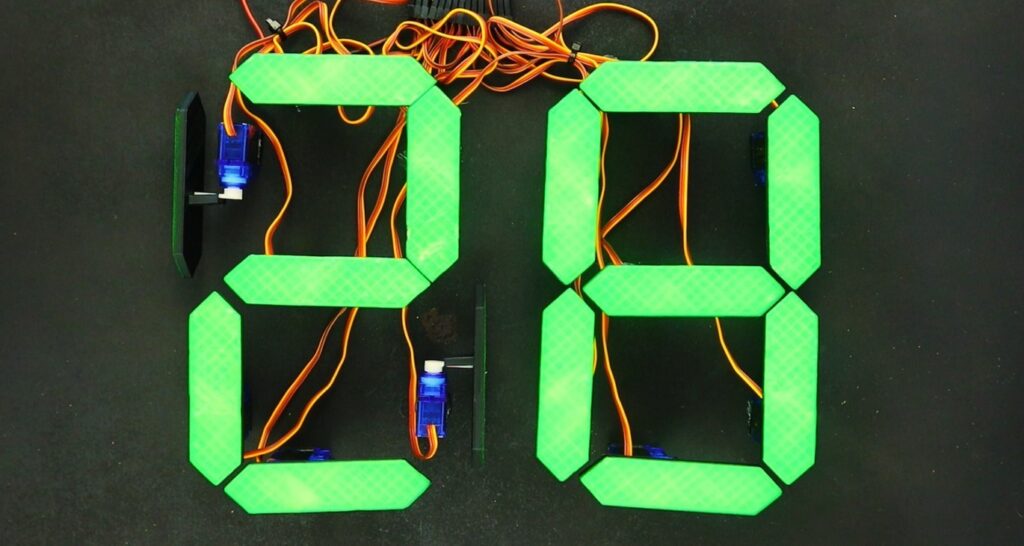
Flip displays are an interesting piece of technology, physically moving segments into place that stay put until other information is needed. Michael Klements has been especially fascinated by these devices, and after inspiration from another project, he decided to craft his own.

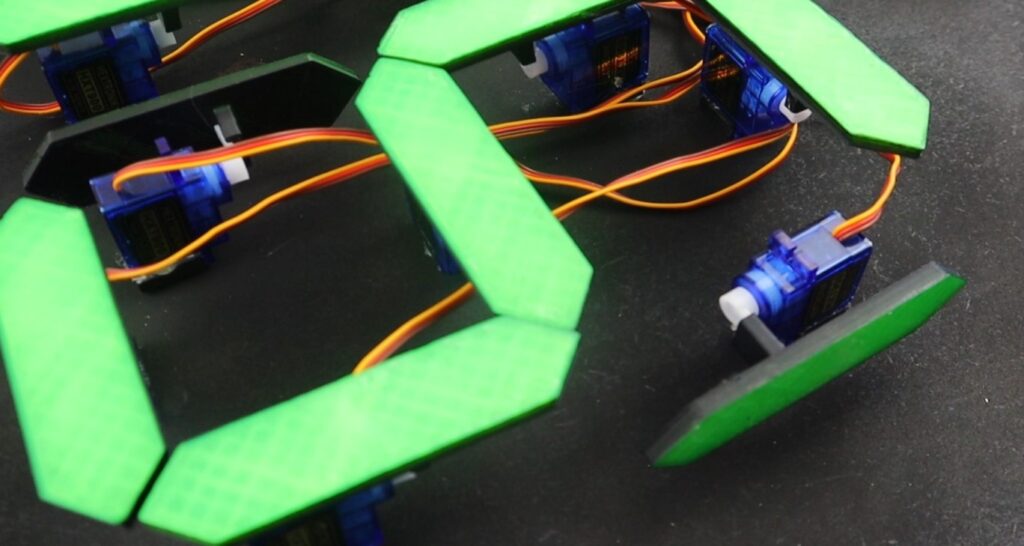
His version utilizes 14 micro servos to flip segments into a visible position, then rotate them to 90° when no longer needed. This “off” mode displays a slimmer profile, and the sides and back are painted black, making them much less visible.

An Arduino Mega, with 15 possible PWM outputs, is used to control the servos, while a hobby RC-style battery eliminator circuit provides power to the motors. 

Be sure to check out the build process and in-action shots below! 

Be Still, My Animatronic Heart

Fair warning for the squeamish: some versions of [Will Cogley]’s animatronic heart are realistic enough that you might not want to watch the video below. That’d be a shame though, because he really put a lot of effort into the build, and the results have a lot to teach about mimicking the movements of living things.

As for why one would need an animatronic heart, we’re not sure. [Will] mentions no specific use case for it, although we can think of a few. With the Day of Compulsory Romance fast approaching, the fabric-wrapped version would make a great gift for the one who stole your heart, while the silicone-enrobed one could be used as a movie prop or an awesome prank. Whatever the reason, [Will]’s build is a case study in incremental development. He started with a design using a single continuous-rotation servo, which powered four 3D-printed paddles from a common crank. The four paddles somewhat mimicked the movements of the four chambers of the heart, but the effect wasn’t quite convincing. The next design used two servos and complex parallelogram linkages to expand each side of the heart in turn. It was closer, but still not quite right.

After carefully watching footage of a beating heart, [Will] decided that his mechanism needed to imitate the rapid systolic contraction and slow diastolic expansion characteristic of a real heart. To achieve this, his final design has three servos plus an Arduino for motion control. Slipped into a detailed silicone jacket, the look is very realistic. Check out the video below if you dare.

We’ve seen plenty of animatronic body parts before, from eyes to hands to entire faces. This might be the first time we’ve seen an animatronic version of an internal organ, though.

Active Suspension R/C Car Really Rocks

When you’re a kid, remote control cars are totally awesome. Even if you can’t go anywhere by yourself, it’s much easier to imagine a nice getaway from the daily grind of elementary school if you have some wheels. And yeah, R/C cars are still awesome once you’re an adult, but actual car-driving experience will probably make you yearn for more realism.

What could be more realistic and fun than an active suspension? Plenty of adults will never get the chance to hit the switches in real car, but after a year of hard work, [snoopybg] is ready to go front and back, side to side, and even drift in this super scale ’63 Oldsmobile Dynamic 88 wagon. We think you’ll agree that [snoopybg] didn’t miss a detail — this thing makes engine noises, and there are LEDs in the dual exhaust pipes to simulate flames.

An Arduino reads data from a triple-axis accelerometer in real time, and adjusts a servo on each wheel accordingly, also in real time, to mimic a real car throwing its weight around on a real suspension system. If that weren’t cool enough, most of the car is printed, including the tires. [snoopybg] started with a drift car chassis, but even that has been hacked and drilled out as needed.

There are a ton of nice pictures on [snoopybg]’s site if you want to see what’s under the hood. We don’t see the code anywhere, but [snoopybg] seems quite open to publishing more details if there is interest out there. Strap yourself in and hold on tight, because we’re gonna take this baby for a spin after the break.

If this is all seems a bit much for you, but you’ve got that R/C itch again, there’s a lot to be said for upgrading the electronics in a stock R/C car.

Via r/duino

This Arduino Keeps Its Eyes On You

[Will] wanted to build some animatronic eyes that didn’t require high-precision 3D printing. He wound up with a forgiving design that uses an Arduino and six servo motors. You can see the video of the eyes moving around in the video below.

The bill of materials is pretty simple and features an Arduino, a driver board, and a joystick. The 3D printing parts are easy to print with no supports, and will work with PLA. Other than opening up holes there wasn’t much post-processing required, though he did sand the actual eyeballs which sounds painful.

The result is a nice tight package to hold six motors, and the response time of the eye motion is very impressive. This would be great as part of a prop or even a robot in place of the conventional googly eyes.

While the joystick is nice, we’d like to see an ultrasonic sensor connected so the eyes track you as you walk across the room. Maybe they could be mounted behind an old portrait for next Halloween. Then again, perhaps a skull would be even better. If you want a refresher about servos, start with a laser turret tutorial.

Some tips and tricks for controlling a servo with an Arduino

Servos aren’t particularly hard to control with Arduinos, and in fact there’s a library available just for that purpose. Actually making the connection between the board and servo and managing one’s power usage will require a bit more finesse.

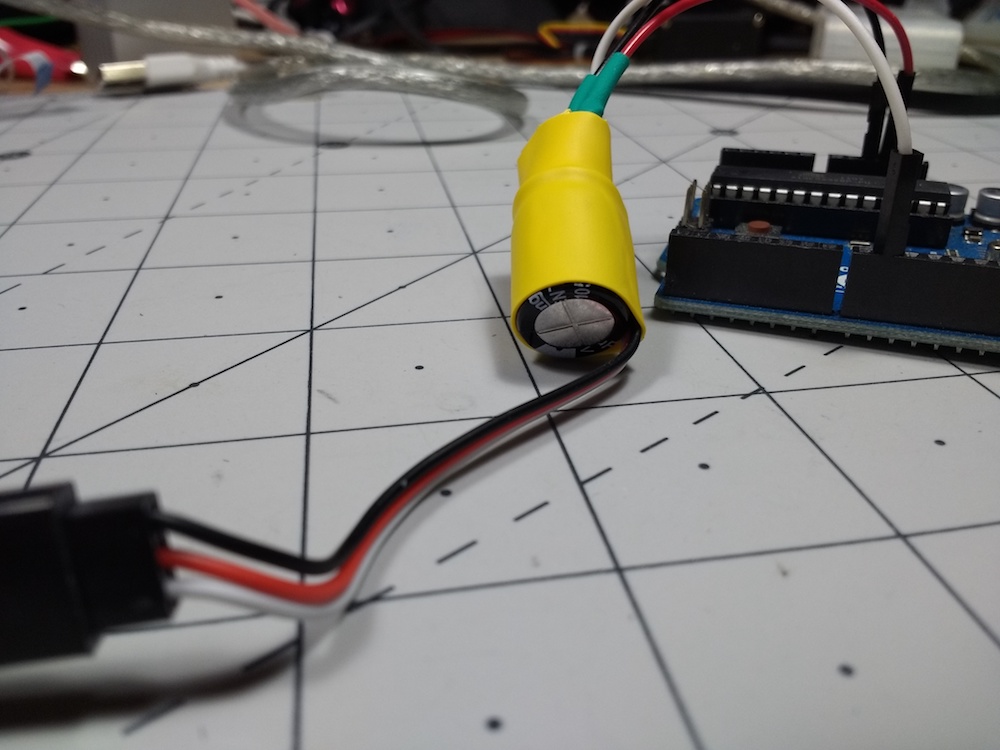
In the video below, Jeremy S. Cook explains how you can create an adapter that goes between your servo and an Uno, including a capacitor to help even out voltage spikes. While in most cases you would want to supply power your servos separately from the Arduino, this technique seems to work well in a quick round of tests. 

In addition, the clip shows how to attach a servo and then detach it to cut it off, using a function outside of the main loop and no additional hardware. This would be very helpful in applications where power is at a premium — or if you just don’t want the servo jittering back and forth!

Arduino Blog 06 Nov 19:26
arduino  servo  servo motors  uno  

Haptic Glove Controls Robot Hand Wirelessly

[Miller] wanted to practice a bit with some wireless modules and wound up creating a robotic hand he could teleoperate with the help of a haptic glove. It lookes highly reproducible, as you can see the video, below the break.

The glove uses an Arduino’s analog to digital converter to read some flex sensors. Commercial flex sensors are pretty expensive, so he experimented with some homemade sensors. The ones with tin foil and graphite didn’t work well, but using some bent can metal worked better despite not having good resolution.

The wireless communications set up was pretty easy thanks to the NRF24L01 modules. The hard part was sewing the flex sensors into the glove. We thought some of the circuitry looked precarious on the glove, too.

For the robot hand, he used balsa wood and hinges for each joint. Flexible thread provided the return power like a spring. The hand was surprisingly artistic in a primitive sort of way.

While this is a cool demo, the hand isn’t likely to be practical for much as it is. Nerve impulses are better but harder. The glove reminded us a little of one we’d seen before.

Superbly Synchronized Servos Swaying Softly

LEDs and blinky projects are great, and will likely never fade from our favor. But would you look at this sweeping beauty? This mesmerizing display is made from 36 micro servos with partial Popsicle sticks pasted on the arms. After seeing a huge display with 450 servos at an art museum, [Doug Domke] was inspired to make a scaled-down version.

What [Doug] didn’t scale down is the delightful visuals that simple servo motion can produce. The code produces a three-minute looping show that gets progressively more awesome, and you can stare at that after the break. Behind the pegboard, a single, hardworking Arduino Uno controls three 16-channel PWM controllers that sweep the servos. We like to imagine things other than Popsicle sticks swirling around, like little paper pinwheels, or maybe optical illusion wheels for people with strong stomachs.

You won’t see these in the video, but there are five ultrasonic sensors mounted face-up on the back of the pegboard. [Doug] has optional code built in to allow the servo sticks to follow hand movement. We hope he’ll upload a demo of that feature soon.

Servos can be hypnotic as well as helpful, as we saw in this 114-servo word clock.

Via Arduino blog

Printed Perching Pals Proliferate

Anansi in African folktale is a trickster and god of stories, usually taking physical form of a spider. Anansi’s adventures through oral tradition have adapted to the situation of people telling those stories, everything ranging from unseasonable weather to living a life in slavery. How might Anansi adapt to the twenty-first century? [odd_jayy] imagined the form of a cyborg spider, and created Asi the robot companion to perch on his shoulder. Anyone who desire their own are invited to visit Asi’s project page.

Asi was inspired by [Alex Glow]’s Archimedes, who also has a project page for anyone to build their own. According to [Alex] at Superconference 2018, she knew of several who have done so, some with their own individual customization. [odd_jayy] loved the idea of a robot companion perched on his shoulder but decided to draw from a different pool of cultural folklore for Asi. Accompanying him to various events like Sparklecon 2019, Asi is always a crowd pleaser wherever they go.

Like every project ever undertaken, there is no shortage of ideas for Asi’s future and [odd_jayy] listed some of them in an interview with [Alex]. (Video after the break.) Adding sound localization components will let Asi face whoever’s speaking nearby. Mechanical articulation for legs would allow more dynamic behaviors while perched, but if the motors are powerful enough, Asi can walk on a surface when not perched. It’s always great to see open source projects inspire even more projects, and watch them as they all evolve in skill and capability. If they all become independently mobile, we’ll need clarification when discussing the average velocity of an unladen folklore robot companion: African or European folklore?

Laser Light Show Turned Into Graphical Equalizer

The gold standard for laser light shows during rock concerts is Pink Floyd, with shows famous for visual effects as well as excellent music. Not all of us have the funding necessary to produce such epic tapestries of light and sound, but with a little bit of hardware we can get something close. [James]’s latest project is along these lines: he recently built a laser light graphical equalizer that can be used when his band is playing gigs.

To create the laser lines for the equalizer bands, [James] used a series of mirrors mounted on a spinning shaft. When a laser is projected on the spinning mirrors it creates a line. From there, he needed a way to manage the height of each of the seven lines. He used a series of shrouds with servo motors which can shutter the laser lines to their appropriate height.

The final part of the project came in getting the programming done. The brain of this project is an MSGEQ7 which  takes an audio input signal and splits it into seven frequencies for the equalizer. Each one of the seven frequencies is fed to one of the seven servo-controlled shutters which controls the height of each laser line using an Arduino. This is a great project, and [James] is perhaps well on his way to using lasers for other interesting musical purposes.

Hack a Day 14 Feb 03:00