Posts with «rgb led» label

Counter-Strike Gets the RGB LED Treatment

Inspired by the over-the-top stage lighting and pyrotechnics used during e-sport events, [Hans Peter] set out to develop a scaled-down version (minus the flames) for his personal Counter-Strike: Global Offensive sessions. It might seem like pulling something like this off would involve hacking the game engine, but as it turns out, Valve was kind enough to implement a game state API that made it relatively easy.

According to the documentation, the CS:GO client can be configured to send out state information to a HTTP server at regular intervals. It even provided example code for implementing a simple state server in Node.js, which [Hans] adapted for this project by adding some conditional statements that analyze the status of the current game.

These functions fire off serial commands to the attached Arduino, which in turn controls the WS2812B LEDs. The Arduino code takes the information provided by the HTTP server and breaks that down into various lighting routines for different conditions such as wins and losses. But things really kick into gear when a bomb is active.

[Hans] wanted to synchronize the flashing LEDs with the beeping sound the bomb makes in the game, but the API doesn’t provide granular enough data. So he recorded the audio of the bomb arming sequence, used Audacity to precisely time the beeps, and implemented the sequence in his Arduino code. In the video after the break you can see that the synchronization isn’t perfect, but it’s certainly close enough to get the point across in the heat of battle.

With the special place that Counter-Strike occupies in the hearts of hackers and gamers alike, it’s little surprise people are still finding unique ways to experience the game.

This Cup Holder Crystal Ball Tells Your MPG Future

Hybrid vehicles, which combine an eco-friendly electric motor with a gasoline engine for extended range, are becoming more and more common. They’re a transitional technology that delivers most of the advantages of pure electric vehicles, but without the “scary” elements of electric vehicle ownership which are still foreign to consumers such as installing a charger in their home. But one element which hybrids are still lacking is a good method for informing the driver whether they’re running on petroleum or lithium; a way to check at a glance how “green” their driving really is.

[Ben Kolin] and his daughter [Alyssa] have come up with a clever hack that allows retrofitting existing hybrid vehicles with an extremely easy to understand indicator of real-time vehicle efficiency. No confusing graphics or arcade-style bleeps and bloops, just a color-changing orb which lives in the cup holder. An evolved version which takes the form of a smaller “dome light” that sits on the top of the dashboard could be a compelling aftermarket accessory for the hybrid market.

The device, which they are calling the ecOrb, relies on an interesting quirk of hybrid vehicles. The OBD II interface, which is used for diagnostics on modern vehicles, apparently only shows the RPM for the gasoline engine in a hybrid. So if the car is in motion but the OBD port is reporting 0 RPM, the vehicle must be running under electric power.

With a Bluetooth OBD adapter plugged into the car, all [Ben] and [Alyssa] needed was an Arduino Nano clone with a HC-05 module to read the current propulsion mode in real-time. With some fairly simple conditional logic they’re able to control the color of an RGB LED based on what the vehicle is doing: green for driving on electric power, purple for gas power, and red for when the gas engine is at idle (the worst case scenario for a hybrid).

Check out our previous coverage of OBD hacking on the Cadillac ELR hybrid if you’re looking to learn more about what’s possible with this rapidly developing class of vehicle

3D-printed “orbament” lights up with movement

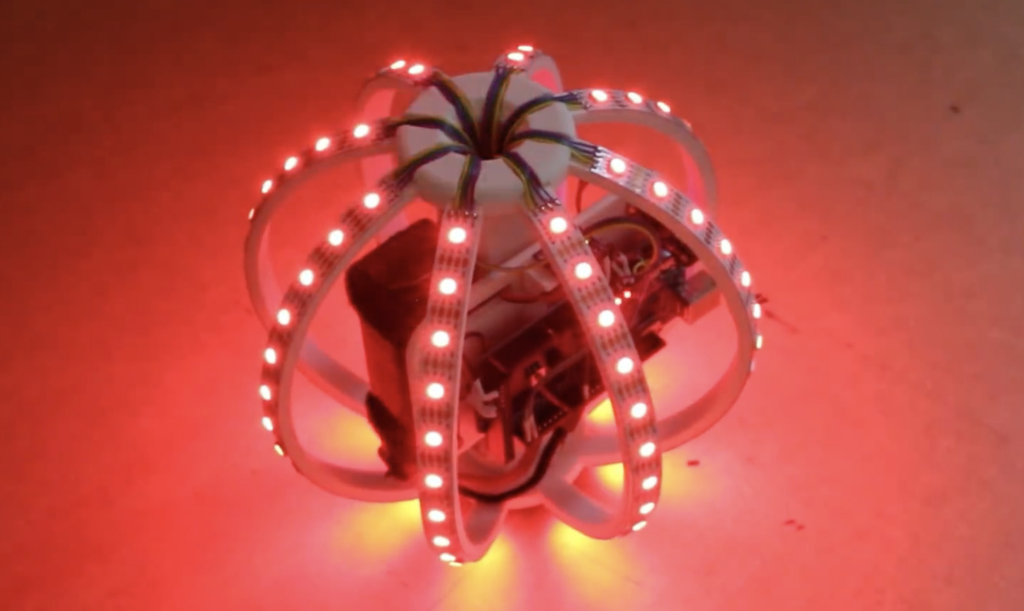
What would you get if you crossed a gigantic Christmas tree ornament with an LED strip and Arduino/IMU control? Perhaps you’d come up with something akin to this colorful “RGB LED Ball” by James Bruton.

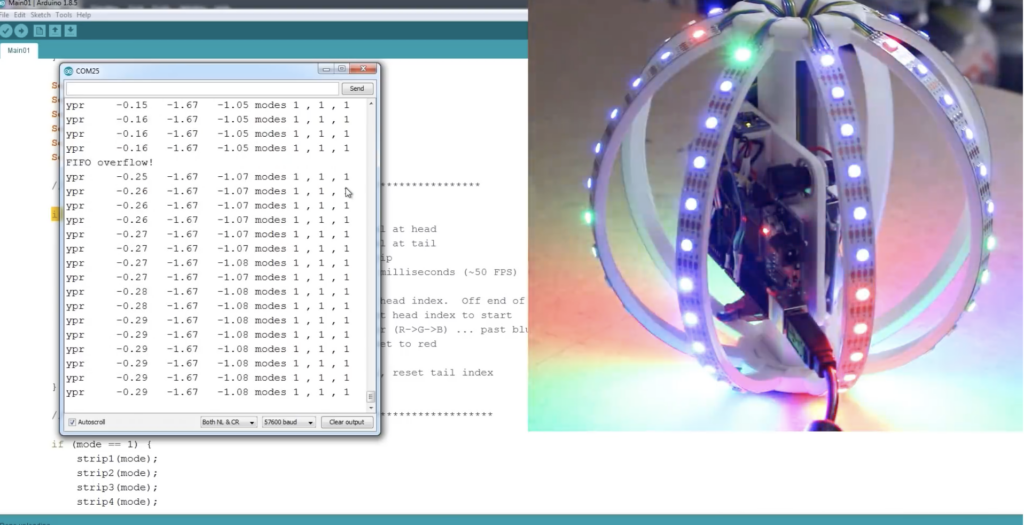
The device features eight curved supports along with a central hub assembly, forming a structure for APA102 RGB LED strips. Each of these is linked together via wiring that winds through the central hub making them appear to the Arduino Mega controller as one continuous chain of lights. 

Several animations can be selected with a pair of control buttons, and the ball even responds to movement using an MPU6050 IMU onboard. Files for the build are available on GitHub.

Lasers, Mirrors, and Sensors Combine in an Optical Bench Game

Who would have thought you could make a game out of an optical bench? [Chris Mitchell] did, and while we were skeptical at first, his laser Light Bender game has some potential. Just watch your eyes.

The premise is simple: direct the beam of a colored laser to the correct target before time runs out. [Chris] used laser-cut acrylic for his playfield, which has nine square cutouts arranged in a grid. Red, green, and blue laser pointers line the bottom of the grid, with photosensors and RGB LEDs lining the grid on the other three sides. Play starts with a random LED lighting up in one of the three colors, acting as a target. The corresponding color laser comes on, and the player has to insert mirrors or pass-through blocks in the grid to create a path to the target. The faster you hit the CdS cell, the higher your score. It’s simple, but it looks really engaging. We can imagine all sorts of upgrades, like lighting up two different targets at once, or adding a beamsplitter block to hit two targets with the same color. Filters and polarizers could add to the optical fun too.

We like builds that are just for fun, especially when they’re well-crafted and have a slight air of danger. The balloon-busting killbots project we featured recently comes to mind.


Interactive Plant Lamps for Quiet Spaces

If you’ve spent any serious time in libraries, you’ve probably noticed that they attract people who want or need to be alone without being isolated. In this space, a kind of silent community is formed. This phenomenon was the inspiration [MoonAnchor23] needed to build a network of connected house plants for a course on physical interaction and realization. But you won’t find these plants unleashing their dry wit on twitter. They only talk to each other and to nearby humans.

No living plants were harmed during this project—the leaves likely wouldn’t let much light through, anyway. The plants are each equipped with a strip of addressable RGB LEDs and a flex sensor controlled by an Arduino Uno. Both are hot glued to the undersides of the leaves and hidden with green tape. By default, the plants are set to give ambient light. But if someone strokes the leaf with the flex sensor, it sends a secret message to the other plant that induces light patterns.

Right now, the plants communicate over Bluetooth using an OpenFrameworks server on a local PC. Eventually, the plan is use a master-slave configuration so the plants can be farther apart. Stroke that mouse button to see a brief demo video after the break. [MoonAnchor23] also built LED mushroom clusters out of silicone and cling wrap using a structural soldering method by [DIY Perks] that’s also after the break. These work similarly but use force-sensing resistors instead of flex-sensing.

Networking several plants together could get expensive pretty quickly, but DIY flex sensors would help keep the BOM costs down.

Beautiful Linear RGB Clock

Yup, another clock project. But here, [Jan] builds something that would be more at home in a modern art museum than in the dark recesses of a hacker cave. It’s not hard to read the time at all, it’s accurate, and it’s beautiful. It’s a linear RGB LED wall clock.

You won’t have to learn the resistor color codes or bizarre binary encodings to tell what time it is. There are no glitzy graphics here, or modified classic timepieces. This project is minimal, clean, and elegant. Twelve LEDs display the hours, six and nine LEDs take care of the minutes in add-em-up-coded decimal. (It’s 3:12 in the banner image.)

The technical details are straightforward: WS2812 LEDs, an Arduino, three buttons, and a RTC. You could figure that out by yourself. But go look through the log about building the nice diffusing plexi and a very clean wall-mounting solution. It’s the details that separate this build from what’s hanging on our office wall. Nice job, [Jan].


Filed under: clock hacks
Hack a Day 19 Feb 03:00
arduino  clock  clock hacks  diy  rgb led  rtc  ws2812b  

Walnut Guitar Back Yields Wood for Classy Word Clock

Word clocks are cool, but getting them to function correctly and look good is all about paying attention to the details. One look at this elegant walnut-veneered word clock shows what you can accomplish when you think a project through.

Most word clocks that use laser-cut characters like [grahamvinyl]’s effort suffer from the dreaded “stencil effect” – the font has bridges to support the islands in the middle of characters like “A” and “Q”. While that can be an aesthetic choice and work perfectly well, like in this word clock we featured a few months back, [grahamvinyl] was going for a different look. The clock’s book-matched walnut guitar back was covered in tape before being laser cut; the tape held the letters and islands in place. After painstakingly picking out the cutouts and tweaking the islands, he used clear epoxy resin to hold everything in place. The result is a fantastic Art Deco font and a clean, sleek-looking panel to sit on top of an MDF light box for the RGB LED strips.

The braided cloth cable adds a vintage look to the power cord, and [grahamvinyl] mentions some potential upgrades, like auto-dimming and color shifting. This is very much a work in progress, but even at this point we think it looks fabulous.

[via r/diy]


Filed under: clock hacks

Make Your Own Remote Control LED Light

Want to control the colors in your home? Sure, you could just buy a Philips Hue bulb, but where’s the hacking fun in that? [Dario] agrees: he has written a tutorial on building an Arduino-controlled RGB light system that plugs into a standard light socket.

[Dario] is using a bulb from Automethion in Italy, an Arduino, and an ESP8288 shield that sends signals to the bulb. The Arduino and shield are running the Souliss framework that provides smart home features and runs on a number of platforms, so it is a good open platform for creating your own smart home apps, and would be easy to expand. We have also seen a few other projects that use the ESP8288 to control an RGB strip, but this is the first one that uses a bulb that plugs into a standard light socket.

At the moment, Automethion is the only company selling this light, but I hope that others will sell similar products soon.


Filed under: Arduino Hacks
Hack a Day 23 Aug 18:00

Programmable 3d-printed decorations for your Xmas

We can’t miss the chance to play with some LEDs now that holidays are coming and mix some electronics with 3d printing on Materia 101.

In the tutorial of this Kristoffer is experimenting on Xmas decorations, Arduino Micro and some code to play around with.

The result is what you see in the picture below!

Do you want to make it too? Follow the steps on Scuola >>
Check the previous tutorials on 3d printing with Material 101

Interested in getting in touch and showing your experiments? Join Kristoffer on the Arduino forum dedicated to Materia 101 and give us your feedback.

Mood Lighting with LEDs and an Arduino

Regular candles can be awfully boring at times. They can only produce one color and the flicker is so… predictable. They can’t even be controlled by an infrared remote control, not to mention the obvious fire hazard. Now, however, [Jose] has come up with an LED candle that solves all of these problems. (Original link to the project in Spanish.)

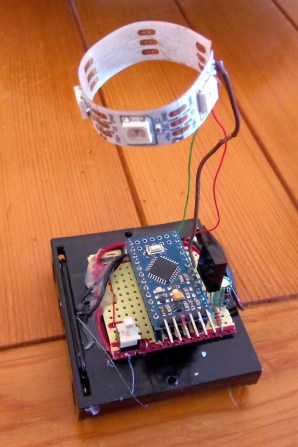
The heart of the project is an Arduino Pro Mini, which is especially suited for this project because of its size. [Jose] put the small form-factor microcontroller in the base of a homemade wax enclosure and wired it to a Neopixel WS2812b LED strip. The strip can produce any color, and has some programmed patterns including flicker, fade, rainbow, and fire.

The artificial candle is controlled with an infrared remote control, and all of the code for the project is available on the project site if you want to build your own. [Jose] has been featured here before for his innovative Arduino-driven RGB lighting projects, and this is another great project which builds on that theme!


Filed under: Arduino Hacks