Posts with «mega» label

Custom weather station enhances and modifies electronic music

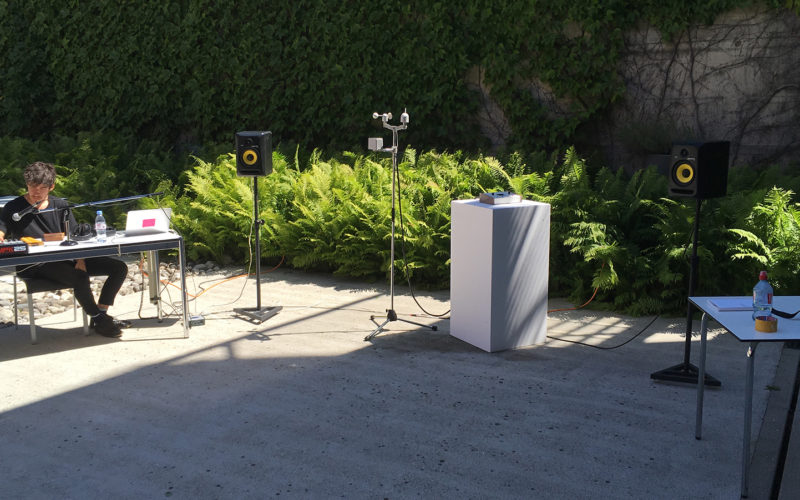
While the environment is important for any musical performance, generally it’s not an active part of the show. Adrien Kaeser, though, has come up with a device called the “Weather Thingy that integrates weather directly into electronic music performances. It’s able to sense wind direction and speed, light intensity, and rain, translating this data into MIDI inputs.

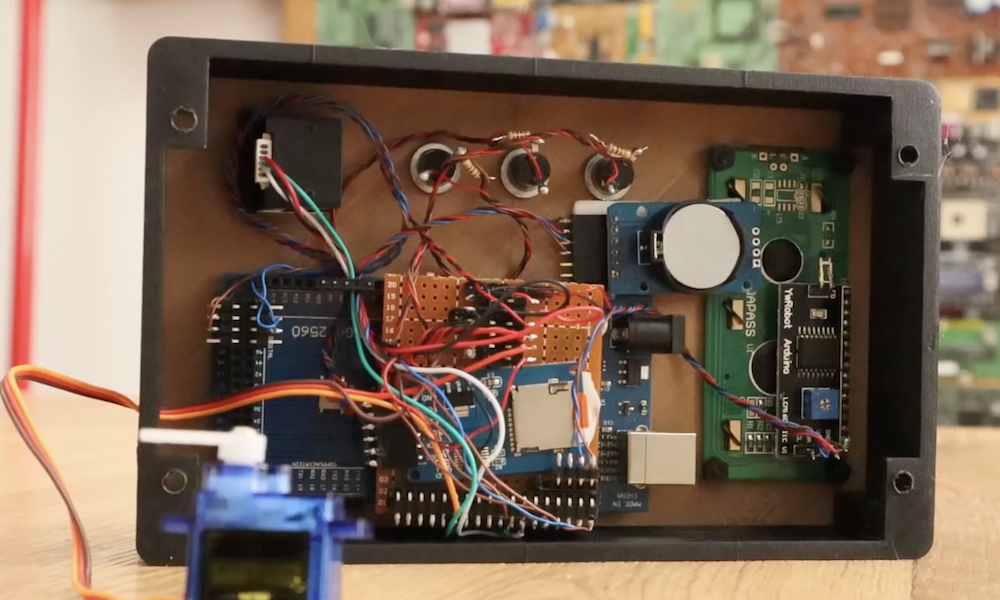
The system, which was created at ECAL, consists of two parts: a compact weather station on top of a portable stand, as well as a small console with buttons and knobs to select and modify environmental effects on the music. 

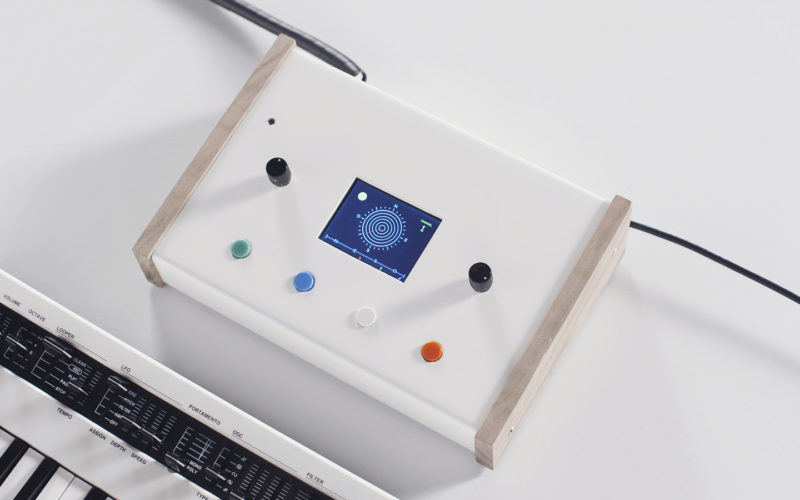
Hardware for the project includes an Arduino Mega and Leonardo, a small TFT screen to display the element under control and its characteristics, an ESP32 module, a SparkFun ESP32 Thing Environment Sensor Shield, a SparkFun MIDI Shield, high speed optocouplers, rotary encoder knobs, and some buttons.

Be sure to see the demo in the video below, preferably with the sound on!

Twinky, the Arduino robot assistant

In the middle of a project, you may find that what you’re making is similar to something that’s been done before. Such was the case with Adrian Lindermann when he started constructing his “Twinky” robot and found the Jibo social bot had a similar design. 

Like any good hacker, he pressed ahead with his build, creating a small yellow companion that can respond to voice commands via a SpeakUp click module, along with pressure on its face/touchscreen.

Control is provided by an Arduino Mega, and Twinky can interact with other devices using a Bluetooth module. The robot’s head can even turn in order to point the display in the needed direction, and it’s able to play sound through an audio amplifier and speaker. 

IT CAN SPEAK! PLAY MUSIC, SET TIMERS, ALARMS, TURN ON/OFF THE LIGHTS OR OTHER APPLIANCES. IT HAS A CALCULATOR AND A WEATHER STATION! DATE & TIME, BLUETOOTH 4.0, EVERYTHING WITH VOICE COMMANDS!!! And also with a touchscreen, it has one little motor so it can turn around when one of the two microphones hear you talk or make a noise.

For more on this wonderful little robot, check out the project’s write-up and and build files here.

3D-printed “orbament” lights up with movement

What would you get if you crossed a gigantic Christmas tree ornament with an LED strip and Arduino/IMU control? Perhaps you’d come up with something akin to this colorful “RGB LED Ball” by James Bruton.

The device features eight curved supports along with a central hub assembly, forming a structure for APA102 RGB LED strips. Each of these is linked together via wiring that winds through the central hub making them appear to the Arduino Mega controller as one continuous chain of lights. 

Several animations can be selected with a pair of control buttons, and the ball even responds to movement using an MPU6050 IMU onboard. Files for the build are available on GitHub.

Build an Arduino Mega fingerprint door lock

If you don’t want to carry keycard or memorize a passcode, this build from Electronoobs might be just the thing. 

The system uses a fingerprint reader to check to see if you have access, and if approved, the device’s Arduino Mega unlocks the theoretical door using a micro servo motor. Three push buttons and a 16×2 LCD screen complete the user interface, and allow more authorized fingers to be added with the main person/finger’s permission.

While you might question the security gained by a hobby servo, the video notes that this could trigger any sort of security device, perhaps via a relay or electromagnetic coil lock. Besides security, the build gives a good introduction to Arduino fingerprint scanning, as well as the use of an SD card for data logging functions.

Sip and puff Morse code entry with Arduino

Those that need a text entry method other than a traditional keyboard and mouse often use a method where a character is selected, then input using a sip or puff of air from the user’s mouth. Naturally this is less than ideal, and one alternative interface shown here is to instead use sip/puff air currents to indicate the dots and dashes of Morse code.

The system—which can be seen in action in the video below—uses a modified film container, along with a pair of infrared emitters and detectors to sense air movement. The device was prototyped on an Arduino Mega, and its creators hope to eventually use a Leonardo for direct computer input. 

A tube connected to a custom made bipolar pressure switch drives an Arduino which translates puffing and sucking into Morse code and then into text.

Puffs make repeating short pulses (dots) and sucks repeating longer pulses (dashes) just like ham radio amateurs do with a dual-lever paddle.

Code for this open source project can be found on GitHub.

Don’t Forget Your Mints When Using This Synthesizer

While synthesizers in the music world are incredibly common, they’re not all keyboard-based instruments as you might be imagining. Especially if you’re trying to get a specific feel or sound from a synthesizer in order to mimic a real instrument, there might be a better style synth that you can use. One of these types is the breath controller, a synthesizer specifically built to mimic the sound of wind instruments using the actual breath from a physical person. Available breath controllers can be pricey, though, so [Andrey] built his own.

To build the synthesizer, [Andrey] used a melodica hose and mouthpiece connected to a pressure sensor. He then built a condenser circuit on a custom Arduino shield and plugged it all into an Arduino Mega (although he notes that this is a bit of overkill). From there, the Arduino needed to be programmed to act as a MIDI device and to interact with the pressure sensor, and he was well on his way to a wind instrument synthesizer.

The beauty of synthesizers is not just in their ability to match the look and sound of existing instruments but to do things beyond the realm of traditional instruments as well, sometimes for a greatly reduced price point.

Electric-powered fan rocket takes off and lands(?) vertically

Does a rocket need to use a certain type of fuel, or even be capable of spaceflight? While James Bruton’s build might not fit everyone’s definition of this type of craft because of its electric ducted fan (EDF) propulsion, it does face the same major challenge of controlling a tall pipe-like structure from thrust coming from the tail. It’s meant to both take off and land in a vertical orientation as well, something inconceivable in traditional rockets until very recently.

For control, Bruton uses an Arduino Mega inside the main fuselage of the craft, which regulates the speed of the three EDFs. It also turns two of these fans with a servo and linkage system in order to compensate for unwanted roll. A second Arduino and an IMU are embedded in the nose cone, which passes data to the Mega board via a serial connection. 

The build and early tests can be seen in the video below, and a full test is planned for the future alongside Ivan Miranda, who has been working on his own version.

Check the weather on this Arduino-controlled split-flap display

Split-flap displays show information using characters changed by an electric motor. While they’ve largely been replaced by more modern means, hobbyists like “gabbapeople” have been keeping this this technique alive, in this case as a four-character weather display.

The device is built using laser-cut plexiglass, and uses four individual servos to actuate the character flaps. Control is accomplished using an Arduino Mega programmed in the XOD visual programming environment, along with the requisite driver modules. Weather data is pulled from the AccuWeather API. 

You can see it flapping away in the video below, displaying the weather in abbreviations such as “ICLO” for intermittent clouds, as well as the temperature in degrees Celsius.

Generating waves with Arduino

Need a wave generator to test out your latest boat, barge, or submarine design, but can’t quite afford one? If so, then you might consider Subham Bhatt’s DIY tank that he was able to construct for around $1,200 USD. 

Bhatt’s device features a pair of stepper motors and lead screws that push a stainless steel paddle through the water, producing waves formed to his precise specifications. An Arduino Mega is used for control, along with a single stepper driver to power both motors. 

User interface is provided through the Arduino IDE’s serial interface, set up to take commands via a simple text-based menu system. 

Light painting rig is a masterpiece of artistic hardware hacking

Light painting is an art form where dark areas are selectively lit to form interesting effects. While normally a manual operation, Josh Sheldon has come up with a rig to automate and enhance the process. The results are nothing short of spectacular, producing not static images, but astonishing animated light displays.

His device resembles a 3D printer made out of aluminum extrusion. X,Y, and Z axes are controlled by a series of stepper motors, but it uses a point of controlled light instead of melted plastic to form shapes. 

Light animations are set up in Blender, and a hardware and software toolchain including Processing, an Arduino Mega, and a Dragonframe module are implemented for control.

Check out the whole story in the video below, or see code/build documentation are available on GitHub.