Temperature updation on thingspeak using sim900
Hello friends,
In this post we are going to discuss how to upload temperature on thingspeak channel using sim 900 and arduino uno. As I had already uploaded the data on thingspeak channel using sim 900 and terminal software.
Introduction:
This project is a wireless temperature logger on thingspeak channel using gsm module and arduino.
For temperature sensor, we are using lm35, that gives output in millivolt which can be easily calibrated in terms of °C. We have to use adc module, since it's an analog sensor. Once the raw data is converted into temperature, we can upload the data.
Now, we are ready to upload the data on thingspeak channel. Thingspeak provides api for uploading of data. Before this, we have to use activate GPRS on sim900. We also to provide APN for accessing the internet. After activating the GPRS, we have to use GET like this:
GET http://api.thingspeak.com/update?api_key=QZFXXXXXXXXXXX&field1=data
Replace this api with yours, and data is the data you want to be upload. You can upload a number of field like temperature, pressure, humidity, etc.
Stuff you need:
Connections:
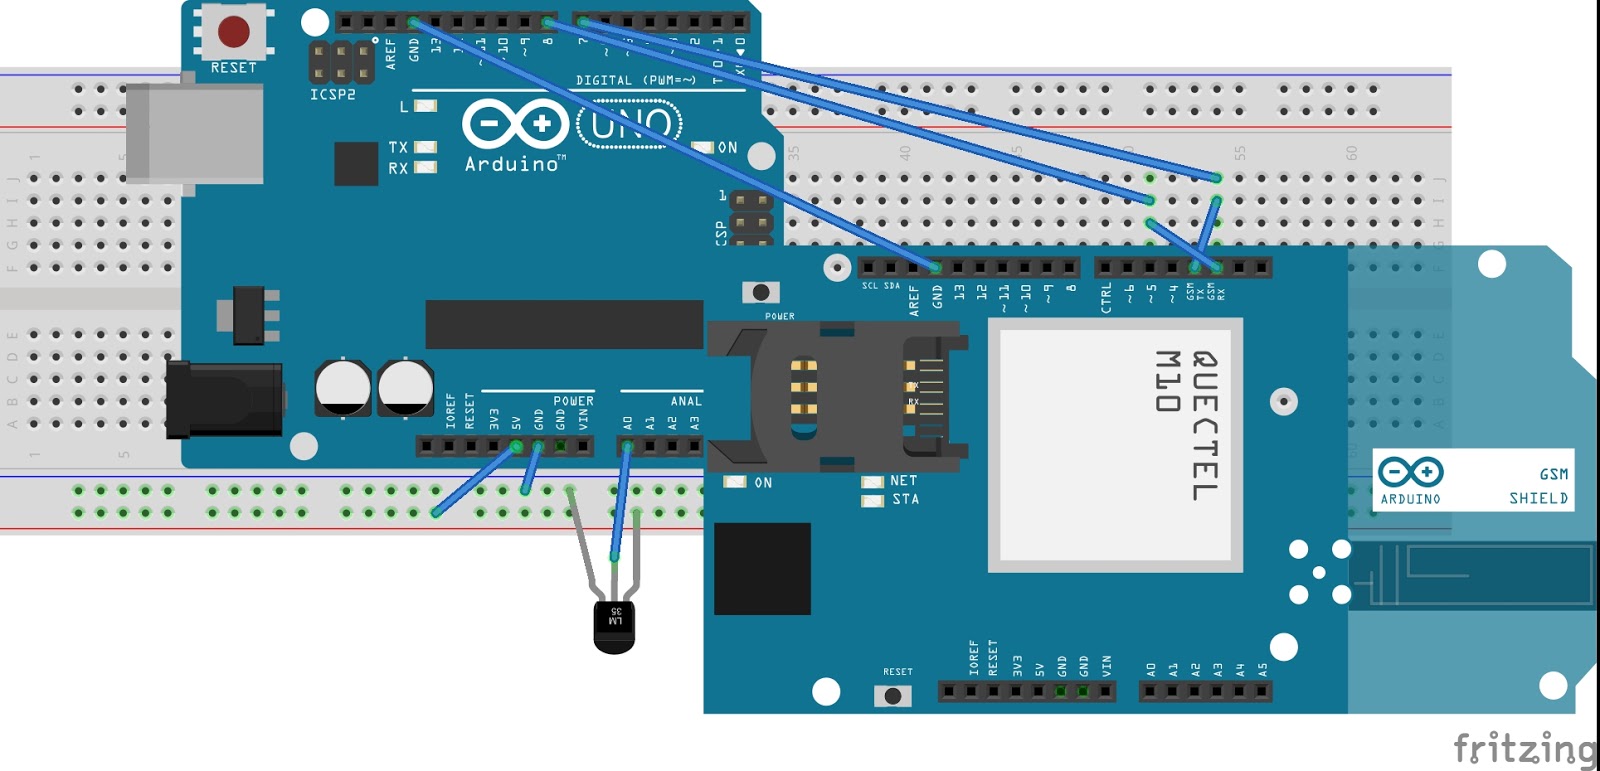
Arduino GSM module
Pin no. 7 ======> Tx
Pin no. 8 ======> Rx
Gnd ======> Gnd
In this post we are going to discuss how to upload temperature on thingspeak channel using sim 900 and arduino uno. As I had already uploaded the data on thingspeak channel using sim 900 and terminal software.
Introduction:
This project is a wireless temperature logger on thingspeak channel using gsm module and arduino.
For temperature sensor, we are using lm35, that gives output in millivolt which can be easily calibrated in terms of °C. We have to use adc module, since it's an analog sensor. Once the raw data is converted into temperature, we can upload the data.
Now, we are ready to upload the data on thingspeak channel. Thingspeak provides api for uploading of data. Before this, we have to use activate GPRS on sim900. We also to provide APN for accessing the internet. After activating the GPRS, we have to use GET like this:
GET http://api.thingspeak.com/update?api_key=QZFXXXXXXXXXXX&field1=data
Replace this api with yours, and data is the data you want to be upload. You can upload a number of field like temperature, pressure, humidity, etc.
Stuff you need:
- SIM900A
- Arduino uno
- LM35 (it's output is in degree celsius)
- 12 volt adapter (for GSM module)
- Jumper wires
- Account on thingspeak
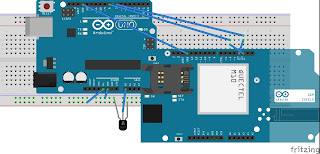
Connections:
Arduino GSM module
Pin no. 7 ======> Tx
Pin no. 8 ======> Rx
Gnd ======> Gnd
Output of LM35 is connected to A0 of arduino uno.
Download the code from here: