Posts with «flappy bird» label

Button, Button, Who’s Got the (One) Button?

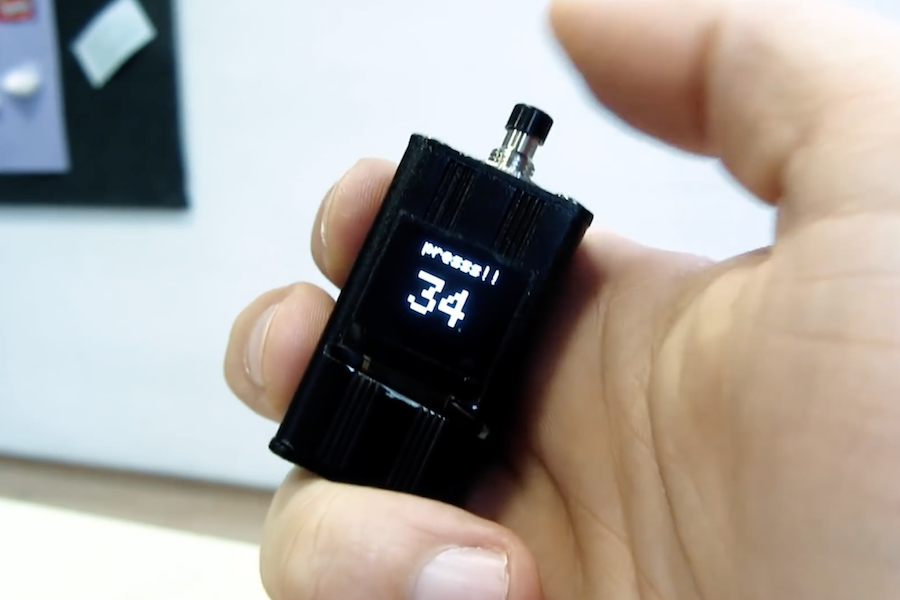
We often think that less is more, but what can you do with a device that has only a single button? [Volos] wondered the same thing and he built an Arduino with a single button and a display. After doing some obvious things  (like a counter or stopwatch) he decided to make a calculator.

You can find the source code online and he used a library from GitHub to handle the reaction to single presses, double presses, and long presses. Is it ideal? Probably not. But if you only have a limited amount of space or pins, it can make the difference between a feasible project and one you can’t finish.

His original projects also included a Flappy Bird clone. The OLED display is only 64×48 so that’s not a lot of room. The packaging of the tiny Arduino, the battery, and the display in a good looking case, was pretty impressive. So the device might be usable for something.

Of course, the library will work with any program and there’s no reason you can’t have more than one button and simply multiply their functions with the same strategy. There’s a sample on GitHub that shows how you can create two OneButton objects connected to different hardware devices.

By the way, the little box may have only one button, but it also has a power switch. Turns out, you can use it as an input in certain circumstances. If the OLED display strikes you as too luxurious, try the DUO BINARY.

This one-button device can do many things

Bigger isn’t always better, as illustrated nicely by this device from YouTuber “Volos Projects.” It’s not only physically quite small, squeezing an Arduino into a 40x25x25mm aluminum enclosure, but uses an interface consisting of a single button (plus a power switch). Data output is handled via a similarly tiny 64×48 pixel OLED display.

Regardless of its minuscule size and binary input method, it can still be utilized for a variety of functions, including as a stopwatch or counter, or even to play Flappy Bird. 

Demonstration and build footage can be seen in the clip below, while a parts list, code, and electrical diagram can be found in the video’s description.

Many Uses For A Single Button

When building projects with a simple goal in mind, it’s not unheard of for us to add more and more switches, buttons, and complexity as the project goes through its initial prototyping stages. Feature creep like this tends to result in a tangled mess rather than a usable project. With enough focus, though, it’s possible to recognize when it’s happening and keep to the original plans. On the other hand, this single-button project with more than one use seems to be the opposite of feature creep. (YouTube, embedded below.)

[Danko]’s project has one goal: be as useful as possible while only using a single button and a tiny screen. Right now the small handheld device can be used as a stopwatch, a counter, and can even play a rudimentary version of flappy bird. It uses an Arduino Pro Mini, a 64×48 OLED screen running on I2C, and has a miniscule 100 mAh 3.7V battery to power everything. The video is worth watching if you’ve never worked with this small of a screen before, too.

Getting three functions out of a device with only one button is a pretty impressive feat, and if you can think of any other ways of getting more usefulness out of something like this be sure to leave it in the comments below. [Danko] is no stranger to simple projects with tiny screens, either. We recently featured his homebrew Arduino calculator that uses an even smaller screen.

An Arduino fidget spinner arcade controller

Apparently unsatisfied with existing video game input devices, game designer Rob Santos created his own using, what else, fidget spinners. His system combines a spinner and five buttons on a pair of controllers to interface with Flock Off, an arcade game loosely based on Flappy Bird.

To register spinner input, a magnet is embedded on each lobe, triggering a Hall effect sensor three times per revolution when spun. An Arduino in each control box reads these signals, then sends this information, along with button inputs, to the game via USB accessible through a serial port.

Although using the Uno means that the game must be programmed especially for this type of input, Santos notes that using an HID-capable board, such as the Leonardo, would give it the capability to act as keyboard input by itself.