Posts with «featured» label

A special day dedicated to Arduino in Stockholm

Tekniska Museum of Stockholm in collaboration with Italian Embassy, and the Royal Institute of Technology  (KTH), will host a special edition of the Arduino Day on the 26th of November.

Massimo Banzi and David Cuartielles together with professors from KTH and some of the most creative professionals, students and enthusiasts, will be the protagonists of a showcase of inspirational lectures and Pop Up speeches suitable for both hardcore Arduino fans as well as for the curious newbie.

Are you in Stockholm next week? Come and say hello!

The program

Part 1: h.14:00 – 16:00 (Entrance with museum Ticket)

Presentations and Q&A in Althinsalen at Tekniska museet.

– Massimo Banzi (Arduino founder)
– David Cuartielles (Arduino founder)
– Clara Leivas (Interaction Designer)
– Dr Jon-Erik Dahlin (KTH) Ellen Sundh (Creative Technologist)
– Sagar Moreshwar Behere, PhD (KTH)

Part 2: h.16:00 – 20:00 (free entrance from 17:00)

Four hours of Arduino Maker Faire in Eventrummet at Tekniska museet.

Professionals, students and amateurs show their Arduino projects with improvised Pop-Up talks among the projects.

– Massimo Banzi (Arduino founder)
– David Cuartielles (Arduino founder)
– Ellen Sundh (Creative Technologist)
– Dr Carlo Fischione, (KTH)
– Dr Jon-Erik Dahlin (KTH)
– Rickard Dahlstrand (.SE)
– Members of Stockholm Robot Society Members of Stockholm Maker Space
– Leonardo Araujo de Assis (University of Brasilia)

Having fun with your Materia 101 – 3d printing tutorial

We recently launched Materia 101 3d printer, happy to know some of you are already using it  and having fun with 3d printing. In order to lower the barriers to this technology even more and to allow you to experiment on interesting stuff, we planned to create a series of tutorials for beginners.

Today we are ready to present you the first tutorial created by Kristoffer working at Arduino in Malmo. He’s going to post e a step-by-step guide every week on different topics and also ready to receive your feedbacks on the Arduino forum.

Take a look at the “Getting Started with Materia 101” tutorial and learn how to print and take care of your printer for amazing results.

The tutorial has goodie inside: an Octocat g-code file you can download to create a perfect print of the weird creature you can see in the picture below!

Next week we are going to post a tutorial to create cool 3d-printed gadgets for your home. Stay tuned. #Materia101

The perfect teal

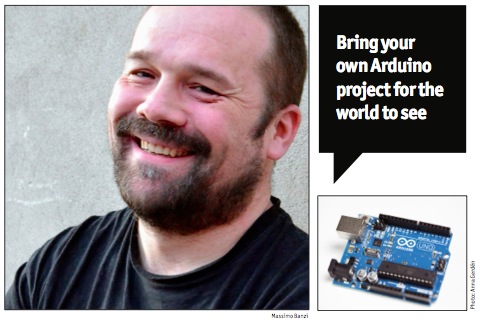
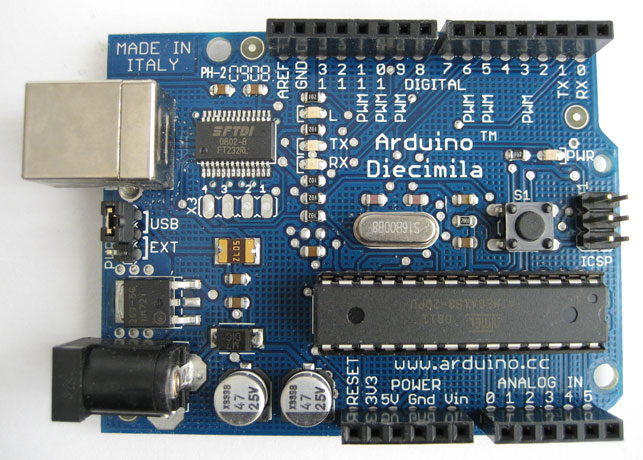
Last year Massimo Banzi wrote a long post on this blog to explain the genealogy of Arduino.  He described how an open-hardware project, designed to lower the barriers to prototyping interactive projects, was able to find its way into economical sustainability and still keep innovating.

He clearly explained what an original Arduino is, and why its cost is a matter of maintaining an open-source ecosystem, and not only of manufacturing and distributing the boards.

He detailed out what ‘counterfeit Arduinos’ are, and why they are harmful to the whole open-source hardware movement. We release Arduino’s hardware design files so that people could make their own versions, but this doesn’t mean manufacturing boards only for profit and pretending to be Arduino.

 We don’t release any element of the Arduino brand identity (logo and graphics of the boards), so whoever uses the trademarked Arduino graphics makes a deliberate act of Trademark infringement and prevent us in our effort to guarantee the quality of our products, always replaceable if defective.

We also created a page on our website showing how to spot a counterfeit Arduino.

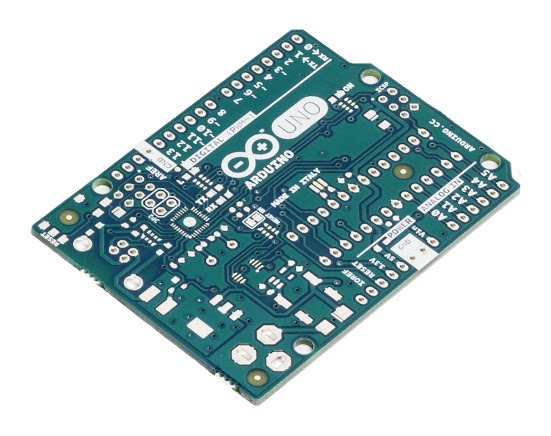
As you can see at the link, we recently upgraded the page with new pictures as we are entering a new phase: we are redesigning the PCB silkscreens of all Arduino boards, in production in the next few months. As you might imagine, this is going to be a long process as it cannot happen in one night. The new silk will be better counterfeit-proof, and will allow you to recognise an original Arduino just by a quick look.

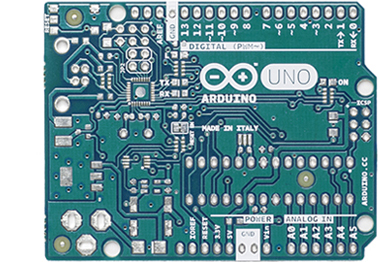
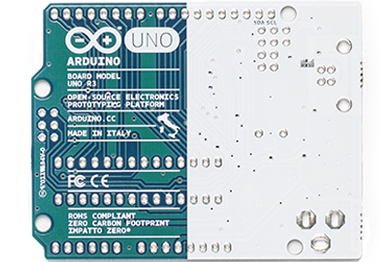
As you can see in the images above (click on the images for hi-res), we changed some graphic elements of the board and also switched to a different shade of teal.

In the next months we will upgrade the pictures of the boards in the product pages of the Arduino website as they roll out and are distributed around the world. It’s a transitioning phase so stay tuned for more news on the blog!

Next Saturday Arduino booth at Mini Maker Faire in London

On saturday 15th of November we are going to be in London  for the Elefant&Castle Mini Maker Faire at the London College of Communication. We’ll have a booth with some projects made with Arduino boards and  demos to test our new Arduino Zero. You can visit our booth located in The Street area of the First Floor (check the Map).

Massimo Banzi will be around as well in the afternoon and you can come and say hi to him at the booth starting from 3pm.

Arduino Blog 12 Nov 15:48

Make your cat behave when you are away using Arduino

The goal of this project was to create a small device, which detects movement in protected areas (e.g. tables) and allows you to speak usual phrases in your voice to the cat to control its behaviour when you are away. It’s called Cat Protector and prototyped on Arduino Uno  by Lucky Resistor, a creative guy who enjoys software development and electrical engineering:

I started with a prototype, using an Arduino Uno and a large breadboard. The first step was to realize an acceptable sound output. To realize this I added a shield with SD card adapter and wrote some optimized code to stream sound from the SD card in 22.1kHz using a 12bit DAC. The amplification to a speaker completed this part of the project where I have two solutions. Next I experimented with different motion sensors to detect the motion of the cat and finished the hardware part using a dual color LED for a simple status display.

Creating a compact device from the prototype was the next challenge, I could place the whole circuit I used on a small prototyping area and squeezed everything in a small casing. From outside, the device looks simple and tidy.

He documented everything in details on his website, especially the software part:

I read so many Arduino related articles and tutorials, but most of them stop when the prototype is running. I hope this documentation helps people to see how to structure Arduino software to make it extensible and keep it readable. This is especially necessary to write more complex logic than just to blink some LEDs. Also I hope to give some inspiration how to develop the prototype to a final device.

Check the full  documentation here.

Arduino Blog 11 Nov 21:06

A simple light follower with Analog 180° Micro Servo

Servos are composed of an electric motor mechanically linked to a potentiometer and they are able to translate the width of the pulse into a position. When you command the servo  to rotate, the motor is powered until the potentiometer reaches the value corresponding to the commanded position.

Today we’d like to share with you a tutorial with the aim of showing how to make a simple light follower made of cardboard using Arduino Uno and a microservo, in this case the Analog 180° Micro Servo.

Follow the step by step lesson to build one yourself.


Arduino Blog 10 Nov 22:18

MoMa welcomes Arduino

We are really happy to share with you that at the beginning of the week Paola Antonelli (Senior Curator Department of Architecture and Design) and Michelle Millar Fisher, (Curatorial Assistant, Department of Architecture and Design) published on the Moma blog a post announcing the acquisition of Arduino  and other DIY electronic devices in the collection of the  Museum of Modern Art of New York City, with this explanation:

As design curators, we have an instinctive response to designs we find compelling, and when that feeling survives the passing of time, we know we’re on to something worthwhile. We believe our new acquisitions will withstand that test. All promise to make a difference—not just in the utopian “design can save the world” kind of way (always good, but often a high bar for any one object), but at the very micro level. We all know what it feels like to master a skill previously thought completely outside our abilities, or to unlock new possibilities of experience and thought. It’s exhilarating, life-changing, and (healthily) addictive, the same reason people keep coming back to see MoMA’s Pollocks and Picassos—and, we hope, this new group of humble masterpieces.

That’s how they are describing Arduino:

A tiny but powerful microcontroller, the Arduino is an open-source, programmable microchip housed on a circuit board that fits in the palm of one’s hand—an apt metaphor for the control over design functions that it allows its user—and a pillar of contemporary maker culture and practice. Designed by a star-studded team, the Arduino can be programmed to drive components such as sensors, LEDs, and motors in order to build and develop all kinds of interactive objects. This new building block of design has resulted in applications as diverse as light sculptures, digital pollution detectors, and tools to help people who are unable to use such common interfaces as a computer mouse. Beyond its concrete applications, the Arduino acts as a platform for the interdisciplinary practice that lies at the heart of so much compelling contemporary work across science and the humanities.

Read the post on the Moma blog.

Arduino Blog 07 Nov 21:09

Becoming Alina with a couple of interactive Gauntlets

We’ve been amazed by the great projects coming up the week before Halloween on Twitter and Gplus community and still being submitted to our blog.

Leah Libresco published an Instructables about a pair of interactive gauntlets made with Arduino Lilypad:

This Halloween, I decided to be Alina Starkov from the Grisha Trilogy by Leigh Bardugo. In the books, she’s the one and only Sun Summoner, doing magic with light and heat.

Since those powers were beyond me, I put together a set of Arduino-controlled gauntlets instead, that would light up on gesture commands and slip under my sleeves. [This set up, with a few tweaks, would probably serve you well for Iron Man, too]

Instead of using a single position value from the accelerometer to turn the LEDs on and off, I picked two different triggers, so that it would be easy to *choose* whether I wanted my hands illuminated when they were straight out in front of me (a necessity, since I plan to host a party in these!)

Full construction and code are available at this link, below you can see the project in action!

Control Large DC Motors with Arduino

Arduino boards are able to control small motors very easily and it’s just as easy when you have to deal with controlling large motors. In the following video tutorial by NYC CNC you’ll see two examples. In the first you’ll learn how to get up and running, to start, stop, control direction and speed of a large motor with Arduino Uno. In the second example, how to use two proximity sensors as limit switches and two potentiometers to allow on-the-fly speed adjustment.

Arduino Blog 31 Oct 16:44

The making-of an animatronic baby alien

Eva Taylor works at EKT Workshop and built an animatronic rod puppet Alien as a masterwork research project for the National Institute of Dramatic Art (NIDA) in Sydney Australia. It was inspired by the “bambi burster” built for the film Alien 3, although her creature is somewhat different.

The animatronics are controlled via a Playstation 3 controller, using a servoshock module between the controller and an Arduino Uno board:

It contains and 8 way 2 stage tail mechanism and animatronic lips, jaw and tongue. The remaining parts are rod controlled. A myriad of techniques were deployed in its construction – the torso and limbs were hand-carved from Queensland Maple while the joints were custom made from recycled parts of RC cars and planes. The skeleton of the tail was custom made from acrylic and cut on a laser cutter. The head contains an underskull of fibreglass, dental acrylic teeth and silicone skin. The muscle groups are also made of deadened, encapsulated silicone.

She shared with us the video above showing the main phases of the making-of process, while the one below gives you an idea of how  the puppet looks like in a more dramatic piece:

Arduino Blog 29 Oct 23:47