Posts with «featured» label

Thanks to all 100k participants: Maker Faire Rome 2015 was great

Last weekend we were in Rome to take part to the third edition of Maker Faire Rome. With more than 100.000 participants, the event confirmed itself as the biggest Maker Faire outside of US. We thank you all for visiting our booth and express your support to Arduino.cc community.

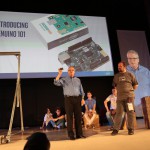
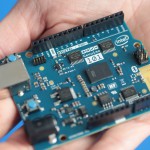
On Saturday we had a special announcement to make, Intel and Massimo Banzi were on the main stage presenting the collaboration on the Arduino 101 and Genuino 101:

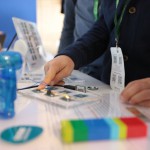
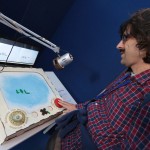
During the three days makers, designers, kids and parents, and many more visited the Genuino Booth and the Maker Store to see the new Arduino’s sister brand Genuino boards, explore the interactive installations and chat with the Arduino team:

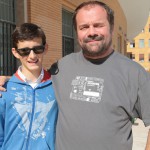
Massimo Banzi met  many fans and took part to a lot of selfies :

Explore the gallery of all pictures on Arduino account on Flickr. And see you at Maker Faire Rome 2016!

Increasing citizen’s responses to the haze with Arduino Uno

Once in a while, South East Asia countries such as Singapore and Malaysia suffers from the haze, a fire-related large-scale air pollution problem that occurs regularly. Especially during dry season there are some persisting forest fires in Indonesia that spread to other countries nearby.

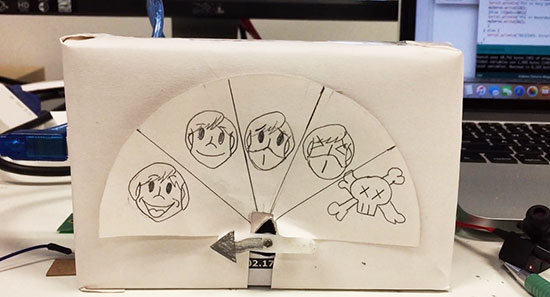
In 2015 the haze hit Singapore quite badly, causing schools to close down for one day. That’s why during Hyper Haze Hackathon taking place in Singapore, Tian Lye Teo and Ethan Lee Yong Sheng worked on and presented a low-cost solution based on Arduino Uno to tackle difficulty to communicate haze rising to illiterate elderly in the nation and won second prize !

Here’s how the two creators described the project:

The main problem we are trying to address is to help the elderly who are living alone in Singapore during the haze period. There are several factors that make this a suitable source of information for them. While the PSI* reading are widespread, they might not be accessible to these elders (no cellphone, TV, radio) or they do not understand the mainstream languages used by our medium (Chinese, English etc).

Furthermore, the PSI reading comes with 2 sets of readings (3hr and 24 hrs) and it is confusing to them what need to be done when PSI reached a certain number (“200 already? so what? aiyo… looks clear lei”).

The solution we came up with is this inexpensive Arduino device that fetch current PSI reading from a server. With the reading, the device will point at one of the five indicators that ranges from don’t need to “wear mask” to “die die cannot go out’.

The device actually cost about 20 dollars to build and implementation is ideally done at home. However, we understand that elders would not pay for this (“20 dollars?! I can eat 5 days meals with this”). We are hoping we can get in touch with some organisation(perhaps the govt) to install this at either the lift lobby at every floor or at the ground floor. We believe that even at its current stage, it is still very useful for the elders.

The ideal grand plan we had for this is to be able to link this to the pioneer generation card and from there, dispense a mask for the elder so that they can travel safe (something we felt the govt might help)

Please help spread this by sharing it and hopefully someone can help us achieve this little wish of two guys trying to give back to the pioneer generation who helped built the nation


*PSI (Pollutant Standards Index) is an index to provide  understandable information about daily levels of air quality and it’s the indicator used in Singapore to show how bad the haze is. The monitoring stations measure concentration levels of particulate matter (PM10), fine particulate matter (PM2.5), sulphur dioxide (SO2), nitrogen dioxide (NO2), ozone (O3), and carbon monoxide (CO). All of them determine the level of PSI.

Arduino Blog 20 Oct 22:30

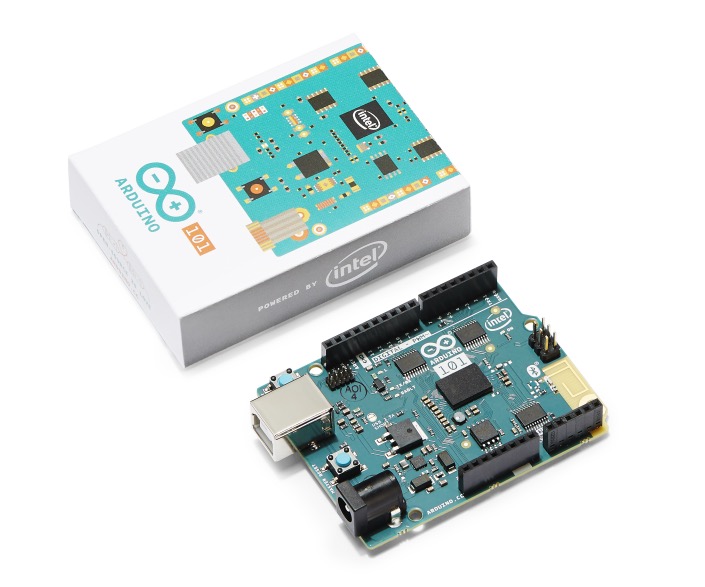
Intel and Banzi just presented Arduino 101 and Genuino 101

Today during Opening Conference at Maker Faire Rome, Josh Walden Senior Vice President of Intel Corporation and Massimo Banzi, co-founder of Arduino, announced the upcoming release of Arduino 101 (U.S.) and Genuino 101 (outside the U.S.). The board features a 32-bit Intel® Quark™ microcontroller for minimal power consumption, 384 kB of flash memory, 80 kB of SRAM (24kB available for sketches), an integrated DSP sensor hub, Bluetooth* Low Energy radio, and 6-axis combo sensor with accelerometer and gyroscope.

We collaborated with Intel to provide the maker community an affordable learning and development board ideal for entry-level makers and education environments and also the first widely available development board based on the tiny, low-power Intel Curie  module.

Josh Walden explained the new partnership with Arduino:

“Empowering budding entrepreneurs and young students has always been a priority for Intel, and by partnering with Arduino, we are bringing the power of Intel to a new generation of makers. With the advanced features of the Intel Curie module embodied in the Arduino 101 board, young learners as well as developers can now bring to life truly unique, smart and connected creations.”

Massimo Banzi added:

“We worked closely with Intel on the development of this board and are expanding our educational courseware to incorporate the connectivity and advanced features expected by today’s student developers. Through our work with Intel, we’re able to reach a global community of entry-level makers and students with a comprehensive introduction to physical computing and now with a more advanced, powerful technology solution that will help them bring their creative visions to reality.”

Arduino 101 will be available in the first quarter of 2016 for a suggested retail price of US$30 (approximately 27 euros). The Intel-manufactured board will be sold under the Arduino 101 brand in the United States and under the Genuino 101 brand outside the United States. It will be also available through catalog distributors and retailers selling other Intel maker and innovator products such as Amazon, Conrad Electronic, Farnell Element 14, Microcenter, Mouser, Radio Shack, RS Components and SparkFun.

In the meanwhile Arduino 101 will be incorporated into the Creative Technologies in the Classroom (CTC) physical computing curriculum developed and tested by our team and currently deployed in over 300 schools. CTC is the world’s first formal physical computing curriculum for elementary and secondary school classrooms and provides educators with the tools, support and confidence needed to introduce their students to the foundations of programming, electronics and mechanics.

Intel will work closely with us to bring the CTC program to schools across the globe in coming years. As it is introduced to classrooms, Arduino 101 will nurture the next generation of technology industry professionals, entrepreneurs and inventors!

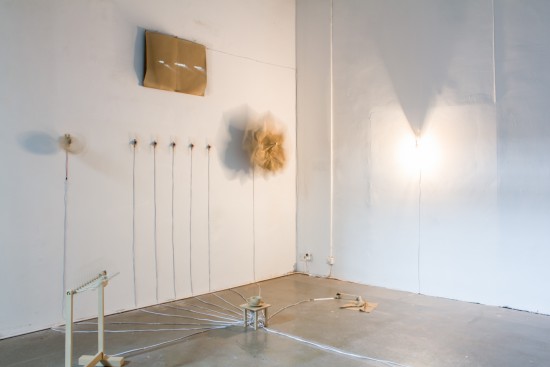
Staging Beckett with 11 motors and Arduino Mega

Happy Days is an installation inspired by the work of the Irish avant-garde novelist Samuel Beckett who wrote the namesake play in two acts in the 60s. Designer and visual artist Irena Kukric created it in collaboration with Canny Sutanto and the aim of exploring narrative in the form of an installation. The five-minute play is staged using ten servo motors and a DC motor with an Arduino Mega and VVVV live programming environment:

We were beginners with Arduino and motors so we started out pretty basic, trying to move several motors at once. We decided to use VVVV platform in addition when we realized we needed a timeline for our script for the play. With this timeline, it was easier to deal with details such as when we want to move which motor under which angle and such. For beginners with coding, this visual programming environment is very approachable and the entrance level is much lower.

It is easier and faster to get to your desired outcome. What is great about VVVV and Arduino is that there is the Firmata library that enables you to work with both platforms in conjunction so even artists and designers with lower level coding skills are able to go from concept to realization quite easy. We used Arduino Mega which was very convenient considering the number of our motors and the pins that Mega has to offer. After we had our final order of cables and pins, we even made our own shield for it.

The play was staged without human actors or conventional (verbal) dialogue  as performing a ritual in the play overshadows the performer, the object of the ritual can survive on its own. Therefore, they used these objects or rather props from the play and made them actors, animating them with motors, as you can see in the video below:


Come and meet Arduino team at the Genuino booth in Rome!

From October 16th to 18th, most of us will be participating to the third edition of Maker Faire Rome. We’re setting up an amazing booth showcasing Genuino boards, Arduino Create, Casa Jasmina installations, educational projects from Creative Technologies in the Classroom (CTC), the new Genuino Starter Kit and much more!

We’ll be at Maker Faire Rome all three days at our new Genuino booth, right next to the Maker Store where, for the first time, you’ll be able to purchase Genuino Uno and Genuino Mega!

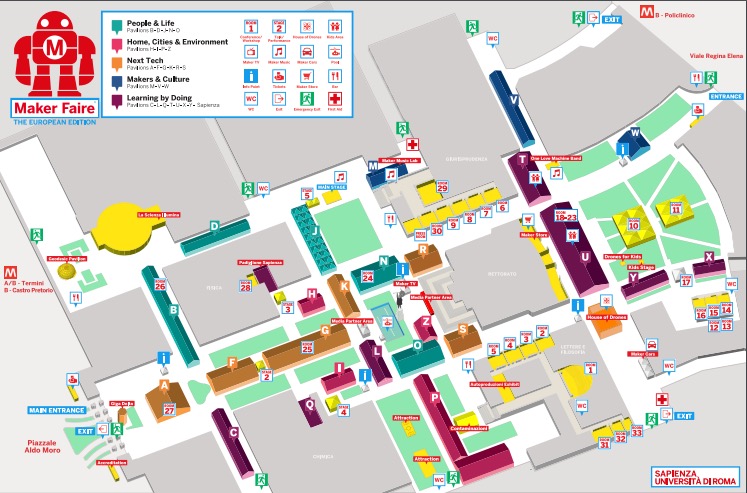
Take a look at the map below to see where we are (in front of Pavillion U) and click on it if you want to download a PDF version.

Here’s a little preview of what’s new at our booth:

Genuino Modules
The Genuino Modules aim at providing the user a breadboard-less experience in building interactive electronic systems. The family of products contains a Hub, a Shield and umpteen number of individual modules. The Hub is a microcontroller board by itself, based on the ATmega32u4. The Shield is an add-on board that can be mounted onto another board (like Uno). The modules can be used by connecting them directly to the Hub, or to another Genuino or Arduino board using the Shield.

Eslov
The Eslov project is Genuino’s open-source, smart modular development platform made of a hub that connects to a computer, and a series of smart blocks. Each block features different functions, from analog sensors (like LDRs or potentiometers), to gyroscopes, accelerometers or even digital servo motors.
The different blocks automatically identify themselves in the Visual IDE when plugged to their hub. You can then virtually connect the blocks to one another by drawing pipes between sensor and actuator blocks. Without programming a single line of code, it’s possible to build complex prototypes like a seismic detector, a pet tracking device, or your own fitness band. Each block comes with a default firmware ready to run as part of the Eslov platform, but it is also possible to use it in combination with any of the existing Genuino or Arduino boards as a smart device connected via I2C.

Arduino Create 
Arduino Create is a platform that simplifies making a project as a whole, without having to switch between many different tools to manage the various aspects of whatever you are making.
You can write code and upload sketches to any Arduino & Genuino board directly from the browser, store all your sketches online, and access them from any device. The web-based software (IDE) offered by the Arduino Create platform is always up-to-date, including the latest Libraries and Cores, without having to install anything. Boards around you are automatically available in one single dropdown. You can add Schematics and Layout PNGs to your sketches, so that you have in one place all the core elements of your project.

During the three days you can also play with some cool interactive installations, among which:

Colour Theremin
The theremin is a musical electronic instrument that plays monophonic melodies by hand gestures. In this version, Colour Theremin creates a color ‘symphony': its intensity and shade are controlled by the movements of hands. The installation is based on a FastLED library by Daniel Garcia and Mark Kriegsman and it’s running on a Genuino Uno, an LCD shield, two ultrasound sensors, one pot for speed and 122 WS2812b pixels.

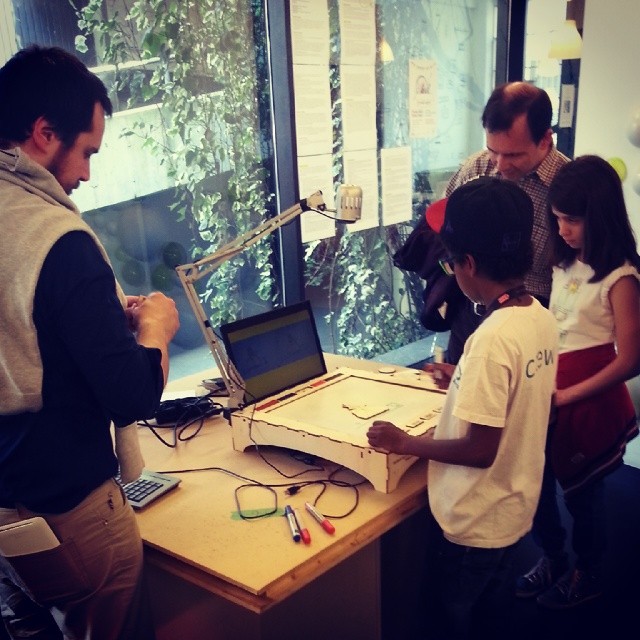
(S)passoUno
A DIY Live Stop Motion Tool heavily based on the work of Alexandre Quessy’s ToonLoop (2009), edited and used in Arduino and Processing workshop by Davide Gomba and Mirco Piccin.
(S)passoUno offers the player the possiblity to easily create a custom animation positioning objects on a lasercut board. Add a frame by pressing the Big Red Button, erase the last frame by pressing the Big Black Button, choose a sequence, add colors, add symmetry effects and enjoy the result!

(s)passo uno

Ready to celebrate the maker movement with us? Add the following events to your agenda:

  • Friday, 16th October at 11.00am - During the Opening Conference “Life with the Machines” taking place at Aula Magna of Sapienza, Massimo Banzi will have a keynote and an important announcement.
  • Saturday 17th October at 4.30pm – Massimo Banzi and Bruce Sterling will talk about “Casa Jasmina, the IoT for real people” at Room 10 of the Maker Faire (check map above).

Share your pictures and thoughts on social media channels using the hashtag #MFR15 and #Genuino

Get your discounted ticket to Maker Faire Rome (promo valid until October 14th –  h.18).

Staying focused with a brain-sensing smart lamp

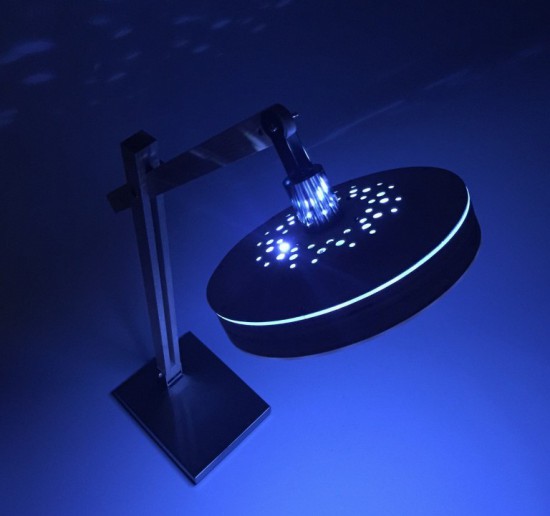
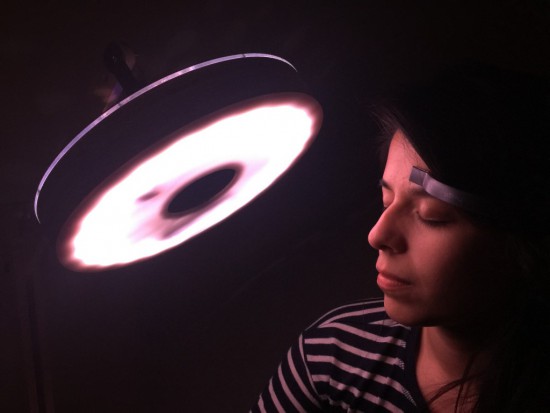
Clara is a smart lamp able to respond to your brain waves and subtly adjust your environment. The project, running on Arduino Uno, was created by  Marcelo Mejía Cobo, Belen Tenorio, and Josh Sucher for a class at the School of Visual Arts in NYC (US).

The team worked with the Neurosky MindWave Mobile, a Bluetooth EEG-reading headset in order to wirelessly detect “attention” and map the lamp’s color temperature and speaker volume accordingly:

At first, the lamp emits a warm, comforting glow, conducive to idea generation and creativity. But as you start homing in on a specific idea, the light becomes crisper and cooler, and the volume of the ambient noise flowing from the embedded speaker slowly increases, enhancing your ability to concentrate and block out external distractions.

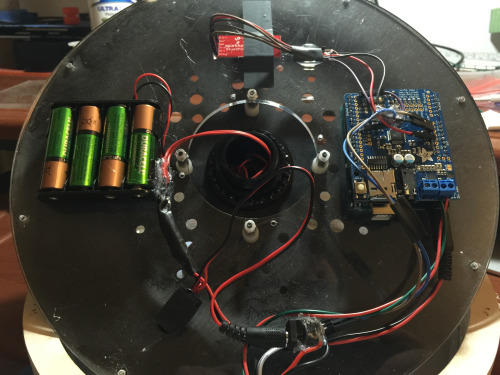
In the picture below you can see the inside of the lamp with the Arduino Uno and Adafruit Music Maker shield:

Explore the Arduino Sketch on Github.

Arduino Blog 09 Oct 23:19

Bootstrapping Motion Input with Cheap Components

Motion control is a Holy Grail of input technology. Who doesn’t want an interface that they can control with simple and natural movements? But making this feel intuitive to the user, and making it work robustly are huge hills to climb. Leap Motion has done an excellent job creating just such a sensor, but what about bootstrapping your own? It’s a fun hack, and it will give you much greater appreciation for the currently available hardware.

Let’s get one thing straight: This device isn’t going to perform like a Leap controller. Sure the idea is the same. Wave your hands and control your PC. However, the Leap is a pretty sophisticated device and we are going to use a SONAR (or is it really SODAR?) device that costs a couple of bucks. On the plus side, it is very customizable, requires absolutely no software on the computer side, and is a good example of using SONAR and sending keyboard commands from an Arduino Leonardo to a PC. Along the way, I had to deal with the low quality of the sensor data and figure out how to extend the Arduino to send keys it doesn’t know about by default.

The Plan

The plan is to take an inexpensive SONAR module (the HC-SR04) and an Arduino Leonardo and use it to perform some simple tasks by mimicking keyboard input from the user. The Leonardo is a key element because it is one of the Arduinos that can impersonate a USB keyboard (or mouse) easily. The Due, Zero, and Micro can also do the trick using the Arduino library.

I wanted to determine how many gestures I could really determine from the HC-SR04 and then do different things depending on the gesture. My first attempt was just to have the Arduino detect a few fingers or a hand over the sensor and adjust the volume based on moving your hand up or down. What I didn’t know is that the default Arduino library doesn’t send multimedia keys! More on that later.

How the SONAR Works

The SONAR boards come in several flavors, but the one I used takes 4 pins. Power and ground, of course, are half of the pins. In fact, my early tests didn’t work and I finally realized the module requires more power than I could draw from the Arduino. I had to add a bench supply to power the module (and, of course, I could have powered the module and the Arduino from the same supply).

The other two pins are logic signals. One is an input and a high-going pulse causes the module to ping (8 cycles at 40kHz). There is a delay and then the other pin (an output) will go high and return low when the module detects the return ping. By measuring the time between your signal to ping and the return, you can judge the distance. In my case, I didn’t care about the actual distance (although that’s easy to compute). I just wanted to know if something was farther away or closer.
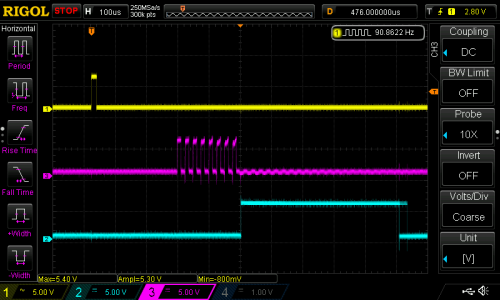
The scope trace to the right shows the sensor pointing at something relatively near. The top trace is the start pulse and the bottom trace is the input to the Arduino. The center trace is the output of the SONAR transducer. All the signal conditioning is inside the sensor, so you don’t need to worry about the actual signal processing to generate and recover the audio. You only need to measure the width of that bottom pulse.

The scope has persistence and you can see that the bottom trace does not always come out right at the same time (look at falling edge and you can see “ghosts” for previous samples. It shouldn’t come as a surprise that it may take a little effort to reduce the variations of the signal coming back from the SONAR.

Noise Reduction and Actions

Averaging

I wound up trying several different things to attempt to stabilize the input readings. The most obvious was to average more than one sample. The idea is that one or two samples that are way off will get wiped out by the majority of samples that are hovering around some center value. I also found that sometimes you just miss–especially when looking for fingers–and you get a very large number back. I elected to throw out any data that seemed way off when compared to the majority of received data.

Verifying

One other tactic I used was to verify certain elements with a second reading. For example, the start event occurs when the SONAR reports a value under the idle limit. The idle limit is a number less than the reading you get when the SONAR is pointed at the ceiling (or wherever it is pointing) and you don’t have anything blocking it. To recognize a valid start, the code reads twice to make sure the value is under the limit.

The code inside the Arduino loop is essentially a state machine. In the IDLE state, it looks for a reading that is below the idle limit. When found, that causes a transition to the sampling state. When the reading goes up or down more than some preset value, the code in the sample state sends a volume up or down key via the keyboard interface. If the sample goes back over the idle limit, the state machine returns to IDLE.

I got pretty good results with this data reduction,  but I also found the NewPing library and installed it. Even though it isn’t hard to write out a pulse and then read the input pulse, the NewPing library makes it even easier (and the code shorter). It also has a method, ping_median, that does some sort of data filtering and reduction, as well.

You can select either method by changing the USE_NEW_PING #define at the top of the file. Each method has different configuration parameters since the return values are slightly different between the two methods.

I said earlier that the code sends volume up and down commands when it detects action. Actually, the main code doesn’t do that. It calls an action subroutine and that subroutine is what sends the keys. It would be easy to make the program do other things, as well. In this case, it simply prints some debugging information and sends the keys (see below). I didn’t react to the actual position, although since the action routine gets that as a parameter, you could act on it. For example, you could make extreme positions move the volume up two or three steps at a time.

Sending Keyboard Commands

I wanted to send standard multimedia keys to the PC for volume up and down. Many keyboards have these already and usually your software will understand them with no effort on  your part. The problem, though, is that the default Arduino library doesn’t know how to send them.

Fortunately, I found an article about modifying the Arduino’s library to provide a Remote object that wasn’t exactly what I had in mind, but would work. Instead of sending keys, you have methods on a global Remote object that you can call to do things like change or mute the volume. The article was for an older version of the Arduino IDE, but it wasn’t hard to adapt it to the version I was using (version 2.1.0.5).

The action routine really only needs the UP_IN and DN_IN cases for this example. However, I put in all four branches for future expansion. Here’s the action subroutine:

void action(int why, unsigned value=0)
{
 Serial.print(value);
 switch (why)
 {
 case START_IN:
 Serial.println(" Start");
 break;
 case STOP_IN:
 Serial.println(" Stop");
 break;
 case UP_IN:
 Serial.println(" Up");
 Remote.increase();
 break;
 case DN_IN:
 Serial.println(" Down");
 Remote.decrease();
 break;
 }
}

The Final Result
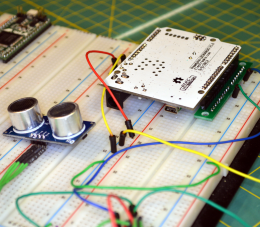
The final result works pretty well, although the averaging makes it less responsive than you might wish. You can turn down the number of samples to make it faster, but then it becomes unreliable. You can download the complete code from Github. The first thing you’ll want to do is check the top of the file to make sure your module is wired the same (pin 3 is the trigger pin and pin 8 is the echo return pin). You’ll also want to select if you are going to use the NewPing library or not. If you choose to use it, you’ll need to install it. I flipped my Leonardo upside down and mounted it on a breadboard with some adapters (see picture to right). It really needs a more permanent enclosure to be useful. Don’t forget to give the SONAR module its own 5V power supply.

If you look near the top of the loop function there is an #if statement blocking out 3 lines of code. Change the 0 to a 1 and you’ll be able to just get averaged data from the sensor. Put the module where you want it and see what kind of numbers you get. Depending on the method I used I was getting between 4000 and 9000 pointed up to the ceiling. Deduct a bit off of that for margin and change IDLETHRESHOLD (near the top of the file) to that number.

The DELTATHRESHOLD is adjustable too. The code sees any change that isn’t larger than that parameter as no change. You might make that bigger if you have shaky hands or smaller if you want to recognize more “zones”. However, the smaller the threshold, the more susceptible the system will be to noise. The display of samples is helpful because you can get an idea how much the readings vary when your hand is at a certain spot over the sensor. You can try using one or two fingers, but the readings are more reliable when the sound is bouncing off the fleshy part of your palm.

If you want to add some more gestures, you may have to track time a bit better. For example, holding a (relatively) stationary position for a certain amount of time could be a gesture. To get really sophisticated gestures, you may have to do some more sophisticated filtering of the input data than a simple average. A Kalman filter might be overkill, but would probably work well.

If you look around, many robots use these sensors to detect obstacles. Makes sense, they’re cheap and work reasonably well. There are also many projects that use these to show an estimate of distance (like an electronic tape measure). However, you can use them for many other things. I’ve even used a similar set up to measure the level of liquid in a tank and earlier this week we saw ultrasonic sensors used to monitor rice paddies.

If you really want to get serious, [uglyduck] has some analysis of what makes spurious readings on this device. He’s also redesigning them to use a different processor so he can do a better job. That might be a little further than I’m willing to go, although I was impressed with the 3D sonic touchscreen which also modified the SONAR units.


Filed under: Arduino Hacks, Featured, peripherals hacks

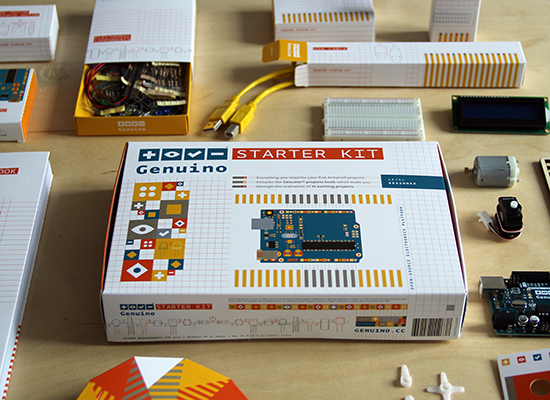
Arduino team (proudly) presents Genuino Starter Kit!

We are happy to announce that the new Genuino Starter Kit is now available on store.arduino.cc (customers from the USA will be redirected to the US-based store and will be able to purchase the Arduino Starter Kit from there).

Genuino Starter Kit, like the Arduino Starter Kit, is a great way to get started with making, coding and electronics!

Genuino is Arduino.cc’s sister-brand created by Arduino co-founders Massimo Banzi, David Cuartielles, Tom Igoe, and David Mellis, the Arduino.cc team and community.
This brand is used for boards and products sold outside the US and the Genuino Starter Kit is the first product of the series!

The Starter Kit is based on lessons Arduino’s founders have learned teaching their own classes: if you start with the assumption that learning to make digital technologies is simple and accessible, you can really make it so.

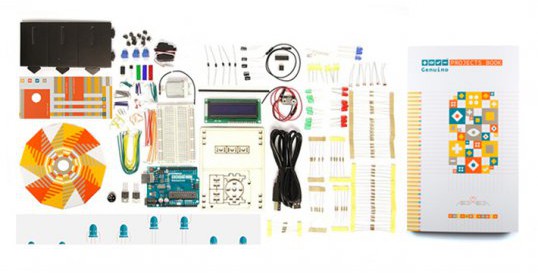
The package includes a Genuino Uno board and the components you need to make 15 fun projects following the step-by-step tutorials on the Project Book. The book walks you through the basics in a hands-on way, with creative projects you build by learning. Once you’ve mastered the basics, you’ll have a palette of software and circuits that you can use to create something beautiful, and useful!

Genuino Starter Kit will also be available for purchase during Maker Faire Rome! Come and visit us, we’ll be happy to show you demos and projects based on Arduino and Genuino boards.

DIY Connected objects for happy connected people

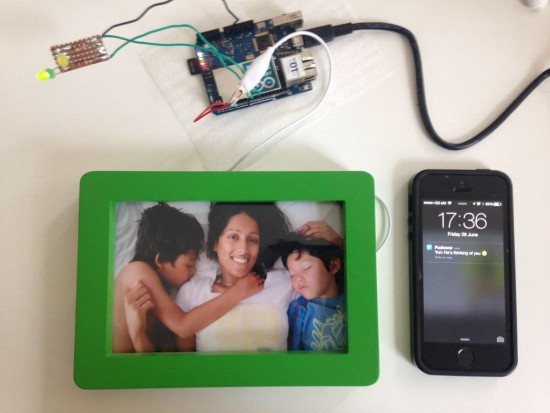
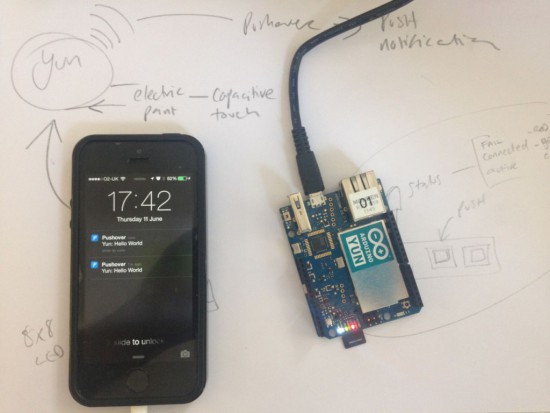
What happens when a creative technologist wants his family to know he’s thinking about them? He creates a project with Arduino Yún! IMissYou is a simple project transforming a picture in a connected object thanks to a capacitive layer made with Bareconductive Paint and inserted behind the photo. The ‘touch’ is detected by the Arduino through the glass of the frame by a spike in the values (with a basic Capsense library), sent to the internet via wi-fi and delivered to a phone with Pushover.

Martin Hollywood, the Arduino user who made  the project, wrote us:

Looking at the photograph of my family that I have on my desk one day, I missed them and wanted to be home. I touched the photo and realised that somewhere between those was the germ of the idea…

I wanted my family to know I was thinking of them, but I didn’t want to create two products; think GoodNight Lamp – I do love that project. In any case, there was no guarantee they would even notice a ‘blinking’ photo frame responding to my signal. Making the Receive a PUSH notification seemed like a no brainer, but the last time I developed for mobile was iOS 1! There are a number of service apps out there: Pusher, Pushingbox but I decided on Pushover. It had a 7 day trial period and good API support (I’ve since bought a license).

Take a look at his blog for more details and if you want to give him some tips to make it a real product.

Listening to the sound of a 300-million-year-old disc

There’s a mineral called pyrite with a interesting nickname, fool’s gold, because it has a superficial resemblance to gold and it’s by far the most frequently mineral mistaken for gold. Even if it’s pretty abundant, there’s a rare form of pyrite which is crystallised in radial shape (as unusual disc spherulites), taking the shape of a disc. The amazing fact is that the only deposit where pyrites of such morphology are found is in Illinois (USA) and the discs are dated around 300 million years ago!

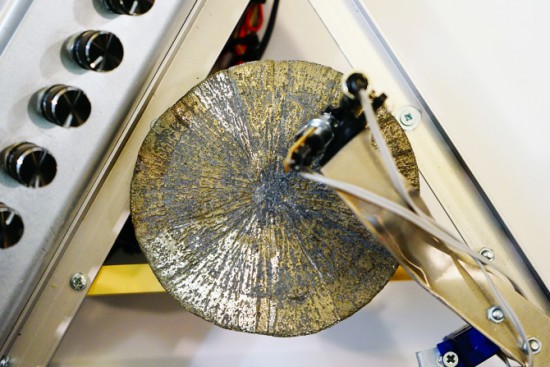
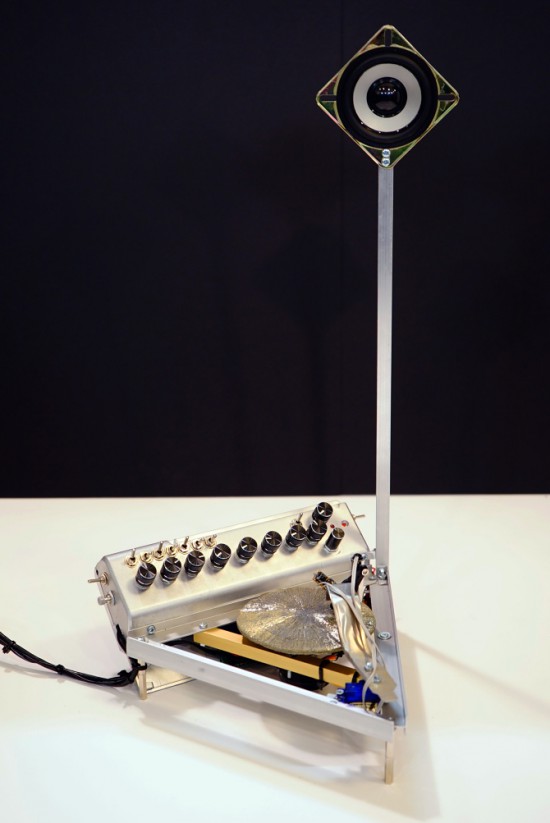
Dmitry Morozov (aka ::vtol::), a media artist living in Moscow, had the chance to use a pyrite disc and created Ra,  a sound object / synthesizer running on Arduino Nano. Ra uses laser for scanning the irregularities of the surface of the disc and further transforms this data to produce sound:

This project originated as a result of an interesting set of circumstances – a pyrite disc was given to me as a gift by a mineral seller in Boulder city (USA). Upon hearing about my works, she asked to do something with such crystal, and refused to take payment for getting it. In the same period, I was reading articles on various ways of archiving and preservation of sounds from the first, historical sources of the recorded sound – wax discs and other fragile carriers. All technologies were based on the usage of lasers. Inspired by these projects, I set out to create a self-made laser sound reader which would be able to produce sound from various uneven surfaces, using minimal resources to achive it. Thus emerged the idea to construct an instrument using the pyrite disc and a self-made laser sound reader.

The production of the object was possible thanks to the commission of the Sound Museum in St.-Petersburg which now has Ra in its collection.

Check the bill of materials and other details on Dmitry’s website. Explore other projects by Dmitry featured on Arduino Blog.

Arduino Blog 05 Oct 12:54