Posts with «featured» label

Arduino Development; There’s a Makefile for That

Hardware and software combined, Arduino does many things right. It lowers the entry level into embedded systems development with a nifty hardware abstraction layer. It aims for cross-platform compatibility by supporting Windows, Mac OSX, and Linux operation systems. It throws out the need for an external programmer to get you up-and-blinkin’ those LEDs quickly.

One thing most of us never cease to curse about, though, is the IDE. Many have cried out wildly against the Java-based text-editor for its cryptic compiling-and-linking process, its inability to accommodate bare C or C++ source files, and (shh!) its lack of Vim keybindings. Fortunately, our cries have been heard, and the like many community-based projects, the community fights back with a custom solution.

Calling all Grumpy Engineers: The Arduino-Makefile

Enter the Arduino Makefile.

What began as [Sudar’s] lightweight program to escape the IDE has become a fully-blown, feature rich Makefile that has evolved and adapted to grow with the changes of Arduino. With a community of 47 contributors, the Makefile enables you to escape from the IDE entirely by writing code in the cushy text editor of your choice and compiling with a simple incantation of make into your terminal, be you in Linux, Mac, or Windows.

Without further ado, let’s take a walking tour of the project’s highlights.

Cryptic Shortcuts–Begone!

For many beginners, writing (or even editting) a Makefile can cause some serious confusion with most Makefile authors’ shameless shortcut use. Make no mistake, the cryptic syntax of many Makefiles forms a concise list of instructions for compiling and linking your executable, but this recipe does seem a bit hard to parse for the uninitiated. What’s more, Makefiles also tend to throw bizarre errors (trailing whitespace anyone?) that are difficult to track down–especially when we want to spend most of our time bringing up embedded systems, not understanding the mechanics and syntax of a Makefile. Fortunately [Sudar] and the rest of the development team have made the interface very human readable.

Their solution: A two-part Makefile. For a simple project, your Makefile need be no longer than this snippet (inspired from the Makefile Examples):

BOARD_TAG    = uno
include $(ARDMK_DIR)/Arduino.mk

Project-specific settings (like which board you’re using) are outlined in this brief Makefile that then includes the larger Makefile which contains the actual nuts and bolts for building your code. The assumption here is that you’ve defined two environment variables, both ARDMK_DIR and ARDUINO_DIR that point towards the (1) Arduino Makefile directory and the (2) Arduino Installation directory. In addition, if you have additional libraries, you can include them with a line in your top-level Makefile that defines the filepath.

 USER_LIB_PATH += /home/my_username/my_libraries_directory

You’ll also need to add all libraries you’re using (both user-added and built-in) to the list of libraries like so:

ARDUINO_LIBS += Wire \
                SPI \
                my_custom_lib

The benefit of a “split-Makefile” setup is that the short, top-level Makefile hides the gritty compiler gymnastics involved in compiling and linking against the default and user-added Arduino Libraries. On the flip-side, this “mini” Makefile becomes a brief, informative summary of a few minor details, such as which Arduino Libraries are being used, that are likely more relevant to the author and future developers.

Raw C and C++ is In–if you prefer such things

Tired of that *.ino file extension? Tired of having to constrain yourself into those setup and loop functions? With the Makefile, you can quickly wish these away and write your code in raw C or C++. You can even neglect to #include <Arduino.h> if you want to work in vanilla C or C++ and disregard the Arduino libraries altogether.

That said, if you’re mixing C and C++, keep in mind that you’ll need to insert guards around your C header files like so:

#ifdef __cplusplus
extern "C" {
#endif

/// the rest of my C header file 

#ifdef __cplusplus
}
#endif

Adding Project Libraries

Possibly my favorite aspect of the Arduino Makefile is its flexibility to accomodate a richer file structure and painlessly split your project into multiple files. Let’s say I have a one-off project where it makes sense to include a custom library. Given the flexibility of the Makefile, you can define:

    USER_LIB_PATH+=.
    ARDUINO_LIBS += my_custom_library

in your project Makefile and produce a directory tree like so.

 ├── main.ino
 ├── Makefile
 ├── my_custom_library
 ├── my_custom_library.cpp
 └── my_custom_library.h

If you need more flexibility, you can also split your source code across several directories, keeping the Makefile in the same directory of your code that acts like a “main.” (In this case, main.ino defines setup  and loop.) To do so, your Makefile will, instead, have:

    USER_LIB_PATH+=../libs
    ARDUINO_LIBS += my_custom_library

in your project Makefile, and your directory structure will look like so:

 ├── libs
 │   └── my_custom_library
 │     ├── my_custom_library.cpp
 │     └── my_custom_library.h
 └── src
  ├── main.ino
  └── Makefile

Finally, we don’t need to constrain ourselves to writing just C++ classes to split projects into multiple files.  Since we’re really working with vanilla C++, you can freely split your project into multiple source (*.c, *.cpp, *.ino, *.pde) and header (*.h, *.hpp) files that live in the same directory as the Makefile, and the Makefile will compile them into one executable.

Other Micros are Fair Game Too

Finally, the Arduino-Makefile is also compatible with a host of other microcontrollers and programmers, not just the ATMEGA328P on the Uno. In short, this feature is an exposition of the features of AVRDUDE, the program for downloading and uploading code to various AVR microcontrollers. Last, but not least, it’s also Teensy-compatible.

Define Our Standard

If you’re looking to get comfortable with the Arduino-Makefile workflow, have a quick look at their examples directory for a host of different use-cases. You can also take a peek at my i2c_demultiplexing_demo source from a couple weeks back for yet another example. At the end of the day, Arduino, with its giant library collection, makes project prototyping fast. For bigger projects, though, we don’t tend to see any standard practices for file organization to make projects easier to navigate. That’s where you come in. With the flexibility of the Makefile, you get it all: the text editor you always wanted, the separate header and implementation files, a clean directory… Now it’s your shot to take this tool and refine your workflow into a method worth sharing with the rest of us.


Filed under: Arduino Hacks, Featured

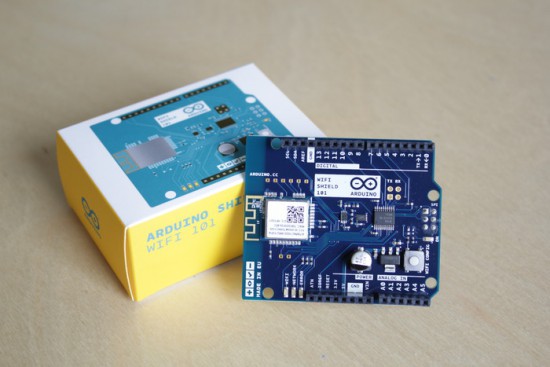
Arduino WiFi Shield 101 is now available in the US store!

We are excited to announce Arduino Wifi Shield 101 developed with Atmel is now available for purchase on the Arduino Store US (49.90$).

Arduino WiFi Shield 101 is a powerful IoT shield with crypto-authentication that connects your Arduino or Genuino board to the internet wirelessly. Connecting it to a WiFi network is simple, no further configuration in addition to the SSID and the password are required. The WiFI library allows you to write sketches which connect to the internet using the shield.

The shield is based on the Atmel SmartConnect-WINC1500 module, compliant with the IEEE 802.11 b/g/n standard. The WINC1500 module provided is a network controller capable of both TCP and UDP protocols.  The main feature is an hardware encryption/decryption security protocol provided by the ATECC508A CryptoAuthentication chip that is an ultra secure method to provide key agreement for encryption/decryption, specifically designed for the IoT market.

Last year, Massimo Banzi introduced the shield:

“In this increasingly connected world, the Arduino Wi-Fi Shield 101 will help drive more inventions in the IoT market. Expanding our portfolio of Arduino extensions, this new shield can flawlessly connect to any modern Arduino board giving our community more options for connectivity, along with added security elements to their creative projects.”

The WiFi Shield 101 is the first Arduino product fully supporting SSL and all the communication between your board and our secured server. With the power of the Arduino Zero and the WiFi Shield 101 it is possible to make secure IoT applications simply and just using the Arduino Language.

A working example and instructions on how to get started are available on Arduino Cloud, a work-in-progress project that gives you access to a pre-configured MQTT server for your IoT sketches using only your Arduino account. More examples and features will be available in the next months.

Feel like knowing more about the shield? Explore the  Getting Started guide.

A door-stopper becomes an amazing game with Arduino

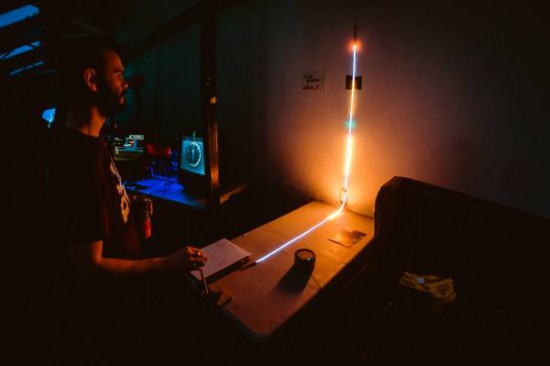
Developed by Robin Baumgarten during a 48-hour game jam,  Line Wobbler is a one-dimensional dungeon crawler game running on Arduino Uno. Robin was inspired watching a cat interacting with a door stopper and having fun!

The game is played using a unique wobble controller made out of a door-stopper spring and a several meter long ultrabright LED strip display. All the movement is controlled by bending the Wobble controller left and right, while enemies are attacked by wobbling:

Using a spring, an accelerometer and a rigid surface, the Wobble controller is a tactile and surprisingly precise joystick with a unique ‘wobble’ action (pull it back and let go to make it oscillate back and forth rapidly). It is this wobble action that is core to the experience and the game we have created for it. Initially made out of a shoe-tree, I’m now using door-stopper springs, since they’re easier to use. Fun fact: the original inspiration for the controller came from this cat video.

Since it was created, it’s been exhibited during Experimental Gameplay Workshop at GDC 2015, at Burning Man 2015 and other city around the world (London, Chicago and Oslo). Line Wobbler won also two prizes at the AMAZE Awards 2015 in Berlin and has been nominated as a finalist for the IndieCade 2015 awards last October!

Visualizing air quality with interactive origami flowers

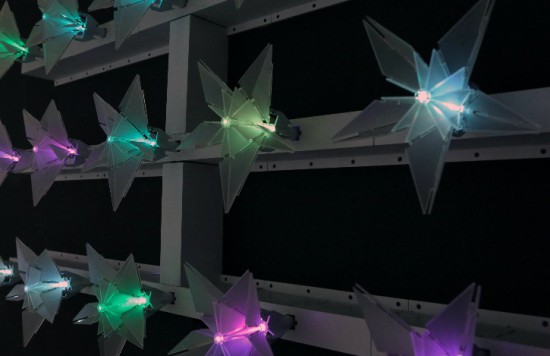
“Under the Dome – PMgami” is an installation created by designer Jiayu  Lui using Arduino Nano. Inspired by paper origami techniques, the digitally fabricated flowers move and change color according to the quality of air measured locally. The main aim of the installation is to obtain a more intuitive way to communicate pollution data and  the relationship between technology and nature.

In the gallery you can explore some other pictures and the schematic. Check the video below to see the installation in action!


Yet another cool Pong with Arduino Uno

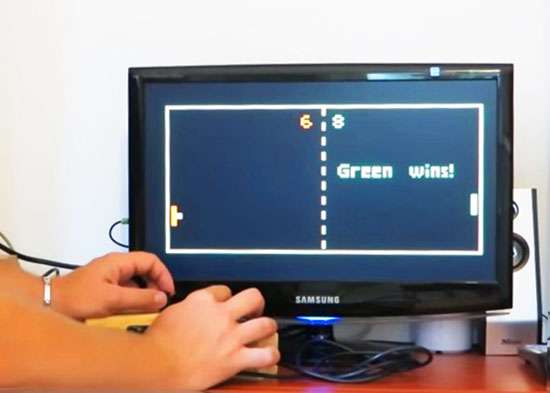
Everyone knows Pong, the first commercially successful arcade video game machine  originally release by Atari in 1972. In those years the game helped to establish the video game industry and nowadays is often used by makers to experiment with creating game consoles with Arduino.

Roberto Melzi recently shared on the Arduino forum a new version of Pong made with Arduino Uno:

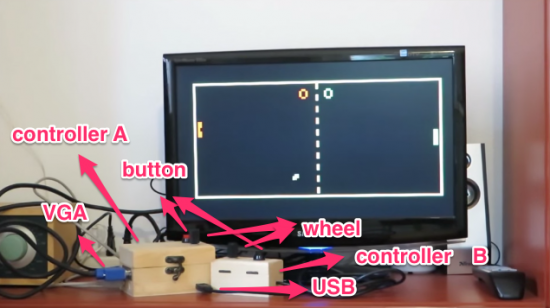
Thanks to the VGAx library done by Smaffer, based on the previous work done by Nick Gammon, I have done a little color game for an Arduino Uno working for a VGA monitor. See for details here:

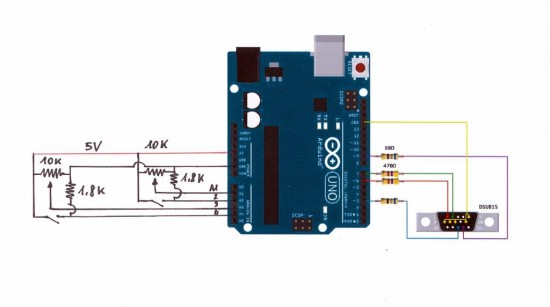
The target was to use an Arduino Uno board without special shields and supporting IC.
the fundamental components are a button, a potentiometer, few resistors and DSUB15 connector.

Tale a look at the video to see it in action:

Follow the step-by-step guide on Instructables to build one yourself.

Arduino Blog 24 Sep 21:11
arduino  featured  forum  library  pong  tutorial  uno  vga  video game  

Meet us at Makercon and World Maker Faire 2015!

This week New York City is the city of Makers, with Makercon conference and World Maker Faire coming up on our agenda!

You can begin on September 24th, with Massimo Banzi taking part to the session TECH: Cheaper, Faster, Better of Makercon (at 3.30pm local time) to discuss the future of maker development platforms – particularly microcontroller boards – and they paths toward being more powerful, less expensive, and more accessible to a broader range of Makers than ever before.

In the meanwhile, watch the video from 2014 edition:

On the weekend, September 26th and 27th, we’ll be joining Atmel booth in Zone 3 for the 6th annual World Maker Faire. We’ll be exhibiting some of our latest products and cool projects made with Arduino.

Here’s a memo of presentations made by Arduino team:

Saturday h.1.00 PM to 1.30 PM Center Stage – NYSCI Auditorium
State of Arduino by Massimo Banzi

Saturday 3:15 PM —3:30 PM Center Stage – NYSCI Auditorium
Who Are You Making For?  by Tom Igoe
Tom will share a few stories of makers whose work has inspired him in and out of the classroom, and discuss how their stories and motivations led to the things they’ve made.

Saturday 11:30 AM — 11:45 AM  Zone 3 – Make: DIY
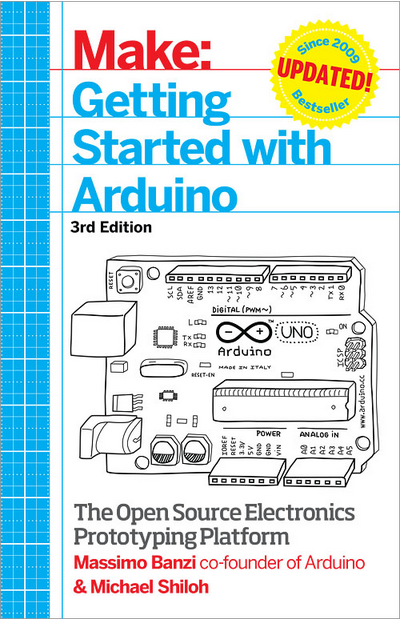
Getting Started with Arduino (3rd edition) by Michael Shiloh
Co-author with Massimo Banzi of ‘Getting Started with Arduino’, Michael takes you through the microcontroller’s latest iterations.

Sunday 11:15AM – 11:30 AM Zone 3 – Make: DIY
Getting Started with Arduino (3d edition) by Michael Shiloh
Co-author with Massimo Banzi of ‘Getting Started with Arduino’, Michael takes you through the microcontroller’s latest iterations.


Industruino makes industrial automation easy, now AtHeart

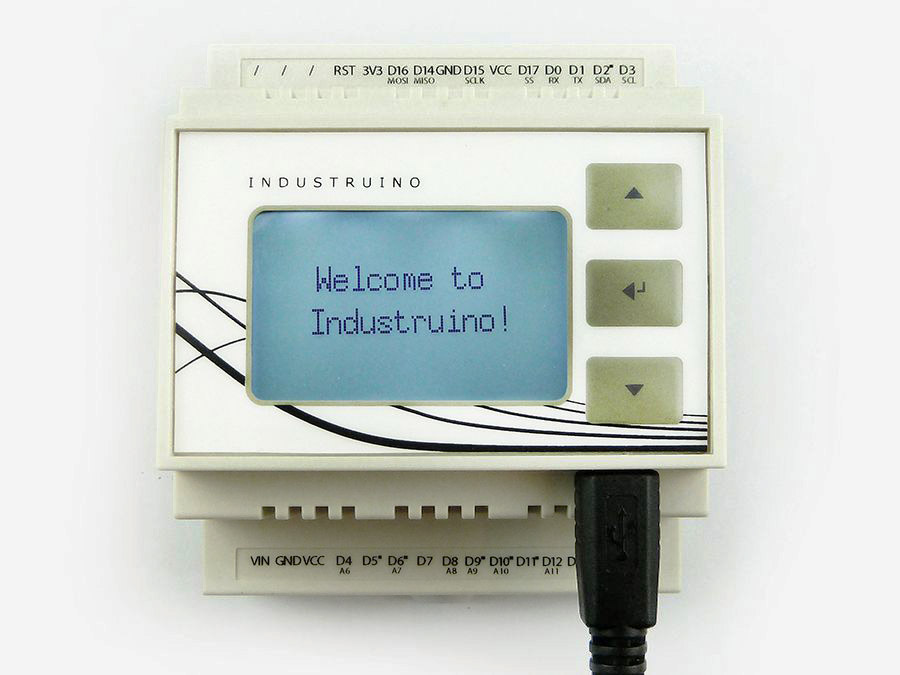
Industruino’s mission is to offer industrial automation components that have the simplicity of Arduino at its core. It’s created by Loic & Ainura, two product designers originally from Belgium and now based in Shenzhen, with a mission to help people make their own products, by creating an accessible platform.

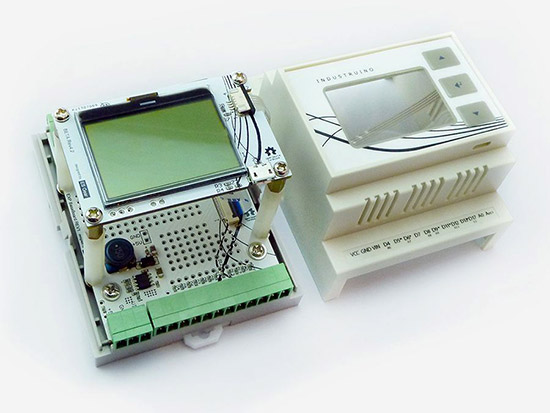
Today they are officially joining the Arduino AtHeart program with Industruino Proto, a Leonardo compatible industrial controller housed in a DIN-rail enclosure, with screw connector terminals to robustly connect to sensors and actuators.

Industruino allows makers and professionals to take a breadboarded solution and make it into an enclosed finished looking product, ready for permanent installation. Watch Loics’ introduction:

With Industruino everyone can combine the strengths of Arduino with the specific requirements of industry:

We are now at the dawn of a new industrial revolution, one in which the key elements will be automation, robotics and interconnected devices. In this revolution the Arduino platform is growing to be a real contender.

We are very excited to become part of the At Heart family! It is our way to show that we are very much interlinked with the Arduino community. We are looking forward to further develop the use of Arduino in industrial applications whilst contributing back to the Arduino platform.

When you open the enclosure you will find a prototyping area to add your own components, and re-routable jumper connections, letting you connect any point to either the microcontroller’s pins or the external screw connectors. The onboard graphic LCD and membrane button panel facilitate quick UI development to visualise and input your application’s data.

Explore other tech info on Industruino website and make it yours on their store!


Automating a bubble blaster with Arduino Micro


Thomas Renck is a coder and a maker. He went to Disneyland, saw a bunch of little kids having fun with bubble guns and realized that a bubble blaster is a sure way to measurably improve joy and happiness in life.

Back home, it took only two hours to create and add-on to automate the bubble blaster using a 3d printer, Arduino Micro and a servo:

On his blog you can find the tutorial, the sketch and the 3d files to make one yourself and bring more happiness in your life too!

A DIY Jukebox made with Arduino and NFC Shield

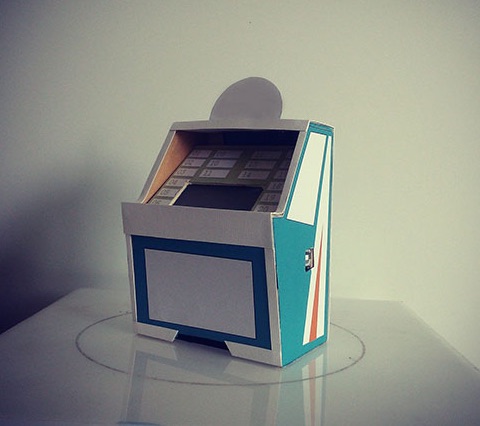
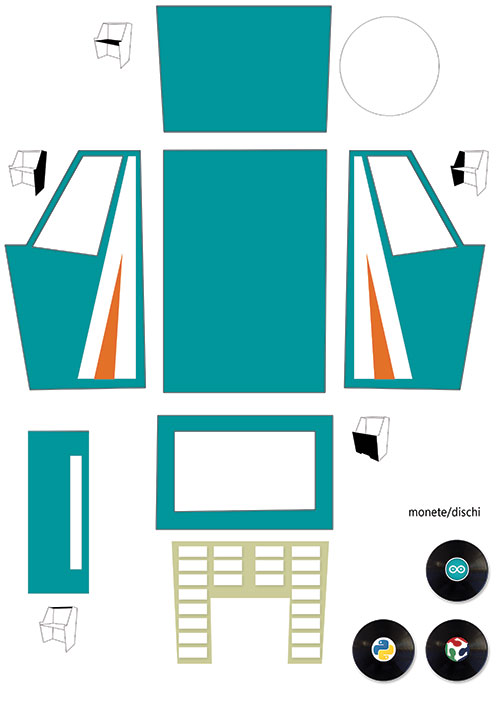
DIY Jukebox is a project made by Mario Pucci to show how Arduino Uno, NFC Shield and Python can be used to build a real jukebox. NFC means Near Field Communication and the NFC shield can perceive objects attached to little chips called NFC tags containing specific messages. In this project, Marco programmed each chip to play a different music genre when the tag is inserted in the cardboard jukebox:

You can download the file of the cardboard Jukebox at this link and the sketches here.

The steps of the tutorial are in italian but you can use google translate if needed! Enjoy the sound of music

Arduino Blog 16 Sep 14:32
arduino  featured  jukebox  music  nfc  shield  tutorial  uno  

Ars Electronica: we’re back with Eslov!

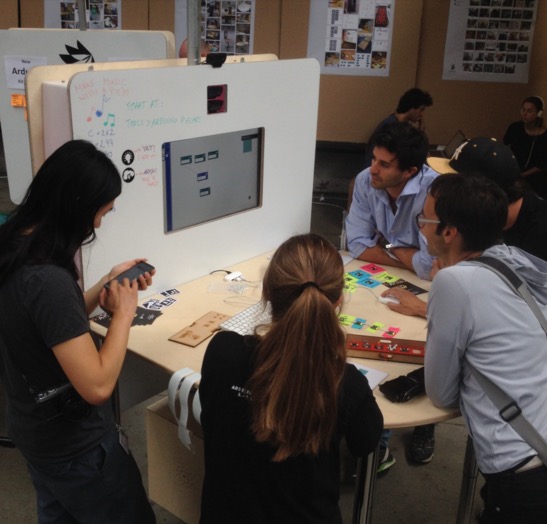
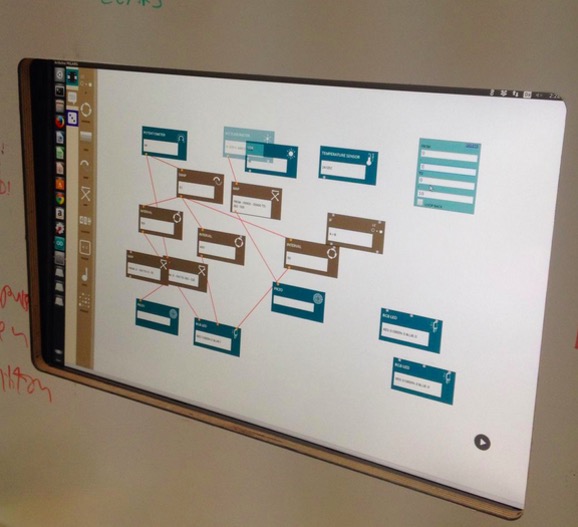
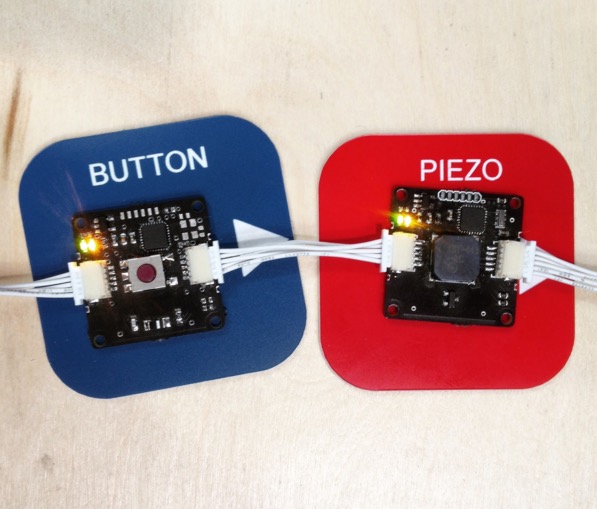
After nine years, Arduino participated to Ars Electronica 2015 to present an intelligent module system developed at the Malmö office: the system is called Eslov and is meant to make creation and coding very easy. This system allows you to explore the concepts of physical computing by plugging modules that can be programmed using a visual interface.

Our partners at the PELARS* project and some of our team members went to Linz to build the PELARS “Learning + Making” Zone for the U19 / Create Your World area, a part of the festival dedicated to teenagers. A pop-up experimental learning environment was built and it aimed to support learners understand what’s going on when they do hands-on science, technology & math in the classroom. Students and visitors tried Eslov and made some game dynamics to experience how the modules work. The feedback from the participants was encouraging with many students staying for a couple of hours and even returning back for multiple sessions.

Eslov will be also presented on our booth at World Maker Faire New York on September 26th to 27th, and Maker Faire Rome on October 16th to 18th.

*Pelars stands for Practice-based Experiential Learning Analytics Research And Support. Pelars is a project meant for improving how teachers, learners and technologies can support one another in hands-on learning of science, technology and math (STEM). Pelars will develop technologies (kits, sensing and electronic systems for classrooms) that will help teachers and learners understand what happens when people do science and math in the classroom.

PELARS project has received funding from the European’s Seventh Framework Programme for research technological development and demonstrations under grant agreement 619738.

If you want to follow up the development of the project in depth, visit the PELARS main page at: http://learningmaking.eu

(The news was originally posted on Arduino Verkstad blog by Laura Balboa)