Posts with «art» label

Generate Positivity with Machine Learning

Gesture recognition and machine learning are getting a lot of air time these days, as people understand them more and begin to develop methods to implement them on many different platforms. Of course this allows easier access to people who can make use of the new tools beyond strictly academic or business environments. For example, rollerblading down the streets of Atlanta with a gesture-recognizing, streaming TV that [nate.damen] wears over his head.

He’s known as [atltvhead] and the TV he wears has a functional LED screen on the front. The whole setup reminds us a little of Deep Thought. The screen can display various animations which are controlled through Twitch chat as he streams his journeys around town. He wanted to add a little more interaction to the animations though and simplify his user interface, so he set up a gesture-sensing sleeve which can augment the animations based on how he’s moving his arm. He uses an Arduino in the arm sensor as well as a Raspberry Pi in the backpack to tie it all together, and he goes deep in the weeds explaining how to use Tensorflow to recognize the gestures. The video linked below shows a lot of his training runs for the machine learning system he used as well.

[nate.damen] didn’t stop at the cheerful TV head either. He also wears a backpack that displays uplifting messages to people as he passes them by on his rollerblades, not wanting to leave out those who don’t get to see him coming. We think this is a great uplifting project, and the amount of work that went into getting the gesture recognition machine learning algorithm right is impressive on its own. If you’re new to Tensorflow, though, we have featured some projects that can do reliable object recognition using little more than a Raspberry Pi and a camera.

The HackadayPrize2020 is Sponsored by:

How Much Is That Plotter in the Window?

We live in a strange time indeed. People who once eschewed direct interactions with fellow humans now crave it, but to limited avail. Almost every cashier at the few stores deigned essential enough to maintain operations are sealed away behind plastic shields, with the implication that the less time one spends lingering, the better. It’s enough to turn an introvert into an extrovert, at least until the barriers are gone.

We get the idea that the need to reach out and touch someone is behind [Niklas Roy]’s “Please Leave a Message”, an interactive art installation he set up in the front window of his Berlin shop. Conveniently located on a downtown street, his shop is perfectly positioned to attract foot traffic, and his display is designed to catch the eye and perhaps crack a smile. The device consists of a large wooden easel holding the guts from an old X-Y pen plotter, an Arduino and an ESP-8266, and a couple of drivers for the plotter’s steppers. Passers-by are encouraged to scan a QR code that accesses a web page served up by the ESP-8266, where they can type in a brief message. The plotter dutifully spells it out on a scroll of paper for all to see, using a very nice font that [Niklas] designed to be both readable and easily plotted. The video below shows it in action with real people; it seems to be a crowd-pleaser.

[Niklas] has been incredibly prolific, and we’ve covered many of his interactive art installations. Just search for his name and you’ll find everything from a pressure-washer dancing waters display to a plus-sized pinball machine.

Hack a Day 14 May 16:30

Sequino Tells Time In The Most Satisfying Way: Sequins

You know you’ve done it. You’re walking through the store and you see those pillows covered in sequins that change color depending on which way you lay them. You swipe your fingers across the surface, for a letter, or maybe a simple drawing. Then comes the satisfying part, you swipe […]

Read more on MAKE

The post Sequino Tells Time In The Most Satisfying Way: Sequins appeared first on Make: DIY Projects and Ideas for Makers.

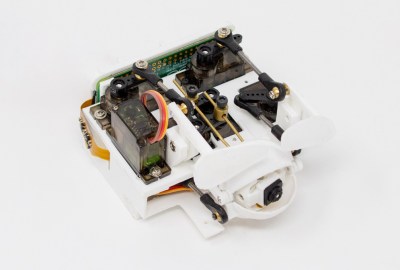
Vintage Mini Inkjet Prints On-Demand ASCII Art

Readers of a certain age may fondly remember ASCII art emerging from line printers in a long-gone era of computing; for others, it’s just wonderfully retro. Well, when [Emily Velasco] found a vintage Kodak Diconix 150 inkjet at a local thrift store for $4, she knew what she had to do: turn it into a dedicated ASCII-art machine.

Dating to the mid-1980s, the diminutive printer she scored was an early example of consumer inkjet technology; with only 12 “jets,” it sported a resolution roughly equivalent to the dot-matrix impact printers of the day. [Emily] notes that this printer would have cost around $1000 in today’s money — this is from a time before printer companies started selling the printer itself as a loss leader to make revenue on the back end selling consumables. It seems you can’t escape the razor-and-blades model, though: [Emily] had to pay $16 for a new ink cartridge to revive the $4 printer.

With the new ink in place, and some tractor-feed paper acquired, [Emily] started work on the art generator. The concept is something that might have been sold on late-night TV ads: a “cartridge” you plug into your printer to make ASCII masterpieces. Starting with a stripped-down Centronics printer cable that matches the printer’s port, she added an Arduino nano to store and serve up the art. The user interface is foolproof: a single button press causes a random selection from one of ten ASCII images to be printed. The whole thing is ensconced within a slick 3D printed case.

One of the coolest aspects of this project is the lack of power supply. When she first hooked the Arduino to the printer’s parallel port, [Emily] noticed that it powered right up with no external supply, and in true hacker fashion, just ran with it. Upon reflection, it seems that power is being supplied by the printer status lines, Busy and/or Ack, through the input protection diodes of the Atmega328 on the nano.

We really like this project, and are more than a little bummed we tossed those old printers that were kicking around the Hackaday labs for years. If you still have yours, and would like turn out some rad ASCII art, the code for this project is up on GitHub.

We’re no strangers to [Emily]’s work, but if you aren’t familiar with it, check out her inspiring talk from the 2019 Hackaday Superconference. Meanwhile, don’t miss the excellent video about the ASCII art printer cartridge, after the break.

Hack a Day 09 Jan 16:30

These interactive drawing machines are inspired by Japanese zen gardens

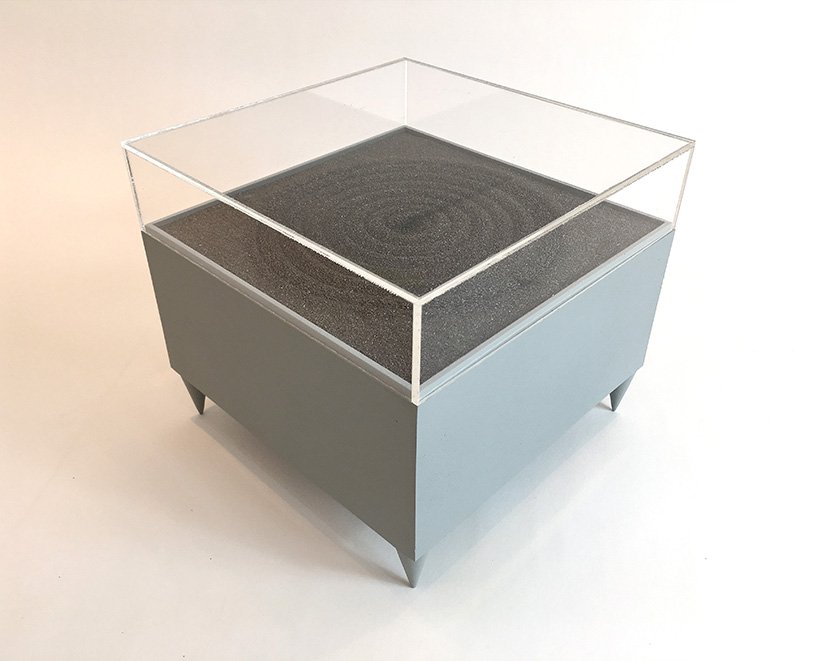
Artist Jo Fairfax has created automated drawing machines inspired by carefully manicured Japanese rock gardens, AKA zen gardens. The mesmerizing artwork uses magnets and motors that move underneath a bed of iron filings, generating soothing shapes as viewers come near via motion sensor.  

An Arduino Uno is utilized for the device, or rather devices, and you can see a square “magnet garden” in the first video below, automatically producing a circular pattern. A (non-square) rectangular garden sketches a sort of snake/wave pattern in the second clip. 

The build is reminiscent of sand drawing machines that rotate a metal marble through magnetic force, but does away with a visible source of movement as the filings react directly to the magnetic field as it’s applied.

An Arduino Uno is programmed to set off a mechanism with integrated magnets below the platform of iron filings. each time a viewer approaches the machine, it starts to ‘draw’ and agitate the black particles, moving them around the platforms. Slowly the drawings become three dimensional and the sense of the magnets’ tracing becomes visible. 
 
The charged iron filings create varying geometric clusters that shape the zen gardens. The drawing machines reveal the forces acting on them, imitating grass and sand that react to the natural force of the wind. the gesture of the viewer’s movement that activates the machine coupled with the magnetic power makes the artwork become a dialogue of forces… elegant and subtle, just like a zen garden.

Lessons Learned From An Art Installation Build

Art installations are an interesting business, which more and more often tend to include electronic or mechanical aspects to their creation. Compared to more mainstream engineering, things in this space are often done quite a bit differently. [Jan Enning-Kleinejan] worked on an installation called Prendre la parole, and shared the lessons learned from the experience.

The installation consisted of a series of individual statues, each with an LED light fitted. Additionally, each statue was fitted with a module that was to play a sound when it detected visitors in proximity. Initial designs used mains power, however for this particular install battery power would be required.

Arduinos, USB power banks and ultrasonic rangefinders were all thrown into the mix to get the job done. DFplayer modules were used to run sound, and Grove System parts were used to enable everything to be hooked up quickly and easily. While this would be a strange choice for a production design, it is common for art projects to lean heavily on rapid prototyping tools. They enable inexperienced users to quickly and effectively whip up a project that works well and at low cost.

[Jan] does a great job of explaining some of the pitfalls faced in the project, as well as reporting that the installation functioned near-flawlessly for 6 months, running 8 hours a day. We love to see a good art piece around these parts, and we’ve likely got something to your tastes – whether you’re into harmonicas, fungus, or Markov chains.

This machine creates images using Skittles as pixels

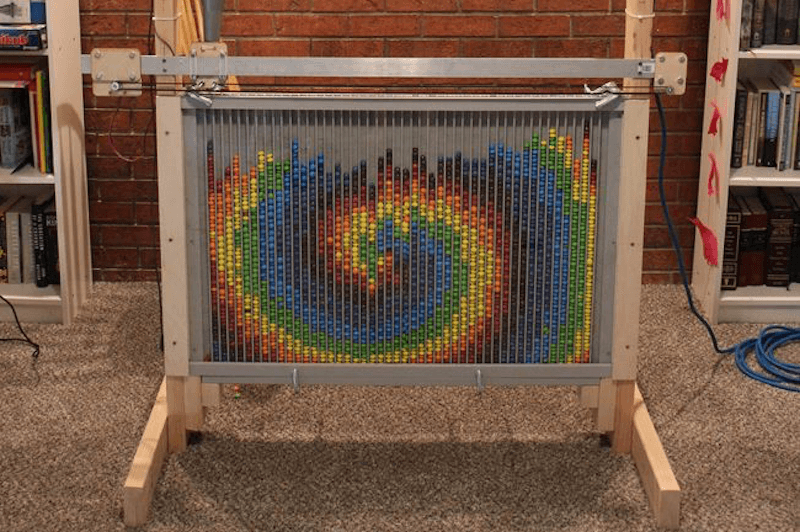
Skittles candies come in various vibrant colors. While they may be a tasty treat, JohnO3 had another idea: to create an amazing automated display for the little circles. 

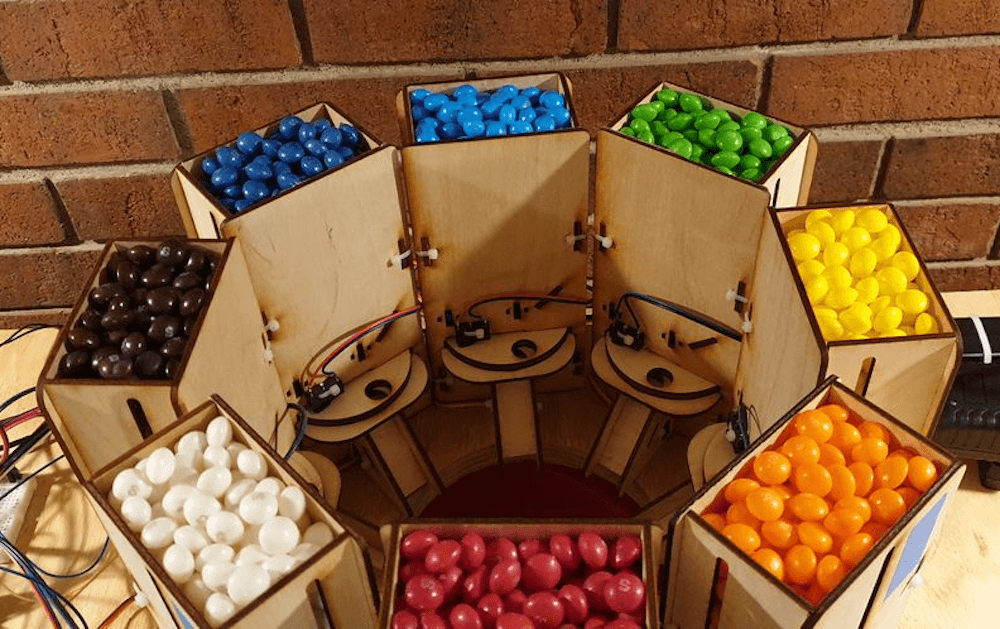
His device, dubbed the “Skittle Pixel8r,” uses an Arduino Mega to pull a dispensing funnel between one of 46 channels, covered on one side with a piece of glass.

On top of the shuttle mechanism, eight boxes release the correct flavor/color into an intermediate tube via individual metal gear servos. The Arduino then commands the linear axis to move the funnel to the appropriate bin. This process is repeated 2,760 times until an image, measuring up to 785 x 610mm (31 x 24 inches), is completed. 

The Skittle Pixel8r an incredible build, and perhaps we could see it expanded even further to not just dispense, but also sort Skittles as an all-in-one auto art installation! Code and files for the project can be found here.

Arduino Blog 09 Jul 16:55

Dead Bug Arduino Is Lively And Shield-Compatible

Microcontroller demo boards such as the Arduino UNO are ubiquitous on Hackaday as the brains of many a project which inevitably does something impressive or unusual. Sometime someone builds a particularly tiny demo board, or an impressively large one. In the case of the board featured here, the Arduino is a gorgeous labor of love which can’t really be called a board since there is no PCB. Instead of the traditional fiberglass, [Jiří Praus] formed brass bars into the circuitry and held it together with solder.

This kind of dedication to a project leaves an impression. His notes show he saw the barest way to operate an ATMega328, built it, tested, and moved on to the power supply to make it self-sustaining, then onto the communication circuit, and finally the lights. The video below shows a fully-functional Arduino happily running the blink program. He plans to encase the brass portion in resin to toughen it up and presumably keep every bump from causing a short circuit. The components are in the same position due to a custom jig which means a standard shield will fit right into place.

The Arduino started far less flashy yet nearly as fragile, and it has grown. And shrunk.

Hack a Day 09 Jun 21:00

Creating A Sonic Landscape With Glitching CD Player

CDs were a great advancement in audio quality when they were first put on the market. There’s no vinyl-style degradation of the medium if it’s played over and over, and there’s no risk of turning them into a giant pile of ribbon while rewinding like a cassette tape. The one downside was that if you were to take them on the move you needed special hardware and software to prevent the inevitable skipping. If you look at the skipping not as a downside, though, but as a way to produce interesting music, you might end up with a pretty unique piece of hardware.

[Dmitry] is known for his interesting art installations, and the latest one uses parts from three 1988 Sony D2 CD players that have been reassembled in order to take advantage of a skipping and glitching CD. The modified equipment is able to play during pause or rewind thanks to a processor modification, and can also change the rotational speed of the disc. There are other pieces of hardware included for more fine control of glitching and skipping of the audio being read off of the CD.

The new device functions as a working musical instrument, although [Dmitry] says that it is more useful for deconstructing the information stored on the disc, and exploring the medium itself. Of course if you have enough motivation, you can find sounds from almost anywhere on (or in) the planet too.

Hack a Day 28 May 06:00

This Creepy Skull Shows Time With Its Eyes

Sometimes you have an idea, and despite it not being the “right” time of year you put a creepy skull whose eyes tell the time and whose jaw clacks on the hour into a nice wooden box for your wife as a Christmas present. At least, if you’re reddit user [flyingalbatross1], you do!

The eyes are rotated using 360 degree servos, which makes rotating the eyes based on the time pretty easy. The servos are connected to rods that are epoxied to the spheres used as eyes. Some water slide iris decals are put on the eyes offset from center in order to point in the direction of the minutes/hours. An arduino with a real time clock module keeps track of the time and powers the servos.

Check out the video after the break:

The jaw opens and closes on the hours – springs are screwed to the inside of the jaw to the outside of the skull behind the bones that surround the eyes; they’re hidden when the skull is in its box. A third servo is used as a winch to pull the jaw open from the inside of the bottom of the chin. When it releases, the springs close the mouth and the clack of the teeth replaces an hourly chime.

A bit late (or early) for Halloween, but it’s a really fun project. [Flyingalbatross1] has made the arduino code available, as well as showing plenty of images of how the parts are put together. Take a look at this this atomic clock-in-a-skull, or you make your own talking skull for Halloween!

via Reddit

Hack a Day 02 Feb 06:00