Introduction
In the same manner as their MSP430 development board, Texas Instruments also have another LaunchPad board with their powerful Stellaris LM4F120H5QR microcontroller. It’s an incredibly powerful and well-featured MCU – which offers an 80 MHz, 32-bit ARM Cortex-M4 CPU with floating point, 256 Kbytes of 100,000 write-erase cycle FLASH and many peripherals such as 1MSPS ADCs, eight UARTs, four SPIs, four I2Cs, USB & up to 27 timers, some configurable up to 64-bits.
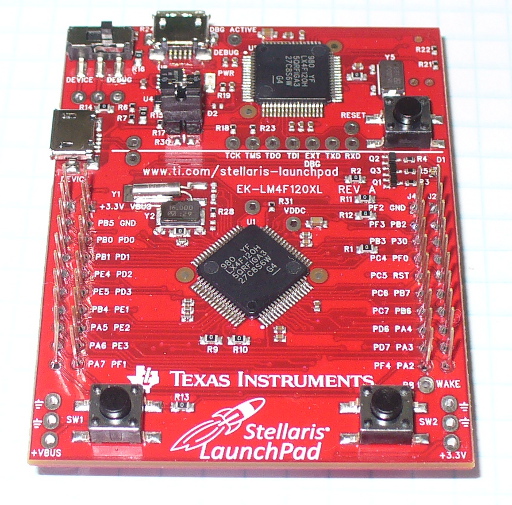
That’s a bucket of power, memory and I/O for not much money – you can get the LaunchPad board for around $15. This LaunchPad has the in-circuit debugger, two user buttons, an RGB LED and connectors for I/O and shield-like booster packs:
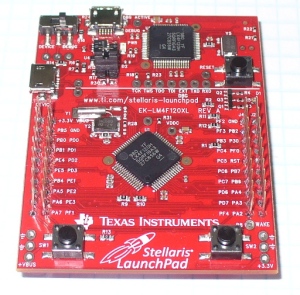 and the other side:
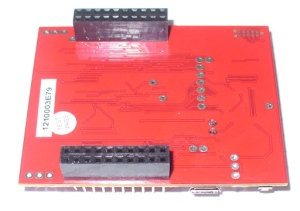
However the good news as far as we’re concerned is that you can now use it with the Energia Arduino-compatible IDE that we examined previously. Before rushing out to order your own Stellaris board, install Energia and examine the available functions and libraries to make sure you can run what you need. And if so, you’re set for some cheap Arduino power.
Installation
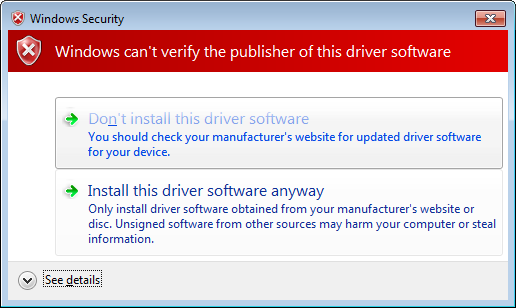
Installation is simple, just get your download from here. If you’re running Windows 7 – get the USB drivers from here. When you plug your LaunchPad into the USB for the first time, wait until after Windows attempts to install the drivers, then install drivers manually after download via Device manager … three times (JTAG, virtual serial port and DFU device). Use the debug USB socket (and set the switch to debug) when installing and uploading code. If you get the following warning from Windows, just click “Install this driver software anyway”:

Once the drivers are installed, plug in your LaunchPad, wait a moment – then run Energia. You can then select your board type and serial port just like the Arduino IDE. Then go ahead and upload the “blink” example…

Awesome – check out all that free memory space. In the same manner as the MSP430, there are some hardware<>sketch differences you need to be aware of. For example, how to refer to the I/O pins in Energia? A map has been provided for front:

… and back:

As you can imagine, the Stellaris MCUs are different to an AVR, so a lot of hardware-specific code doesn’t port over from the world of Arduino. One of the first things to remember is that the Stellaris is a 3.3V device. Code may or may not be interchangeable, so a little research will be needed to match up the I/O pins and rewrite the sketch accordingly. For example, instead of digital pins numbers, you use PX_Y – see the map above. So let’s say you want to run through the RGB LED… consider the following sketch:
int wait = 500;
void setup()
{
 // initialize the digital pin as an output.
 pinMode(PF_1, OUTPUT); // red
 pinMode(PF_3, OUTPUT); // green
 pinMode(PF_2, OUTPUT); // blue
}
void loop()
{
 digitalWrite(PF_1, HIGH);
 delay(wait);
 digitalWrite(PF_1, LOW);
 digitalWrite(PF_3, HIGH);
 delay(wait);
 digitalWrite(PF_3, LOW);
 digitalWrite(PF_2, HIGH);
 delay(wait);
 digitalWrite(PF_2, LOW);
}
Which simply blinks the red, green and blue LED elements in series. Using digital inputs is in the same vein, and again the buttons are wired so when pressed they go LOW. An example of this in the following sketch:
void setup()
{
 // initialize the digital pins
 pinMode(PF_1, OUTPUT); // red
 pinMode(PF_3, OUTPUT); // green
 pinMode(PF_2, OUTPUT); // blue

 pinMode(PF_4, INPUT_PULLUP); // left - note _PULLUP
 pinMode(PF_0, INPUT_PULLUP); // right - note _PULLUP
}
void blinkfast()
{
 for (int i=0; i<10; i++)
 {
 digitalWrite(PF_1, HIGH);
 delay(250);
 digitalWrite(PF_1, LOW);
 digitalWrite(PF_3, HIGH);
 delay(250);
 digitalWrite(PF_3, LOW);
 digitalWrite(PF_2, HIGH);
 delay(250);
 digitalWrite(PF_2, LOW);
 }
}
void blinkslow()
{
 for (int i=0; i<5; i++)
 {
 digitalWrite(PF_1, HIGH);
 delay(1000);
 digitalWrite(PF_1, LOW);
 digitalWrite(PF_3, HIGH);
 delay(1000);
 digitalWrite(PF_3, LOW);
 digitalWrite(PF_2, HIGH);
 delay(1000);
 digitalWrite(PF_2, LOW);
 }
}
void loop()
{
 if (digitalRead(PF_4)==LOW) { blinkslow(); }
 if (digitalRead(PF_0)==LOW) { blinkfast(); }
}
And for the non-believers:
Where to from here?
Sometimes you can be platform agnostic, and just pick something that does what you want with the minimum of time and budget. Or to put it another way, if you need a fast CPU and plenty of space but couldn’t be bothered don’t have time to work with Keil, Code Composer Studio, IAR etc – the Energia/Stellaris combination could solve your problem. There’s a growing Energia/Stellaris forum, and libraries can be found here. At the time of writing we found an I2C library as well.
However to take full advantage of the board, consider going back to the TI tools and move forward with them. You can go further with the tutorials and CCS etc from Texas Instruments own pages.
In the meanwhile have fun and keep checking into tronixstuff.com. Why not follow things on twitter, Google+, subscribe for email updates or RSS using the links on the right-hand column? And join our friendly Google Group – dedicated to the projects and related items on this website. Sign up – it’s free, helpful to each other – and we can all learn something.
The post Exploring the TI Stellaris platform with Energia Arduino-compatible IDE appeared first on tronixstuff.