Posts with «arduino» label

LoRa made easy: Connect your devices to the Arduino IoT Cloud
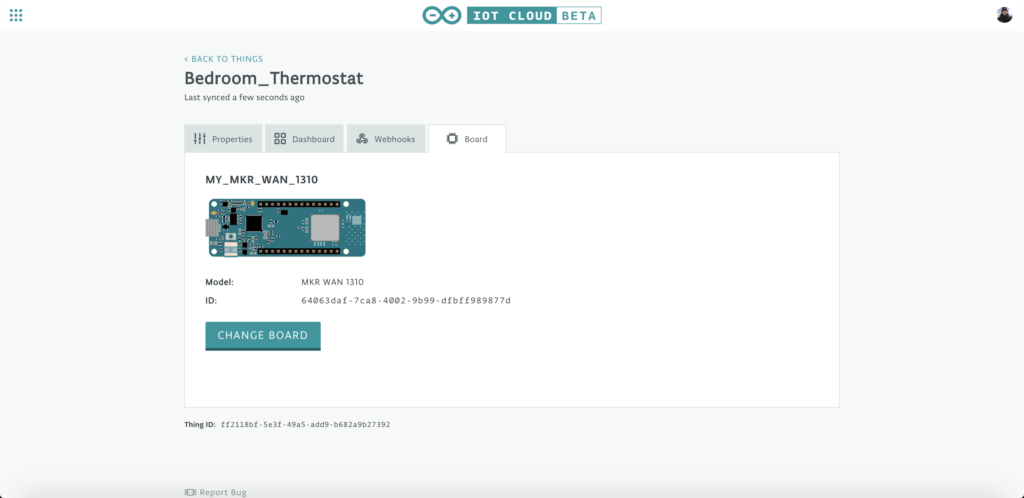
An important new feature is now available in the Arduino IoT Cloud — full support for LoRa® devices!

LoRa® is one of our favorite emerging technologies for IoT because it enables long-range and low power transmission of data without using cellular or WiFi connections. It’s a very powerful and promising technology but it comes with its own complexity. In our pursuit to make IoT easier, we’ve already released a few products that enable anyone to build a LoRa® device (or a fleet of LoRa® devices!). Thanks to the Arduino MKR WAN 1310 board, combined with the Arduino Pro Gateway you can create your own LoRaWAN network. But we have decided to do more than that, and it’s time to release one more important piece….
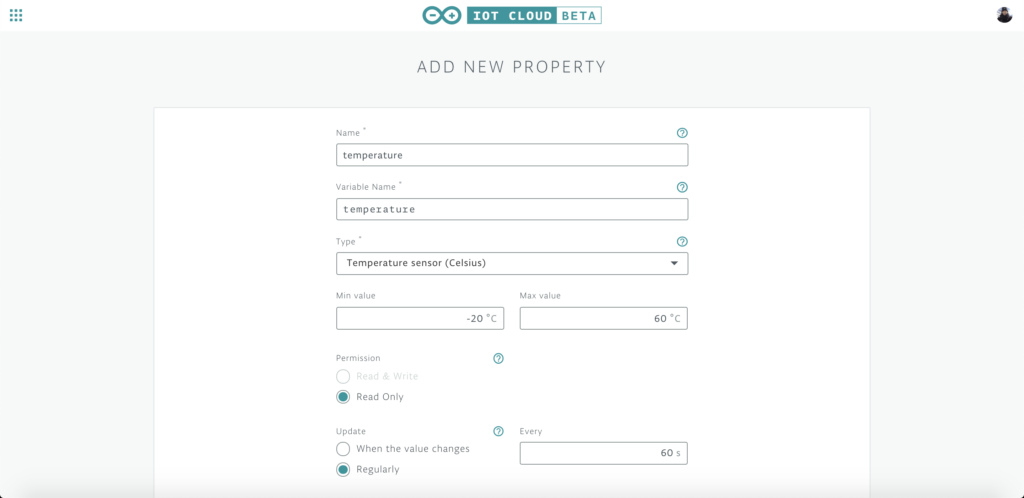
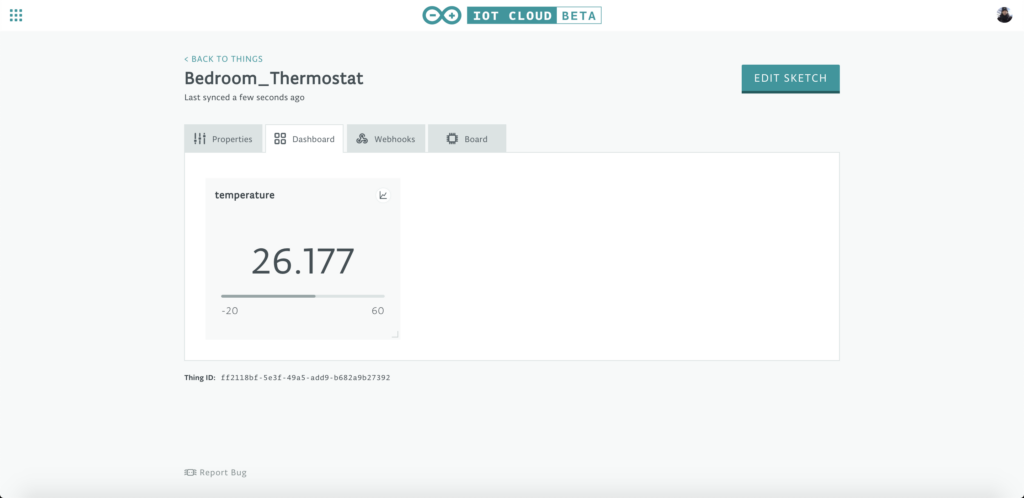
The  Arduino IoT Cloud now provides an incredibly easy way to collect data sent by your LoRa® devices. With a few clicks, the IoT Cloud will generate a sketch template for the boards that you can adapt to read data from your sensors, pre-process it as you want, and then send it to the IoT Cloud. With a few more clicks (no coding required), you’ll be able to create a graphical dashboard that displays the collected data in real-time and lets users see their history through charts and other widgets. You will not need to worry about coding your own compression, serialization and queueing algorithm, as it will all be done under the hood in a smart way — you’ll be able to transmit multiple properties (more than five), pushing the boundary beyond the packet size limits of LoRaWAN

This is our take on edge computing – you program the device to collect and prepare your data locally, and then we take care of shipping such data to a centralized place.
Such a simplified tool for data collection is already quite innovative, but we decided to take it an important step further. All the available solutions for LoRa® currently focus on collecting data, but they do not address it from the other way round i.e. sending data from a centralized application to the LoRa® device(s). Arduino IoT Cloud now lets you do this — you’ll be able to control actuators connected to your device by sending messages via LoRa®, with no coding needed.

Build and control your own LoRaWAN network with Arduino IoT Cloud, the Pro Gateway and the new improved MKR WAN 1310 board that features the latest low-power architecture to extend the battery life and enable the power consumption to go as low as 104uA.
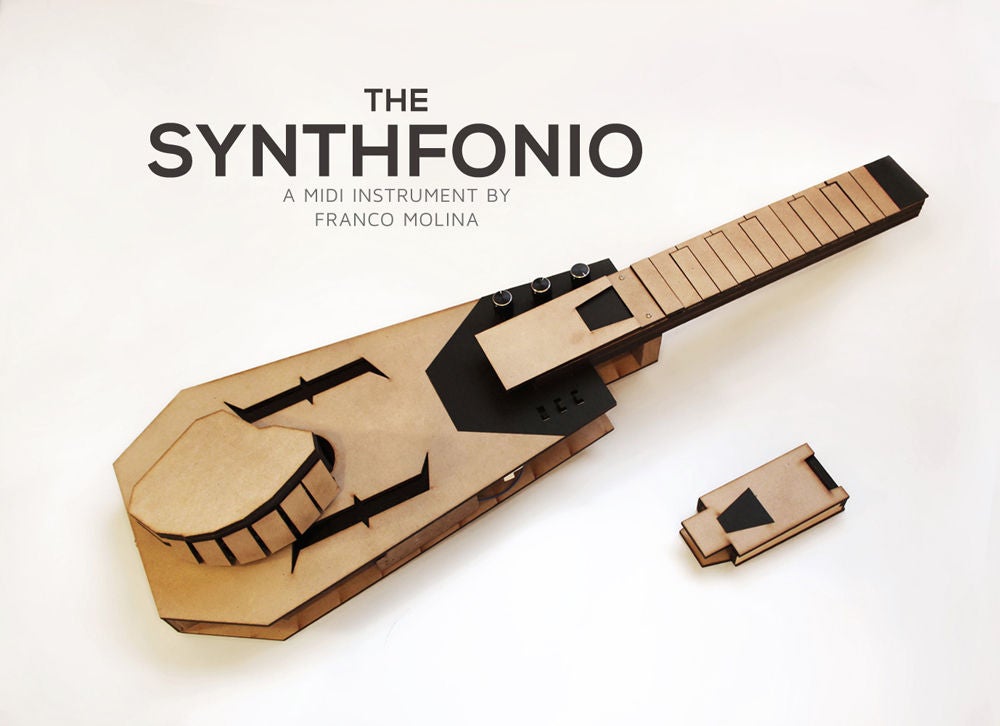
The Synthfonio is a guitar-shaped MIDI instrument

Learning to play an an instrument well takes a lot of time, which many people don’t have. To address this, Franco Molina — who enjoys MIDI controllers and writing music, but describes himself as being terrible at playing the keyboard — created the Synthfonio.

Molina’s DIY device is vaguely reminiscent of a guitar, with a series of keys on the neck that indicate the chords and key signatures, and another set roughly positioned where you’d strum a guitar to play the notes.

The Synthfonio is assembled from laser-cut MDF sections, and utilizes a MKR WiFi 1010 to take care of I/O and MIDI functions. A second microcontroller in the form of an ATmega328 on a breadboard is used to produce actual synth sounds, though most Arduinos would be suitable either function.

The Synthfonio features 2 sets of keys, one to define chords and key signatures, and another one to actually play the notes. Whatever chord is pressed in the instruments neck keys, will define the pitch of the keys on the instrument handle. Similar to a guitar, violin, and other string instruments; with the added advance that the Synthfonio is a smart device that can deduce the chords being played from a single set of notes. This way, for example, the musician can use the handle keys to play chords, melodies, and arpeggios in the key of A, just by pressing the A key on the neck. In the same way, pressing the A key on the neck in conjunction with the C key (minor third of A) will activate an A minor tonality for the handle keys.

This can allow any player to execute a 4-chord melody, accompaniment, or even improvisation; with no more than one or two fingers in position.

Arduino Blog 30 Jan 20:21

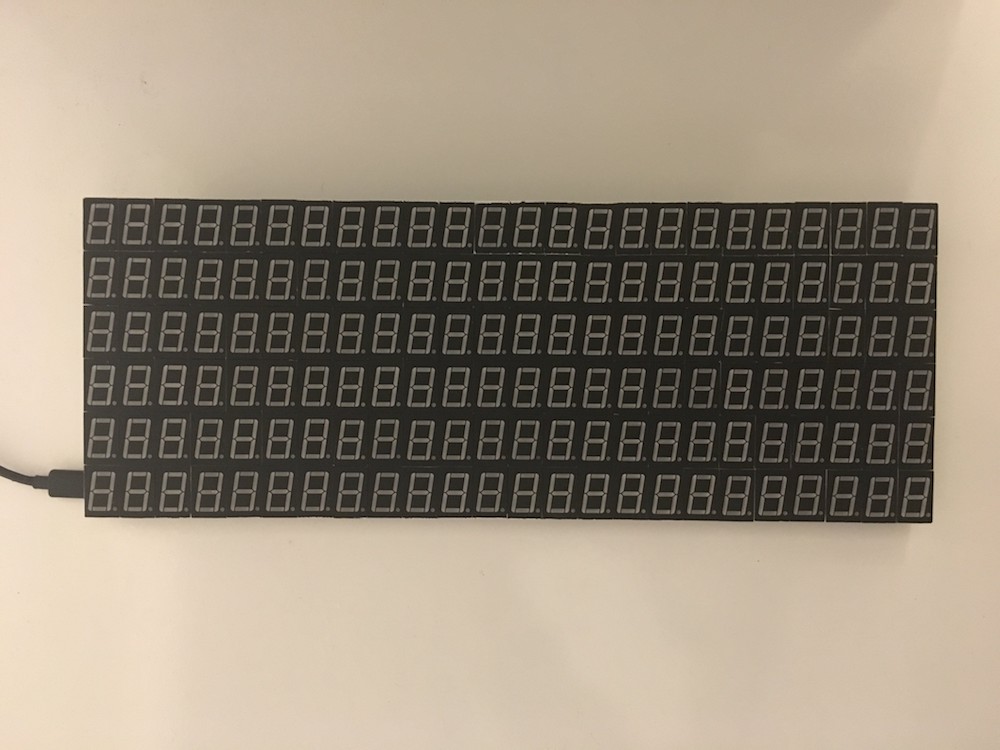
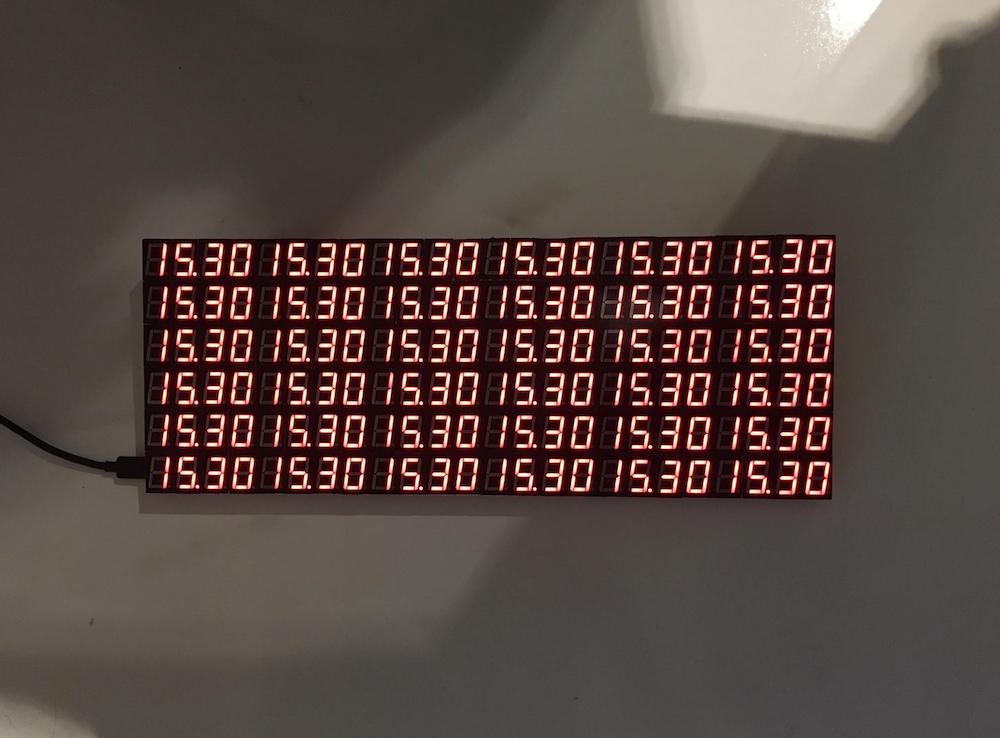
144 7-segment displays make up this delightful digital clock

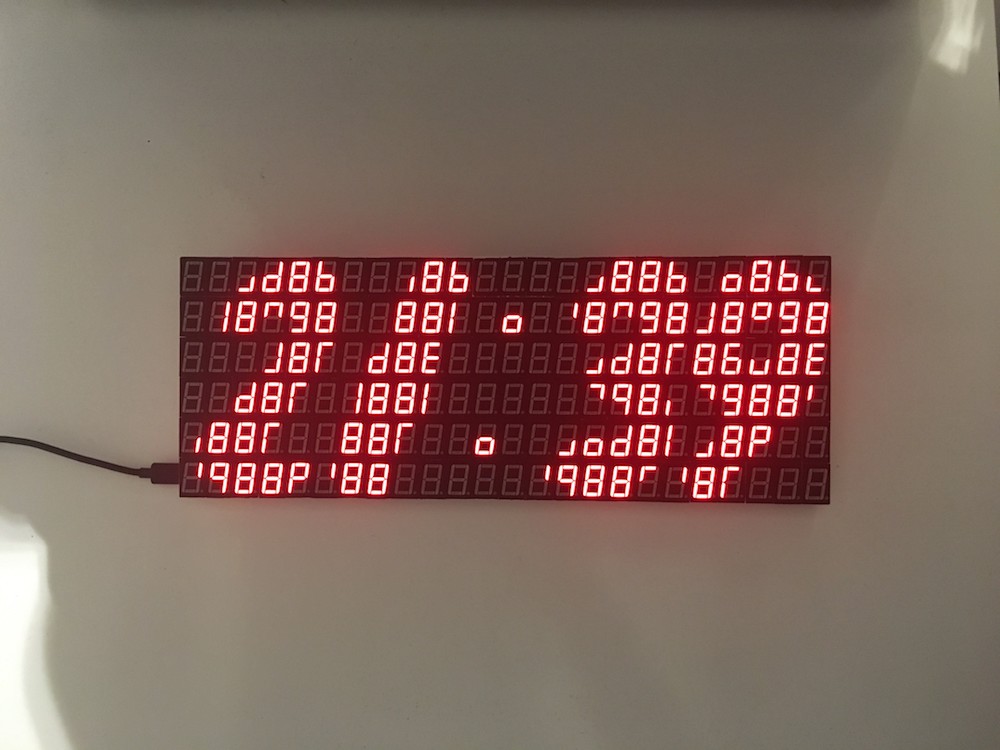
Using 7-segment displays to make a clock is nothing new, but what if you combined 144 of them together to create an epic LED timepiece? That’s exactly how this project was made, allowing it to show surprisingly smooth mega-numbers and a colon set at an angle.

The build itself is controlled by an Arduino Nano, along with an RTC module for timekeeping and 18 MAX7219 drivers to activate over a thousand (1,008) individual segments. 

One could see this used for a variety of purposes, perhaps as a scoreboard for sporting events, a scrolling display, or even as 36 little clocks, which can actually be seen below.

Give your memory a boost with Newrons

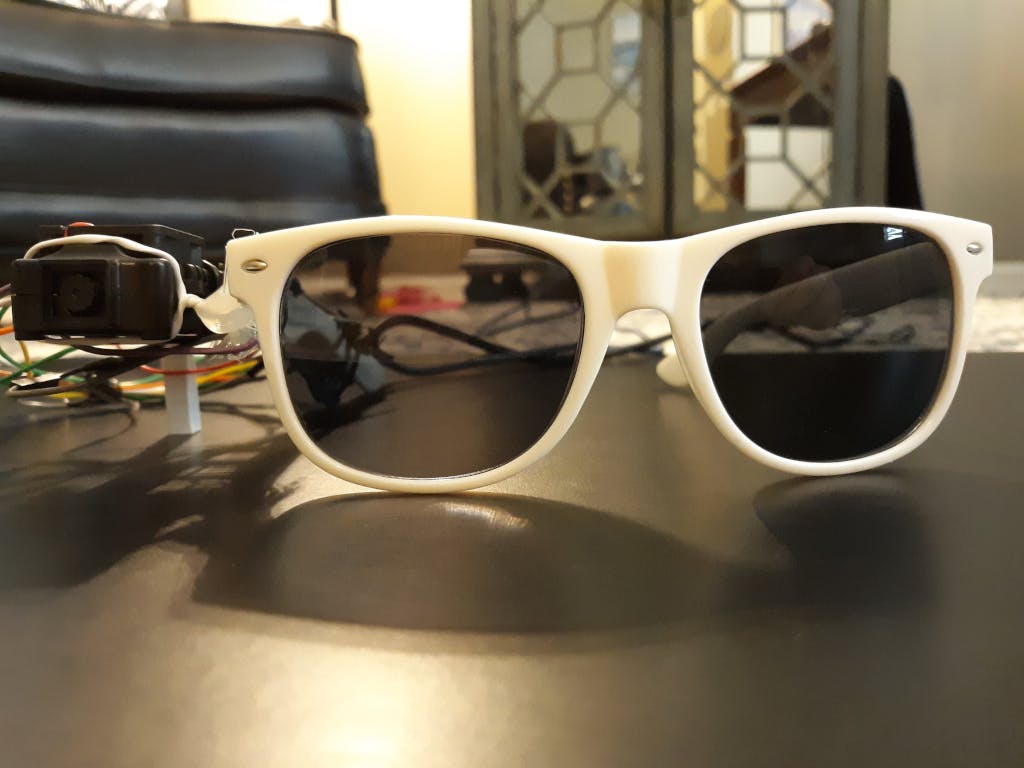
When you get a notification on your smartphone, more often than not, you’re doing something more pressing. You then silence the alarm, and perhaps forget about it. Nick Bild, however, has created a pair of smart glasses that take a new “look” at things by instead giving you a notification when you’re staring at an appropriate item.

For instance, as demonstrated in the demo below, if your calendar says to “Go for a walk,” the Newrons would light up when you’re glancing at a pair of sneakers.

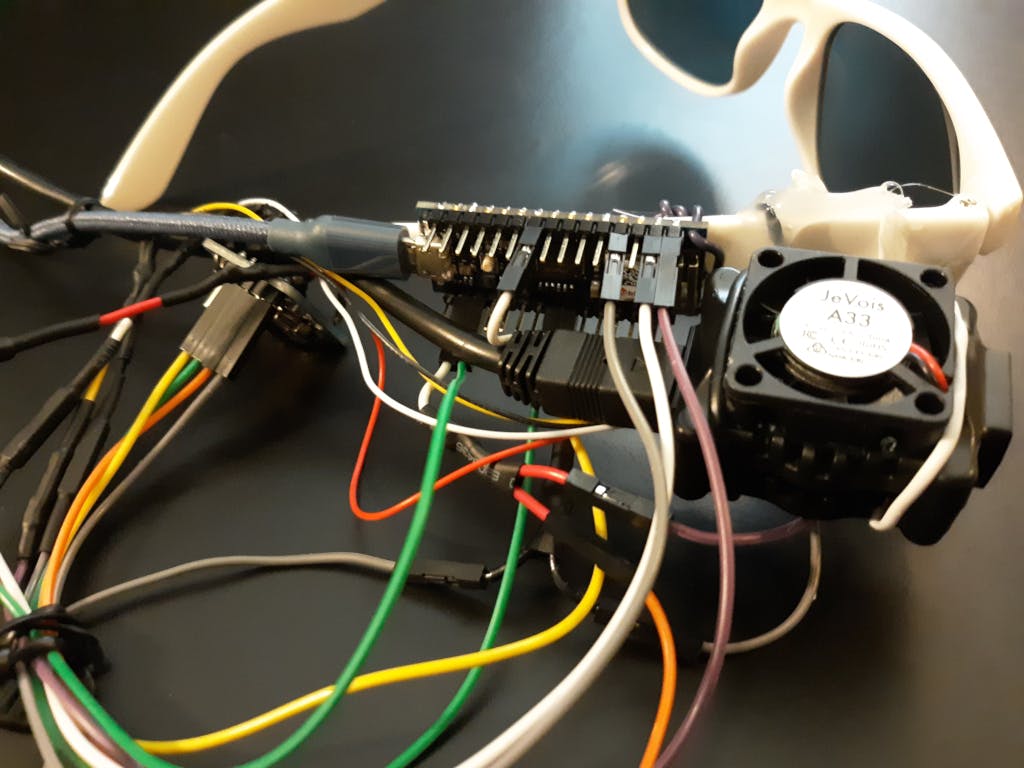
The prototype is controlled by an Arduino Nano 33 IoT, which connects to the Google Calendar API over WiFi to view your schedule. Object recognition is taken care of with a JeVois A33 machine vision camera and notifications are shown on an LED.

More details can be found in Bild’s write-up here

“The Arduino lie detector determined that was a lie”

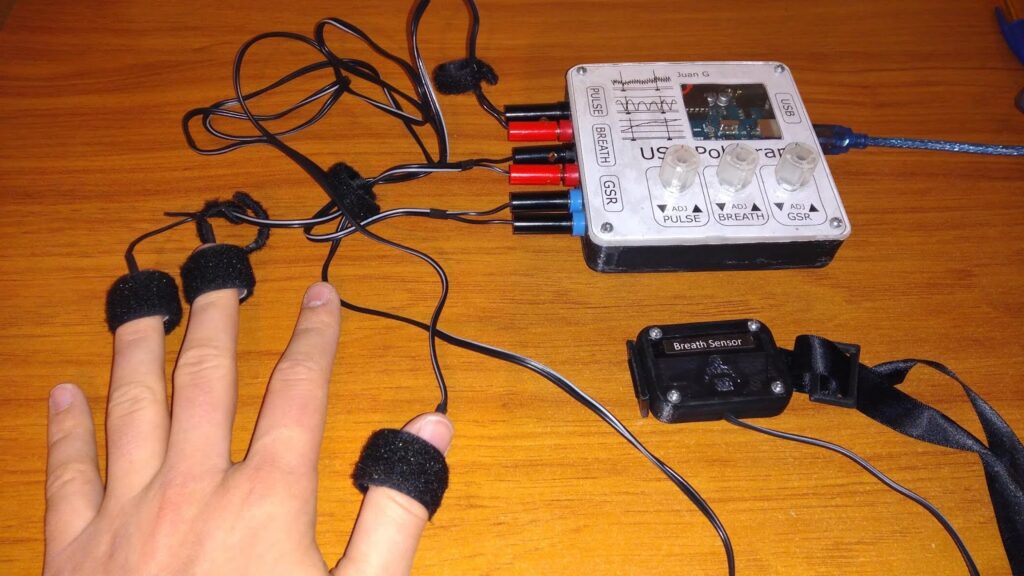
Want to know if someone is telling you the truth? Well, unfortunately Juan Gg’s “USB Polygraph” isn’t a professional product and won’t actually give you an answer. However, it is a neat exploration into biometrics that incorporates Arduino, some sensors, and data visualization.

The DIY lie detector does measure one’s galvanic skin response, pulse, and breathing, so it’s an interesting way to observe “suspects” when questioned. Perhaps one could even use it to monitor a person’s vitals when performing various physical activities.

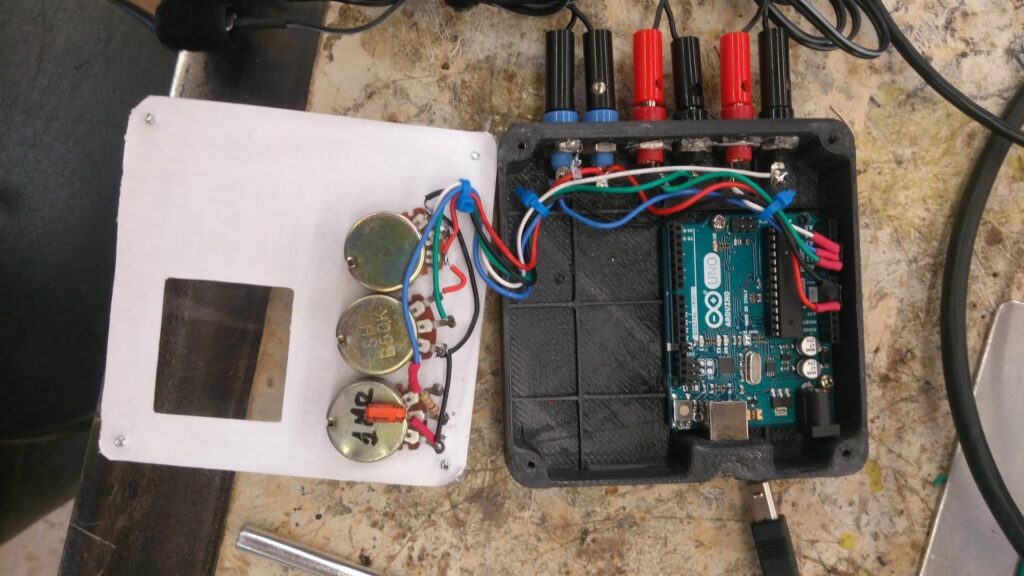
The device collects sensor readings via an Arduino Uno. These are then passed along to a nearby computer over serial, which graphs everything using a custom Python program. 

If you’d like to make your own, code and mechanical files are available on GitHub!

This is a USB Polygraph, which I designed and built as a classroom project on June 2018. The hardware side is pretty simple, an Arduino UNO collects data from some sensors and sends it via serial. On the computer, a Python program takes that data and not only graphs it, but it also allows the user to save it, manages questions and adds question and answer markers to the graphs so results can later be inspected. All results are saved in .txt files.

Arduino Blog 28 Jan 15:30

Prototype room-scale, shape-changing interfaces with LiftTiles

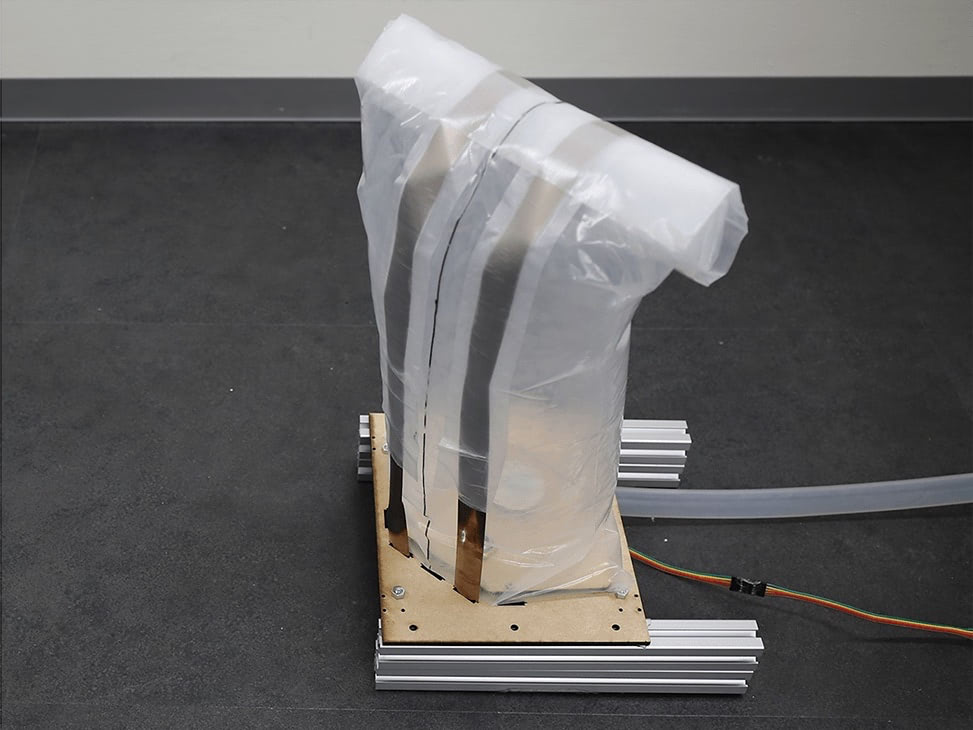
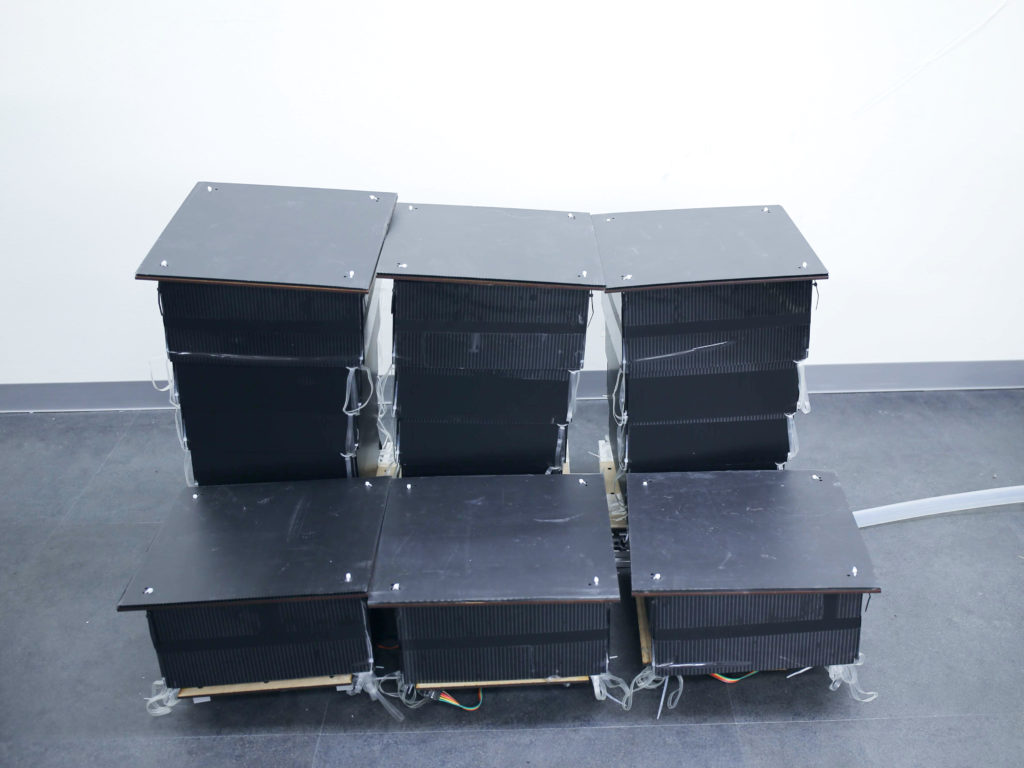
Shape-shifting interfaces, which could be deployed to create dynamic furniture, structures or VR environments, have great potential; however, creating them is often quite difficult. To simplify things, researchers from the University of Colorado Boulder have developed “LiftTiles,” modular blocks that raise to the desired height (between 15 and 150 centimeters) via air pressure and then collapse under spring force when needed.

Each pneumatic tile costs under $10 USD, weighs only 10kg each, and supports up to 10kg of weight. To demonstrate their design, the team used solenoid valves to inflate blocks and servo motors to open release valves that allow the blocks deflate and compress. 

The system is based on an Arduino Mega board, along with an SR300 depth camera to measure the height of each section and client software running on a control computer. 

More details can be found in the project’s research paper.

Sequino Tells Time In The Most Satisfying Way: Sequins

You know you’ve done it. You’re walking through the store and you see those pillows covered in sequins that change color depending on which way you lay them. You swipe your fingers across the surface, for a letter, or maybe a simple drawing. Then comes the satisfying part, you swipe […]

Read more on MAKE

The post Sequino Tells Time In The Most Satisfying Way: Sequins appeared first on Make: DIY Projects and Ideas for Makers.

Turning a Tic Tac box into a portable magnetometer

If you want a way to measure magnetic fields on the go, then look no further than this tiny device from Instructables user “rgco.”

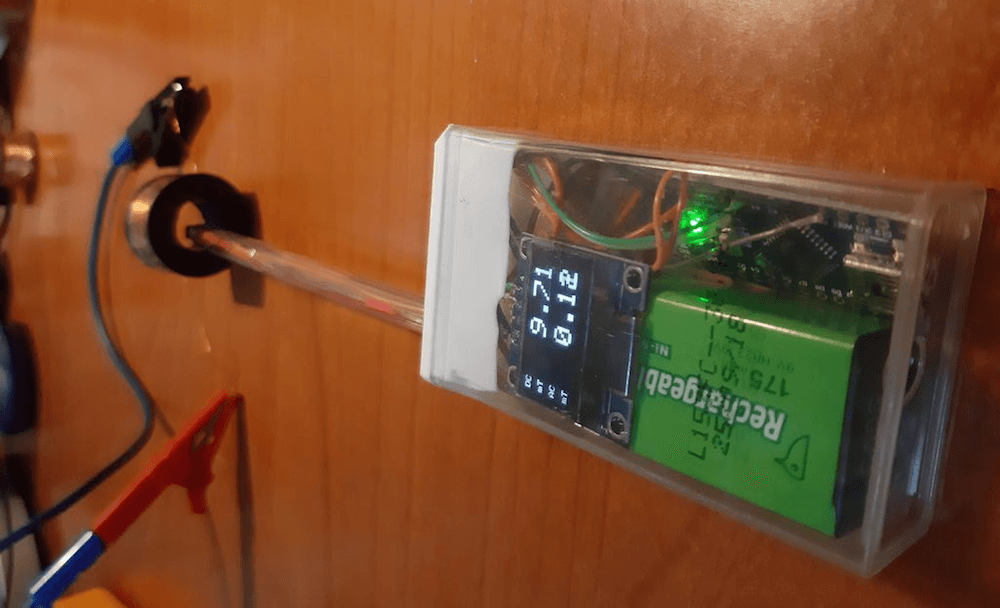
The portable magnetometer was made using just a couple of common parts, including an SS49E linear Hall effect sensor, an Arduino Nano, a 0.96” OLED screen, and a push button.

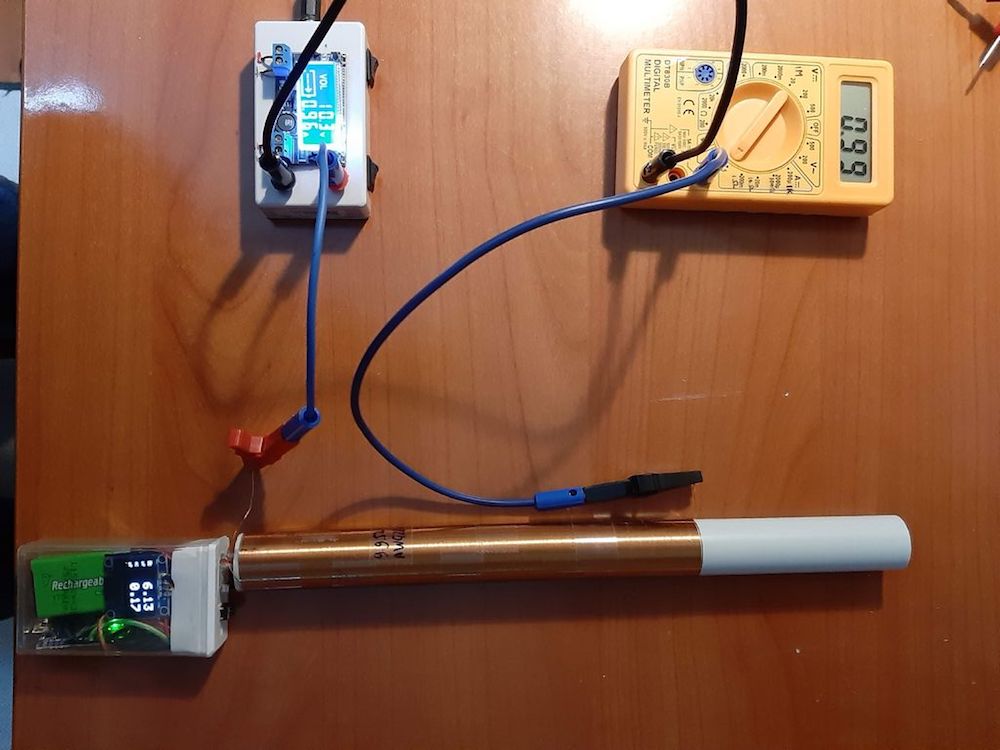
All the electronics are concealed inside a Tic Tac box, which holds the components together and provides a window for the display. The SS49E itself is isolated from the rest of the unit via a ballpoint pen tube, which allows it to be placed in narrow openings without interference. 

For increased accuracy, the sensor was calibrated using a cylindrical electromagnet, and the project was prototyped using an Uno before being stuffed into its rather small enclosure.

An Arduino-powered dice generator

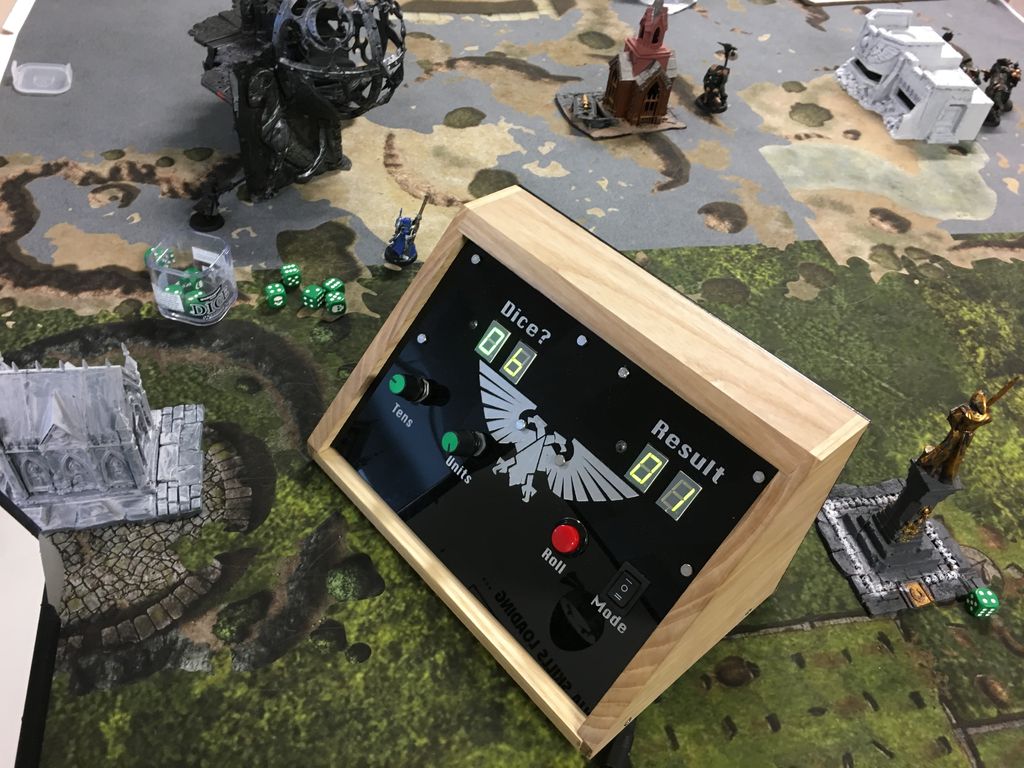
Board games can be fun, but what happens when you need more than six, 12, or even 20 possibilities to decide your character’s fate? One could of course use several dice, or an online simulator, but creator “Rehaan33” built something much more elegant in the form of a dedicated dice terminal.

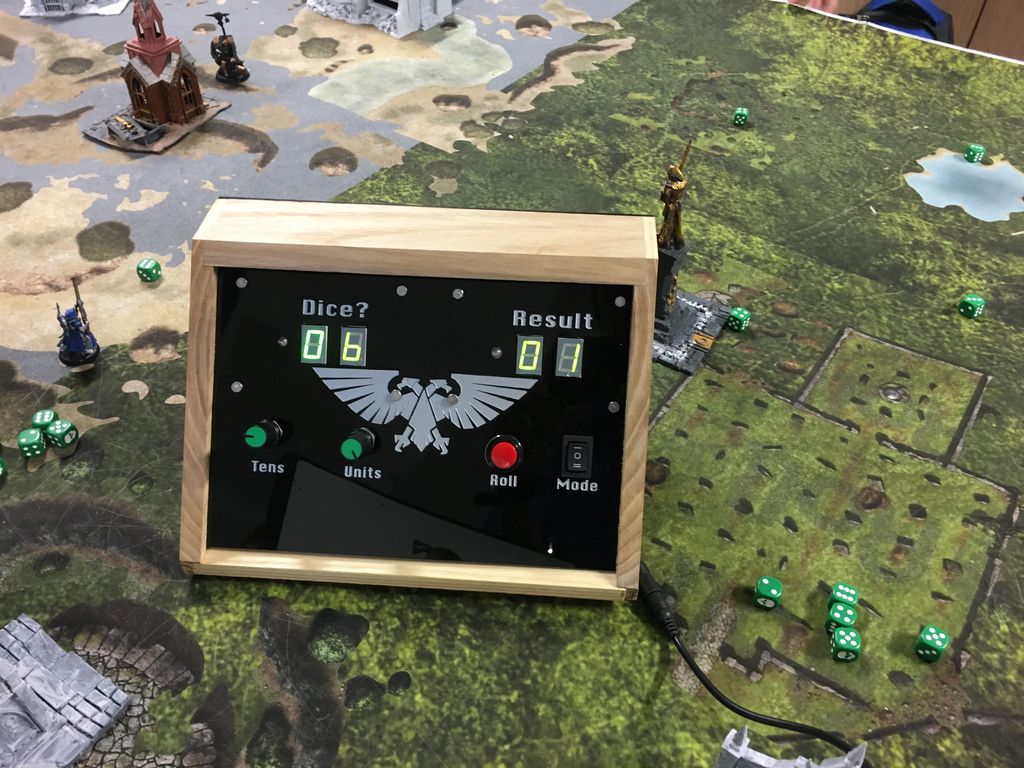
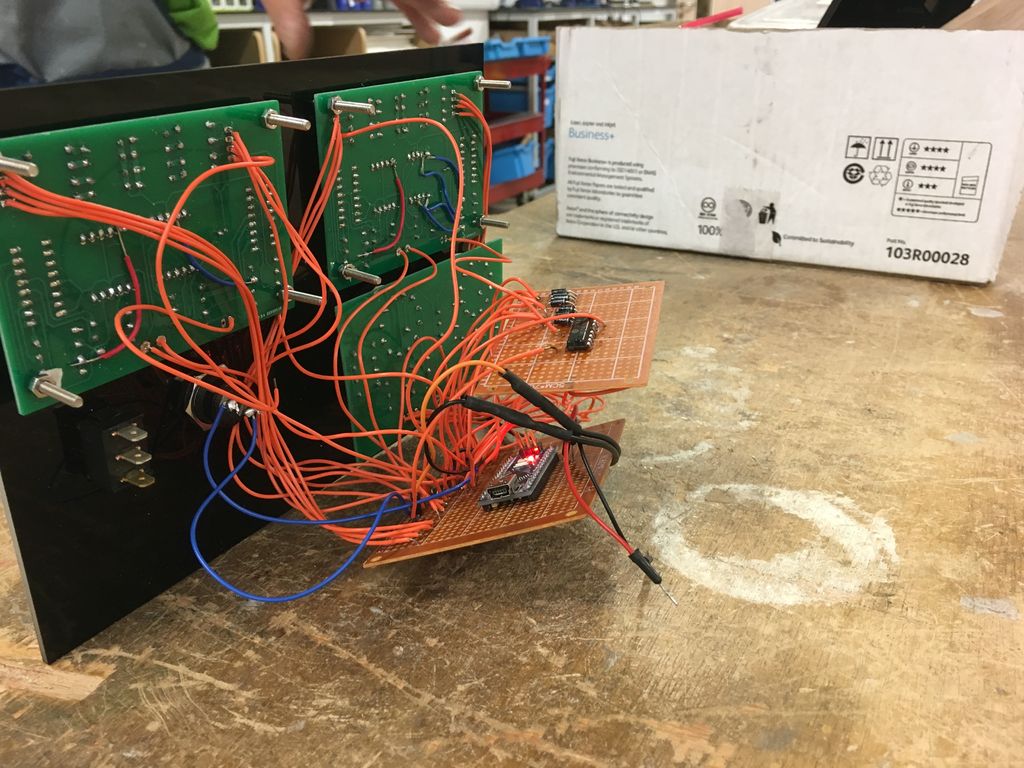
This device takes user input from a pair of rotary switches to the dice high limit, then uses an Arduino Nano to generate a random value when its “roll” button is pressed. Limit and result values are shown on their own seven-segment LED displays. 

The enclosure for the unit is beautifully constructed out of ash wood and black acrylic, which should fit in nicely with a variety of games, including Warhammer 40,000 for which it was designed.

Arduino Blog 22 Jan 19:15

P-51 Cockpit Recreated with Help of Local Makerspace

It’s surprisingly easy to misjudge tips that come into the Hackaday tip line. After filtering out the omnipresent spam, a quick scan of tip titles will often form a quick impression that turns out to be completely wrong. Such was the case with a recent tip that seemed from the subject line to be a flight simulator cockpit. The mental picture I had was of a model cockpit hooked to Flight Simulator or some other off-the-shelf flying game, many of which we’ve seen over the years.

I couldn’t have been more wrong about the project that Grant Hobbs undertook. His cockpit simulator turned out to be so much more than what I thought, and after trading a few emails with him to get all the details, I felt like I had to share the series of hacks that led to the short video below and the story about how he somehow managed to build the set despite having no previous experience with the usual tools of the trade.

A Novel and a Film

Grant has been making short films for a while, mainly in collaboration with John Dwyer, an author of historical novels. Grant’s shorts are used as promos for John’s books, and nicely capture the period and settings of John’s novels. Most of these films required little in the way of special sets, relying instead on stock footage and vintage costumes to achieve their look and feel. John’s latest novel would change all that.

Called Mustang, the novel centers on a hotshot fighter pilot in WWII. Grant’s vision for the short to promote the book was inspired by the recent Christopher Nolan film Dunkirk, which featured intricate sequences filmed in the cockpit of a Spitfire. Granted wanted a similar look, and began arranging to use a real P-51 Mustang for filming. That presented immediate problems. First, there aren’t that many of the vintage aircraft left, and those that are still flying usually have anachronistic instruments in the cockpit, like GPS. Also, Grant wanted the instruments to respond as if the plane were airborne, and to have the shadows cast by the canopy into the cockpit suggest aerial maneuvers. Such an effect would be difficult to achieve with a plane stuck on a runway.

That’s when Grant realized that a gimballed cockpit simulator was needed. It could have a period-accurate dashboard, be positioned outdoors to take advantage of natural daylight and real backgrounds rather than CGI, and could be pitched, rolled and yawed to simulate flight. It would be perfect, and it would save the project. There was just one problem: he had no idea how to build it.

Helping Hands

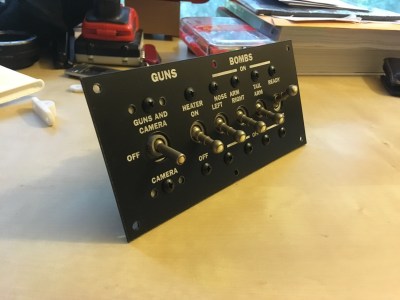
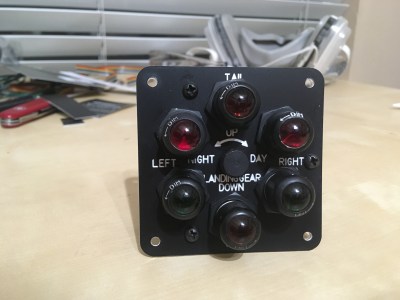
Wisely, Grant turned to his local hackerspace, Dallas Maker Space, for help. There he found not only the tools he lacked, but kindred spirits with the necessary skills and the willingness to share them. They started working on the cockpit instrument panel, which ended up including a combination of actual flight hardware and mocked-up instruments. The fake instruments used steppers and an Arduino to drive the needles, which were controlled by a custom iPad app that was used to animate them live during filming. The real instruments, like the artificial horizon and turn-and-slip indicator, were powered by a vacuum pump and responded to the movements of the simulator on its gimbals.

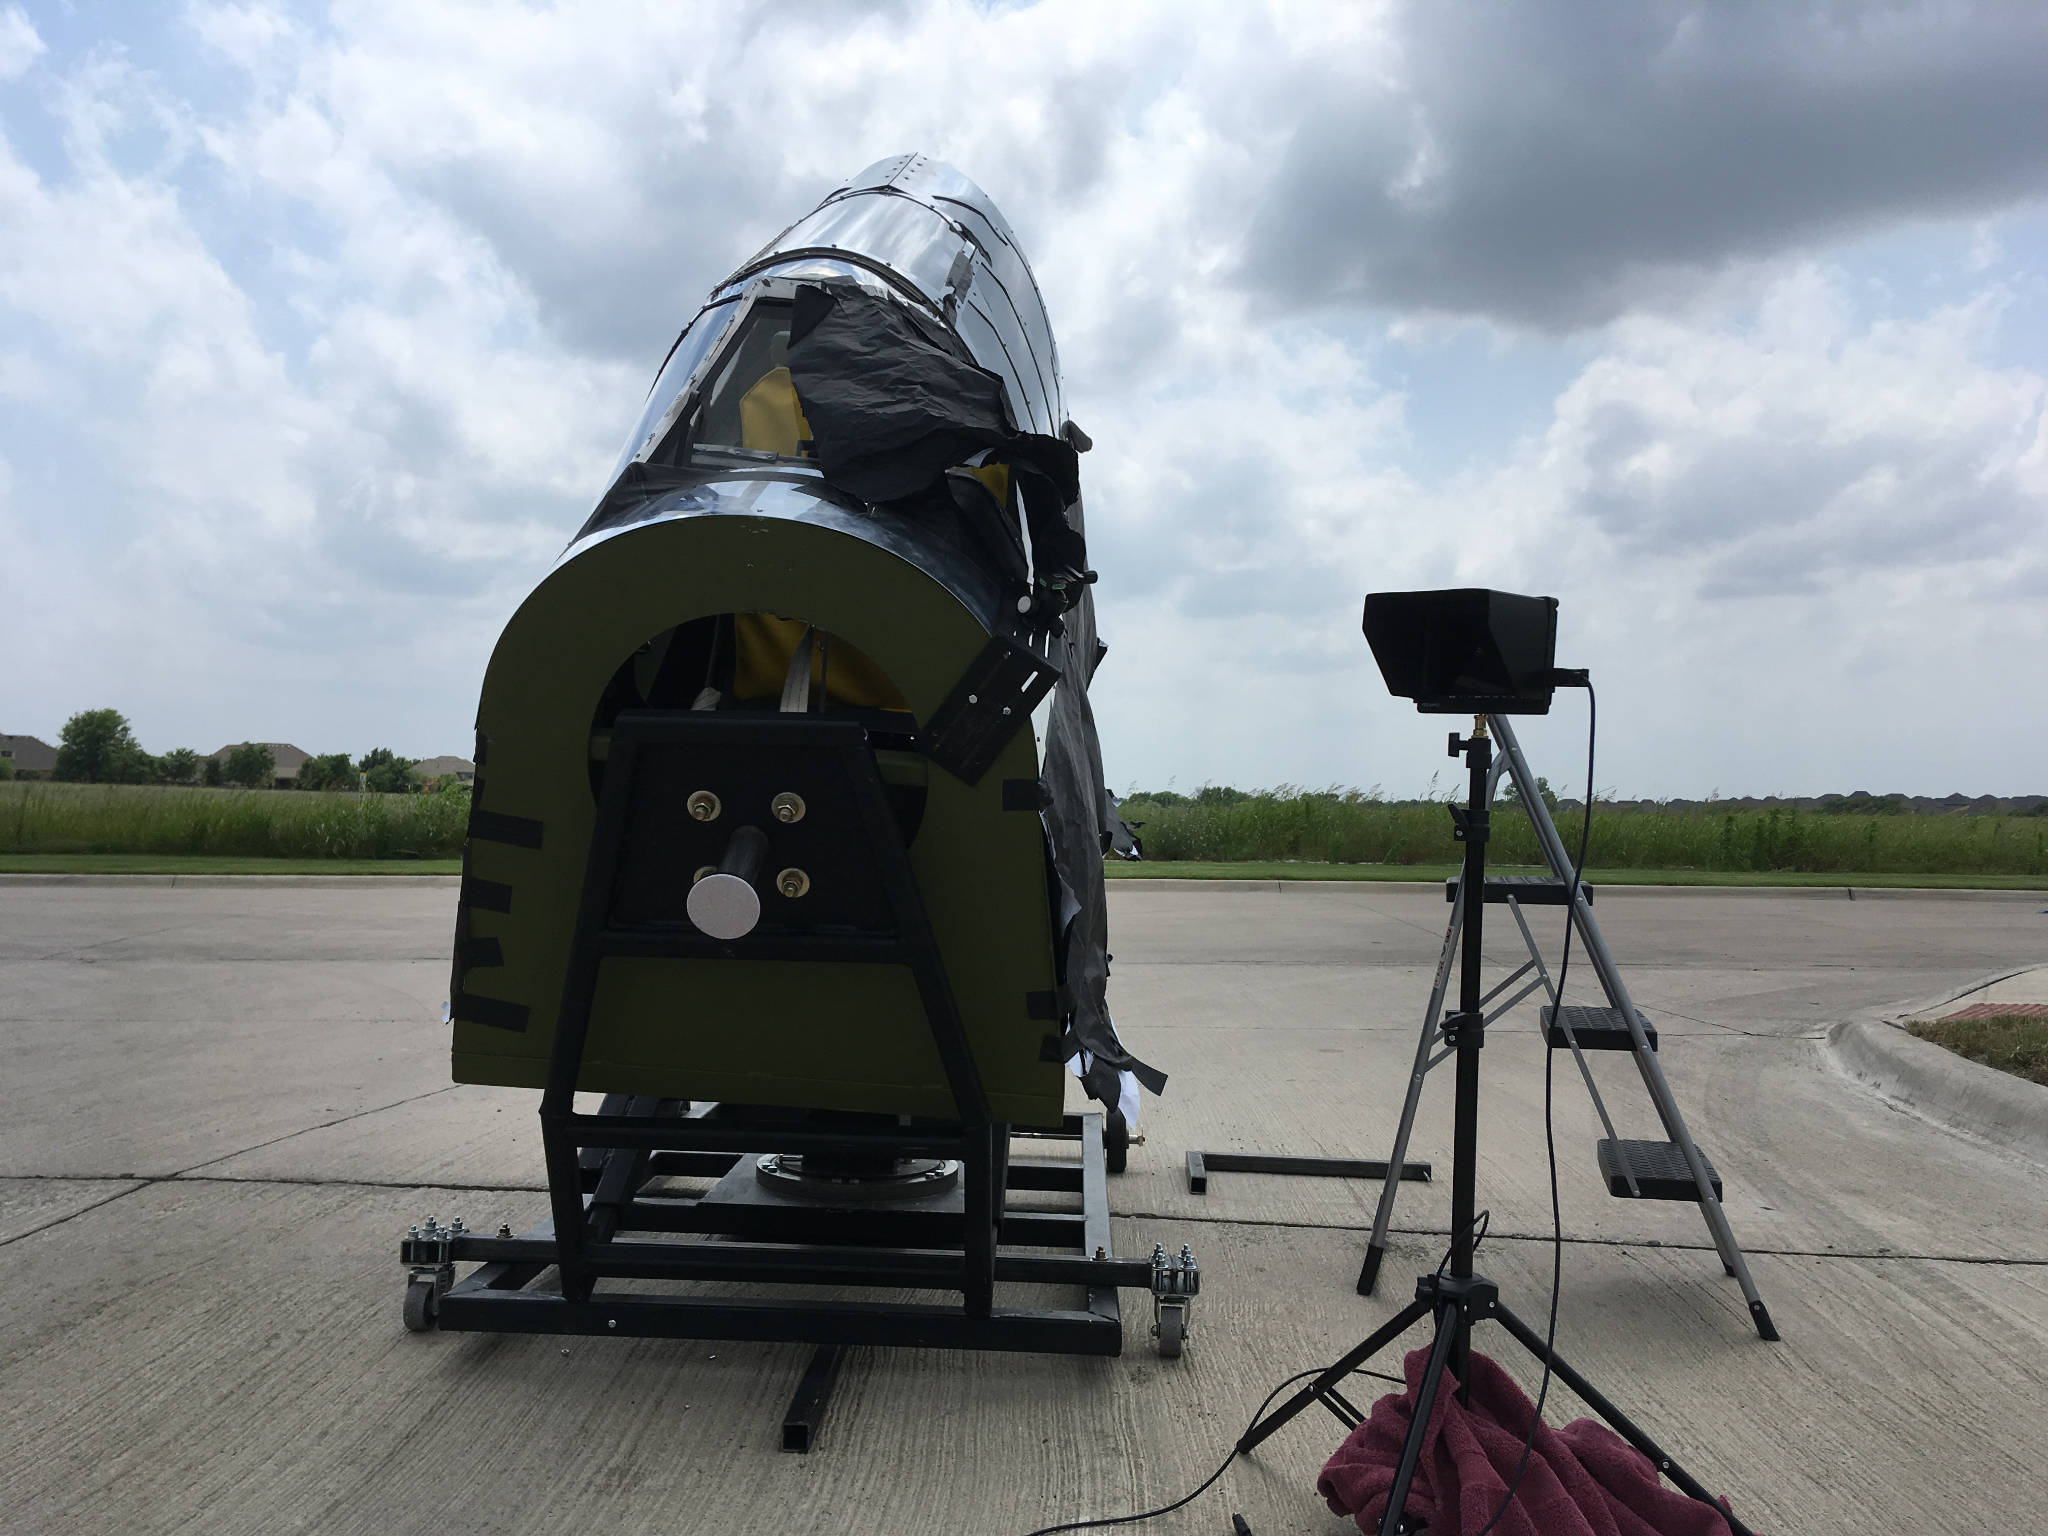
The gimballed cockpit set for exterior shots. The wide horizon and natural lighting combined with the 3-DOF gimbal make for a very realistic effect.

Mounting this convincing panel into something was an entirely different undertaking. Grant relied heavily on the experience of DMS members to design a structure strong enough to support the actor and allow for the motion needed to create a convincing effect. The cockpit mockup, made from plasma-cut sheet metal and plywood, is mounted to a heavy-duty three-axis gimbal, including a massive bearing from a pallet jack for the yaw axis.

Set and talent, ready for action.

Grant had originally planned to place the mockup on a mountaintop for shooting, much as the Spitfire mockup from Dunkirk was placed on the edge of a cliff to give an unobstructed horizon to simulate flying over the English Channel. When that proved logistically challenging, he set up on an airport runway and used clever camera blocking to avoid shooting the horizon. Grips manually moved the simulator while Grant manipulated the fake instruments and filmed the results, which I think speak for themselves. If only the budget – and on-set safety – would have supported simulating the massive four-blade Mustang propeller, the illusion would have been complete.

I really enjoyed digging into this project and all the hacks that it entailed. Movie magic is as much about hacking as anything else, at least behind the cameras, and it’s good to see what’s possible with a limited budget. We recently featured a low-budget but high-style sci-fi movie set build, and we’ve gone in-depth with a playback designer for the Netflix series Lost in Space, both in these pages and as a Hack Chat.