Posts with «arduino» label

Espresso Machine Now Powers Plants

This thing has what plants crave! No, not electrolytes exactly — just water, light, and moisture polling every 30 minutes. We think it’s fitting to take something that once manufactured liquid liveliness for humans and turn it into a smart garden that does the same thing for plants.

So let’s just get this out of the way: the espresso machine was abandoned because it was leaking water from a gasket. [The Plant Bot] cleaned it up, replaced the gasket, and got it brewing, and then it started leaking hot water again from the same gasket. We might have gone Office Space on this beautiful machine at that point, but not [The Plant Bot].

Down in the dirt, there’s a soil moisture sensor that’s polling every 30 minutes. If the moisture level falls below the threshold set appropriately at a life-sustaining 42%, the Arduino is triggered to water the plant through a relay board using the espresso machine’s original pump. If the plant is dry, the machine will pump water for two seconds every minute until the threshold is met. [The Plant Bot] tied it all together with a nice web interface that shows plant data and allows for changes over Bluetooth.

[The Plant Bot] started by disconnecting the heating element, because plants don’t tend to like hot steam. But if the cup warming tray along the top has a separate heating element, it might be neat to reuse it for something like growing mushrooms, or maintaining a sourdough starter if the temperature is right.

Via r/duino

Duel Disk System blends physical cards with a virtual playfield

Yu-Gi-Oh! and other similar card games can be quite popular, but actually finding a group to play with can be challenging. Online games, on the other hand, have their advantages yet render your deck pretty much useless. As a way to combine these two worlds, Augusto Masetti has created a prototype Dual Disk System that will allow you to play with real cards in a virtual playfield.

To play, participants attach NFC stickers inside a card sleeve, which are scanned by an NFC reader controlled by an Arduino Uno. The card ID is then compared to the YGOProDeck API database via a computer, giving players a tactile element to this virtual competition.

Masetti’s project is still a work in progress, though we can’t wait to see the final version!

Arduino Blog 21 Feb 21:59

Counter-Strike Gets the RGB LED Treatment

Inspired by the over-the-top stage lighting and pyrotechnics used during e-sport events, [Hans Peter] set out to develop a scaled-down version (minus the flames) for his personal Counter-Strike: Global Offensive sessions. It might seem like pulling something like this off would involve hacking the game engine, but as it turns out, Valve was kind enough to implement a game state API that made it relatively easy.

According to the documentation, the CS:GO client can be configured to send out state information to a HTTP server at regular intervals. It even provided example code for implementing a simple state server in Node.js, which [Hans] adapted for this project by adding some conditional statements that analyze the status of the current game.

These functions fire off serial commands to the attached Arduino, which in turn controls the WS2812B LEDs. The Arduino code takes the information provided by the HTTP server and breaks that down into various lighting routines for different conditions such as wins and losses. But things really kick into gear when a bomb is active.

[Hans] wanted to synchronize the flashing LEDs with the beeping sound the bomb makes in the game, but the API doesn’t provide granular enough data. So he recorded the audio of the bomb arming sequence, used Audacity to precisely time the beeps, and implemented the sequence in his Arduino code. In the video after the break you can see that the synchronization isn’t perfect, but it’s certainly close enough to get the point across in the heat of battle.

With the special place that Counter-Strike occupies in the hearts of hackers and gamers alike, it’s little surprise people are still finding unique ways to experience the game.

This SpaceX fan created a levitating Starship lamp

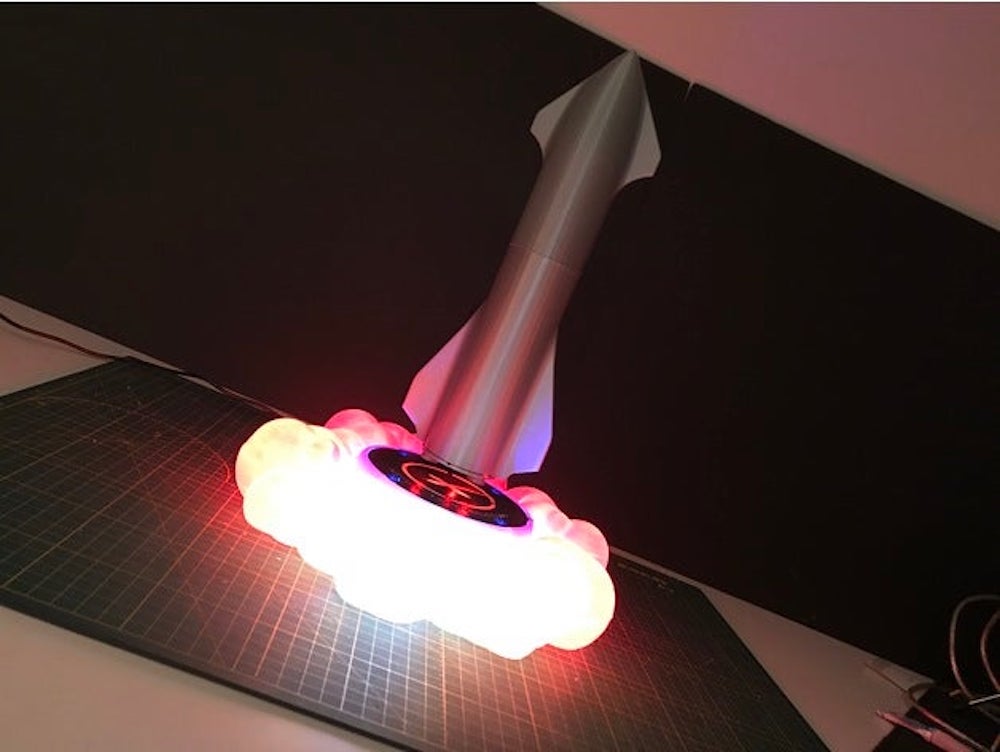
Although you might not be able to build or house your own SpaceX Starship, YouTuber “Embrace Racing” has created a levitating lamp model that will be much more attainable for non-multi-billionaires. 

The lamp’s landing pad features an Arduino Nano inside, which is used with WS2812 LEDs to simulate the smoke plume of the rocket through a 3D-printed “clear” PLA diffuser.

The base also contains a levitating module capable of supporting up to 400g to suspend the spacecraft in midair. While its height would tend to make it unstable, the onboard levitating magnet lowers the center of gravity, along with a battery and three LEDS that provide light from the bottom of the rocket itself. 

Print files and other project info are available on Thingiverse.

AAScan is an open source, Arduino-powered 3D scanner that uses your phone

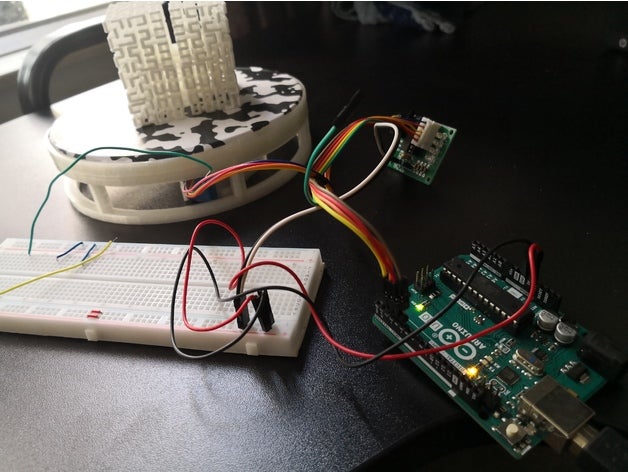
3D scanners are amazing tools that literally let you turn everyday things into three-dimensional computer models. As seen on Reddit, if you want to make one yourself — using little more than a spare Android phone, Arduino, stepper motor, and 3D-printed parts — the AAScan setup by QLRO could be an excellent option.

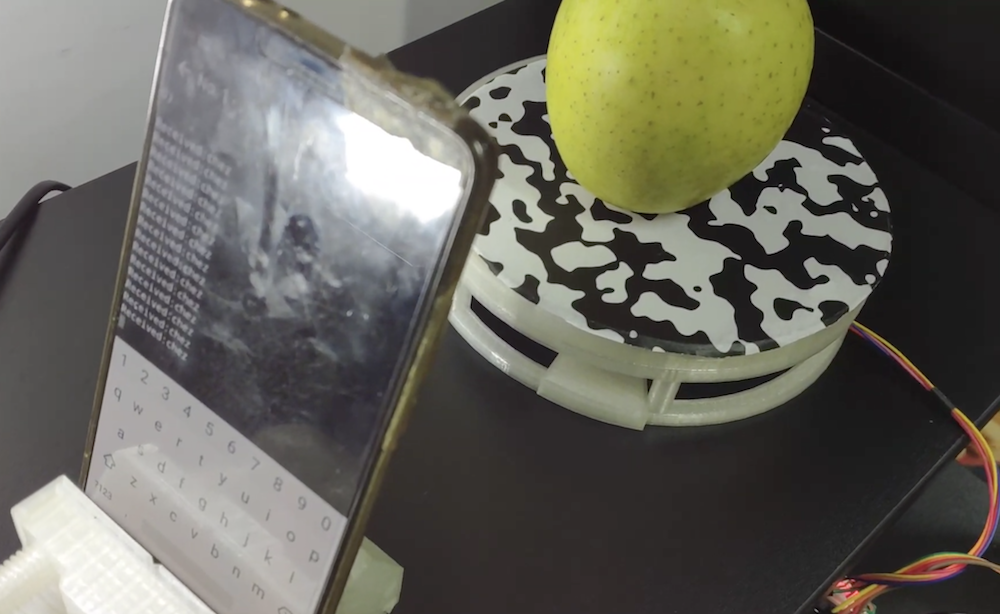
The device spins an object on a 3D-printed turntable using an Uno and ULN2003 driver board, allowing it to take ~180 images automatically via a Python script running on the phone. These images are then combined in Meshroom to create a brand new 3D model. 

You can check out a demo of AAScan in the video below, rotating an apple to take pictures of each side.

You can make your own rotary cellphone

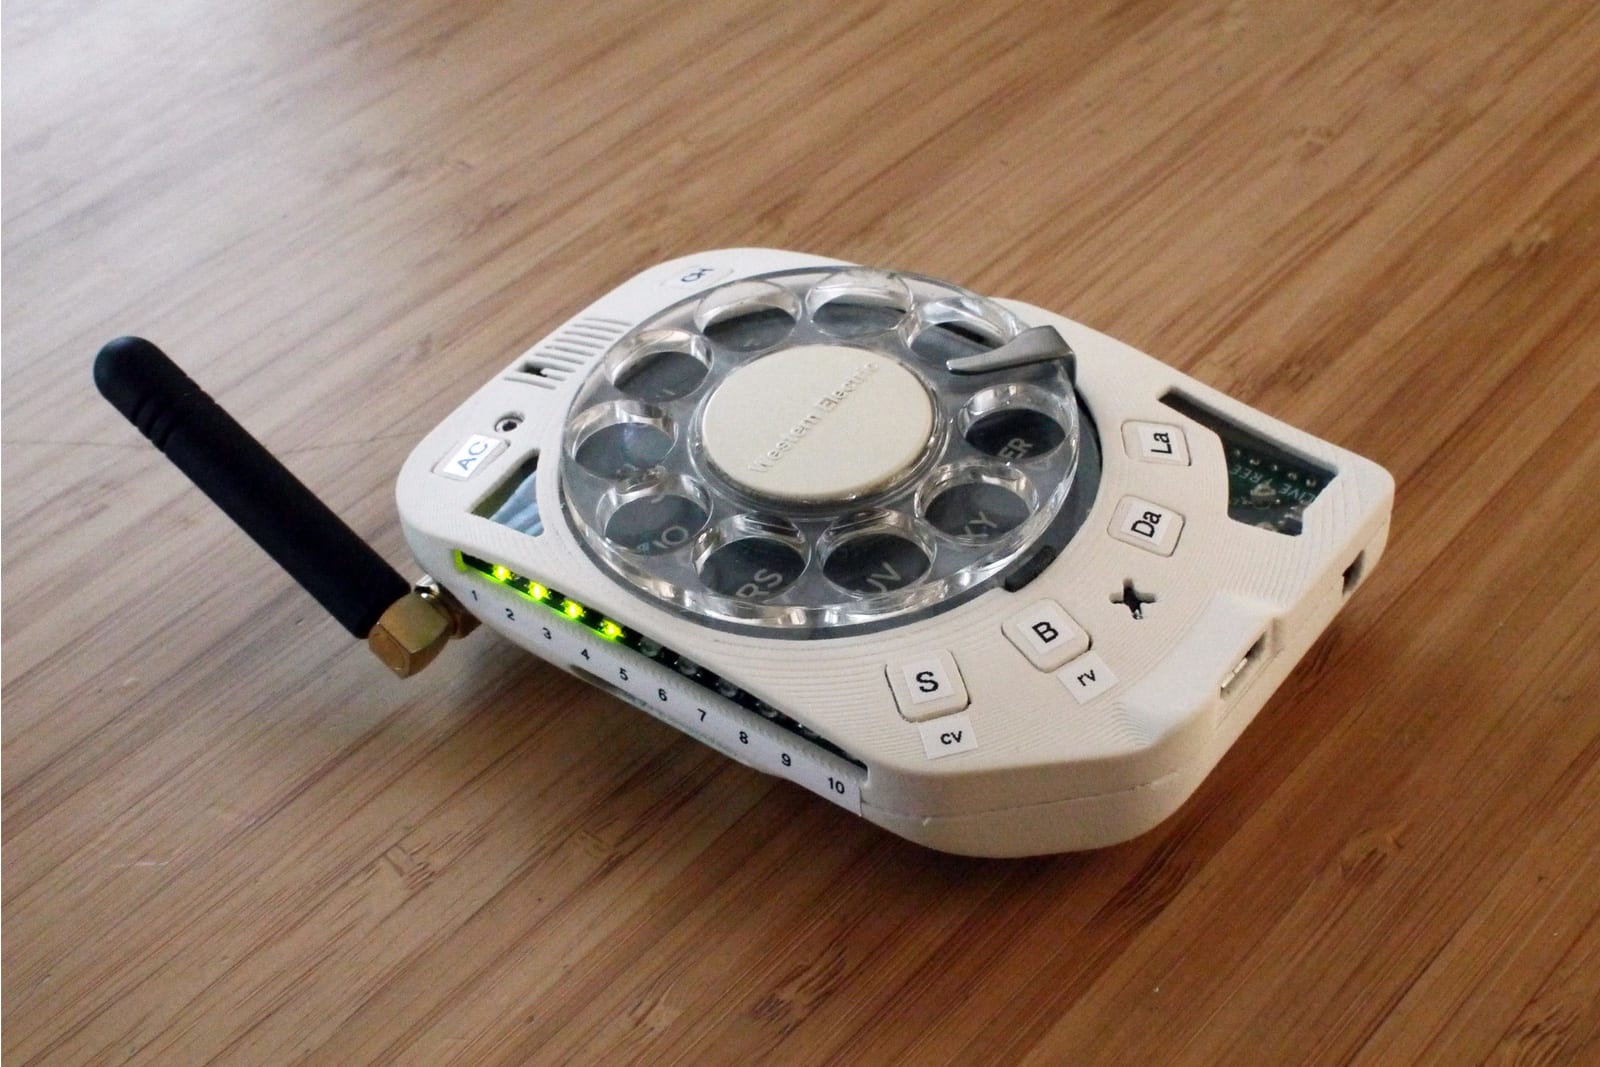
As convenient as modern cellphones are, there's a certain charm to spinning an old-fashioned rotary dial to make a call -- and now, there's a cellphone that caters to that nostalgia. Brookhaven National Lab engineer Justine Haupt has developed a rotary cellphone that's not only functional, but available to make with the help of a $240 do-it-yourself kit. It's effectively a throwback to the days when phones were for calling and nothing else, plus a few present-day creature comforts.

Source: Justine Haupt, Sky's Edge

You can make your own rotary cellphone

As convenient as modern cellphones are, there's a certain charm to spinning an old-fashioned rotary dial to make a call -- and now, there's a cellphone that caters to that nostalgia. Brookhaven National Lab engineer Justine Haupt has developed a rotary cellphone that's not only functional, but available to make with the help of a $240 do-it-yourself kit. It's effectively a throwback to the days when phones were for calling and nothing else, plus a few present-day creature comforts.

A DIY digital readout for your wood lathe

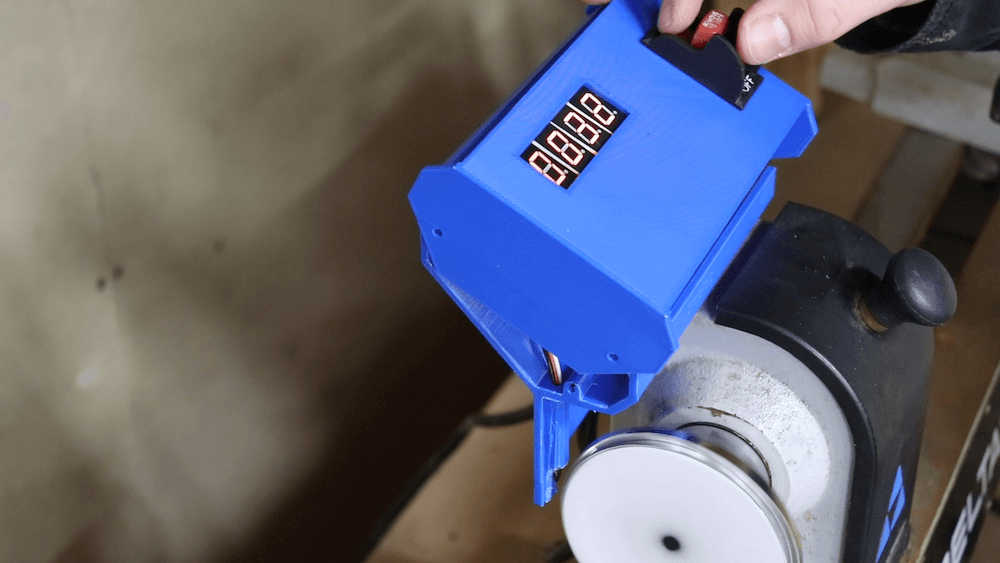
Small wood lathes don’t typically come with an RPM readout, so after obtaining such a machine several months ago, engineer Zach — also known as ‘byte sized’ — decided to build his own custom display.

The device uses an Arduino Nano for control, along with a Hall effect sensor to pick up on four magnets attached to the spinning handwheel.

RPM values are shown on a series of four 7-segment displays, and everything is enclosed in a nicely 3D-printed housing. LEDs shine through a sanded acrylic window that acts as a diffuser. Power for the lathe is still provided by a single cable, with a transformer module used to convert the AC input into 5V DC for the Arduino and other electronics.

Arduino Blog 15 Feb 21:24

Nixie Clock Claims to be Simplest Design

[Engineer2you] built a nixie tube clock and claims it is the simplest design. We felt like that was a challenge. In this design, the tubes are set up as a matrix with optoisolators on each row and column. With 60 segments, the matrix allows you to control it all with 16 bits. There are six columns, each corresponding to a digit. That means each row has 10 lines.

The Arduino code reads the clock and produces the output to the tubes fast enough that your eye perceives each digit as being always on, even though it isn’t.

It may be semantics, but part of what makes the design simple isn’t that it is simple on its own, but that it does use a small number of dense modules. For example, the clock is a DS3231, and there is a DC step up board to generate 390V for the tubes. So instead of minimizing part count, this design really minimizes how many parts you have to connect by employing modules, including the Arduino. That’s still something, though.

It looks as though the nixie tubes used are of Soviet origin. They need no more than 170V to ignite and at least 120V to stay lit. Not a problem with a simple DC to DC converter since the current is very low — on the order of 2.5 mA or so.

We suppose one day the stock of nixie tubes will be gone. But there are still people making them. Or you can do a modern version with light pipes.

Hack a Day 15 Feb 06:00

Arduino Drives a 600-Character Display

[Peterthinks] admits he’s no cabinet maker, so his projects use a lot of hot glue. He also admits he’s no video editor. However, his latest video uses some a MAX7219 to create a 600 character scrolling LED sign. You can see a video of the thing, below. Spoiler alert: not all characters are visible at once.

The heart of the project is a MAX7219 4-in-1 LED display that costs well under $10. The board has four LED arrays resulting in a display of 8×32 LEDs. The MAX7219 takes a 16-bit data word over a 10 MHz serial bus, so programming is pretty easy.

The MAX chip can decode for seven-segment displays or just allow you to light up the outputs directly, which is what the code here does. You can cascade the chips, so it is possible to string more than one of these modules together.

The code is available on Dropbox. The code is extremely simple due to the use of the Parola library and a MAX72XX library. We’ve seen a number of projects based around this chip. Some of the uses are pretty novel.