Posts with «arduino» label

DeskLights Ambient Notification System

San Diego-based software engineer Michael LaGrasta brought his DeskLights ambient notification system to Maker Faire Bay Area this year, where I had the chance to meet him. In a nutshell, using an Arduino Uno Ethernet and 160 RGB LEDs (in the form of Adafruit’s Pixels, “the desk receives event notifications over the network and alters its color and pattern to provide those notifications to the user. The combination of color and location can be used to communicate a wide variety of information.” You can customize the color of the lights, flashing patterns, and where they light up on the desk to denote an endless number of different notifications, like incoming email, calendar alerts, basically whatever would be most useful to you. Also, “a light can change from green to red to indicate server health and process load or increase its intensity the longer you ignore your email.” Michael used an Ikea Galant desk, which has a frosted surface, but he’s currently working on a tabletop version that won’t require a translucent desktop, and will be posting updates on Twitter. Michael shared his step-by-step for the build with us in Make: Projects and is offering his code on GitHub. Useful project, and yet another reason to incorporate pretty lights.


Hexy: hands-on with the adorable, affordable hexapod (video)

The Artisan's Asylum has a few guiding principles, one of which is anyone can "make." We assume one of the others is "you can never have too many hexapods." If Stompy, the giant rideable bot, is a bit much for you to handle (or store), then maybe Hexy is more your speed. He's got six legs and 20 servos, but at only $200, he's much cheaper than similar hexapod kits and, most importantly, more adorable. The bot is the brain child of Joseph Schlesinger, a resident at the Somerville hacker space who saw a need for a low-cost but serious robotics kit. Since hitting Kickstarter in May, his creation has raked in roughly $86,000 in pledges, far surpassing his original goal of thirteen grand. We swung by Joe's booth to get a taste of what exactly his hundreds of backers have bought into and to find out what's next for the budding bot entrepreneur.

Continue reading Hexy: hands-on with the adorable, affordable hexapod (video)

Hexy: hands-on with the adorable, affordable hexapod (video) originally appeared on Engadget on Thu, 14 Jun 2012 18:41:00 EST. Please see our terms for use of feeds.

Permalink | Email this | Comments

Embedded Linux meets Arduino with the Rascal Micro

Behold the Rascal Micro. It’s running embedded Linux and has a dual-row of pin headers which probably seem pretty familiar. The idea here is to bring Arduino hardware (ie: shields) to a party with a powerful web server.

The image above is the beta version of the hardware. What’s being shown off in a recent Engadget demo is a version that slides two USB ports in between the barrel jack and the NIC. This makes it easy to jump over to wireless with the use of a USB dongle, or you can figure out what other peripherals you want to include in your project.

The novelty here is that the web server included a built-in editor. So not only can it serve you a webpage to control hardware or display sensor status, but it will let you edit the interface without needing to reflash anything.

The price rings in somewhere around $100-150, and like the popular Raspberry Pi board, you can’t get your hands on it right now.


Filed under: linux hacks, Microcontrollers

Glowback: Arduino-Powered Clay Sculpture


Ben Hollis and Eva Funderburgh chose an unusual material to house their Arduino in: clay. Glowback, the little creature they’ve created, has nodules on its back made of transluscent porcelain. The porcelain gives off a soft glow in staggered rhythms provided by the super bright LEDs underneath the nodules.

With physical computing being used more and more in fine arts, it’s exciting to see a project such as this one. See Ben Hollis’ site for full documentation.


MAKE » Arduino 14 Jun 20:00

SMS Text Scroller Powered by Android and Arduino

follower posted a new project up on Labradoc: an <a href="“>LED matrix display connected to an Arduino Mega ADK and an Android phone:

I was working to get things working for the evening of Sat 19th (NZ time) but noticed an issue during the afternoon that stopped much in the way of new feature development.

Once I had the the display working okay I added a couple of features:

  • One permanent message (hardcoded into the sketch) to display.
  • Four “slots” used to store the last four SMS messages received. When a new message is received the oldest message is overwritten. (The display order doesn’t change however–i.e. the message in slot 1 is always displayed after the permanent message, even if it’s not the most recent/oldest.)

Project: SMS Text Scroller by follower


MAKE » Arduino 14 Jun 16:30
adk  android  arduino  sms  

Changing teaching plans

It turns out that I won’t be teaching an introduction to programming for biologists, as I announced in February.  Funding was found for that class to be taught by the instructor who has been teaching it, freeing me up to take on a different class as overload.  (I already pretty much committed myself to teaching an overload this year.)

I decided that the most pressing need was for an applied electronic circuits course for our bioengineering majors (the current EE circuits class is way too theoretical).  The School of Engineering’s best EE instructor (Steve P.) and I had discussed doing such a course before I went on sabbatical, and our respective department chairs were enthusiastic, but funding was not found for it.  Everyone was even more enthusiastic this time around, so Steve and I are going to design the course this summer and try teaching it together in Winter (at least, if all the enthusiasm converts into a secure position for him—otherwise he’s going to have to pick up another couple of courses from a different department and not teach the new one).  We probably won’t know for sure about the funding until November, so we’re going to go ahead and design the course on spec, hoping that we get to teach it.

If Steve becomes unavailable, I don’t think I have the confidence to teach circuits by myself, since I’ve never taken a circuits course, being almost entirely self taught (my Dad taught me a little, including a German joke about a Wien bridge, when I was in high school).  After we co-teach it once, I think either of us could do the course alone, though co-teaching with a master teacher like Steve is fun.  (If the applied circuits course falls through for this year, I’ll probably try to cobble together a graduate genome assembly and annotation course, based in part on the Banana Slug Genomics class but adding a bunch of new material, so I’ll end up with a teaching overload and working on a new course this year no matter what happens.)

I’m looking forward to designing a course with Steve. We’ve both designed many courses before, and co-taught senior design project courses, but we’ve not designed a course together before. I’ve lost track of how many I’ve designed—something like 15–20, depending how you count the courses that someone else started but I extensively modified.

The approach that Steve and I are taking to the course design is to start by looking for lab projects for the students to do.  We need 10 labs (one a week for 10 weeks) ranging from very basic getting-to-know-the-equipment labs up to real (but small) design challenges.  We will try out the labs ourselves separately, then compare notes on how things went before writing up the lab handouts.  After we have the labs figured out, we’ll make sure that we cover the theory needed to understand the labs and do the designs, pacing the lectures to stay just a little ahead of the labs.  At least, that is how we both envision the process currently.

Here are a few labs that I’ve been thinking about—I’d appreciate a lot more suggestions.

  • Skin conductance meter.  There are a lot of do-it-yourself lie detector circuits for measuring skin resistance (“electrodermal response” if you want to sound medical).  I like the “Lego” sensor that just uses the inputs of a Lego RCX brick to read the resistance between two fingers. But getting RCX bricks for the lab just to measure resistance is silly.
    I wonder if we should give them something that reads and records voltage (like an Arduino or other microprocessor with an A/D converter) and have them make a voltage divider to read resistance.  This could be a good first lab, with them making a single measurement with a multimeter, choosing an appropriate resistor for the voltage divider, then recording a few minutes of skin resistance, perhaps on the inside of the wrist.  We could have them use fancy silver chloride gel electrodes at 500/$80, rather than Al foil and velcro—it’d probably end up cheaper.
  • When I told my son that we wanted to design the labs so that they could be done by the students without hand holding, he suggested the experiment where you pass a (small) current through a chain of people holding hands.  This might not be a bad idea also for a lecture demo.
  • Electrical field measurements in an electrophoresis gel.  The students would cast a gel (possibly agarose, but maybe just agar, to make it cheaper) with a standard buffer, apply a small voltage (much less than usually used in electrophoresis, since we’ll be working without the safety shield of a closed electrophoresis box), then use a handheld voltmeter to measure the voltage at different points in the gel.  We would also have them measure voltage and current.  We might even have them time the movement of a loading dye at different voltages, but I think that would take too long.
    One problem with this lab is that it requires using the wet lab, and neither Steve nor I are really wet-lab people.  I wonder if we could borrow a TA for a week from another course.  Perhaps a bioengineering senior undergrad could be hired, as many of them have some experience at casting gels.
  • Conductivity of saline solutions.  It is standard to measure the ionic content of fresh water and even sea water by measuring its conductivity—Wikipedia has a decent article on the theory of electrolyte conductivity.  A conductivity calculator gives an equivalence of 1 ppm total dissolved solids as 1.56 µS/cm, though they don’t specify the temperature or include a temperature correction.  The City of Santa Cruz 2011 Consumer Confidence Report lists the drinking water in town as 280–760 µS/cm (though they use the charming older name: µmhos/cm), while a 2004 San Lorenzo River Watershed Management Plan gives the conductivity in the estuary as 260–44,860 µS/cm, depending when and where the sample is taken (though they label their table wrong)
    The tricky part here is that the conductivity testing has to be done with an AC signal, not a DC one, to avoid problems at the electrodes. If we trust the students not to spill salt water into the equipment, we could probably do this lab in the electronics lab, and use the bench oscillator and meters.  Later in the quarter we might have them design their own rectifier circuit to communicate with a microprocessor, but I suspect that doing an oscillator may be beyond the scope of the class.
    We may also want to get silver/silver chloride electrodes (or fine silver wire at $0.90/foot and soak it in bleach).    Using thin wires as the electrodes may cause problems with the resistance being very high.  I wonder if we should try doing something cheaper first, like using a pair of pennies cleaned in vinegar and rinsed.  They wouldn’t last long in salt water, but even demonstrating the problem might be instructive.
  • A good project for late in the quarter would be a do-it-yourself EKG, which requires a simple amplifier (and gets another use for the silver/silver-chloride gel electrodes).
  • We could also do an optical pulse detector, using an LED and a light sensor, though we’d probably end up making our own, rather than buying one for $20.
  • Breathalyzer.  A resistance-output sensor for alcohol on the breath looks like it only costs about $5.  This may be too simple.
  • [Added 14 June 2012, after first publishing this post] Thermistors. A different application of voltage dividers, and one that would be relevant for both EE and BIOE students is thermistors.  The intro at http://www.mstarlabs.com/sensors/thermistor-calibration.htmlgives a nice overview of the subject for students. This would be a cheaper lab than the gel electrophoresis, with less cleanup needed.It would be easy to do three temperatures in water baths (ice water, room temperature water, hot water) and do 3-point calibration.  The design exercise of figuring out the best resistance to get fairly linear voltage vs. temperature plot is a useful one, and not too hard (I think).

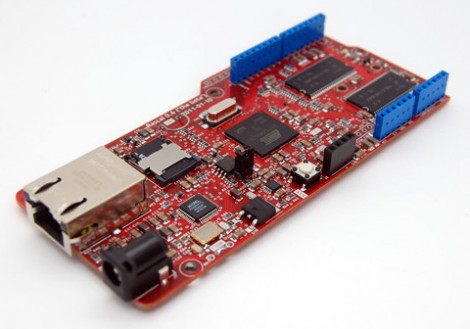
Several of these labs look like they would be most interesting if they involved hooking up to an Arduino or other cheap microprocessor that can record time-course data.  Since programming is outside the scope of the circuits course, we could have the students buy an Arduino for about $20–30 online and give them a simple recording program (perhaps I can get my son to write them a versatile one, based on the one he wrote for our super pulley recording).  The students could sell the Arduino used if they weren’t interested in doing anything with it (the Digital Arts and New Media students use them and probably would be glad of cheap ones).

Obviously, we’re going to need more lab ideas.  Does anyone have any?


Filed under: Uncategorized Tagged: Arduino, bioengineering, circuits, teaching

Rascal Micro hands-on (video)

Not far from the bustling labs of Northeastern University is the even more bustling hacker space known as Artisan's Asylum. The roughly 30,000 square foot complex is home to more than 100 makers, tinkerers and artists who building all sorts of crazy contraptions. One of the less ostentatious projects being worked on within its cavernous halls though, is the Rascal Micro. This tiny board is home to an ARM-based SOC and has its hungry, open-sourced eyes on competitors like Arduino and Beagle. Brandon Stafford, the creator, boiled down its primary selling points to this: "it's maybe 25 times faster, has 1,000 times more storage." Where as the Arduino excels at making things blink, move or Tweet, the Rascal Micro has enough power to function as a full-fledged web server.

Continue reading Rascal Micro hands-on (video)

Rascal Micro hands-on (video) originally appeared on Engadget on Wed, 13 Jun 2012 19:30:00 EST. Please see our terms for use of feeds.

Permalink | Email this | Comments

Traffic signal controller pulls data over WiFi

[Travis Brown] just published a post about the traffic light controller he built. His number one goal was to make the device wireless (except for AC power) and he achieved this by using a WiFi shield for his Arduino. But there is also a separate board that provides a way for the chip to switch the AC lights.

He works for a web hosting company, and the boss wanted a fun way to display the status of the servers among other things. He chose to use the WiServer library which controls the CoperHead WiFi Shield and gives him the ability to serve simple web pages from the Arduino. When power is applied the sketch automatically connects to the AP and starts polling the company’s API for status data. If you’re not within eyesight of the traffic lights you can log into the web server and check that way.

We think [Travis] did a great job of explaining his code, and we applaud him for making proper use of the watchdog timer (something we don’t see in very many projects). This joins the pile of traffic-light display devices we’ve seen around here. We still don’t know where people are getting their hands on the things.


Filed under: arduino hacks

Hackaday Links: June 12, 2012

Amazing 3D rendering in real-time

Ah, the 90s. A much simpler time when the presenters on Bad Influence! were amazed by the 3D rendering capabilities of the SGI Onyx RealityEngine2. This giant machine cost £250,000 back in the day, an amazing sum but then again we’re getting nostalgic for old SGI hardware.

Well, Mega is taken… let’s call it Grande

[John Park] needed to put something together for last month’s Maker Faire. A comically large, fully functional Arduino was the obvious choice. If you didn’t catch the demo last month, you can grab all the files over on Thingiverse.

Is that an atomic clock in your pocket or… oh, I see.

Here’s the world’s smallest atomic clock. It’s made for military hardware, so don’t expect this thing to show up at Sparkfun anytime soon; we can’t even fathom how much this thing actually costs. Still, it’ll be awesome when this technology trickles down to consumers in 10 or 20 years.

Converting a TRS-80 keyboard to USB

[Karl] is working on an awesome project – putting a Raspberry Pi inside an old TRS-80. The first part of the project – converting a TRS-80 keyboard to USB – is already complete. We can’t wait to see this build finished.

 A DIY Propeller dev board

Last week we complained about the dearth of builds using the Parallax Propeller. A few noble tinkerers answered our call and sent in a few awesome builds using this really unique micro. [Stefan]‘s Propeller One is the latest, and looking at the schematics it should be possible to etch a single-sided board for this project. Awesome work and thanks for giving us a weekend project, [Stefan].


Filed under: Hackaday links

Nah, you don’t need an Ethernet module for your Arduino

[Andy] needed a cheap Internet connection between a data-gathering Arduino and his home server. An Ethernet shield would suffice, but he couldn’t run CAT5 to the Arduino’s location. Wireless shields are hideously expensive, and after looking over the popular Zigbee modules, [Andy] had a few concerns about range and build complexity.

The obvious solution to this problem was getting a cheap WiFi router, flashing OpenWRT firmware on the device, and piping sensor data through the Arduino’s USB port, through the router, and over a WiFi connection to the server.

[Andy] used a TP-Link TL-WR703N wireless ‘travel router’ available on eBay £15 (~$30 USD when we checked). After flashing the router with OpenWRT, [Andy] had a wireless connection from a remote data-collecting Arduino directly to his server.

Attentive Hack a Day readers will note this is the third ‘wireless router + OpenWRT as a dev board’ build this week (first one, second one) . No, we don’t know what’s going on, or why the collective unconscious of makers around the globe decided to latch onto this type of build so suddenly. OpenWRT is available for hundreds of different routers, and anything that keeps disused routers out of the landfill (with the bonus of doing something useful) is alright in our book, so if you have another similar build, send it in and we’ll get around to it sometime.


Filed under: arduino hacks, wireless hacks