Posts with «arduino» label
3D Printed SCARA Arm With 3D Printer Components
One of the side effects of the rise of 3D printers has been the increased availability and low cost of 3D printer components, which are use fill for range of applications. [How To Mechatronics] capitalized on this and built a SCARA robot arm using 3D-printed parts and common 3D-printer components.
The basic SCARA mechanism is a two-link arm, similar to a human arm. The end of the second joint can move through the XY-plane by rotating at the base and elbow of the mechanism. [How To Mechatronics] added Z-motion by moving the base of the first arm on four vertical linear rods with a lead screw. A combination of thrust bearings and ball bearings allow for smooth rotation of each of the joints, which are belt-driven with NEMA17 stepper motors. Each joint has a microswitch at a certain position in its rotation to give it a home position. The jaws of the gripper slide on two parallel linear rods, and are actuated with a servo. For controlling the motors, an Arduino Uno and CNC stepper shield was used.
The arm is operated from a computer with a GUI written in Processing, which sends instructions to the Arduino over serial. The GUI allows for both direct forward kinematic control of the joints, and inverse kinematic control, which will automatically move the gripper to a specified coordinate. The GUI can also save positions, and then string them together to do complete tasks autonomously.
The base joint is a bit wobbly due to the weight of the rest of the arm, but this could be fixed by using a frame to support it at the top as well. We really like the fact that commonly available components were used, and the link in the first paragraph has detailed instructions and source files for building your own. If the remaining backlash can be solved, it could be a decent light duty CNC platform, especially with the small footprint and large travel area. This is very similar to a wooden SCARA robots we’ve seen before, except that one put the Z-axis at the gripper. We’ve also seen a few 3D printers and pen plotters that used this layout.
Teaching an Old Lathe New Tricks With a Programmable Power Feed
Ask anybody whose spent time standing in front of a mill or lathe and they’ll tell you that some operations can get tedious. When you need to turn down a stainless rod by 1/4″ in 0.030″ increments, you get a lot of time to reflect on why you didn’t just buy the right size stock as you crank the wheel back and forth. That’s where the lead screw comes in — most lathes have a gear-driven lead screw that can be used to actuate the z-axis ( the one which travels parallel to the axis of rotation). It’s no CNC, but this type of gearing makes life easier and it’s been around for a long time.
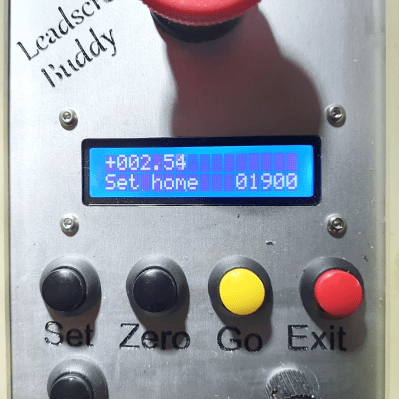
[Tony Goacher] took this idea a few steps further when he created the Leadscrew Buddy. He coupled a beautiful 1949 Myford lathe with an Arduino, a stepper motor, and a handful of buttons to add some really useful capabilities to the antique machine. By decoupling the lead screw from the lathe’s gearbox and actuating it via a stepper motor, he achieved a much more granular variable feed speed.
If that’s not enough, [Tony] used a rotary encoder to display the cutting tool’s position on a home-built Digital Readout (DRO). The pièce de résistance is a “goto” command. Once [Tony] sets a home position, he can command the z-axis to travel to a set point at a given speed. Not only does this make turning easier, but it makes the process more repeatable and yields a smoother finish on the part.
These features may not seem so alien to those used to working with modern CNC lathes, but to the vast majority of us garage machinists, [Tony]’s implementation is an exciting look at how we can step up our turning game. It also fits nicely within the spectrum of lathe projects we’ve seen here at Hackaday- from the ultra low-tech to the ludicrously-precise.
A Digital Magic 8-Ball? Signs Point to Yes
[FacelessTech] was recently charmed by one of our prized possessions as a kid — the Magic 8-Ball — and decided to have a go at making a digital version. Though there is no icosahedron or mysterious fluid inside, the end result is still without a doubt quite cool, especially for a project made on a whim with parts on hand.
It’s not just an 8-ball, it also functions as a 6-sided die and a direct decider of yes/no questions. Underneath that Nokia 5110 screen there’s an Arduino Pro Mini and a 3-axis gyro. Almost everything is done through the gyro, including setting the screen contrast when the eight ball is first powered on. As much we as love that aspect, we really like that [FacelessTech] included a GX-12 connector for easy FTDI programming. It’s a tidy, completely open-source build, and there’s even a PCB. What’s not to like? Be sure to check out the video after the break to see it in action.
Believe it or not, this isn’t the smallest Magic 8-Ball build we’ve seen. Have you met the business card version?
[via adafruit]
Reel in the Years with a Cassette Player Synth
Variable-speed playback cassette players were already the cool kids on the block. How else are you going to have any fun with magnetic tape without ripping out the tape head and running it manually over those silky brown strips? Sure, you can change the playback speed on most players as long as you can get to the trim pot. But true variable-speed players make better synths, because it’s so much easier to change the speed. You can make music from anything you can record on tape, including monotony.
[schollz] made a tape synth with not much more than a variable-speed playback cassette player, an Arduino, a DAC, and a couple of wires to hook it all up. Here’s how it works: [schollz] records a long, single note on a tape, then uses that recording to play different notes by altering the playback speed with voltages from a MIDI synth.
To go from synth to synth, [schollz] stood up a server that translates MIDI voltages to serial and sends them to the Arduino. Then the DAC converts them to analog signals for the tape player. All the code is available on the project site, and [schollz] will even show you where to add Vin and and a line in to the tape player. Check out the demo after the break.
There’s more than one way to hack a cassette player. You can also force them to play full-motion, color video.
Via adafruit
Electric Window Mechanism Into A Electric Screen Door
In many parts of the world leaving open a door or window is a good way to get a house full of bugs. Remembering to close doors behind them can be surprisingly hard for members of the human race, so the [DuctTape Mechanic] used the components from a car’s electric window to automate his sliding screen door.
After the excess pieces were cut of the rail, the motor and rail were mounted on top of the door frame. A long bolt is attached to the moving plate on the rail, which pushes on the pack of the door to close it. After closing, the mechanism returns to its open position, allowing the door to be opened by hand. The motor is controlled by an Arduino running a very simple sketch, which senses if the door is closed with a microswitch and starts a 10 second countdown once opened. Two relays are used to create an H-bridge circuit to drive the motor in both directions.
It doesn’t look like there is any provision to detect if it is obstructed. A simple solution could be to make the push rod spring-loaded, so it can slide over the door if there is excessive resistance. This project is successful as a proof of concept, but making the wiring neater and covering everything would be a welcome upgrade.
If you only want to let certain creatures into your house, we have no shortage of automated pet door for your hacking pleasure.
Voice Controlled Sofa Meets Your Every Beverage Need
It’s often taken for grated, but the modern world is full of luxuries. Home automation, grocery delivery, and even access to the Internet are great tools to have at hand, but are trivial to most of us. If these modern wonders are not enough for you, and the lap of luxury is still missing a certain je ne sais quoi, allow us to introduce you to the ultimate convenience: a voice controlled, beer-dispensing sofa with a built-in refrigeration system.
This is a project from [Garage Avenger] and went through a number of iterations before reaching this level of polish. Metal work on the first version didn’t fit together as expected, and there were many attempts at actual refrigeration before settling on repurposing an actual refrigerator. With those things out of the way, he was able to get to the meat of a project. The couch-refrigerator holds 12 beers, and they are on a conveyor belt which automatically places the next beer onto the automated drawer. When commanded (by voice, app, or remote) the sofa opens the drawer so the occupant can grab one easily without having to move more than an arm. Everything, including the voice recognition module, is controlled by an Arduino, as is tradition.
The attention to detail is excellent as well. The remote control contains a built-in bottle opener, for one, there are backlights and a glass cover for the refrigerator, and the drawer is retracted automatically when it senses the beer has been obtained. We couldn’t ask for much more from our own couches, except maybe that they take us where we want to go. But maybe it’s best to keep these two couch use cases separate for now.
Lego Ziplining Robot Climbs for Claps
The internet has given us plenty of cool robotics projects, but we don’t think we’ve seen one zipline before. At least not until now.
This cool little ziplining robot is courtesy of the folks over at [Tart Robotics]. As they described it, the robot moves using a 4-bar linkage mechanism with the motor’s torque “transferred to the arm mechanisms through a pair of bevel gears and a worm drive.” Even cooler, the robot is activated by clapping. The faster you clap, the faster the robot moves. That’s sure to wow your friends at your next virtual hacker meetup.
They had to do a bit of custom 3D printing work to get a few of the Lego components to connect with their non-Lego off-the-shelf bits, so that took a bit of time. Specifically, they had some cheap, non-branded DC motors that they used that did not naturally mate with the Lego Technic components used to create the rest of the robot’s body. Nothing a few custom 3D printing jobs couldn’t solve.
It always amazes us what cool contraptions you can put together with a few Lego blocks. What’s your favorite Lego project?
Parking Assistant Helps Back Up the Car Without Going Too Far
Sure, [Ty Palowski] could have just hung a tennis ball from the ceiling, but that would mean getting on a ladder, testing the studfinder on himself before locating a ceiling joist, and so on. Bo-ring. Now that he finally has a garage, he’s not going to fill it with junk, no! He’s going to park a big ol’ Jeep in it. Backwards.
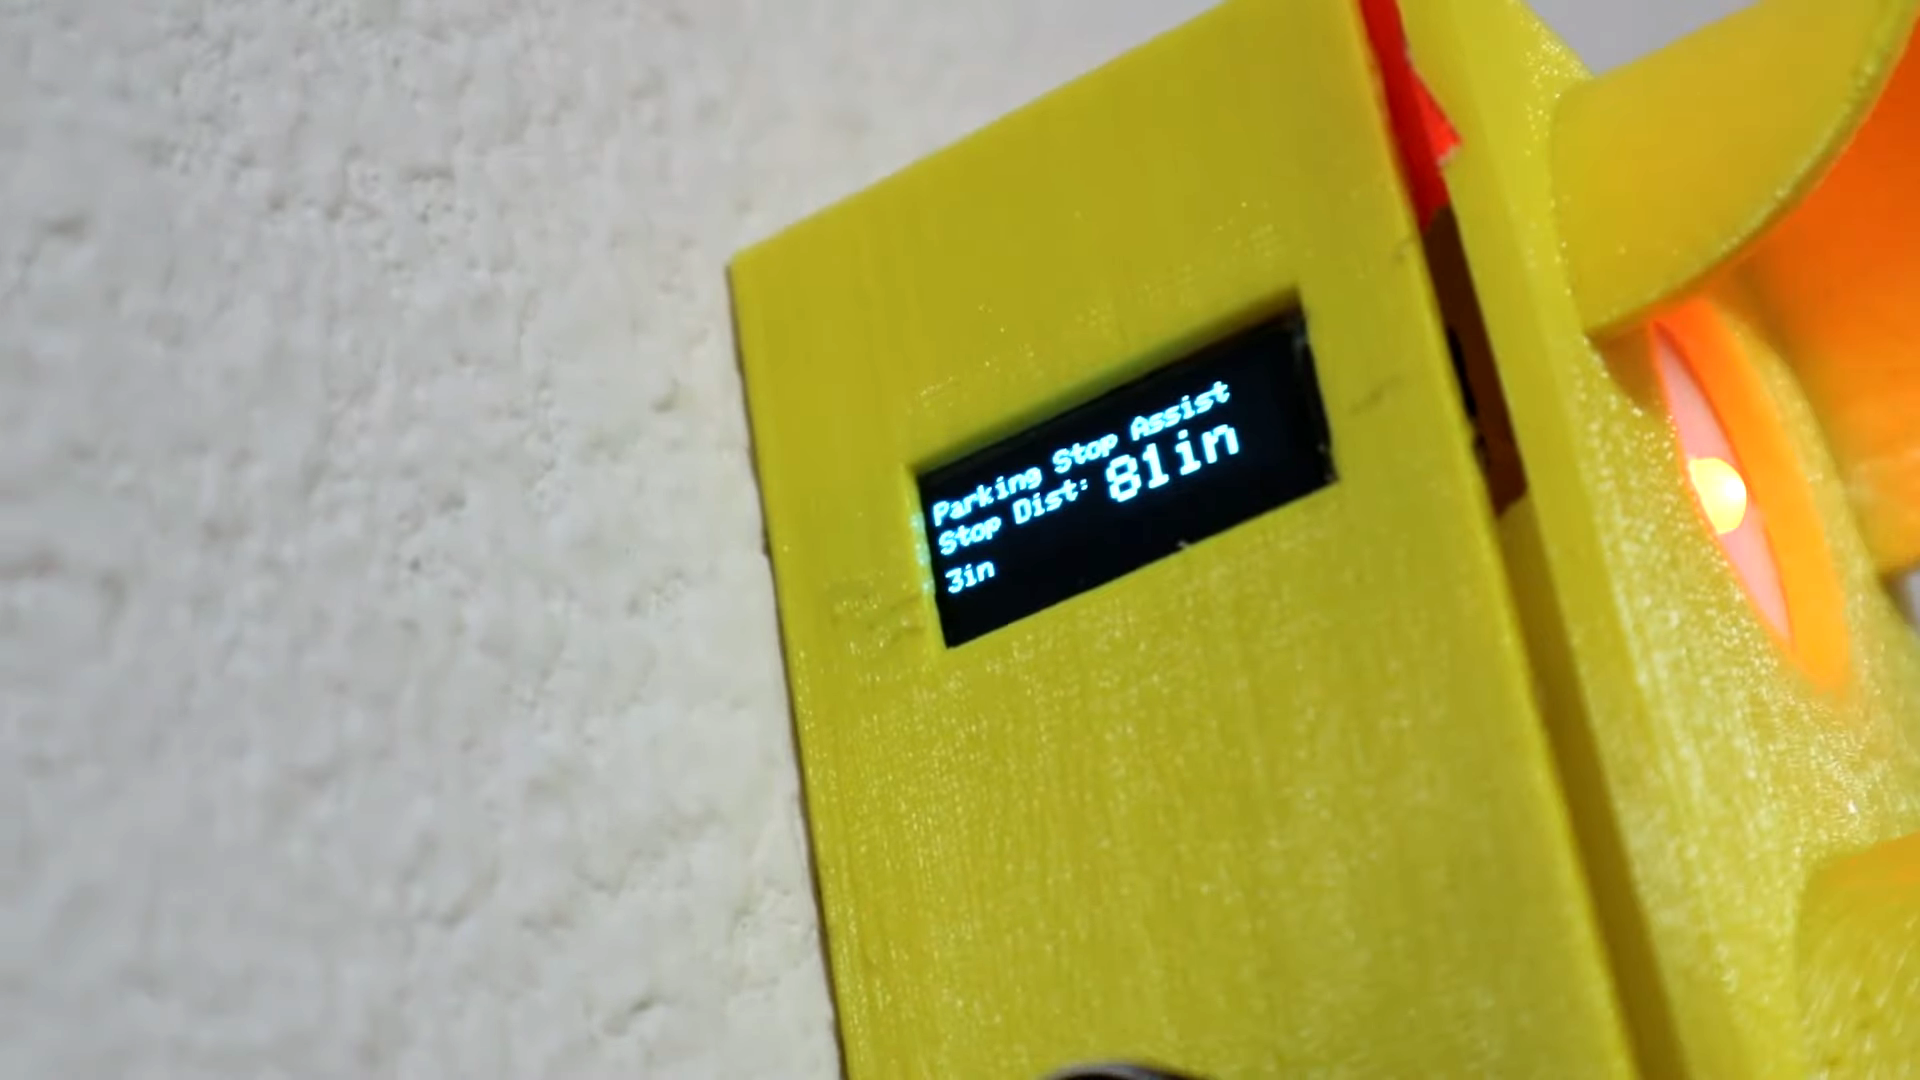
The previous owner was kind enough to leave a workbench in the rear of the garage, which [Ty] has already made his own. To make sure that he never hits the workbench while backing into the garage, [Ty] made an adorable stoplight to help gauge the distance to it. Green mean’s he’s good, yellow means he should be braking, and red of course means stop in the name of power tools.
Inside the light is an Arduino Nano, which reads from the ultrasonic sensor mounted underneath the enclosure and lights up the appropriate LED depending on the car’s distance. All [Ty] has to do is set the distance that makes the red light come on, which he can do with the rotary encoder on the side and confirm on the OLED. The distance for yellow and green are automatically set from red — the yellow range begins 24″ past red, and green is another 48″ past yellow. Floor it past the break to watch the build video.
The humble North American traffic signal is widely recognized, so it’s a good approach for all kinds of applications. Teach your children well: start them young with a visual indicator of when it’s okay to get out of bed in the morning.