


Posts with «arduino» label


The Light Blue Bean Goes Mobile
 Today the Light Blue Bean just because the first Arduino compatible board to allow you to write, compile, and then upload a sketch directly from your iPad.
Programmable Lithium Charger Shield for Arduino
Surely you need yet another way to charge your lithium batteries—perhaps you can sate your desperation with this programmable multi (or single) cell lithium charger shield for the Arduino<! Okay, so you’re not><em>hurting</em> for another method of juicing up your batteries. If you’re a regular around these parts of the interwebs, you’ll recall the <a href="http://hackaday.com/2014/09/21/a-li-ion-battery-charging-guide/">lithium charging guide</a> and that <a href="http://hackaday.com/2014/09/05/an-obsessively-thorough-battery-and-more-showdown/">rather incredible, near-encyclopedic rundown of both batteries and chargers</a>, which likely kept your charging needs under control.</p> <p>That said, this shield by Electro-Labs might be the perfect transition for the die-hard-’duino fanatic looking to migrate to tougher projects. The build features an LCD and four-button interface to fiddle with settings, and is based around an LT1510 constant current/constant voltage charger IC. You can find the schematic, bill of materials, code, and PCB design on the Electro-Labs webpage, as well as a brief rundown explaining how the circuit works. Still want to add on the design? Throw in <a href="http://hackaday.com/2014/07/16/finally-an-easy-to-make-holder-for-lithium-ion-batteries/">one of these Li-ion holders</a> for quick battery swapping action.</p> <p>[via <a href="http://embedded-lab.com/blog/?p=9644">Embedded Lab</a>]</p><br />Filed under: <a href="http://hackaday.com/category/arduino-hacks/">Arduino Hacks</a>, <a href="http://hackaday.com/category/microcontrollers/">Microcontrollers</a> <a><img src="http://feeds.wordpress.com/1.0/comments/hackadaycom.wordpress.com/138748/" /></a> <img src="http://pixel.wp.com/b.gif?host=hackaday.com&blog=4779443&post=138748&subd=hackadaycom&ref=&feed=1" />
New Project: Two Player Simon Memory Game With External Switches
 I designed a two player version of Simon that runs on Arduino, letting you play head to head.
“Making Connected Devices” keynote at Maker Faire Rome

Are connected objects the next big thing? Will they really become part of our life?
Watch Massimo Banzi keynote at Maker Faire Rome – The European Edition to learn more about the Arduino approach to this topic:
Morse Decoder’s Lean and Sexy Search Algorithm
Often the Morse Code centered projects that we feature are to help you practice transmitting messages. This one takes a tack and builds an automatic decoder. We think [Nicola Cimmino's] project is well worth featuring simply based on his explanation of the Digital Signal Processing used on the signal coming in from the microphone. Well done. But he’s really just getting warmed up.
What makes this really stand out is a brilliant algorithm that allows conversion from Morse to ASCII using a lookup table of only 64 bytes. This provides enough room for A-Z and 0-9 without chance of collision but could be expanded to allow for more characters. Below is a concise description of how the algorithm works but make sure you take the time to read [Nicola's] project description in its entirety.
The algorithm can be decribed as follows. Have an index inside the lookup string inizialied to zero. Have an initial dash jump size of 64. At every received element (dot or dash) halve the initial dash jump and then increase by 1 the index inside the lookup string if a dot was received and by dash jump size if a dash was received. Repeat until a letter separator is reached, at that point the index inside the lookup string will point to the ASCII corresponding to the decoded morse.
Have you heard of this technique before? If so, tell us about it in the comments below. Before you jump all over this one, realize that Magic Morse uses a different technique.
Filed under: Microcontrollers, radio hacks


Building a hackable robotic arm
 The meArm is a small, hackable, robotic arm designed from the ground up to be low cost and easy to use.
BITalino (r)evolution: Circuits for Quantified Self and More
 We first met Hugo Silva last year when he introduced us to Bitalino, an Arduino-compatible electronics toolkit designed for exploring the various physiological signals that the human body gives off. The latest iteration of the platform, BITalino (r)evolution, is more affordable and capable than ever, but the team still needs […]
The perfect teal
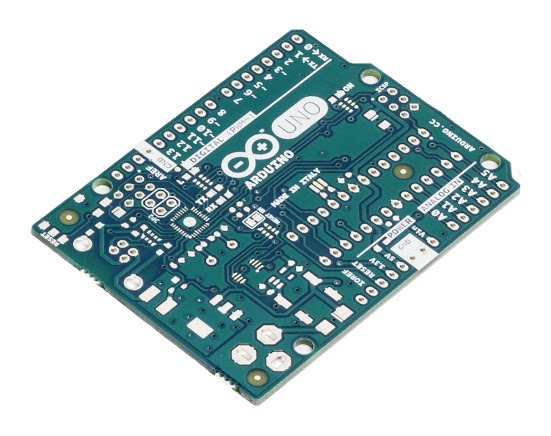
Last year Massimo Banzi wrote a long post on this blog to explain the genealogy of Arduino. He described how an open-hardware project, designed to lower the barriers to prototyping interactive projects, was able to find its way into economical sustainability and still keep innovating.
He clearly explained what an original Arduino is, and why its cost is a matter of maintaining an open-source ecosystem, and not only of manufacturing and distributing the boards.
He detailed out what ‘counterfeit Arduinos’ are, and why they are harmful to the whole open-source hardware movement. We release Arduino’s hardware design files so that people could make their own versions, but this doesn’t mean manufacturing boards only for profit and pretending to be Arduino.
We don’t release any element of the Arduino brand identity (logo and graphics of the boards), so whoever uses the trademarked Arduino graphics makes a deliberate act of Trademark infringement and prevent us in our effort to guarantee the quality of our products, always replaceable if defective.
We also created a page on our website showing how to spot a counterfeit Arduino.
As you can see at the link, we recently upgraded the page with new pictures as we are entering a new phase: we are redesigning the PCB silkscreens of all Arduino boards, in production in the next few months. As you might imagine, this is going to be a long process as it cannot happen in one night. The new silk will be better counterfeit-proof, and will allow you to recognise an original Arduino just by a quick look.
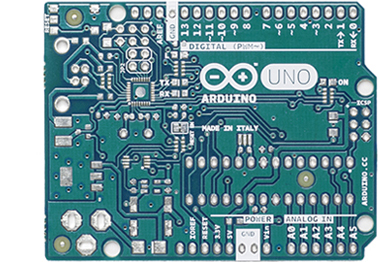
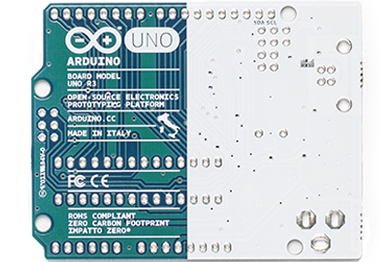
As you can see in the images above (click on the images for hi-res), we changed some graphic elements of the board and also switched to a different shade of teal.
In the next months we will upgrade the pictures of the boards in the product pages of the Arduino website as they roll out and are distributed around the world. It’s a transitioning phase so stay tuned for more news on the blog!

