Posts with «arduino» label

Save the date for Arduino Day 2016: Saturday April 2nd

For the third year we are inviting the open source community gathered around Arduino and Genuino globally to celebrate with us Arduino Day 2016 on Saturday April 2nd!

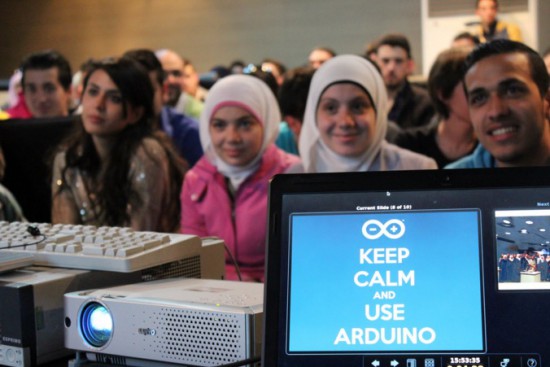
Arduino Day is a worldwide celebration of Arduino’s birthday. It’s a 24 hours-long event –organized directly by the community, or by the Arduino team– where people interested in Arduino get together, share their experiences, and learn more. Everyone can participate in the role of local organizer or as a participant.

For the past two years organizers throughout Europe, North and South America, Asia, Africa and Australia involved participants in activities, workshops, events for a wide range of audiences and skillsets.

Stay tuned because in February we’ll be launching the open call for entries.

In the meanwhile explore what happened in 2014 and 2015 and … start organizing!

Hashtag: #ArduinoD16

From the community: unboxing and setup of Arduino 101

Circuit Basic recently posted a 9-minute video unboxing, Setting Up, and Comparing the Arduino 101 to the Arduino Uno.

The Arduino 101 (US only) and the Genuino 101 (outside US), created in collaboration with Intel, keeps the same robust form factor and peripheral list of the Uno with the addition of onboard Bluetooth LE capabilities and a 6-axis accelerometer/gyro to  expand your creativity into the connected world.

Watch the video below to learn the first steps on how to use this new board!

Arduino Maker Challenge extended to 31st January!

Good news everyone. Due to many requests from our community we agreed to extend the contest to January 31st 2016.

You have some more days to submit your ideas to the World’s Largest Arduino Maker Challenge,  win one of the one thousand Arduino and Genuino MKR1000 and a fully-funded (up to $1,500) trip to Maker Faire Shenzhen, New York, Bay Area or Rome; a chance to present your creation at the Microsoft and the Arduino & Genuino booths; a professional video production of you and your creation; and a whopping $500 gift certificate to Adafruit.

Watch Massimo Banzi’s video presenting the contest.

Keep dreaming new ideas and have fun!

The real open source Theremin on Arduino

Open.Theremin is an open source hardware and software project by Urs Gaudenz of  Gaudi Lab with the aim of building the next digital generation of the legendary music instrument developed in the ’20s by the Russian inventor professor Leon Theremin. The project is documented under a open license and uses Open.Theremin.UNO, an Arduino  or Genuino Uno shield featuring a digital mixer, combined 12 bit audio and CV out, audio jack on the bottom for more compact design, two completely separate antenna circuits:

The theremin is played with two antennas, one to control the pitch and one for volume. The electronic shield with two ports to connect those antennas comprises two heterodyne oscillators to measure the distance of the hand to the antenna when playing the instrument. The resulting signal is fed into the arduino. After linearization and filtering the arduino generates the instruments sound that is then played through a high quality digital analog audio converter on the board. The characteristics of the sound can be determined by a wave table on the arduino.

Most theremins on the market are either expensive or then not really playable. That’s how I decided to design a playable, open and affordable theremin. The first version was modular and difficult to program. Then I decided to redesign it as a shield to fit on the Arduino.UNO. This was a big success and many people could start using it, change the sounds and adapt it to their own application. The whole design is open source and documented on the website. I produced a small batch of the shield that can be bought through the small batch store on the website.

Watch the video below with Coralie Ehinger, a Swiss theremin player and organizer of the first Swiss theremin festival N / O / D / E, playing the instrument:

Arduino Blog 11 Jan 18:43

Microduino Unveils Stackable LittleBits Alternative

mCookies are the stackable, Arduino-compatible circuit boards that look like Microduino's answer to LittleBits.

Read more on MAKE

The post Microduino Unveils Stackable LittleBits Alternative appeared first on Make: DIY Projects, How-Tos, Electronics, Crafts and Ideas for Makers.

Powering SG90 servos with lipo and BEC

Hi there,

I'm building a robot with 15+ SG90 micro servo's.

To power it, I've bought a 2C lipo battery, and a 5/6 volt BEC.

I've hooked up the BEC's 5v (red) to all the servo's red, and the BEC's ground to the servo's ground, as well as some arduino grounds (that control the servo).

The BEC has an on/off switch.  When the BEC is switched to off, and I plug the battery into the BEC, a surge of current flows through to the motors.  They all "twitch" very rapidly, and I've had some wires melt/smoke.

My questions are:

read more

Into the void with lights and shadows

Rodrigo Carvalho is a designer and interactive new media artist from Porto (Portugal) researching on real-time relations between sound, image and movement in audiovisual interactive spaces. He submitted to Arduino blog his latest project “Into the void” running on Arduino Mega:

First version of “Into the Void”, a series of audiovisual installations exploring physical structures creating light and shadows with immersive audiovisual spaces.
A array of triangles is placed on the floor, each one has a LED strip on the back which are connected to an Arduino. On MAX, series of random numbers generators and different probabilities trigger a signal to each triangle, making it turn on or off.
At the same time that a triangle is triggered a MIDI message is sent to Ableton Live and plays notes on a MIDI Instrument and an OSC message is sent to Processing for the Visual output.


The installation was created in collaboration with Ana Duarte, André Sousa and Daniel Correia and you can find more info at this link.

Arduino Blog 07 Jan 19:23

Speech Recognition and Synthesis with Arduino

In my previous post, I showed how to control a few LEDs using an Arduino board and BitVoicer Server. In this post, I am going to make things a little more complicated.

read more

Your Fingers Will Never Leave Your Hands with This Firecracker Launcher

Who doesn’t like to ring in the New Year with explosives? But speaking from personal experience – I can neither confirm not deny nearly blowing my hand off once with a small dry-ice grenade – a hands-off way to launch your fireworks can be a plus, in which case you might want to check out this automatic firecracker launcher.

[Valentin]’s build has all the earmarks of an inspired afternoon of hasty hacking. Mostly built of wood and hot glue, there’s a feed ramp for fresh ammo and an elastic-powered sled on a ramp. Fireworks are metered onto the sled with one turn of a small gear motor, the fuse is light by a butane torch, and another gear motor pulls the sled back and launches the firecracker. The launch is somewhat anemic – perhaps some stouter rubber bands or latex tubing would provide a little more oomph. But it’s still a fun build with plenty of potential for improvement – perhaps something along the lines of this automated beer catapult?


Filed under: misc hacks, weapons hacks

Clubs in UK

I want to build an autonomous mobile robot with wheels or tracks, vision, arms and carrying ability (for example a tray area) that can navigate in a flat inside or outside domestic environment (not both).

I am UK based, have some old OO programming experience and general PC -based programming experience but no electronics expertise apart from basic school physics . 

I work full-time so this would very much be a part-time project.  From looking around I'm thinking of perhaps using ROS, OpenCV and maybe Arduino components but would like to know

read more