Simple Arduino-Controlled, No-Pump Plant Watering
 Make this computer-controlled plant watering system that doesn't use a pump.
The post Simple Arduino-Controlled, No-Pump Plant Watering appeared first on Make: DIY Projects and Ideas for Makers.


Make this computer-controlled plant watering system that doesn't use a pump.
The post Simple Arduino-Controlled, No-Pump Plant Watering appeared first on Make: DIY Projects and Ideas for Makers.

Rather than stumble around in the dark or blind himself with a bedside lamp, Maker Scott Clandinin has come up with an Arduino-powered, motion-activated lighting system for nighttime wandering.
The setup is fairly simple. A PIR sensor detects movement, which automatically triggers a hidden strip of RGB LEDs to illuminate a path as you get out of bed. An RTC module keeps the time and ensures that the lights only turn on between 9pm and 8am. (The good news is that the strip will only stay lit for approximately two minutes, and won’t keep you up for the rest of the night.) A small capacitive touch sensor on the bottom of its case can also be used to test the lighting display outside of operational hours.
Tired of bumping into things or having to find the switch? Then check out Clandinin’s entire project on Hackaday.io.
 This isn't your typical schoolroom globe... Create a Persistence-of-Vision LED Globe to display a map, a skull, or message.
The post Build a Persistence-of-Vision LED Globe appeared first on Make: DIY Projects and Ideas for Makers.
It wasn’t long ago that faced with a controller project, you might shop for something with just the right features and try to minimize the cost. These days, if you are just doing a one-off, it might be just as easy to throw commodity hardware at it. After all, a Raspberry Pi costs less than a nice meal and it is more powerful than a full PC would have been not long ago.
When [Joe Coburn] wanted to make a pan and tilt webcam he didn’t try to find a minimal configuration. He just threw a Raspberry Pi in for interfacing to the Internet and an Arduino in to control two RC servo motors. A zip tie holds the servos together and potentially the web cam, too.
You can see the result in the video below. It is a simple matter to set up the camera with the Pi, send some commands to the Arduino and hook up to the Internet.
The serial protocol for the Arduino is simple: The Pi sends a numeric position followed by a P (for pan) or T (for tilt) at 9600 baud. A web server and some Python handle the interface to the Internet and the human.
We’ve certainly seen our share of similar projects. Some of them have been a bit larger.


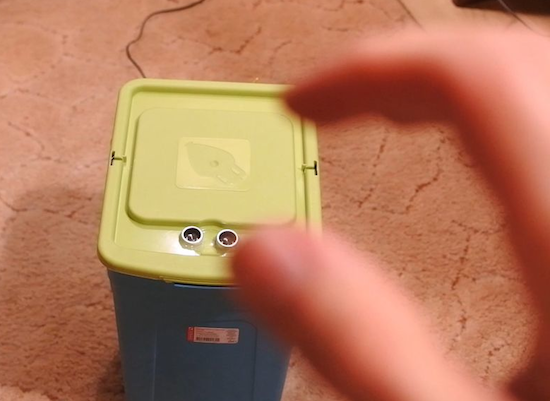
If you’re looking to add some smarts to your kitchen, perhaps a robotic trashcan may be a good start. Take this recent project from Alex Gyver, for example, who built a bin that opens whenever he waves his hand above it.
In Gyver’s case, the can has two modes–one that raises the lid for 10 seconds when a hand is 10 to 30 centimeters away, and another for three seconds when 30 to 70 centimeters away. The latter is clearly for when you have to quickly throwing something out.
The system consists of an Arduino, an inexpensive range ultrasonic sensor, and a servo motor. The distances and times can easily be adjusted by editing the sketch.
Sound like something you’d like in your house, office or dorm? Check out the entire project on Instructables here.
A must-have peripheral for games consoles of the 1980s and 1990s was the light gun. A lens and photo cell mounted in a gun-like plastic case, the console could calculate where on the screen it was pointing when its trigger was pressed by flashing the screen white and sensing the timing at which the on-screen flying spot triggered the photo cell.
Unfortunately light gun games hail from the era of CRT TVs, they do not work with modern LCDs as my colleague [Will Sweatman] eloquently illustrated late last year. Whereas a CRT displayed the dot on its screen in perfect synchronization with the console output, an LCD captures a whole frame, processes it and displays it in one go. All timing is lost, and the console can no longer sense position.
[Charlie] has attacked this problem with some more recent technology and a bit of lateral thinking, and has successfully brought light gun games back to life. He senses where the gun is pointing using a Wiimote with its sensor bar on top of the TV through a Raspberry Pi, and feeds the positional information to an Arduino. He then takes the video signal from the console and strips out its sync pulses which also go to the Arduino. Knowing both position and timing, the Arduino can then flash a white LED stuck to the end of the light gun barrel at the exact moment that part of the CRT would have been lit up, and as far as the game is concerned it has received the input it is expecting.
He explains the timing problem and his solution in the video below the break. He then shows us gameplay on a wide variety of consoles from the era using the device. More information and his code can be found on his GitHub repository.
We’ve featured [Charlie]’s work in the retro gaming field before, with his HDMI mod for a Neo Geo MVS. Console light guns have made a lot of appearances on these pages, a recent one was this video synthesiser but it’s this burning laser mod that most children of the 1980s would have given anything to own.


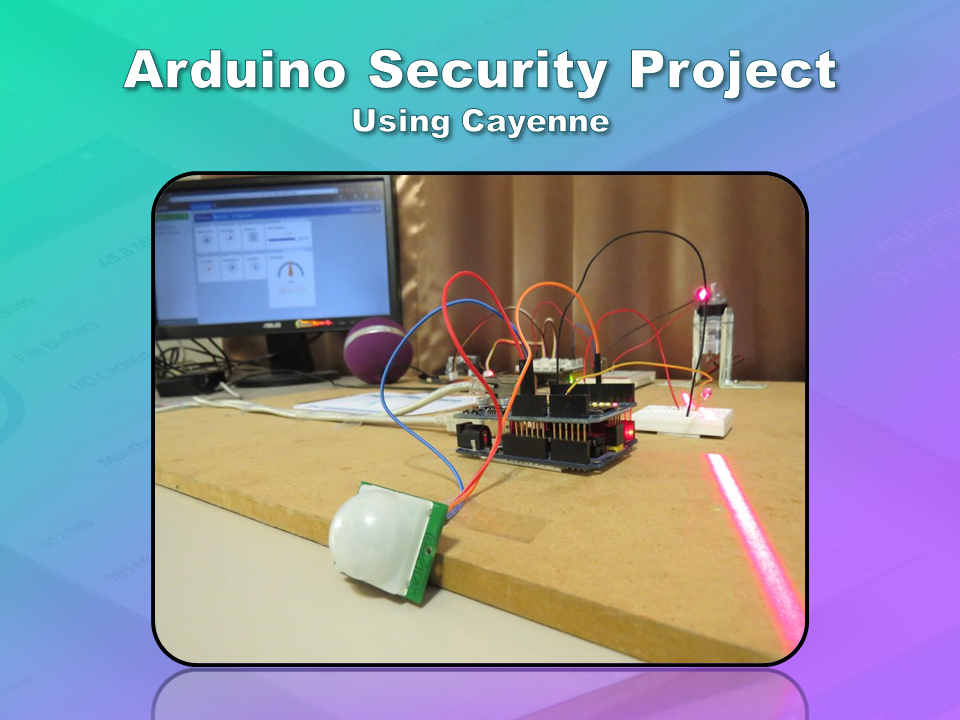
This is an Arduino based home security project that uses the power of "Cayenne" for extraordinary capabilities.
Cayenne is a new IoT drag and drop platform originally released for the Raspberry Pi, but now available for Arduino. Cayenne makes the task of connecting your Arduino to the internet as simple as possible. All of the complexity of internet connectivity is hidden within the Cayenne library.
You can easily create a Network of Arduinos and build an IoT system which can be managed and operated within the Cayenne dashboard. This dashboard is accessible through your browser or via the Cayenne smart phone app (on IOS or Android).
The feature I liked the most, was the ability to change the position of sensors or actuators on the Arduino without having to re-upload Arduino code. I could manage the changed position from within the Cayenne platform. The other feature that I liked was the ability to setup actions based on custom triggers. You can use Cayenne to trigger a whole range of functions, for example: play a sound, move a motor, light up an LED, or to send alert notifications via email or SMS.
Cayenne is in Beta at the moment, so there are a few minor bugs here and there, but overall - I give it a thumbs up - it is definitely worth checking out.

In order to fully experience this new IoT platform, I decided to create a project to really put it through its paces. This is what my Security Project will need:
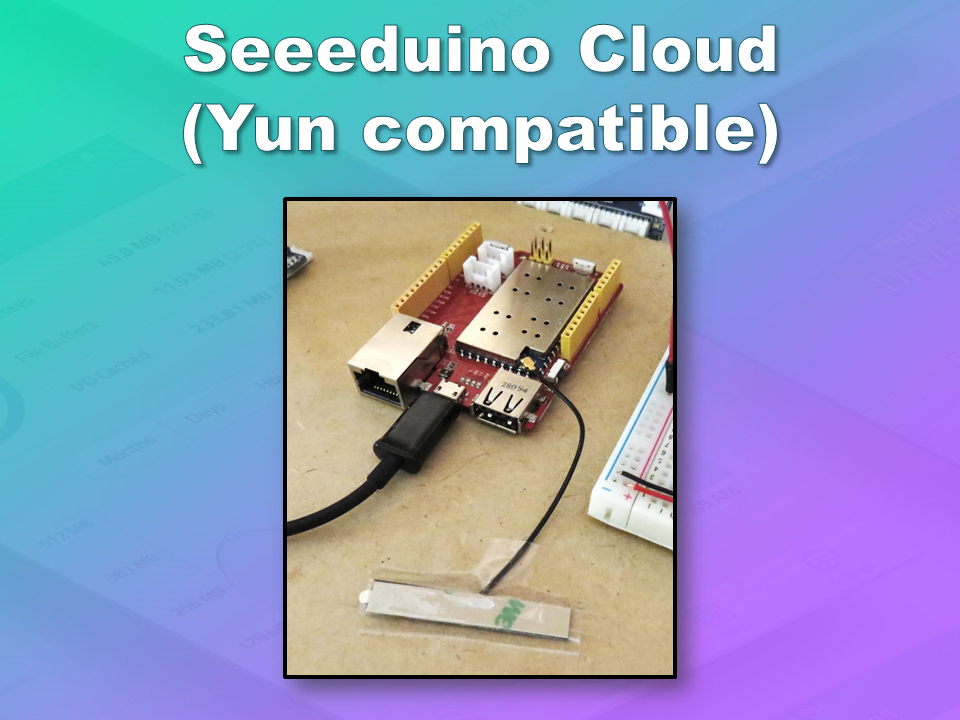
You will need an Arduino IDE to upload code to the Arduino and the Seeeduino Cloud.
Here is the link to the Arduino IDE: Arduino IDE - download location
The Cayenne service requires that you download and install the Cayenne Library into your Arduino IDE.
You can get the Cayenne Library from here: Cayenne Library File - Download
The Seeeduino Cloud needs to be prepared for use with Cayenne.
Normal operating/setup instructions can be found here: Seeeduino Cloud WIKI page
Once you have successfully connected Seeeduino Cloud to your WIFI network, you can add it to the Cayenne Dashboard by making the following selections from within the Cayenne Web application:
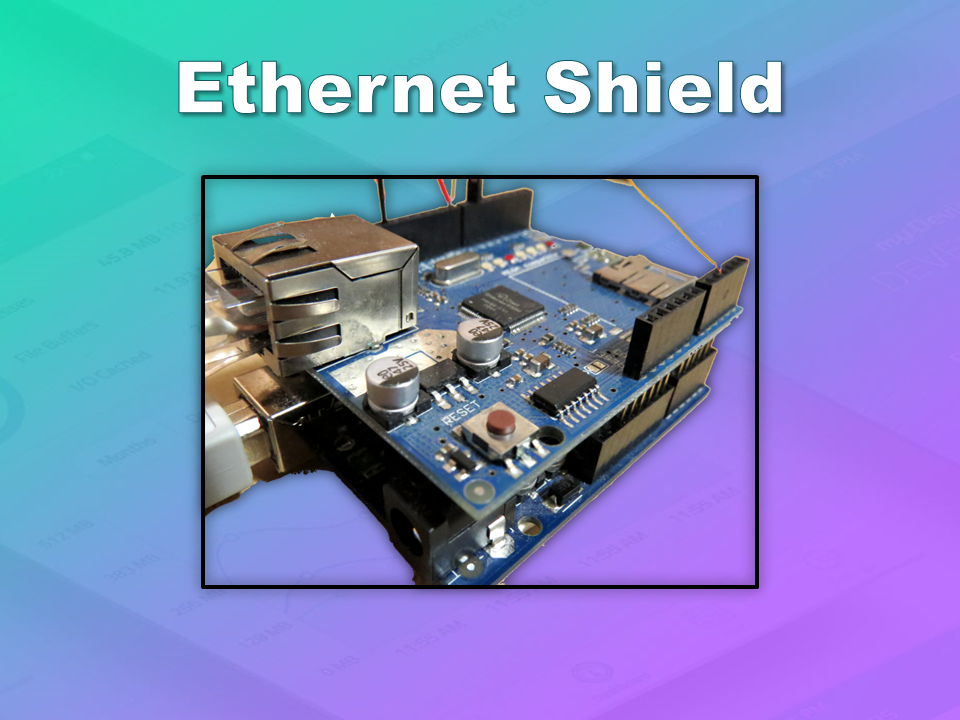
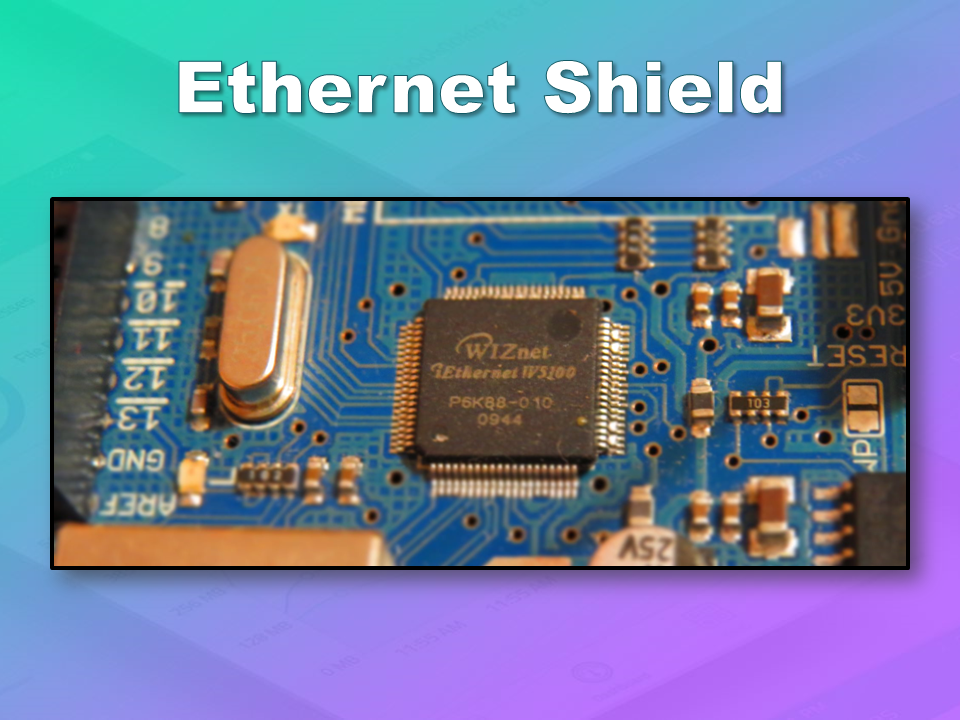
The Arduino UNO with WIZNET 5100 - Ethernet Shield
also needs to be prepared with Cayenne
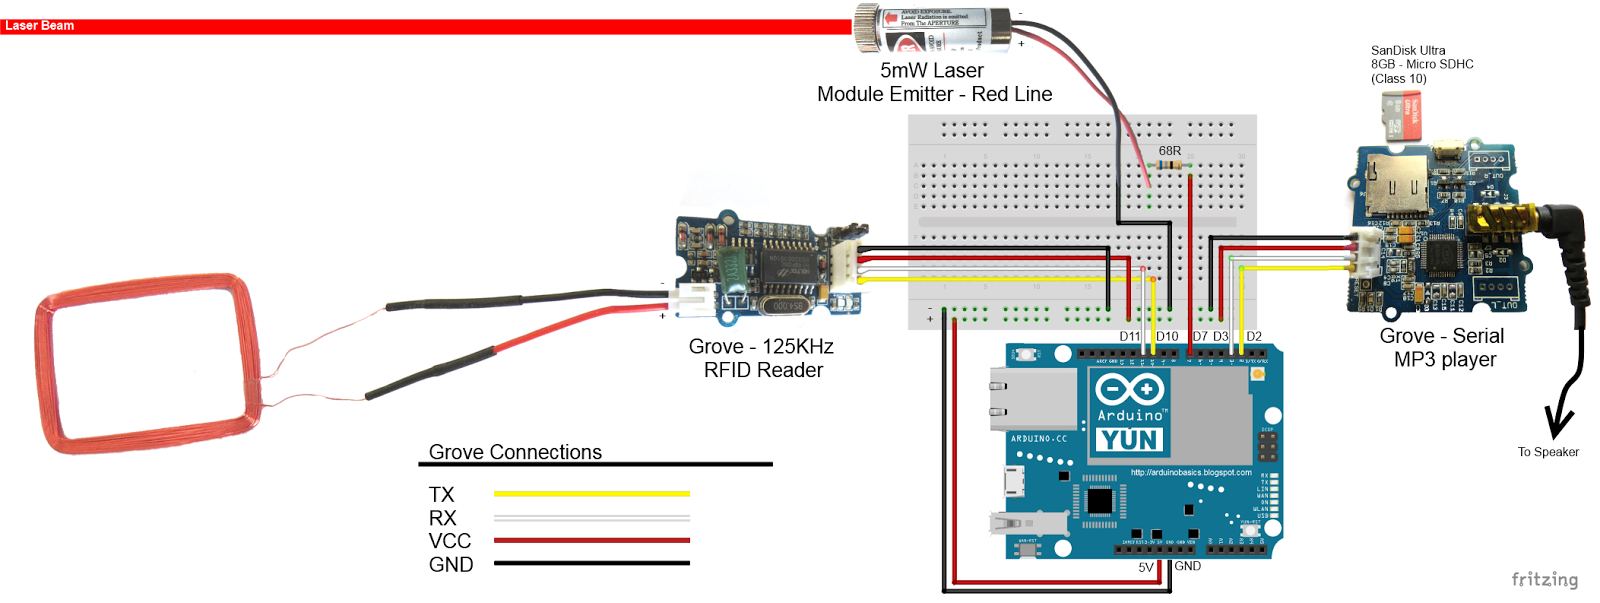
Please click on the picture below for an enlarged version of this fritzing diagram

Please click on the picture below for an enlarged version of this fritzing diagram
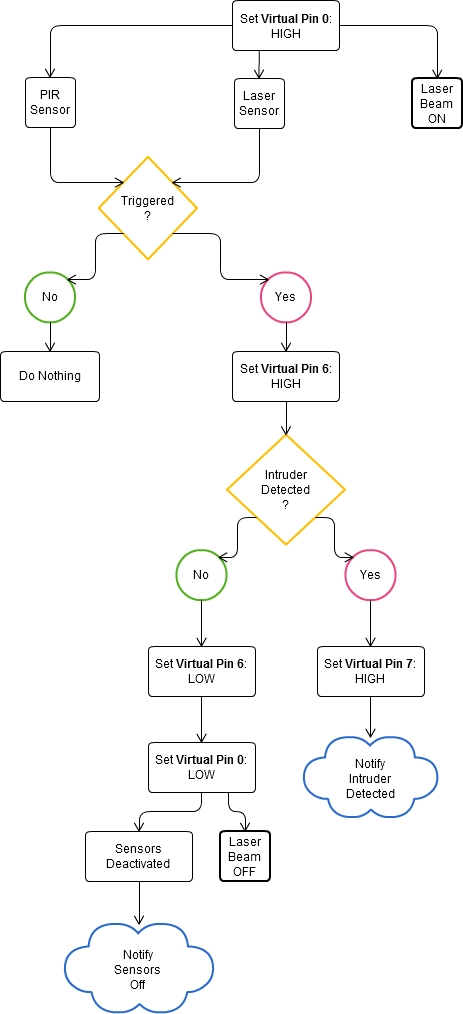
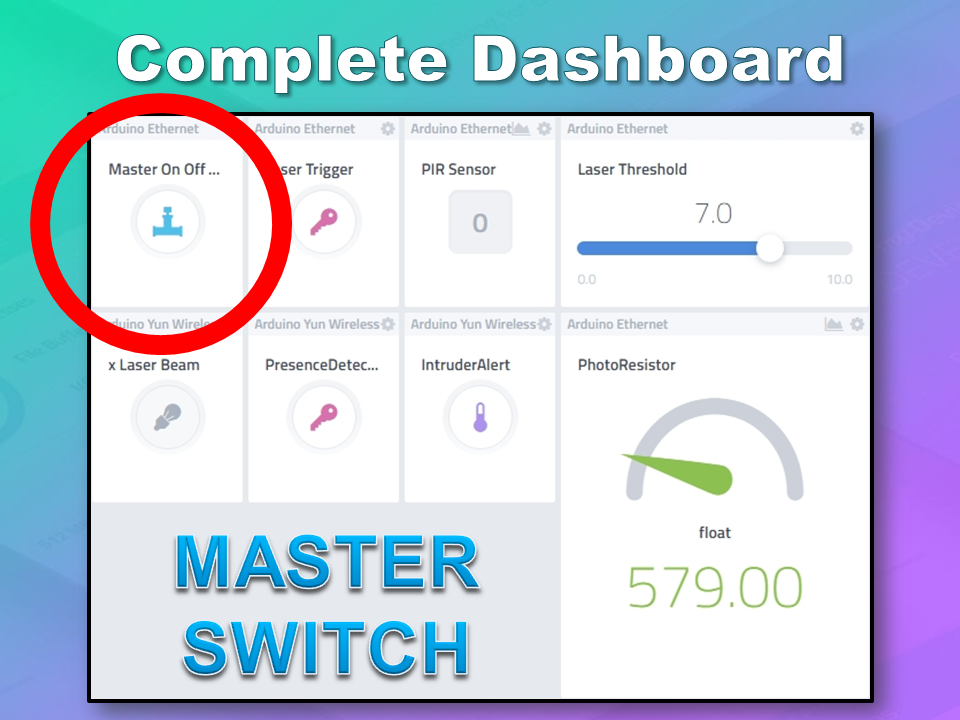
The master switch allows me to turn the security system on and off. When I turn the MASTER SWITCH ON, the laser beam will turn on, and the sensors will start monitoring the area for intruders. This widget is NOT associated with a physical switch/sensor on the Arduino - it uses virtual channel 0. We need to add the Master switch to the dashboard:
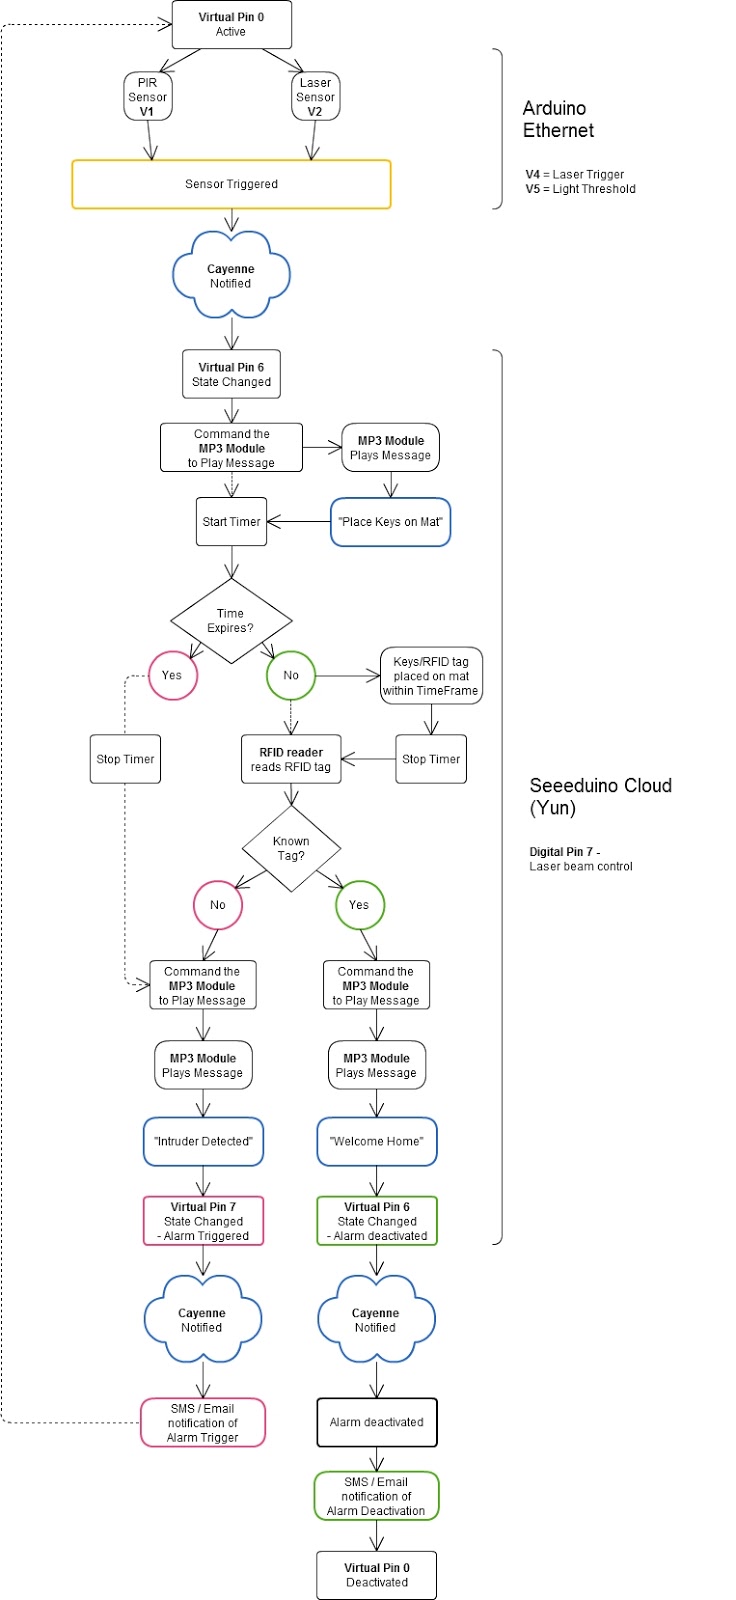
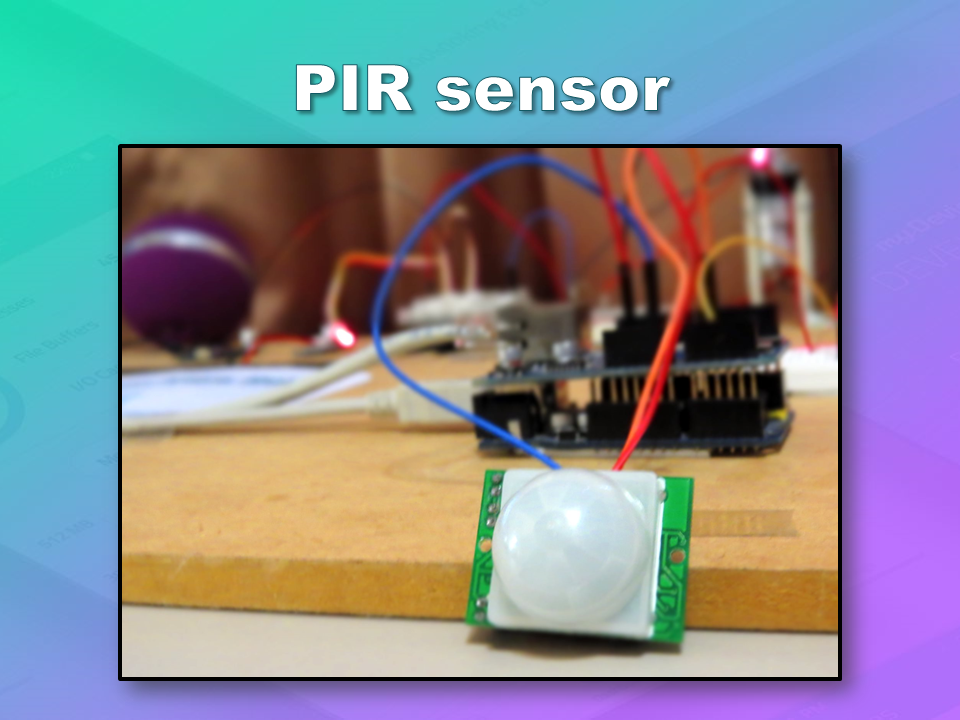
This sensor will be used to detect movement in the room. If a person walks into the room, this sensor will detect movement, and will trigger a message to be played on the Grove Serial MP3 player. The message will aim to get the person to identify themselves. They identify themselves by placing their RFID tag in close proximity to the Grove RFID reader. If the tag is valid, a "Welcome home" message is played on the Grove MP3 player. If a valid tag is not presented to the reader within 10 seconds, an Alarm will go off ("Alarm sound" played on Grove MP3 player.)
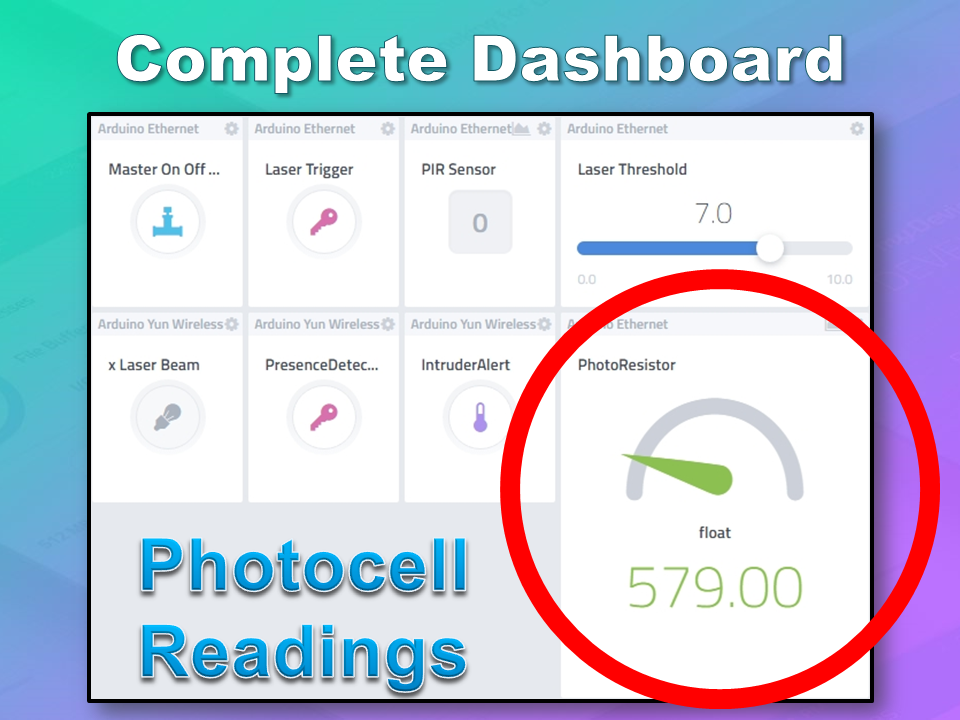
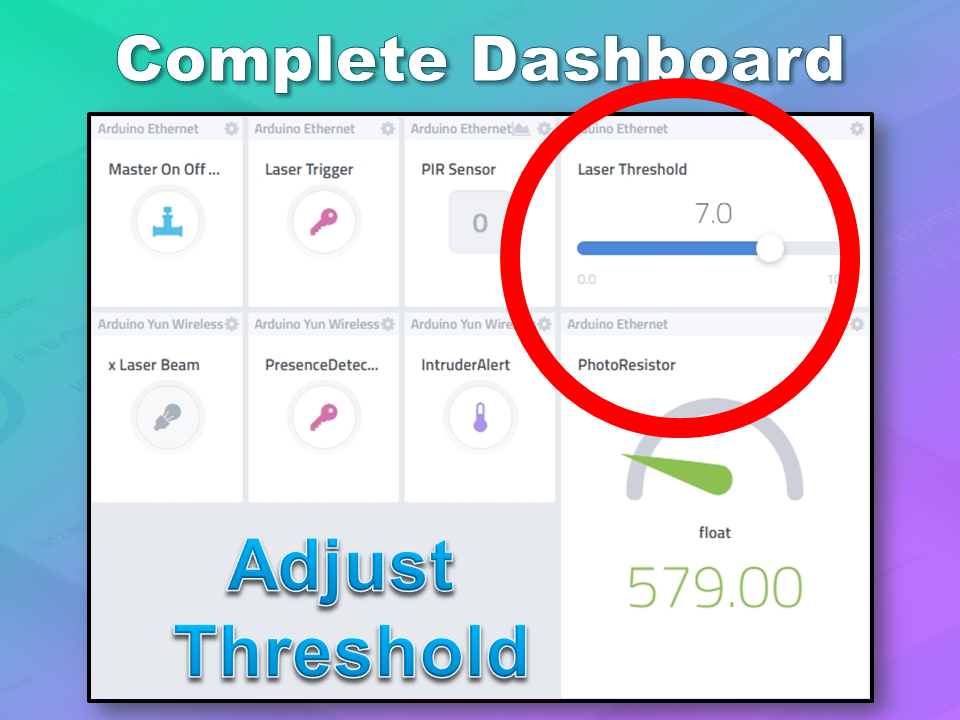
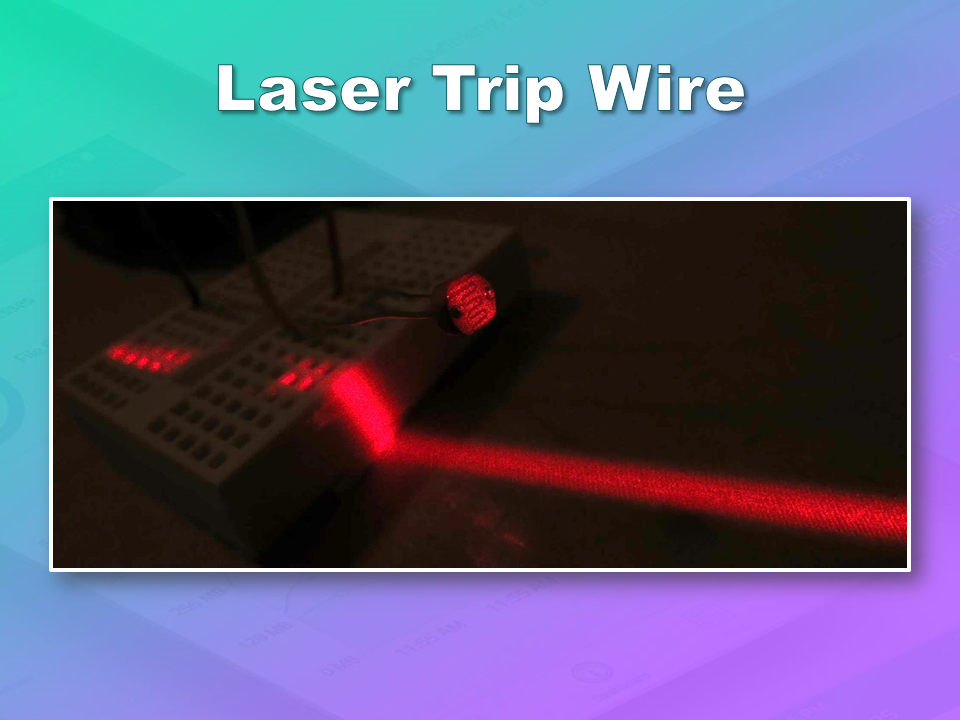
This sensor will be used with the laser beam to create a laser tripwire. If the sensor detects a change in light levels (drops below the threshold), it will activate the laser trigger button on the dashboard. The person will then be required to identify themselves etc etc (similar to the motion detection by the PIR sensor). The photoresistor widget will display the raw analog reading from the sensor (connected to A2), but is associated with virtual channel 2. I used a virtual channel for more control over this sensor. To add the Photoresistor to the dashboard:
The laser trigger is just an indicator that someone tripped the laser beam. The state of this widget is used to notify the Seeeduino that a presence has been detected. This widget is associated with virtual pin 4 on the Arduino UNO with Ethernet.
The laser threshold is used to manually configure the light level at which the laser trigger will trip. When the photoresistor value drops below the threshold value, the laser trigger icon will activate. This allows the threshold value to be updated from the Cayenne dashboard, rather than having to manually adjust the value in the Arduino code. Also, this threshold can be set remotely, in that you don't have to be near the Arduino to change this value. A very useful feature of this Security system. This widget is associated with virtual pin 5 on the Arduino UNO with Ethernet.
The presence detected widget is there to notify the Seeeduino Cloud that a presence has been detected on the Arduino Uno with Ethernet shield. When the PIR sensor detects movement or if the laser tripwire is tripped, Cayenne will change the state of the Presence Detected widget from LOW to HIGH. This is used within the Seeeduino Cloud to trigger the message "Place your keys on the Mat"
. If a valid RFID tag is read by the Grove RFID reader, then this widget's state will change back from HIGH to LOW, and the MasterSwitch will be deactivated - turning the Security system off. This widget is associated with Virtual pin 6 on the Seeeduino Cloud.

If a valid RFID tag is not read by the Grove RFID reader within 10 seconds of a presence detection event, an alarm will sound, and this widget will be activated. This will trigger a notification event - to notify me of the unauthorised intrusion - via SMS or email. I will also have a visual indicator on the Cayenne dashboard that an intrusion has taken place. This widget is associated with Virtual pin 7 on the Seeeduino Cloud.
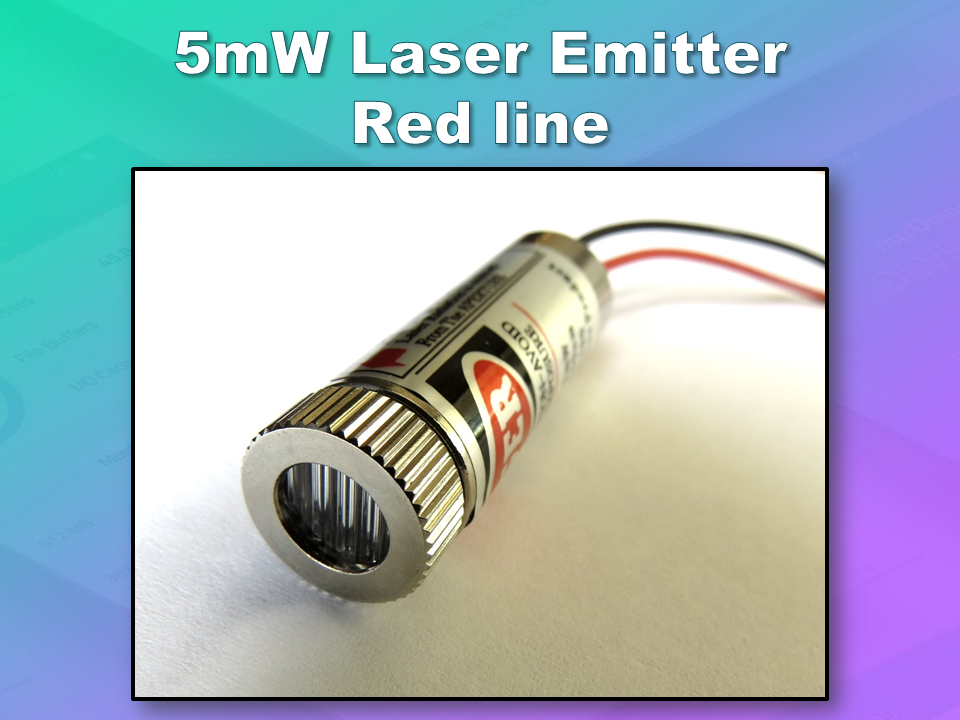
The laser beam widget was created to allow for full control over the laser beam. The laser beam can be turned on or off from the Cayenne dashboard, and a connected to digital pin 7 on the Seeeduino Cloud.

I used many different elements to put this home/office security project together - Multiple Arduinos were connected to the internet, both controlled by a web/smart phone app, cross-communication/synchronisation between the Arduinos, and the use of multiple sensors and modules including a laser beam !
This was way more than just a simple PIR sense and alarm project. I now have a personalised greeting and reminder system when I walk in the door. Everyone else has their own personalised greeting. I can enable my Security System remotely, from two blocks away, and if I wanted to - I could enable it from the other side of the world. I know instantly when someone has entered my house/office.... with an SMS alert straight to my phone.
This project could easily be extended:

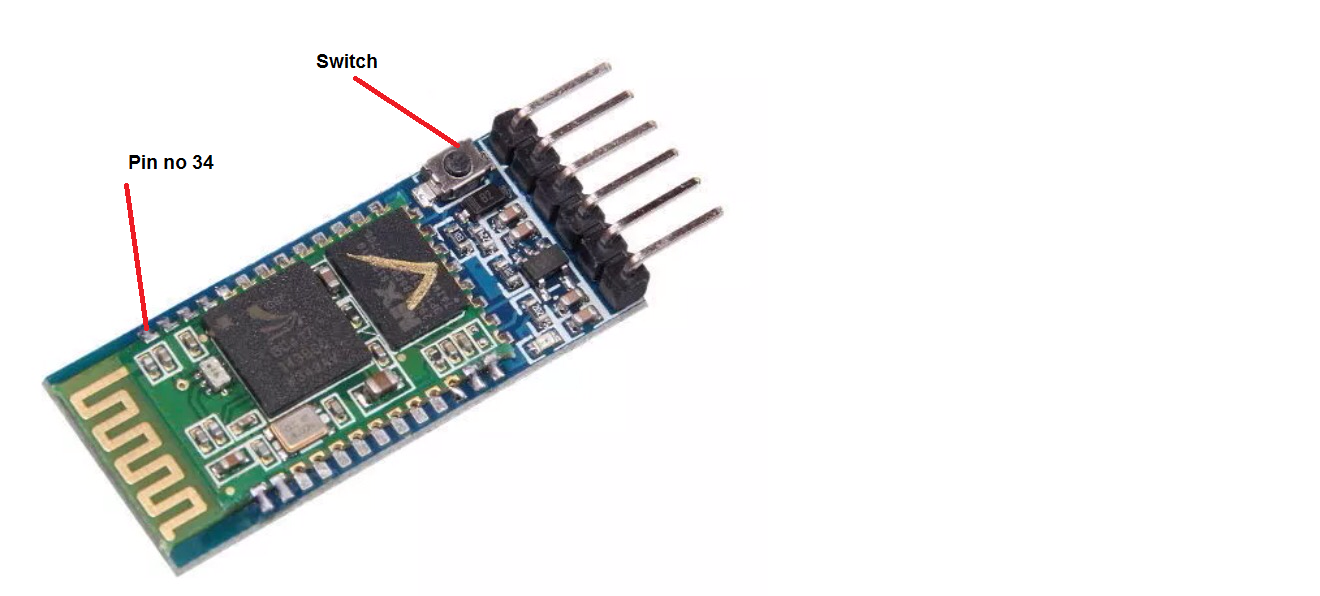 |
| HC-05 |
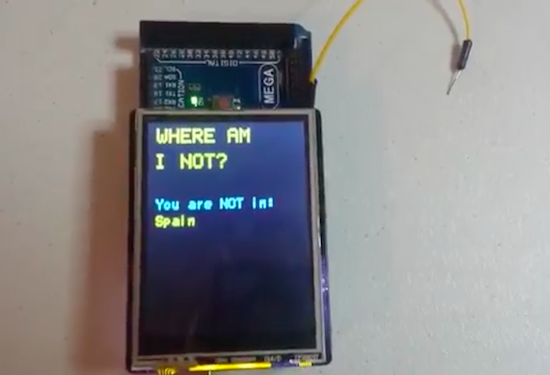
A few months ago, Connor Nishijima demonstrated a neat project highlighting the Arduino Uno’s “built-in motion sensor.” Now, he’s using the Arduino Mega’s “built-in anti-GPS” to guess which countries you’re NOT in. How, you ask? By reading the frequency of the alternating current (AC) cycles in his house using an open analog pin.
You’ll need an Arduino Mega to fit the array of Strings below, Uno doesn’t cut it even with use of PROGMEM. The Sketch is also written to use the Seeed Studio TFT Shield, but if you remove all “TFT” lines from the sketch you can just see the output in the Serial Monitor. An antenna (just a breadboard jumper) on A7 might be necessary.
Since various locations have varying power systems, Nishijima was able to program the board with a list of all those that cycle the AC at 60Hz and 50Hz AC. By knowing which one you have, the Arduino can then reckon which countries you’re not in and display its findings on the TFT shield.
Perhaps the best part of Nishijima’s hilarious video, though, is what happens when you don’t have enough AC in your home. When this occurs, you’ll receive the following error message: “NO ******* CLUE WHERE YOU ARE. SORRY NOT SORRY PAY YOUR ELECTRIC BILL.”
Admittedly, he notes that this trick is “pretty useless, but fun, nonetheless.” You can find more about the anti-GPS project on GitHub.
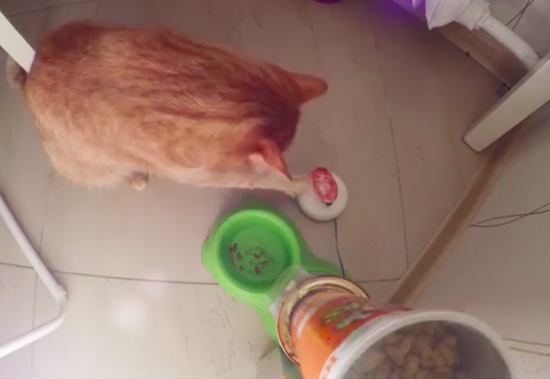
YouTuber “Mom Will Be Proud” and his family have a cat. And like all pets, their feline friend requires fresh food every morning. But rather than disrupt your sleep or daily routine, why not build an automated feeder using some spare parts? This is exactly what the Maker did using an Arduino, a servo, a simple button, a power supply, and two cans–one for housing the electronics, the other for the food.
Mom Will Be Proud cut little openings into each container, and connected them to a servo that rotates one on top of the other without ever getting stuck. A broken IKEA timer and a piece of plastic are used for the button, which when pressed, turn the cans until its holes match up and the food is dispensed into a bowl.
You can see how it works below!