Posts with «arduino» label

EasyEDA RGB5050 LED Scroll Bar


Guest Post Disclaimer

This is a guest post by the EasyEDA team. I would like to thank EasyEDA for providing this tutorial for everyone to enjoy. All information within this post was provided by EasyEDA.


Description

None of us could deny the fact that we would love with to play with LED’s and lighting stuff. I love to play with LED’s and create attractive lighting effects. This project was a result of such an attempt where I created a stunning RGB light effect using the popular development platform Arduino Nano. Let’s see the circuit, code and instruction on building this project:


Image source: EasyEDA


Arduino Libraries and IDE

No libraries are required for this project. The Arduino IDE can be downloaded from the Arduino website. Here is the download link.

ARDUINO CODE:


Preparing the LED strips

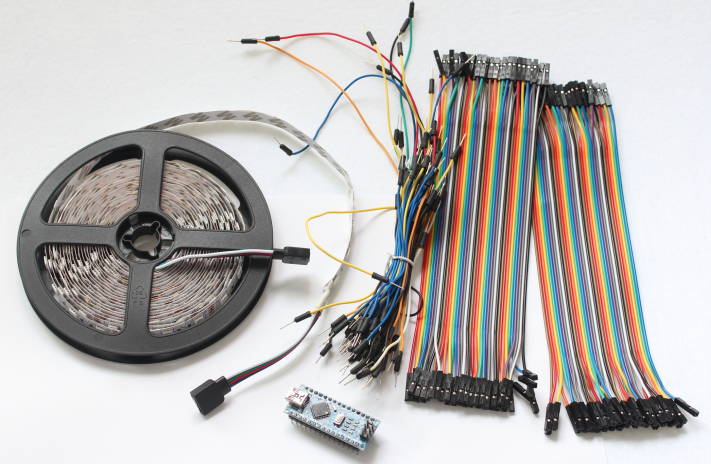
Cut down the LED strips into 10 single pieces. Make sure you cut them into equal halves and make sure that only the copper conduction plate in the strip is cut. Making a wrong cut disrupts the electrical conductivity between the LED’s. After cutting down into separate strips, you will need to connect each strip using a Dupont wire connectors.

Image source: EasyEDA


Designing the Control Board

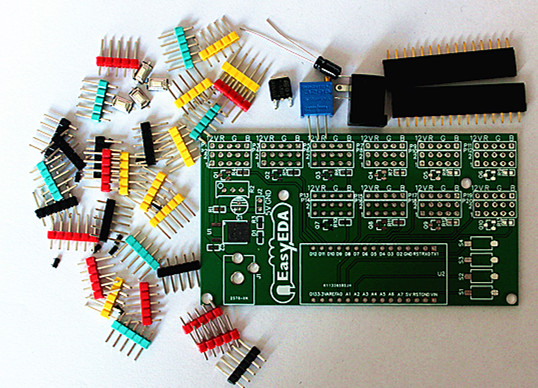
I have made a custom control board that incorporates an Arduino Nano. The control board is used to boost the incoming signal from Arduino and lights up the corresponding LED strips.


Image source: EasyEDA


Control Board Circuit diagram

I used a free Online circuit and PCB designing platform called EasyEDA to develop my control board. It is pretty easy to use especially because of the large library of parts to choose from. Once the design is complete, you have the option to order it through EasyEDA. They offers great prices on custom PCB manufacturing. I have added 10 connection points for 10 LED strips. Each RGB LED strip is controlled by one of the Arduino Nano digital pins.. Transistors Q1,Q2,Q3….Q10 act as a switch for these LED strips for controlling 12V strips via a 5V signal from the Arduino. And switches S1,S2..S4 were added to be able to select the effect on the strip. The schematic can be seen below:


Schematic

You can access the actual EasyEDA schematic by clicking on the image below:

Image source: EasyEDA


PCB Board Design

Here is the PCB board design for this project.
You can access the actual EasyEDA design by clicking on the image below.
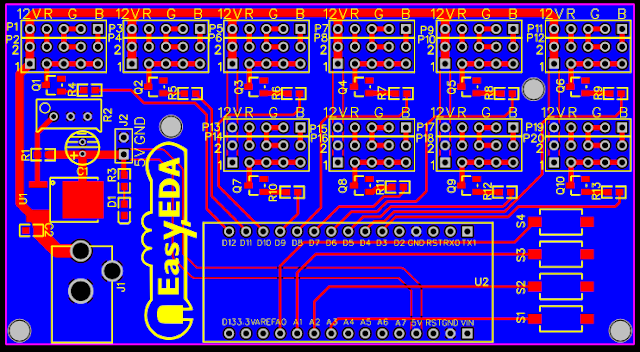
Image source: EasyEDA


PCB Fabrication

After completing the PCB design, you can click on the Fabrication icon.

You will then have access to the PCB order page which will allow you to download your PCB Gerber files that can be sent to any manufacturer. However it is a lot easier (and cheaper) to order it directly from EasyEDA.
Here you can select:

  • the number of PCBs you want to order
  • the number of copper layers you need
  • the PCB thickness
  • copper weight
  • and even the PCB color
After you’ve selected all of the options, click “Save to Cart” and complete you order. You will then get your PCBs shipped a few days later.

Image source: EasyEDA


PCB final product

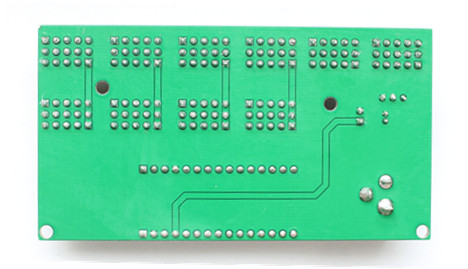
When I received the PCBs, I am quite impressed with the quality, they are pretty nice.
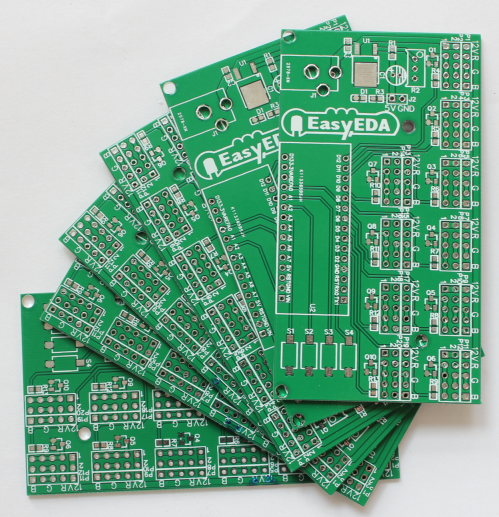
Image source: EasyEDA


PCB Build of Materials
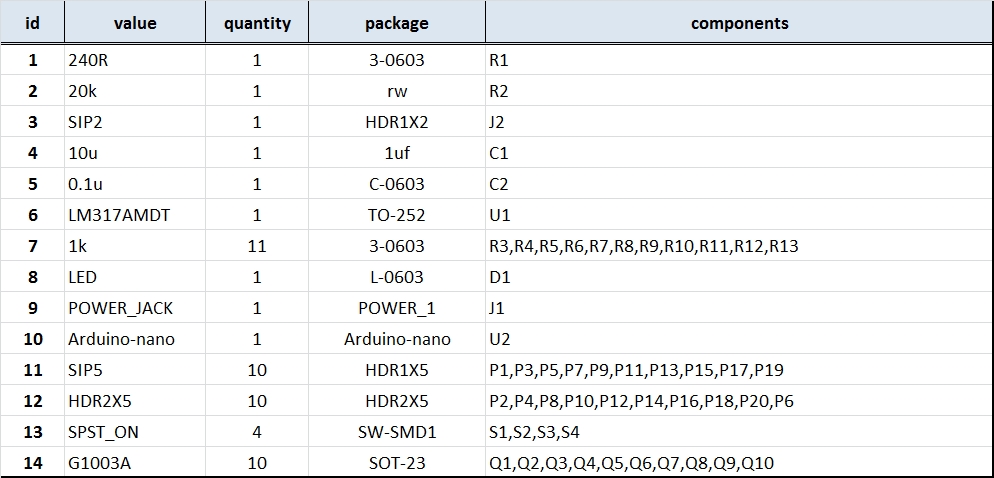
Image source: EasyEDA


PCB connections

Connect the LED strips through the connection points in the board. Make sure that you connect these correctly (push the connectors all the way onto the pin), because the chances of a short increase significantly with the number of wires connected. Once all the connections are done all that left is to install your Arduino Nano (pre-programmed with the Arduino code above), and to power the PCB with a 12V power supply.


Image source: EasyEDA


Project Video


Concluding comments

Hope you like this RGB light effects project, do try it out and post your feedback below.
 
Disclaimer:
This is a guest blog post by the EasyEDA team. All information within this post was provided by EasyEDA.
ScottC 11 Sep 07:09

Relive some arcade memories with a desktop coin pusher

Remember Ryan Bates’ mini vending machine, the Venduino? Well, the Maker has now built a wooden coin pusher that’ll complement his earlier project quite nicely.

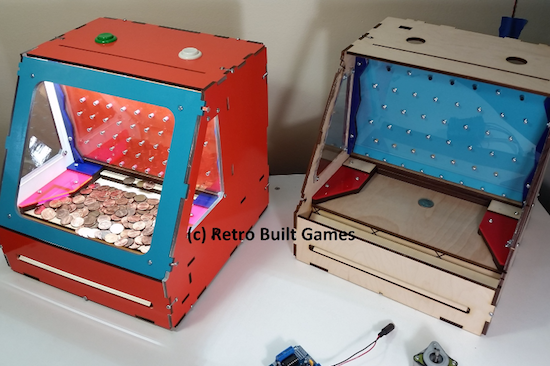
If you’ve seen a machine at an arcade with coins hanging off an edge, you probably thought, “Wow, if I just put one more quarter in, I’ll get like $10 back.” Although perhaps he could make money with it, Bates built his own as a fun distraction. His machine uses a cam mechanism to push a “dozer” back and forth so that when you drop a penny down the money input chute, it hopefully knocks a few coins into the area where you can collect them.

The mechanism is simple, but Bates used an Arduino along with a motor shield to drive dozer motor. It also monitors a tilt sensor to detect if someone tries to cheat. On the other hand, as he notes, it’s small enough that someone could take the device.

Although it’s apparently not ready as of this writing, Bates plans to have this game available as a kit on his website.

Arduino Blog 09 Sep 21:47

Use an Arduino Uno to interface with your Apple II

Instead of a huge box of disks, David Schmenk decided to use an Arduino to add a massive amount of storage.

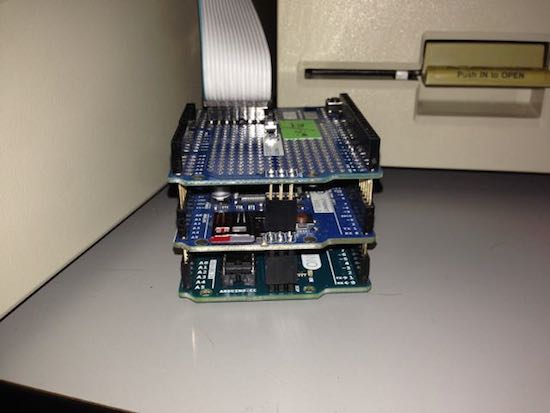
For Apple II enthusiasts, loading games or other programs via a normal disk drive works, but since storage capabilities have exploded since the 1980s, Schmenk’s setup uses an Arduino Uno to access an SD card via the gameport. As seen in the video below, Schmenk is able to read and write data, pulling up Lode Runner in 45 seconds. The Arduino shield’s real-time clock can also be accessed if needed.

There are already plenty of Ethernet products available for the Apple II, but few SD card options for transferring individual files… For my project I wanted something closer to a hardware version of CiderPress: the Apple disk image utility.

Be sure to check out the entire project on Schmenk’s writeup!


Arduino Blog 09 Sep 20:54
arduino  featured  uno  

Drive an RC car with first-person view

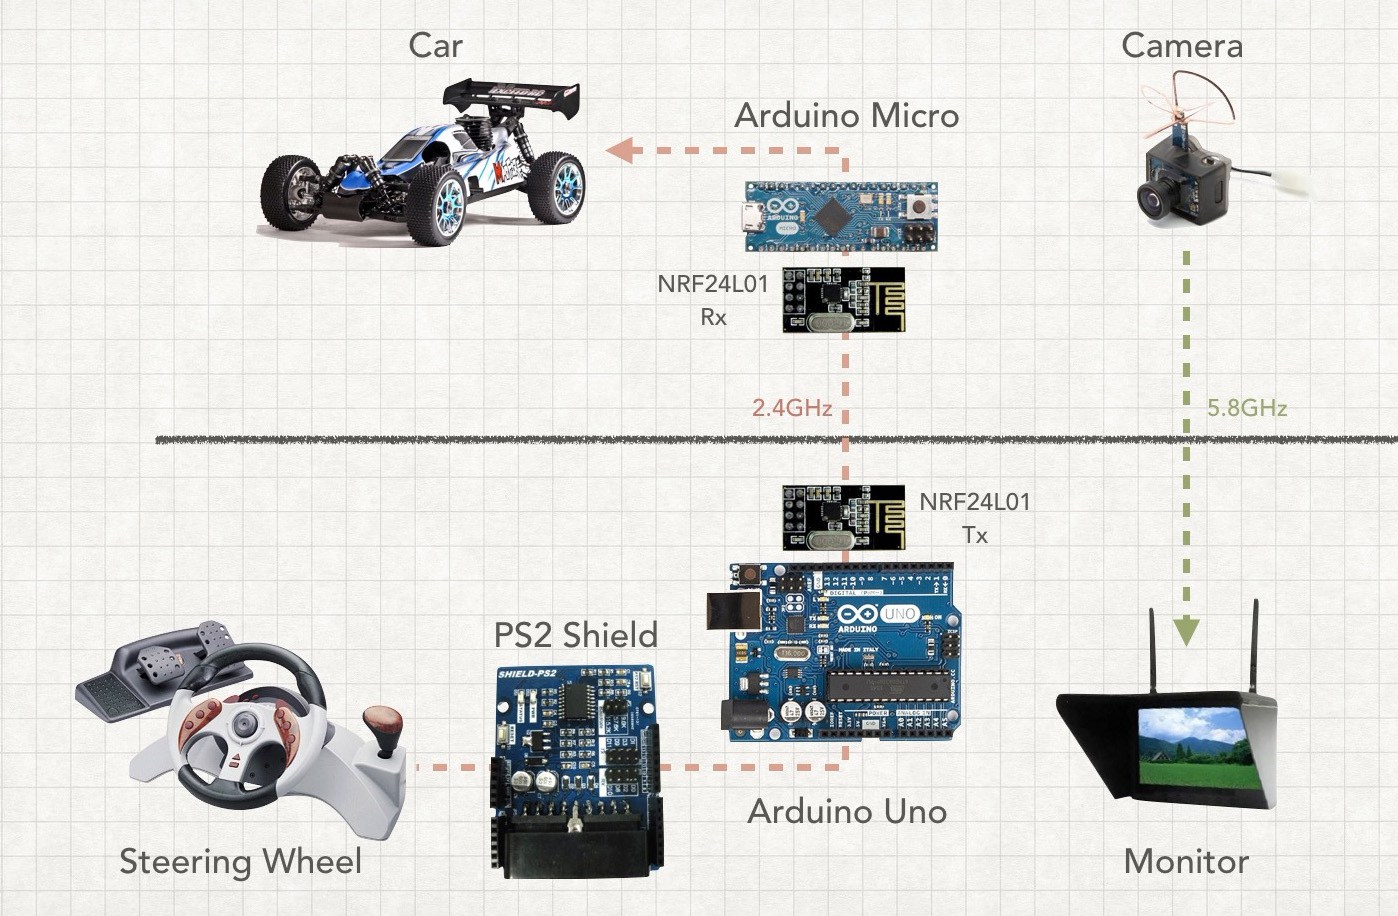
If you’ve ever dreamt of sitting in the driver’s seat of an RC car, you’ll love this recent project from Paul Yan. The designer has hacked together a first-person driving experience using a natural steering wheel that lets you feel like you’re playing a race kart game in real life.

As he describes in the video below, Yan used an old PS2 wheel controller, two Arduinos, a mini FPV camera, and a headset to act as a standalone monitor. The RC car–which is equipped with a Micro–interfaces with the wheel using an Uno and a PS2 Shield. Both Arduinos communicate via a pair of NRF24L01 modules.

I got the idea for this project while watching my three-year-old son play with his radio controlled toy cars. These all use the conventional two joysticks. The left is isolated to vertical movement to control the motor and the right stick is isolated to horizontal movement to control the turning direction of the front wheels.

Upgrade your USB keyboard to Bluetooth with this Arduino device

If you have an old keyboard lying around and wish it were wireless, Maker DastardlyLabs has a solution.

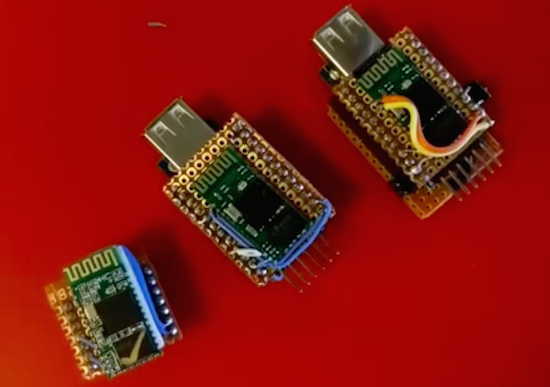
The “HID Relay” is a small adapter that uses an Arduino Pro Mini, a Bluetooth module, a USB host shield, and a few other components to upgrade any USB keyboard to Bluetooth. DastardlyLabs has made three videos to explain the entire “Bluetooth-ification” process–which can be found below.

So far, the method has worked with all of the keyboards that DastardlyLabs has tested it on, as well as most mice (except for one “gamingish” USB mouse). The Arduino source code and build notes are available on GitHub. The HID Relay was inspired by a recent Arduino hack by Evan Kale. 

Connected question mark hopes to spark 1 million conversations

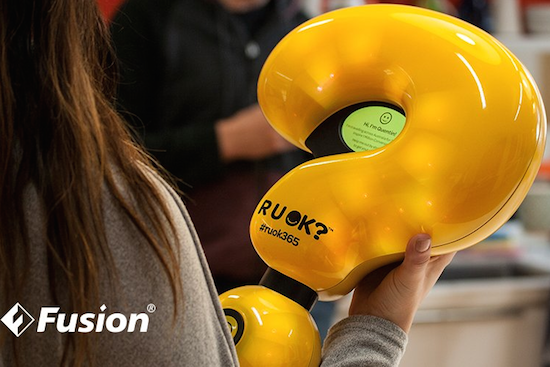
Suicide prevention charity R U OK? has partnered with digital innovation agency Fusion to create a fully-connected device in the form of a question mark with hopes of sparking a million conversations throughout Australia. Similar to the Olympic Torch, Quentin will be passed from person to person as it makes its way from town to town starting on Thursday, September 8th.

But unlike the Olympic Torch, the route is not planned. Instead, the journey is determined by the challenge it issues to each new keeper motivating them to reconnect face-to-face with people in their lives.

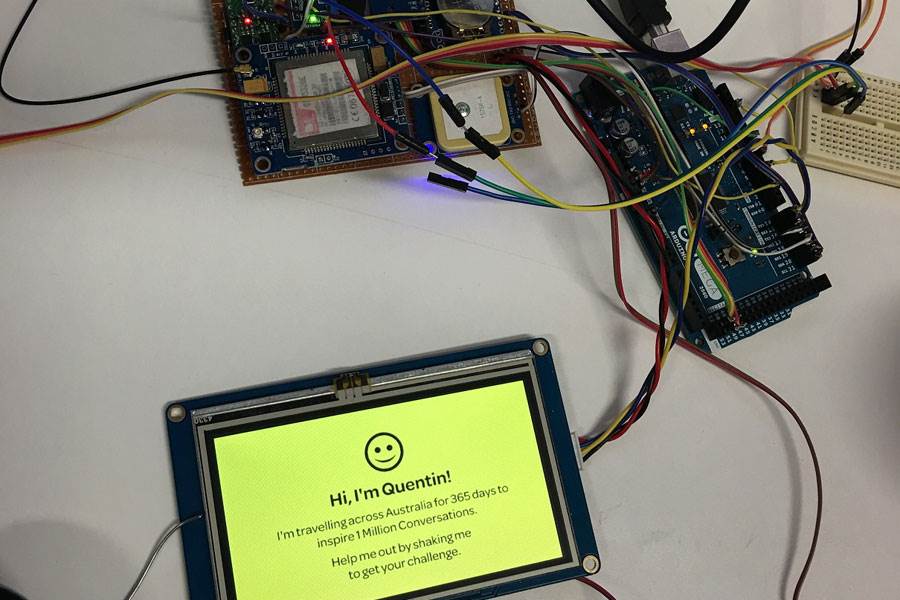
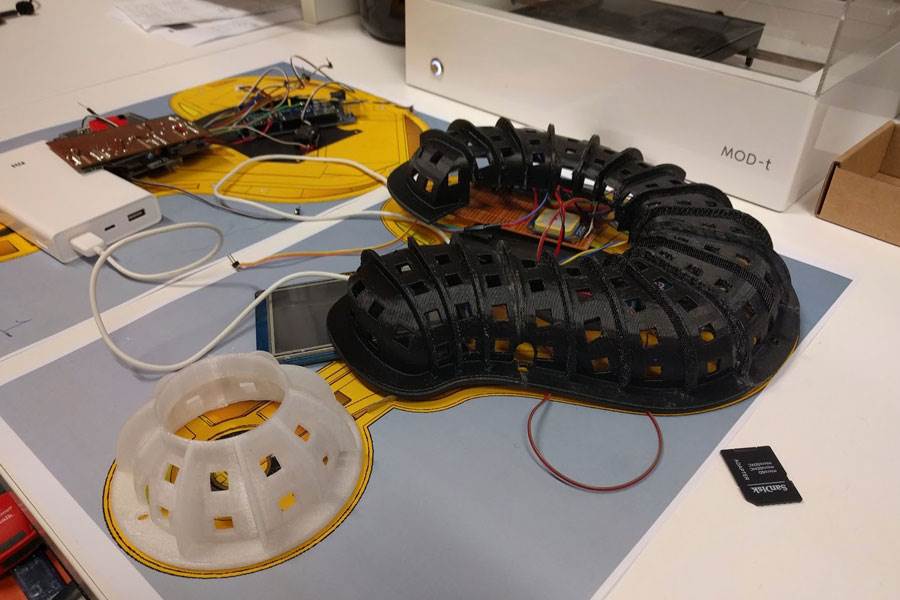
Quentin consists of a translucent 3D-printed shell, and is equipped with an Arduino/Genuino, some sensors, GPS, a display, and an array of LEDs that illuminate, animate and communicate. Users can interact with the device either by SMS or shaking it to receive their R U OK? challenge. Quentin also publishes its activity to the charity’s website, including distance travelled, challenges issued, and the number of keepers.

(Photos: Fusion / Campaign Asia)

The Maven Box is an Arduino controller for software developers

Matthias Faust has created an Arduino controller for speeding up software development.

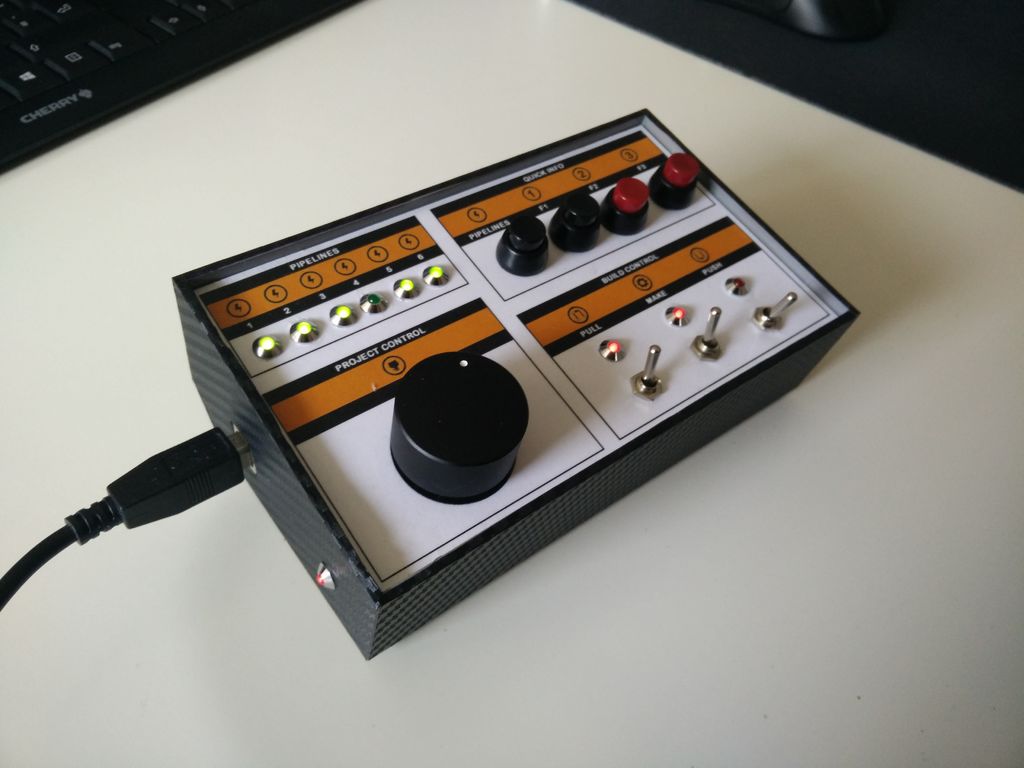
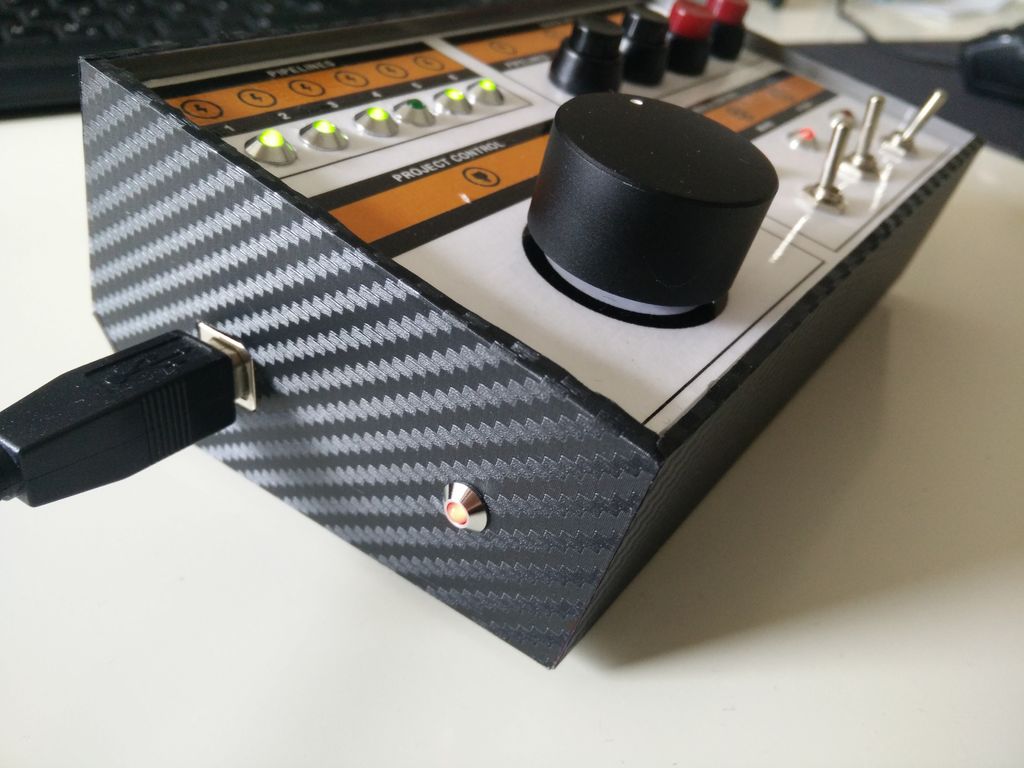
The “Maven Box” is based on an Uno and communicates with a Java program running on a desktop. The device is equipped with customizable buttons, switches and a dial, which act as physical inputs for expediting his daily routine. This enables Faust to select a branch from several GitHub projects, stash changes before pulling, pull the changes, trigger a maven build, as well as display the status of six tests on a set of notification LEDs.

Every job has it’s routine. I am a software developer who works with a Git/Maven based workspace everyday. So when I start working, my daily routine is to update and build my local workspace, pulling changes from GitHub, execute a maven build and execute the updated software. Usually I get my first coffee after that, but because I love coffee so much I thought there must be a faster way to get my system updated and running.

Whether a software developer yourself or simply a fan of awesome Arduino builds, check out the Maven Box’s Instructables page to see more!

Cheap Toy Airboat Gets a Cheap R/C Upgrade

[Markus Gritsch] and his son had a fun Sunday putting together a little toy airboat from a kit. They fired it up and it occurred to [Markus] that it was pretty lame. It went forward and sometimes sideward when a stray current influenced its trajectory, but it had no will of its own.

The boat was extracted from water before it could wander off and find itself lost forever. [Markus] did a mental inventory of his hacker bench and decided this was a quickly rectified design shortcoming. He applied a cheap knock-off arduino, equally cheap nRF24L01+ chip of dubious parentage, and their equivalent hobby servo to the problem.

Some quick coding later, assisted by prior work from other RC enthusiasts, the little boat was significantly upgraded. Now the boat could be brought back to shore using any R/C controller that supported the, “Bayang,” protocol. He wouldn’t have to face the future in which he’d have to explain to his son that the boat, like treacherous helium balloons, was just gone. Video after the break.


Filed under: Arduino Hacks, toy hacks
Hack a Day 07 Sep 09:01
airbot  arduino  arduino hacks  boat  hack  nrf24l01+  rc  servo  simple  toy  toy hacks  

Convert a weed wacker toy into a metal detector

Evan Kale is back with another hack. This time, the YouTuber decided to convert a weed wacker-like toy into a metal detector with the help of an Arduino Uno.

As Kale explains, the project is based on a Colpitts Oscillator, which combines an LC circuit with a transistor amplifier for feedback. The frequency of oscillation is somewhere in the 100KHz range, which cannot be heard by humans. Enter the Arduino. When the trigger is pressed, an Arduino program translates the oscillation into an audible tone that is played out of the speaker. When the oscillation exceeds a certain threshold, it also emits a celebratory light show because… why not?

Kale walks through his entire build—along with the science of it all and how it works—in the video below. The schematics can be found on Imgur.

World Maker Faire: Call for volunteers

Calling Makers in New York! Planning on attending World Maker Faire next month? We’re looking for volunteers to join our team during the event, e.g. staffing tables and displays, helping with one-on-one workshops and demos, and providing technical assistance.

If you volunteer with us for one shift, you’ll receive a pass for both days so you can explore and enjoy everything happening around the faire grounds. Water and snacks will be provided, of course, and we’ve prepared a small gift to show our appreciation at the end of the your shift.

Interested? Please fill out this questionnaire, and we’ll get back to you soon!