Posts with «arduino» label

M2 by Macchina joins At Heart!

We’re excited to announce the latest member of Arduino’s AtHeart program. M2 by Macchinanow live on Kickstarter–is an open-source, versatile development platform for hacking and customizing cars.

M2’s design is compact, modular, wirelessly connectable, and built on the popular Arduino Due. The device can be wired under the hood for a more permanent installation or plugged into the OBD2 port, enabling you to do virtually anything with your vehicle’s software. 

Macchina, a Minnesota-based company, has partnered with Arduino, Digi and Digi-Key to develop M2, and believes that its highly-adaptable hardware will most benefit hot rodders, mechanics, students, security researchers, and entrepreneurs by providing them access to the inner workings of their rides.
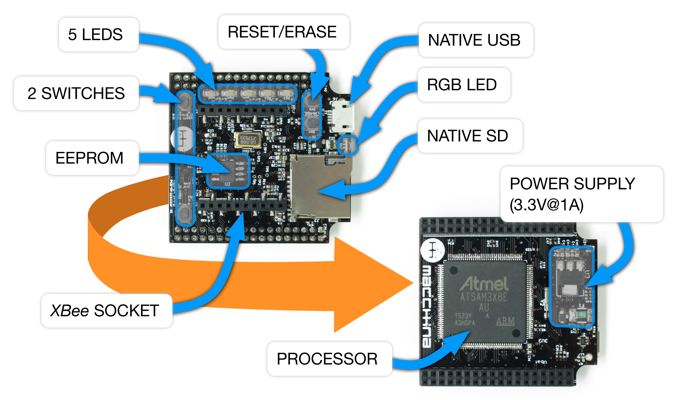
M2 accommodates a wide variety of wireless options thanks to its Digi XBee form-factor socket, allowing you to easily connect your car to the Internet, smartphone, satellites, or the cloud using BLE, WiFi, GSM, LTE, and other modules.

The platform can be programmed using the latest Arduino IDE, and is compatible with a number of software packages. Moreover, given its open-source nature, potential applications are bounded only by the collective imagination of the coding community.

Interested? Check out Macchina’s Kickstarter page to learn more or pre-order your M2 today!
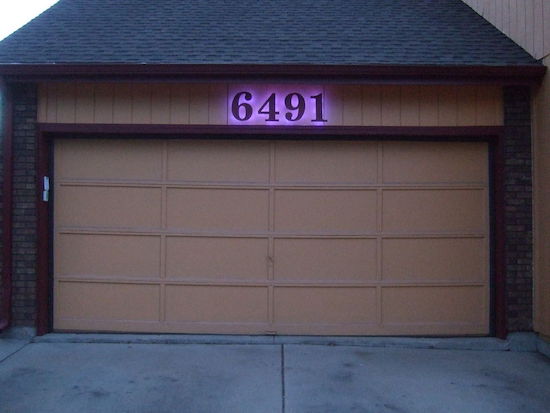
Make sure guests never miss your house with these numbers

If you’d like for someone to visit you, it’s quite helpful if you have the house number displayed somewhere on your premises. Rather than simply rely upon someone reading the numbers as they drove by, “Superbender” has decided to do something a bit different make his home stand out.

During the day, you can identify Superbender’s residence by the giraffe mailbox, but to help point the house out by night, he came up with the glowing Arduino Uno solution seen in the video here.

The numbers were cut on a scroll saw and RGB LED strips were added in the back to enable them to illuminate. The setup allows for one color per night, or the numbers can change every three seconds in “party mode.”

The software was tested on an Uno, then transferred to an ATmega328P in a DIY control board. You can read more about this project on Instructables and watch a demo of it below!

Hit Snooze by Shooting This Alarm Clock with Nerf Darts

Haven't you ever wanted to shoot your clock?

Read more on MAKE

The post Hit Snooze by Shooting This Alarm Clock with Nerf Darts appeared first on Make: DIY Projects and Ideas for Makers.

Nespresso Capsule Detector

Nespresso fans rejoice! If you like coffee (of course you do) and are a Nespresso fan, chances are you are one of two types of persons: the ones that chosen one type of capsule and stick to it or the ones that have a jar full of mixed capsules and lost track which coffee is which. Of course, there is a third, rarer, OCDish, kind. The ones that have every capsule organized neatly by color in a proper holder, full of style. In any case, if you forgot which color is which coffee because you threw the case away and forgot about it here’s an interesting weekend project for you: the Nespresso Capsule Detector.

[circuit.io team] made a neat Arduino-based project that can detect which capsule is which using an RGB color detector and display information about it on an LCD display. It’s a pretty simple project to make. If you have a 3D printer you can print the case, if not it’s fairly easy to come up with a working casing for the electronics and capsule.

The operation is simple, just drop the capsule in the hole and the Nespresso Capsule Detector will tell you which type it is, its intensity, its flavor tones and the optimal cup size for the coffee in question. We are just not sure if it can detect the Nespresso weddingbots correctly, but who knows?

Have a look:


Filed under: Arduino Hacks

Beautiful Linear RGB Clock

Yup, another clock project. But here, [Jan] builds something that would be more at home in a modern art museum than in the dark recesses of a hacker cave. It’s not hard to read the time at all, it’s accurate, and it’s beautiful. It’s a linear RGB LED wall clock.

You won’t have to learn the resistor color codes or bizarre binary encodings to tell what time it is. There are no glitzy graphics here, or modified classic timepieces. This project is minimal, clean, and elegant. Twelve LEDs display the hours, six and nine LEDs take care of the minutes in add-em-up-coded decimal. (It’s 3:12 in the banner image.)

The technical details are straightforward: WS2812 LEDs, an Arduino, three buttons, and a RTC. You could figure that out by yourself. But go look through the log about building the nice diffusing plexi and a very clean wall-mounting solution. It’s the details that separate this build from what’s hanging on our office wall. Nice job, [Jan].


Filed under: clock hacks
Hack a Day 19 Feb 03:00
arduino  clock  clock hacks  diy  rgb led  rtc  ws2812b  

Arduino Altair 8800 Simulator

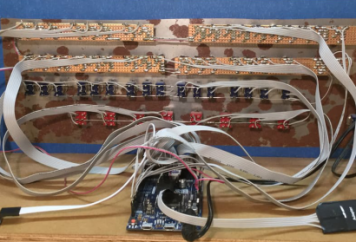
Browse around eBay for an original Altair 8800 and you quickly find that the price range is in the thousands of dollars. If you are a collector and have some money in your pocket maybe that’s okay. But if you want the Altair 8800 experience on a budget, you can build yourself a clone with an Arduino. [David] kindly shared the build details on his Arduino Project Hub post. Using an Arduino Due (or a Mega for 25% of original speed), the clone can accurately reproduce the behavior of the Altair’s front panel elements. We covered a similar project in the past, using the Arduino Uno.

While not overly complicated to build one, you will need a fair amount of patience so you can solder all the 36 LEDs, switches, transistors, and resistors but in the end, you’ll end up with a brand new computer to play with.  In 1975, an assembled Altair 8800 Computer was selling for $621 and $439 for an unassembled version. Sourced right, your clone would be under 50 bucks. Not bad.

The simulator comes with a bunch of software for you to try out and even games like Kill-the-Bit and Pong. BASIC and Assembler example programs are included in the emulator software and can easily be loaded.

In addition, the simulator includes some extra functions and built-in software for the Altair which are accessible via the AUX1/AUX2 switches on the front panel (those were included but not used on the original Altair). From starting different games to mount disks in an emulated disk drive, there are just too many functions to describe here. You can take a look at the simulator documentation for more information.

In case you don’t know already, here’s how to play Kill-the-Bit:


Filed under: Arduino Hacks

Monitor All the Laundry Things with this Sleek IoT System

If like us you live in mortal fear of someone breaking into your house when you’re on vacation and starting a dryer fire while doing laundry, this full-featured IoT laundry room monitor is for you. And there’s a school bus. But don’t ask about the school bus.

In what [seasider1960] describes as “a classic case of scope creep,” there’s very little about laundry room goings on that escapes the notice of this nicely executed project. It started as a water sensor to prevent a repeat of a leak that resulted in some downstairs damage. But once you get going, why not go too far? [seasider1960] added current sensing to know when the washer and dryer are operating, as well as to tote up power usage. A temperature sensor watches the dryer vent and warns against the potential for the aforementioned tragedy by sounding an obnoxious local alarm — that’s where the school bus comes in. The whole system is also linked into Blynk for IoT monitoring, with an equally obnoxious alarm you can hear in the video below. Oh, and there are buttons for testing each alarm and for making an Internet note to reorder laundry supplies.

We’ve seen a spate of laundry monitoring projects lately, all of which have their relative merits. But you’ve got to like the fit and finish of [seasider1960]’s build. The stainless face plate and in-wall mount makes for a sleek, professional appearance which is fitting with the scope-creepy nature of the build.


Filed under: home hacks

[SOLVED] Arduino ATTiny85 does not blink LED. Programmed with Arduino nano

Hi!


I have an ATTiny85 and I want to start with the blink LED sketch but it does not work. Attached is the wiring:

I followed these instructions: http://forums.4fips.com/viewtopic.php?f=3&t=1080 for wiring, burn both bootloader and LED blink sketch with an Arduino nano as programmer (excepting I'm using 1.8.1 nightly Arduino IDE), and everything looks like going fine:


read more

Let's Make Robots 18 Feb 10:04
arduino  attiny85  avr  nano  

Arduino ATTiny85 does not blink LED. Programmed with Arduino nano

Hi!


I have an ATTiny85 and I want to start with the blink LED sketch but it does not work. Attached is the wiring:

I followed these instructions: http://forums.4fips.com/viewtopic.php?f=3&t=1080 for wiring, burn both bootloader and LED blink sketch with an Arduino nano as programmer (excepting I'm using 1.8.1 nightly Arduino IDE), and everything looks like going fine:


read more

Let's Make Robots 18 Feb 10:04
arduino  attiny85  avr  nano  

Bring some zen to your living room with this CNC end table

Why settle for a some boring furniture, when you can have your own sand and rock display powered by an Arduino Uno and stepper motors instead?!

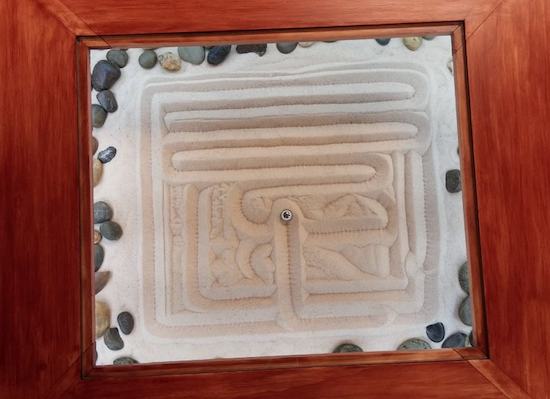
According to his write-up, Instructables user “MakrToolbox” gets many ideas that never leave the pages of his Moleskin notebook. Although it has to be difficult to decide which ones gets to live in reality, this Zen Garden CNC End Table seems like it was a great build choice.

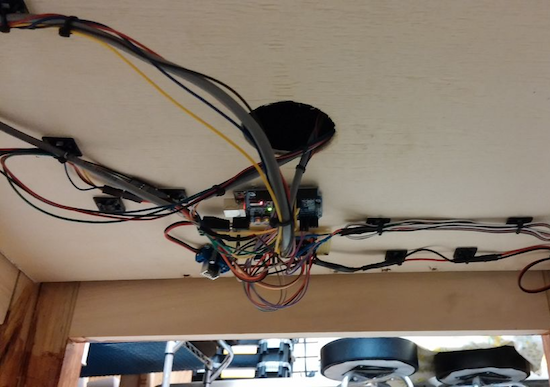
The table consists of a piece of plate glass covering a “garden” of sand and stones. On top of this is a metal ball that moves around via a joystick on the side of the table, traversing the sand and making interesting shapes, like a giant Etch A Sketch. The ball is pulled around with a magnetic servo-powered gantry system underneath.

Look like something you’d love to have in your living room? Be sure to check out the project’s page for more!