Posts with «arduino» label

Linux support comes to Arduino Create

We’re excited to announce a new update to the Arduino Create web platform, which will enable fast and easy development and deployment of IoT applications with integrated cloud services on Linux-based devices.

What this means is that users will be able to program their Linux boards as if they were regular Arduinos. Multiple Arduino programs can run simultaneously on a Linux board and programs can communicate with each other leveraging the capabilities of the new open source Arduino Connector. 
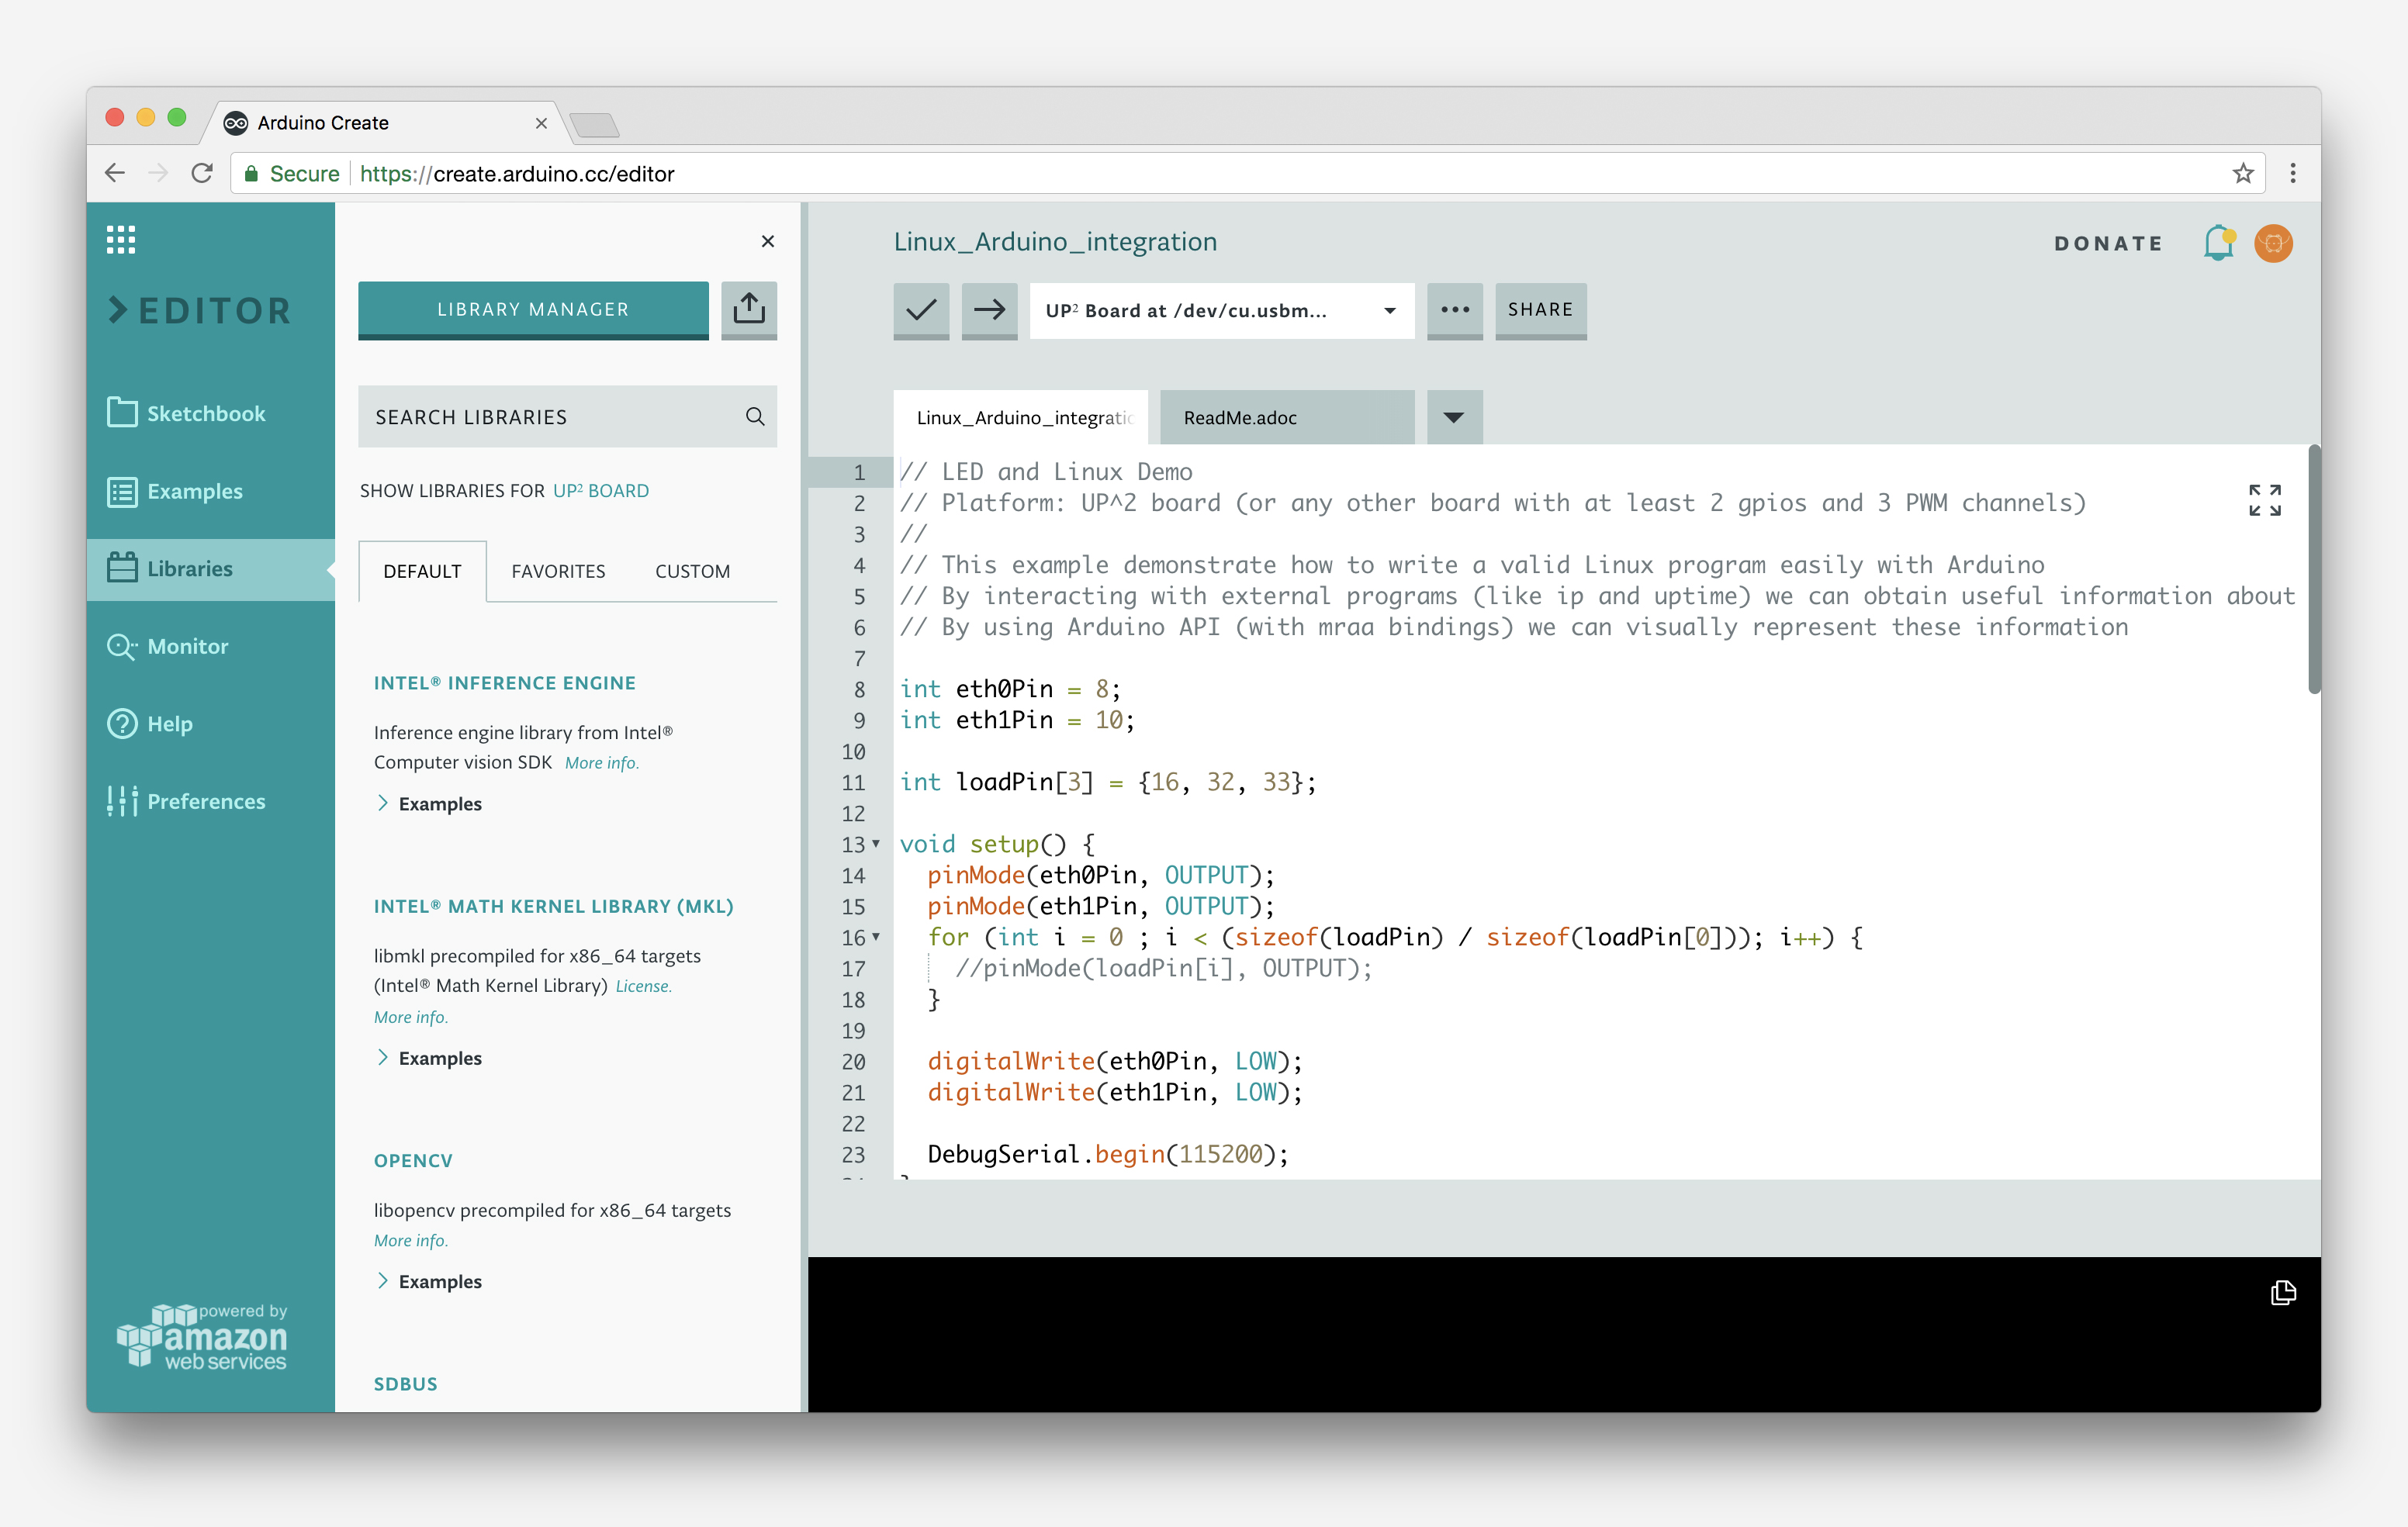
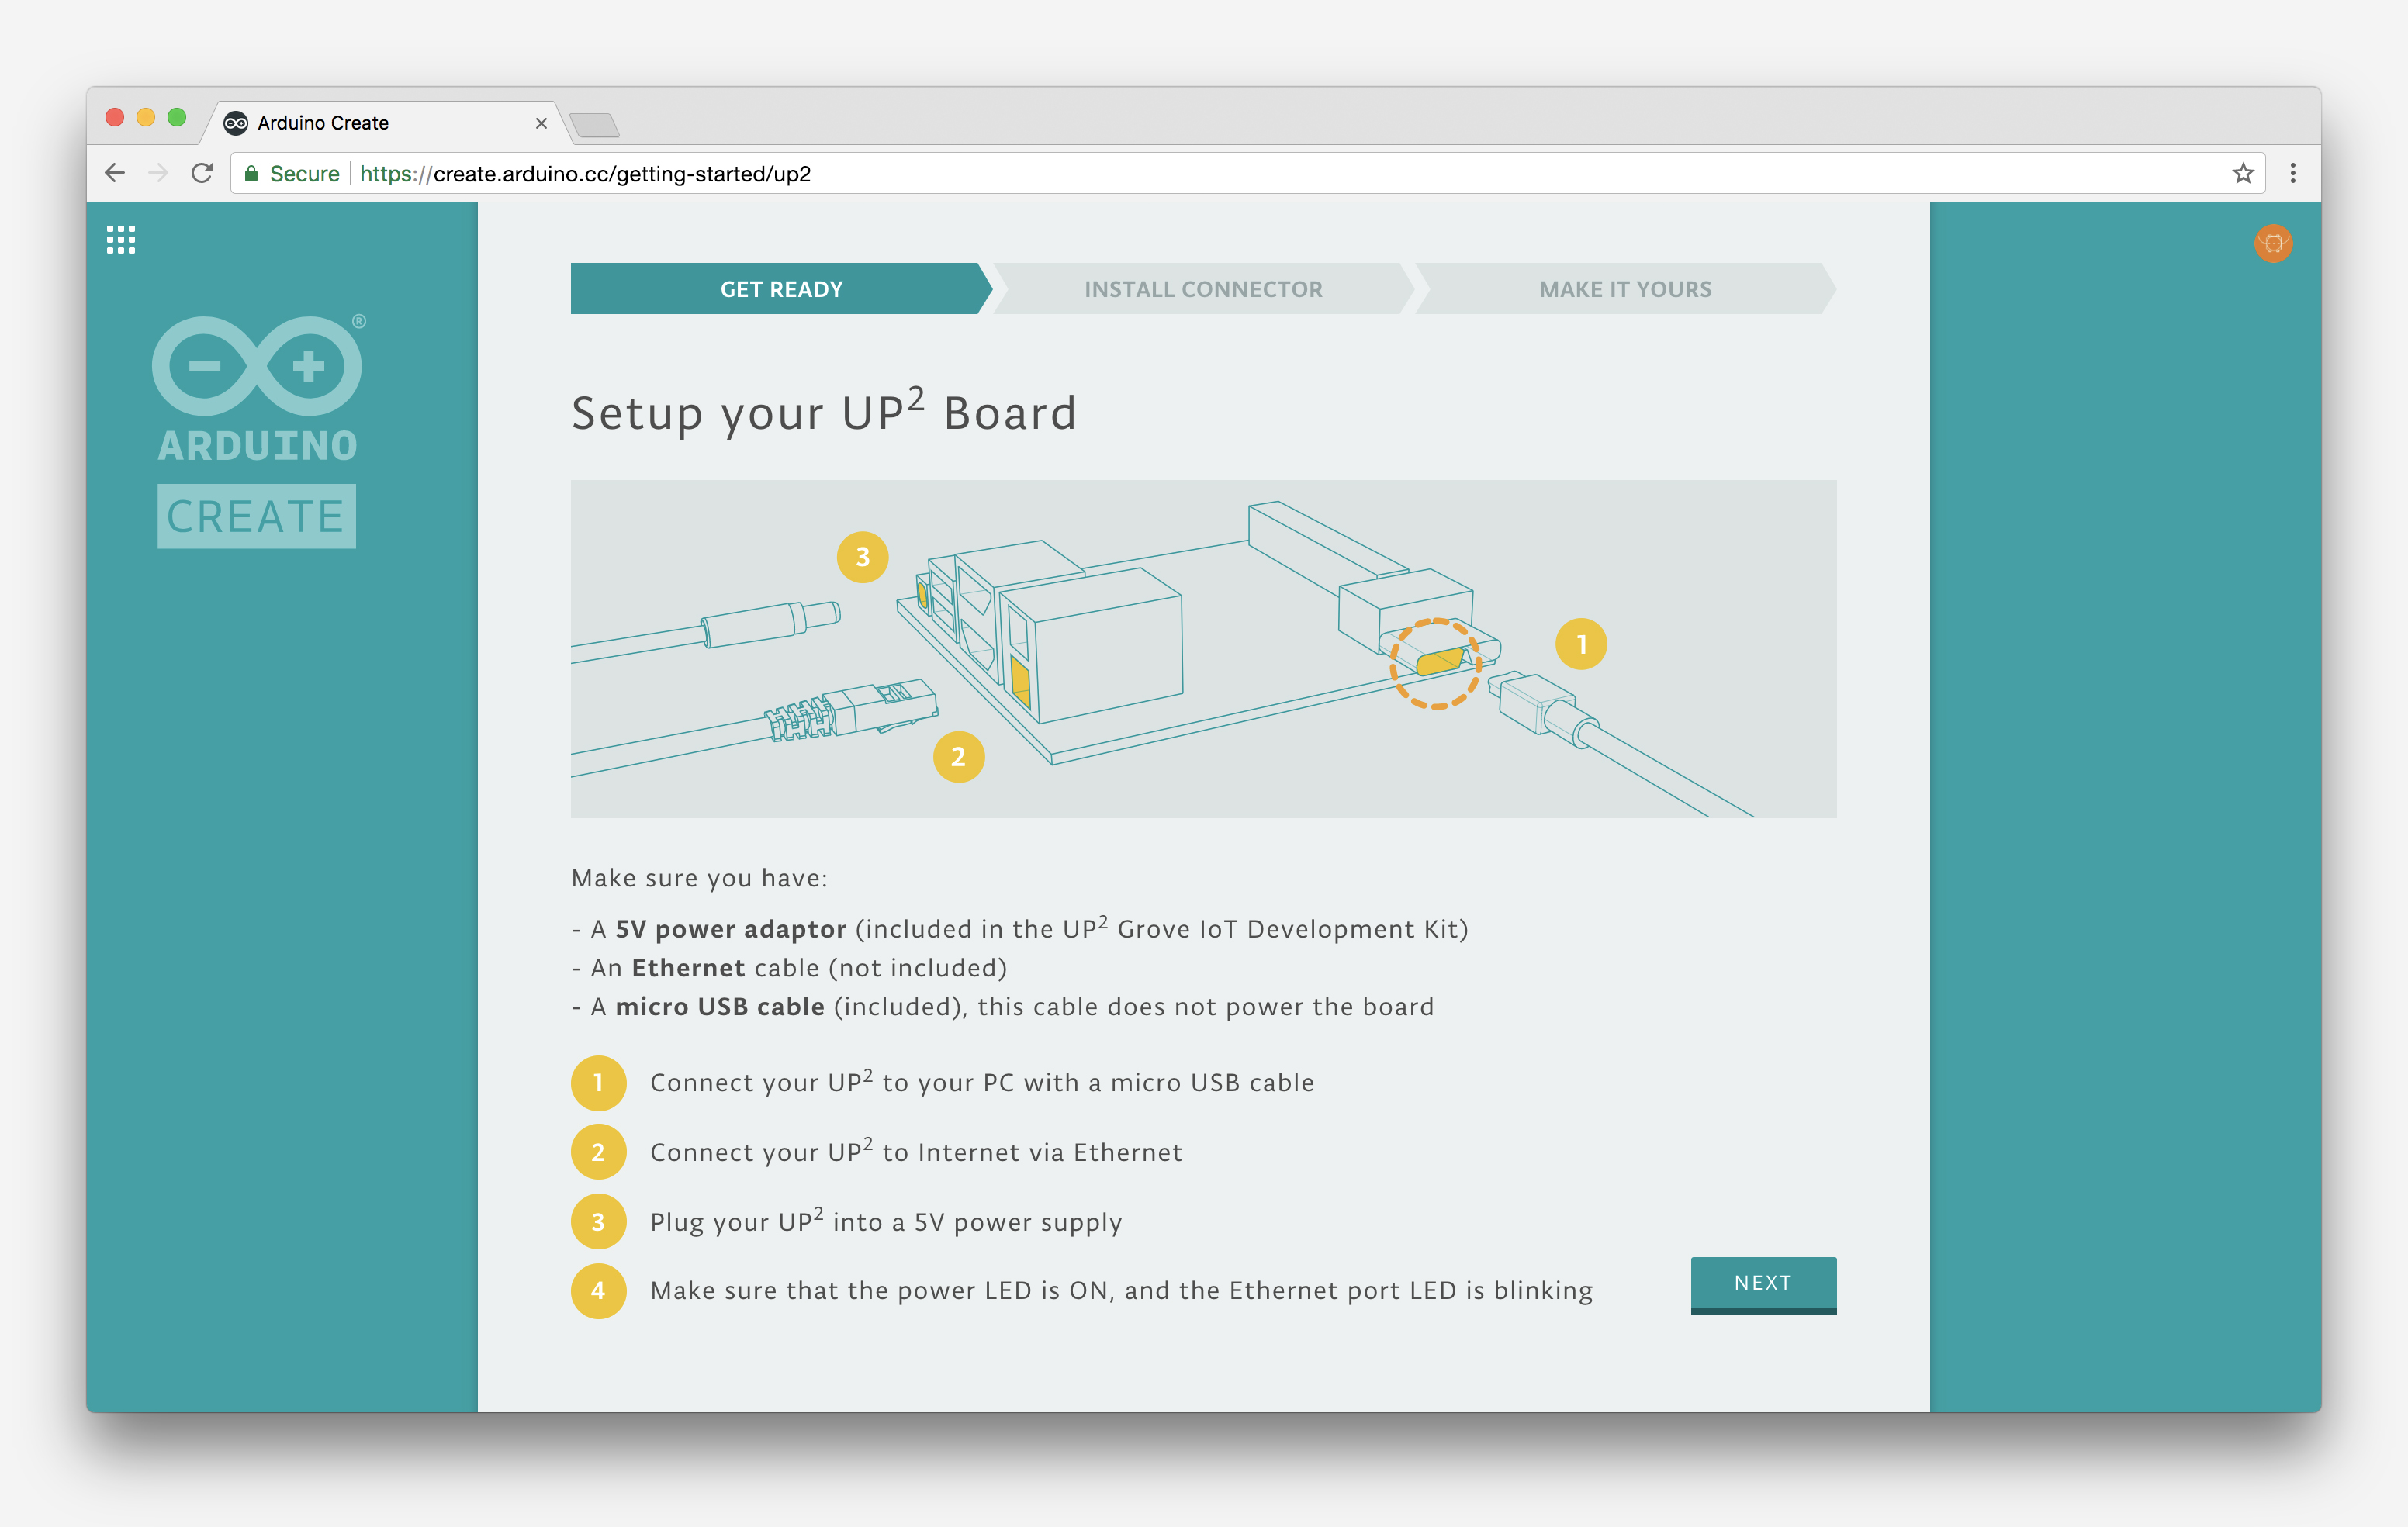
Arduino Create Cloud now allows users to manage individual IoT devices, and configure them remotely and independently from where they are located. To further simplify the user journey, we’ve also developed a novel “out of the box” experience that will let anyone set up a new device from scratch via the cloud without any previous knowledge by following an intuitive web-based wizard

The initial release has been sponsored by Intel® and supports X86/X86_64 boards. As a reference implementation, a simplified user experience has been designed for the AAEON® UP² board, although other platforms are already supported by the Arduino Create Cloud platform, such as the Intel® NUC, Dell Wyse®, Gigabyte™ GB-BXT.

In the coming months, we plan to expand support for Linuxbased IoT devices running on other hardware architectures. Until then, you can find more information here and follow the tutorials below to help get you going:


ASPIR is a full-size, Arduino-powered humanoid robot

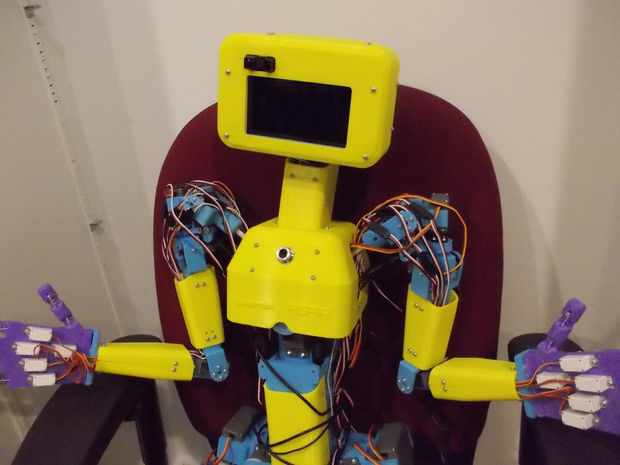
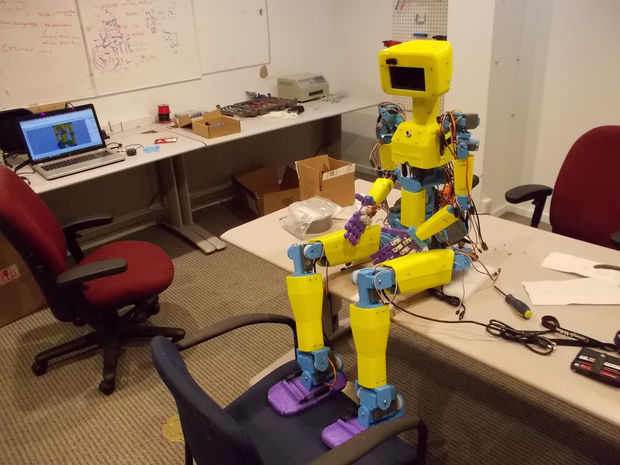
Building robots can be difficult, and if you want to construct something humanoid, designing the mechanics alone can be a significant task. ASPIR, which stands just over four feet tall, looks like a great place to start.

John Choi’s 3D-printed robot can move its arms, legs, and head via 33 servo motors, all controlled by an Arduino Mega, along with a servo shield.

The documentation found here is excellent; however, it comes with a warning that this is a very advanced project, taking several months to build along with $2,500 in parts. Even if you’re not willing to make that commitment, it’s worth checking out for inspiration, perhaps parts of the ASPIR could be adapted to your own design!

This Arduino-controlled LED glove can ‘stop’ moving objects

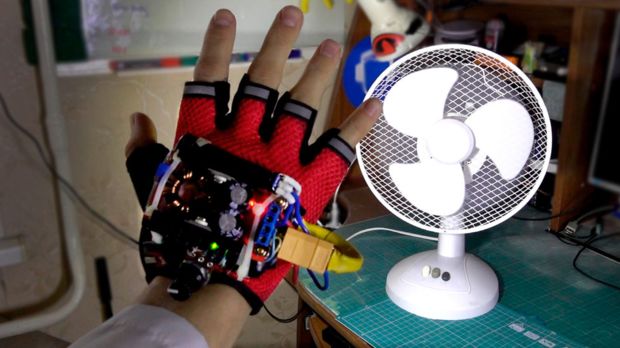
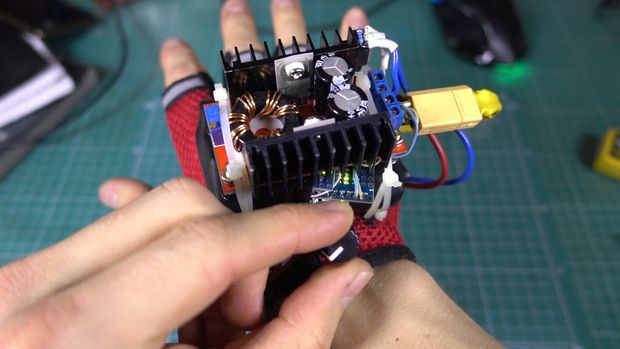
While you might not be able to actually manipulate time, this glove by YouTuber “MadGyver” certainly makes it appear that way. His glove, shown in the video below, uses a gigantic LED controlled by an Arduino Nano to allow objects such as a fan, water falling from a shower, and a spinning top to stop, slow down, and even reverse.

The trick is that when the LED’s frequency is aligned with that of the observed moving subject, it lights it up in the same position over and over, making it appear to pause. Frequency is adjusted by rolling one’s hand via an accelerometer, or a potentiometer mounted in the base of the glove can also be used.

If you want to build your own, instructions can be found here and the Arduino code and schematics are available on GitHub.

Listening for Hand Gestures

[B. Aswinth Raj] wanted to control a VLC player with hand gestures. He turned to two common ultrasonic sensors and Python to do the job. There is also, of course, an Arduino. You can see a video of the results, below.

The Arduino code reads the distance from both sensors — one for the left hand and the other for the right. This allows the device to react to single hand gestures that get closer or further away from one sensor as well as gestures involving both hands. For example, raising your left hand and moving it closer or further away will adjust the volume. The right hand controls rewind and fast forward. Raising both hands will start or stop playback.

Of course, since the Arduino is reading the gestures you could change them to suit you. We might have mounted the sensors further back (or, perhaps, added more sensors) so you could use trigonometry to triangulate the hand’s exact position. Well, perhaps not exact, but you could get an idea of the hand’s motion from right to left as well as forward and backward.

On the host computer side, Python receives serial data from the Arduino and then simulates keystrokes to get the desired result. Of course, this is also highly customizable.

By coincidence, we did a similar project a few years ago using one sensor and the Arduino’s ability to appear like a USB keyboard. We’ve also seen 8 sensors making piano music.


Filed under: Arduino Hacks
Hack a Day 02 Nov 03:00

An Arduino-controlled geodesic greenhouse and chicken coop

Danish industrial design student Mikkel Mikkelsen decided to do something a little different this spring, and constructed a self-sufficient geodesic greenhouse dome. His dome, which was planned using this online calculator, now stands roughly 13 feet tall, providing space for crops, along with an annex for chickens.

While this seems like a very “back to nature” project, he didn’t forget to include modern conveniences via an automation system that uses both an Arduino Nano and a Mega. The chickens can come and go through an automatic door, while ventilation windows on the top of the dome can be opened as needed. Even plant watering is controlled automatically.

The dome is also equipped with a GSM module that allows Mikkelsen to check on things using his phone via SMS, as well as a potentiometer for manually varying the watering levels and a speaker that is triggered upon entering the greenhouse.

Be sure to check out Mikkelsen’s elaborate Instructables write-up for more info on the build.

Add Intuitiveness to OpenSCAD With Encoders

The first time I saw 3D modeling and 3D printing used practically was at a hack day event. We printed simple plastic struts to hold a couple of spring-loaded wires apart. Nothing revolutionary as far as parts go but it was the moment I realized the value of a printer.

Since then, I have used OpenSCAD because that is what I saw the first time but the intuitiveness of other programs led me to develop the OpenVectorKB which allowed the ubiquitous vectors in OpenSCAD to be changed at will while keeping the parametric qualities of the program, and even leveraging them.

All three values in a vector, X, Y, and Z, are modified by twisting encoder knobs. The device acts as a keyboard to

  1. select the relevant value
  2. replace it with an updated value
  3. refresh the display
  4. move the cursor back to the starting point

There is no software to install and it runs off a Teensy-LC so reprogramming it for other programs is possible in any program where rotary encoders may be useful. Additional modes include a mouse, arrow keys, Audacity editing controls, and VLC time searching.

Here’s an article in favor of OpenSCAD and here’s one against it. This article does a good job of explaining OpenSCAD.

[Editor’s note: This is a Hackaday writer’s hack, hence the “I” in place of the usual “we”. We all love custom peripherals though, and a good number of us love OpenSCAD, so you could probably read it either way, but we don’t want to take credit for [Brian]’s work.]


Filed under: 3d Printer hacks, Arduino Hacks

Automate Halloween with the Stack-O-Lantern memory game

While Halloween has come and gone, it’s not too early to start brainstorming for next year’s jack-o’-lantern hack. Perhaps you’re thinking about lighting a pumpkin with an Uno-powered array of LEDs, or activating a shield to play scary recorded noises. If, however, you’d like inspiration for something more involved, the New Scientist team’s Arduino-controlled nine-pumpkin rig shows off lots of creative ideas.

The system holds candy in a hacked cereal dispenser, which is released through a long clear plastic tube. But instead of giving away treats for free, it’s activated by an interactive memory game involving four pumpkins on the sides of the assembly.

Trick-or-treaters must tap each pumpkin’s aluminum foil switches in sequence. If replicated in the correct order, they are rewarded with candy. If not, visitors are “treated” to a spray of silly string!

You can read more about New Scientist‘s project in this article, and see it in action below!

Capturing a complex TV commercial with Arduino

Ever wonder how studios like Oslo-based Flambert get perfectly timed (and complex) shots of “disasters,” such as the destruction of a birthday party setting seen in the Coop Obs! commercial below?

While the moving camera position was handled by a robotic arm, food jumping off of the table is coordinated by a series of 18 pneumatic actuators controlled by an Arduino.

The pneumatic equipment is cleverly concealed by a tablecloth, making the food appear to fly off the table with no trigger other than the hostess of the party initially slipping. Another clever innovation was making the table with two interchangeable tops, so one could be set up while the other was being shot, saving a huge amount of time during filming.

“We decided to build a table consisting of high-pressure valves with nine individual triggers and 18 air pressure points that could shoot items into the air with extreme precision. We recommended a combination of high-speed camera movements, and triggers to set off and capture the chaos. All this was controlled by an Arduino unit, that again was controlled by a motion-controlled robot.”

Arduino Blog 31 Oct 21:55
arduino  featured  

Hackaday Prize Entry: Arduino Video Display Shield

The Arduino is the standard for any introduction to microcontrollers. When it comes to displaying video, the bone stock Arduino Uno is severely lacking. There’s just not enough memory for a framebuffer, and it’s barely fast enough to race the beam. If you want video from an Arduino, it’s either going to be crappy, or you’re going to need some magic chips to make everything happen.

[MagicWolfi]’s 2017 Hackaday Prize entry consists of an video display shield that would be so easy to use that, according to the project description, it could be a substitute for the classic Blink sketch.

The project centers around the VLSI VS23S010D-L chip, which packs 1 Megabit SPI SRAM with serial and parallel interfaces. An integrated video display  sends the composite video signal to display, with the mode depending on how many colors and what resolution is desired: for instance, at 640×400 you can display 16 colors. As he describes it, not 4K video but definitely Joust. The chip expects 3.3 V logic so he made use of a MC74LVX50 hex buffer to tailor the Arduino’s 5 V. Currently he’s working on revision two of the shield, which will include SPI flash memory.

You can follow along with the project on Hackaday.io or the current shield design can be found in [MagicWolfi]’s GitHub repository.


Filed under: The Hackaday Prize

MOVI Adds Voice Control to Arduino Projects

MOVI is designed to provide onboard speech recognition and synthesis, making it easy to add voice control to your Arduino based project.

Read more on MAKE

The post MOVI Adds Voice Control to Arduino Projects appeared first on Make: DIY Projects and Ideas for Makers.