Arduino python GUI led control
Hello Friends,
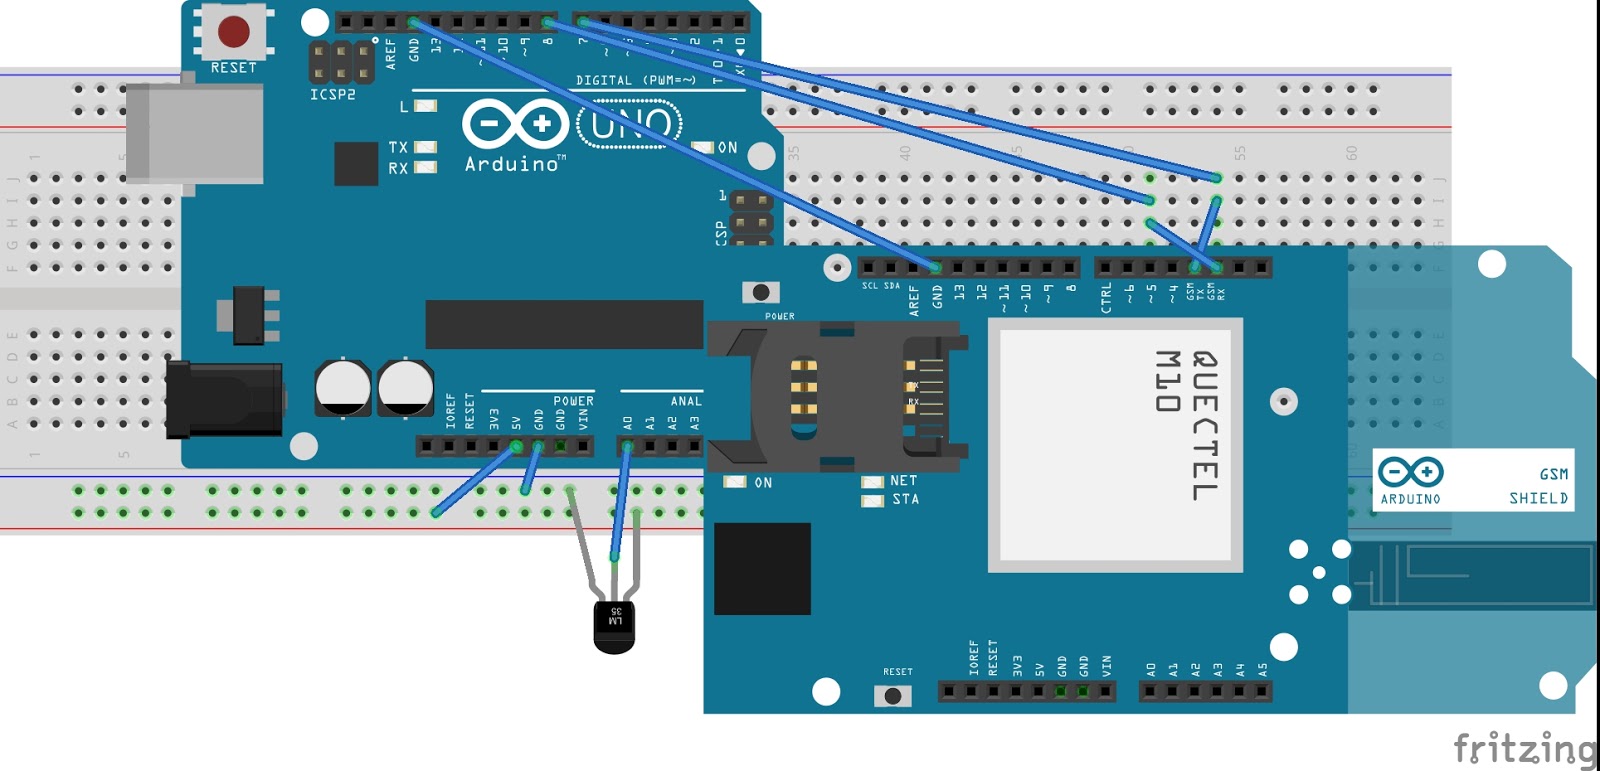
In this project, we are interfacing arduino with python. Arduino can be easily interfaced with python using serial communication (uart) via pyserial library. For GUI on python, we are using tkinter.
Let's start with the python script:
Libraries required: pyserial
It can be esaily installed by: pip install pyserial
Python script:
import serial as s
import time as t
from tkinter import *
from tkinter import messagebox
ser = s.Serial('COM3', 9600, timeout=0) # check your com port
t.sleep(2)
def on():
ser.write(b'7')
def off():
ser.write(b'8')
def exit():
ser.close() # close serial port
quit()
window = Tk()
window.title(" ARDUINO MEETS PYTHON")
window.geometry('640x480')
lbl = Label(window, text="Welcome to this project",fg='black',font=(None, 15))
lbl.place(relx=0.30, rely=0.10, height=50, width=250)
bo = Button(window, text="LED ON", width=10 ,bg='red' ,command=on)
bo.place(relx=0.34, rely=0.30, height=40, width=200)
cb = Button(window, text="LED OFF", width=10, bg='green' ,command=off)
cb.place(relx=0.34, rely=0.40, height=40, width=200)
ext = Button(window, text="Exit", width=10, bg='white', command=exit)
ext.place(relx=0.34, rely=0.50, height=40, width=200)
window.mainloop()
Arduino code:
char a=0;
const int led=13;
#include <Wire.h>
#include <LiquidCrystal_I2C.h>
LiquidCrystal_I2C lcd(0x3f,16,2); // set the LCD address to 0x27 for a 16 chars and 2 line display
void setup() {
Serial.begin(9600);
pinMode(led,OUTPUT);
lcd.init();
lcd.backlight();
}
void loop() {
if(Serial.available()>0)
a=Serial.read();
lcd.setCursor(3,0);
lcd.print(a,DEC);
if(a=='7')
{
digitalWrite(led,HIGH);
}
else
{
digitalWrite(led,LOW);
}
}
////// code ends here
Note: LCD is optional
Video:
In this project, we are interfacing arduino with python. Arduino can be easily interfaced with python using serial communication (uart) via pyserial library. For GUI on python, we are using tkinter.
Let's start with the python script:
Libraries required: pyserial
It can be esaily installed by: pip install pyserial
Python script:
import serial as s
import time as t
from tkinter import *
from tkinter import messagebox
ser = s.Serial('COM3', 9600, timeout=0) # check your com port
t.sleep(2)
def on():
ser.write(b'7')
def off():
ser.write(b'8')
def exit():
ser.close() # close serial port
quit()
window = Tk()
window.title(" ARDUINO MEETS PYTHON")
window.geometry('640x480')
lbl = Label(window, text="Welcome to this project",fg='black',font=(None, 15))
lbl.place(relx=0.30, rely=0.10, height=50, width=250)
bo = Button(window, text="LED ON", width=10 ,bg='red' ,command=on)
bo.place(relx=0.34, rely=0.30, height=40, width=200)
cb = Button(window, text="LED OFF", width=10, bg='green' ,command=off)
cb.place(relx=0.34, rely=0.40, height=40, width=200)
ext = Button(window, text="Exit", width=10, bg='white', command=exit)
ext.place(relx=0.34, rely=0.50, height=40, width=200)
window.mainloop()
Arduino code:
char a=0;
const int led=13;
#include <Wire.h>
#include <LiquidCrystal_I2C.h>
LiquidCrystal_I2C lcd(0x3f,16,2); // set the LCD address to 0x27 for a 16 chars and 2 line display
void setup() {
Serial.begin(9600);
pinMode(led,OUTPUT);
lcd.init();
lcd.backlight();
}
void loop() {
if(Serial.available()>0)
a=Serial.read();
lcd.setCursor(3,0);
lcd.print(a,DEC);
if(a=='7')
{
digitalWrite(led,HIGH);
}
else
{
digitalWrite(led,LOW);
}
}
////// code ends here
Note: LCD is optional
 |
| Python GUI |