Posts with «arduino hacks» label

Transformers, Birthday Cakes in Disguise

[Russel Munro] decided to go all-out for his son’s birthday cake: he made a Transformers robot cake that, well, transforms from a truck into a robot, Optimus Prime style. His impressive build has the actions of the original: first, the front rears up to lift the head, then the back lifts to form the body and the head and arms pop out of the top. Underneath the thin fondant exterior is a 3D printed body, driven by a mechanism in the base. He used fishing line to lift the parts, which is pulled by a motor salvaged from a CD player, being driven by an EasyDriver board from Sparkfun.

The main issue he had to overcome was weight: apparently he underestimated the weight of the fondant that covers the cake, and had to do some last-minute work to strengthen the drive mechanism, and skip plans for the more ornately decorated version that his wife had planned. But the look of glee on his son’s face when he operates it at the party is the best bit. In these days of CGI and computer games, it is good to remind the kids that there is still a lot of fun to be found in ingenuity and liberal quantities of hot glue.


Filed under: Arduino Hacks, robots hacks

Arduino Video Over 2 Wires for Under $50: Mesa-Video

If you want video support on your project, you might start from a device like a Raspberry Pi that comes with it built in. [Kevinhub88] doesn’t accept such compromises, so he and his Black Mesa Labs have come up with a whole new way to add video support to devices like the Arduino and other cheap controllers. This project is called Mesa-Video, and it can add digital video at a resolution of up to 800 by 600 pixels to any device that has a single serial output.

The video is created by an FT813, a low cost GPU from FTDI that offers a surprising amount of video oomph from a cheap, low power chip (he has demoed it running from a lemon battery), meaning that he is hoping to be able to sell the Mesa-Video for under $50.

However, Mesa-Video is just the beginning. [Kevinhub88] wanted to get around the problem of stacking shields on Arduinos: add more  than one and you get problems. He wanted to create an interface that would be simpler, faster and more open, so he created the Mesa-Bus. This effectively wraps SPI and I2C traffic together over a simple, fast serial connection that doesn’t require much decoding. This means that you can send power and bi-directional data over a handful of wires, and still connect multiple devices at once, swapping them out as required. You could, for instance, do your development work on a PC talking to the prototype devices over Mesa-Bus, them swap the PC out for an Arduino when you have got the first version working in your dev environment. Is the Arduino not cutting it? Because Mesa-Bus is cross-platform and open source, it is easy to swap the Arduino for a Raspberry Pi without having to change your other devices. And, because all the data is going over a simple serial connection in plain text, it is easy to debug.

It’s an ambitious project, and [Kevinhub88] has a way to go: he is currently working on getting his first prototype Mesa-Bus devices up and running, and finalizing the design of the Mesa-Video. But it is an impressive start and we’ll be keeping a close eye on this work. Hopefully he can avoid that head crab problem as well because those things are as itchy as hell.


Filed under: Arduino Hacks, video hacks
Hack a Day 01 Sep 09:00

Build a Sensor Network Around a Weather Station

[Yveaux] had a problem. The transmitter on his outdoor weather station had broken, rendering the inside display useless. He didn’t want to buy a new one, so, like the freelance embedded software designer that he is, he decided to reverse engineer the protocol that the transmitter uses and build his own. He didn’t just replace the transmitter module, though, he decided to create an entire system that integrated the weather system into a sensor network controlled by a Raspberry Pi. That’s a far more substantial project, but it gave him the ability to customize the display and add more features, such as synching the timer in the display with a network clock and storing the data in an online database.

Fortunately for [Yveaux], the transmitter itself was fairly easy to replace. The weather station he had, like most, transmitted on the 868MHz frequency, which is a license-free ISM (Industrial, Scientific and Monitoring) spot on the spectrum. After some poking around, he was able to figure out the protocol and teach the Pi to speak it. He then added a Moteino and an nRF2401+ transmitter to the weather station, so it can send data to the Pi, which then sends it to the display. It is a more complicated setup, but it is also much more flexible. He’s had it running for a couple of years now and has collected more than a million sensor readings.


Filed under: Arduino Hacks, wireless hacks

Make Your Own Remote Control LED Light

Want to control the colors in your home? Sure, you could just buy a Philips Hue bulb, but where’s the hacking fun in that? [Dario] agrees: he has written a tutorial on building an Arduino-controlled RGB light system that plugs into a standard light socket.

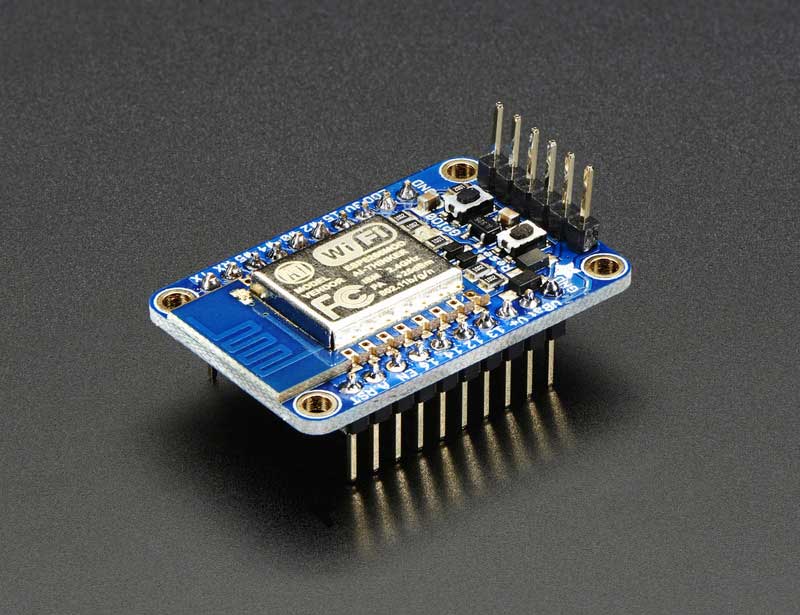
[Dario] is using a bulb from Automethion in Italy, an Arduino, and an ESP8288 shield that sends signals to the bulb. The Arduino and shield are running the Souliss framework that provides smart home features and runs on a number of platforms, so it is a good open platform for creating your own smart home apps, and would be easy to expand. We have also seen a few other projects that use the ESP8288 to control an RGB strip, but this is the first one that uses a bulb that plugs into a standard light socket.

At the moment, Automethion is the only company selling this light, but I hope that others will sell similar products soon.


Filed under: Arduino Hacks
Hack a Day 23 Aug 18:00

High Tech, Low Cost Digital Torque Meter

Ever obsessed with stripping the hype from the reality of power tool marketing, and doing so on the cheap, [arduinoversusevil] has come up with a home-brew digital torque meter that does the job of commercial units costing hundreds of times as much.

For those of us used to [AvE]’s YouTube persona, his Instructables post can be a little confusing. No blue smoke is released, nothing is skookum or chowdered, and the weaknesses of specific brands of tools are not hilariously enumerated. For that treatment of this project, you’ll want to see the video after the break. Either way you choose, he shows us how a $6 load cell and a $10 amplifier can be used to accurately measure the torque of your favorite power driver with an Arduino. We’ve seen a few projects based on load cells, like this posture-correcting system, but most of them use the load cell to measure linear forces. [AvE]’s insight that a load cell doesn’t care whether it’s stretched or twisted is the key to making a torque meter that mere mortals can afford.

Looks like low-end load cells might not be up to measuring the output on your high-power pneumatic tools, at least not repeatedly, but they ought to hold up to most electric drivers just fine. And spoiler alert: the Milwaukee driver that [AvE] tested actually lived up to the marketing.


Filed under: Arduino Hacks, tool hacks

Beautiful Arduino Fireworks Controller

A lot of designers have the luxury of creating things that aren’t supposed to explode. That’s usually easy. The trick is designing things that are supposed to explode and then making absolutely sure they explode at the right time (and only the right time). [JonBush] recently did a beautiful build of an Arduino-based fireworks controller. Seriously, it looks like a movie prop from a summer blockbuster where [Bruce Willis] is trying to decide what wire to cut.

[Jon] used a mega 2560 because he wanted to do the I/O directly from the device. His code only takes about 8K of the total program storage, so with some I/O expansion (like shift registers) a smaller chip would do the job. The device can control up to 8 sets of fireworks, uses a physical arm key, and has a handheld remote. It is even smart enough to sense igniter failures.

The front panel is a work of art and includes a seven-segment display made from Neopixel LEDs. The whole thing is in a waterproof case and uses optical isolation in several key areas.

Fireworks are dangerous, so we might have designed in some more electronic safety features. For example, the power switch only interrupts the ground. It might be safer to disconnect both battery legs when off which would make it hard for a short to accidentally power the device. On commercial devices that explode, you’d probably see dual inputs so that a stuck switch causes a failure (that is, arming or firing requires one switch contact on and another off). The same for outputs. Driving the firing relays on both sides makes it harder for a stuck output to fire accidentally. Still, using a box like this is probably safer than a lit punk, so for this application, it is probably safe enough.

We’ve seen a lot of fireworks controllers in the past, but few of them have looked this good physically. We expect to see a copy of this in some movie next summer.


Filed under: Arduino Hacks

Hackaday Prize Entry: Nuclear Powered Random Number Generator

Random number generators come in all shapes and sizes. Some are software based while others, known as true random number generators, are hardware based. These can be created from thermal noise, the photoelectric effect and other methods. But none of these were good enough for [M.daSilva]. He would base his off of the radioactive decay of Uranium 238, and construct a working nuclear powered random number generator.

Because radioactive decay is unpredictable by nature, it makes for an excellent source for truly random data. The process is fairly simple. A piece of old fiestaware plate is used for the radioactive source. Put it in a lead enclosure along with a Geiger tube. Then wire in some pulse shaping circuitry and a microcontroller to count the alpha particles. And that’s about it. [M.daSilva] still has to do some statistical analysis to ensure the numbers are truly random, along with making a nice case for his project. But all in all, it seems to be working quite well.

Be sure to check out the video for quick rundown of [M.daSilva’s] project. If randomness is your thing, make sure you check out entropy harvested from uninitialized RAM, and the story behind the NIST randomness beacon.

The 2015 Hackaday Prize is sponsored by:


Filed under: Arduino Hacks

Tiny Robot Shakes Head At You In Dissaproval

If you don’t have enough things staring at you and shaking their head in frustration, [Sheerforce] has a neat project for you. It’s a small Arduino-powered robot that uses an ultrasonic distance finder to keep pointing towards the closest thing it can find. Generally, that would be you.

When it finds something, it tries to track it by constantly rotating the distance finder slightly and retesting the distance, giving the impression of constantly shaking its head at you in disappointment. This ensures that you will either unplug it or smash it with a hammer after a very short time, but you should read [Sheerforce]’s code first: it’s a great example of documenting this for experimenters who want to build something that offers more affirmations of your life choices.


Filed under: Arduino Hacks
Hack a Day 16 Aug 00:01

Arduino Radar Watches You Breathe

We’ve all likely watched an episode of “Star Trek” and admired the level of integration on the sick bay diagnostic bed. With its suite of wireless sensors and flat panel display, even the 1960s imagining of the future blows away the decidedly wired experience of a modern day ICU stay. But we may be getting closer to [Dr. McCoy]’s experience with this radar-based respiration detector.

[Øyvind]’s build, which takes the origin of the term “breadboard” to heart, is based on a not-inexpensive Xethru module, which appears to be purpose-built for detecting respiration. The extra-thick PC board seems to house the waveguides internally, which is a neat trick but might limit how the module can be deployed. The module requires both a USB interface and level shifter to interface the 2.8V levels of the module to the 5V Arduino Uno. In the video below, [Øyvind]’s prototype simply lights an RGB LED in response to the chest movement it detects, but there’s plenty of potential for development here. We’ve seen a laser-based baby breathing monitor before; perhaps this systems could be used to the same end without the risk of blinding your tyke. Or perhaps better diagnostics for sleep apnea patients than an intrusive night in a sleep study lab.

Clocking in at $750USD for the sensor board and USB interface, this build is not exactly for the faint of heart or the light of wallet. But as an off-the-shelf solution to a specific need that also has a fair bit of hacking potential, it may be just the thing for someone. Of course if radar is your thing, you might rather go big and build something that can see through walls.


Filed under: Arduino Hacks, Medical hacks

Arduino Powered Rubber Band Sentry Turret Is Not a Lie

You know that guy in the next cube is sneaking in when you are away and swiping packs of astronaut ice cream out of your desk. Thanks to [Kevin Thomas], if you have an Arduino and a 3D printer, you can build a rubber band sentry gun to protect your geeky comestibles. You’ll also need some metric hardware, an Arduino Uno, and a handful of servo motors.

The video shows [Kevin] manually aiming the gun, but the software can operate the gun autonomously, if you add some sensors to the hardware.  The build details are a bit sparse, but there is a bill of material and that, combined with the 3D printing files and the videos, should allow you to figure it out.

We couldn’t help but wish for a first person view (FPV) camera and control via a cell phone, so you could snipe at those ice cream thieves while hiding in the broom closet. On the other hand, if you got the gun working, adding the remote wouldn’t be hard at all. You probably have a WiFi FPV camera on your quadcopter that finally came out of that tree and there’s lots of ways to do the controls via Bluetooth or WiFi.

Not that you don’t have options. But here at Hackaday HQ, we have lots of rubber bands and not so many green pigs. If you’d rather shoot paintballs, be careful you don’t accidentally repaint the insides of your cube.


Filed under: 3d Printer hacks, Arduino Hacks, weapons hacks