Posts with «fireworks» label

Beautiful Arduino Fireworks Controller

A lot of designers have the luxury of creating things that aren’t supposed to explode. That’s usually easy. The trick is designing things that are supposed to explode and then making absolutely sure they explode at the right time (and only the right time). [JonBush] recently did a beautiful build of an Arduino-based fireworks controller. Seriously, it looks like a movie prop from a summer blockbuster where [Bruce Willis] is trying to decide what wire to cut.

[Jon] used a mega 2560 because he wanted to do the I/O directly from the device. His code only takes about 8K of the total program storage, so with some I/O expansion (like shift registers) a smaller chip would do the job. The device can control up to 8 sets of fireworks, uses a physical arm key, and has a handheld remote. It is even smart enough to sense igniter failures.

The front panel is a work of art and includes a seven-segment display made from Neopixel LEDs. The whole thing is in a waterproof case and uses optical isolation in several key areas.

Fireworks are dangerous, so we might have designed in some more electronic safety features. For example, the power switch only interrupts the ground. It might be safer to disconnect both battery legs when off which would make it hard for a short to accidentally power the device. On commercial devices that explode, you’d probably see dual inputs so that a stuck switch causes a failure (that is, arming or firing requires one switch contact on and another off). The same for outputs. Driving the firing relays on both sides makes it harder for a stuck output to fire accidentally. Still, using a box like this is probably safer than a lit punk, so for this application, it is probably safe enough.

We’ve seen a lot of fireworks controllers in the past, but few of them have looked this good physically. We expect to see a copy of this in some movie next summer.


Filed under: Arduino Hacks

Infrared Controlled Remote Firework Igniter

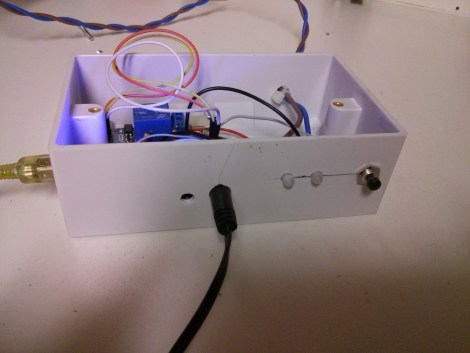
With Independence Day just around the corner, American hackers are likely to find themselves blowing things up in the name of Independence. It’s all great fun but it can also be dangerous. The standard ignition method of “use a lighter and run away really fast” is not exactly safe. Instead of lighting your fireworks the old-fashioned way, why not follow [Facelesstech's] example and build your own infrared controlled remote igniter?

The first step was to decide how to actually ignite the firework fuse. [Facelesstech] had seen others use a car cigarette lighter for this purpose and he decided to follow in their footsteps. He started by removing the cigarette lighter from his own car and pulling it apart. Only one component was needed for this hack. The main heating element is a small disk with a “stem” on the end. If you apply 12V to the stem and attach the outer edge of the disk to ground, the igniter will quickly become hot.

[Facelesstech] originally thought he could just solder some wires to the device. However, the heating element gets so hot that the solder just melts every time it’s turned on. He then got creative and drilled a hole in a small block of wood that fits the heating element. The element is bolted into the wood and the bolt is used as a conductor for the electrical power.

The heating element is powered via a 12V relay. The relay is controlled by an Arduino Nano. The Nano allows two modes of operation. With the first mode, you simply press a button and the Nano will start a five second timer. The idea is to give you enough time to run to a safe distance before the firework is ignited. This isn’t much different from the old-fashioned method, but it does give you a slightly extended fuse. The second mode is where the project really shines. The Nano is also hooked up to an infrared receiver. This allows [Facelesstech] to press a button on an old television infrared remote control to active the igniter. This is a clever solution because it allows you to get to a safe distance without having to run a long wire. It’s also simple and inexpensive. Be sure to watch the video test of the system below.

[Thanks Dale]


Filed under: Arduino Hacks, Holiday Hacks