Posts with «arduino hacks» label

Tarot Machine Flips Through Fate’s Rolodex

Were tarot card readers deemed non-essential in your part of the world (and do you think they saw it coming?) More than ever, we all need diversions that are for entertainment purposes only. And what better basis for entertainment than a mystical fortune-telling robot that can read your tarot cards?

This fantastic-looking ‘bot stands on the shoulders of [Scott Bezak]’s trailblazing method for easy DIY split-flap displays. Push the rather inviting-looking button on the top, and the flaps start flipping around to find your fortune. Once the fates have aligned, a thermal printer on the front spits out an image of your card along with an interpretation.

It’s obvious that [i_mozy] put quite a lot of effort into this slick machine, and we think the stickers look especially great. All the details of physical tarot card readings are accounted for, including a random number to decide the card’s position, and LEDs to represent the card’s element. Suspend your disbelief and check out the demo/promo video after the break.

Split-flap displays are a great choice no matter what you want to show. We’ve seen them used to display everything from the weather to the current Spotify track.

Via r/duino

Tic Tac Arduintoe Moves the Game To 4×4

We know you’re out there spending a lot more time with your loved ones, and appreciate that you may be running out of ways to keep everyone entertained. [Mukesh] dropped us a tip because he has the antidote to boredom — a new twist on that old chestnut, Tic Tac Toe.

Instead of the usual 3×3 configuration, [Mukesh] made the grid 4×4 so the game would be more engaging. Game play is otherwise the same — this Tic Tac Toe still results in a lot of draws, but they take longer and you can’t see them coming a mile away. What’s even more engaging is that you get to push clicky buttons that light up, and don’t have to draw a grid before every game.

Under the hood is an Arduino Uno that controls 16 push buttons and their corresponding RGB LEDs. Whoever goes first is blue, and player two gets pink. If you win, your color floods the board for a brief victory animation. If the game is a tie, the board turns red. We really like the printed two-piece buttons that house the LEDs and actuate the push buttons while keeping the two separate. Toe your way past the break to check out the build video.

Intrigued by the 4×4 version, but need a build that takes more time? Try building your TTT in TTL.

Arduband Gives Your Eyes a Hand

Let’s face it, we probably all sit at our computers for way too long without getting up. Yes, there’s work to be done, games to be played, and the internet abounds with people who are wrong and must be down-voted and/or corrected. We totally get and respect all that. However, if you want to maintain your middle- and long-range vision, you should really get up regularly and gaze out the window for a bit.

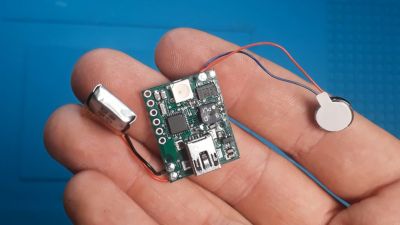
In fact, the Arduband does you one better. Its Arduino Nano and accelerometer check your position every ten minutes. If you haven’t changed your Z by the third check, then it’s time for a break. The combination of an RGB LED, buzzer, and vibrating disc motor working together should be enough to pull you out of any computerized stupor, and they won’t give up and go back to sleep until you have stood up and remained upright for one minute.

We like that [ardutronics123] spun up a board and made it small enough to be wrist-mounted using a watch strap. It would work just as well worn around your neck, and would probably even fit in your pocket. Blink a few times before you check out the build video after the break.

Arduband would be great on the go, but who does that anymore? If you spend every day at the same desk, you could point a time-of-flight sensor at your chair and start a timer.

Resistors Sorter Measures Values

We’ve all been there. A big bag of resistors all mixed up. Maybe you bought them cheap. Maybe your neatly organized drawers spilled. Of course, you can excruciatingly read the color codes one by one. Or use a meter. But either way, it is a tedious job. [Ishann’s] solution was to build an automatic sorter that directly measures the value using a voltage divider, rather than rely on machine vision as is often the case in these projects. That means it could be modified to do matching for precise circuits (e.g., sort out resistors all marked 1K that are more than a half-percent away from one nominal value).

There is a funnel that admits one resistor at a time into a test area where it is measured. A plate at the bottom rotates depending on the measured value. In the current implementation, the resistor either falls to the left or the right. It wouldn’t be hard to make a rotating tray with compartments for different values of resistance. It looks like you have to feed the machine one resistor at a time, and automating that sounds like a trick considering how jumbled loose axial components can be. Still, its a fun project that you probably have all the parts to make.

An Arduino powers the thing. An LCD screen and display control the action. If you want some practice handling material robotically, this is a great use of servos and gravity and it does serve a practical purpose.

We have seen many variations on this, including ones that read the color code. If you ever wanted to know where the color code for resistors came from, we took a trip to the past to find out earlier this year.

An Arduino As A PLL

At the heart of many amateur radio and other projects lies the VFO, or Variable Frequency Oscillator. Decades ago this would have been a free-running LC tuned circuit, then as technology advanced it was replaced by a digital phase-locked-loop frequency synthesiser and most recently a DDS, or Direct Digital Synthesis chip in which the waveform is produced directly by a DAC. The phase-locked loop (PLL) remains a popular choice due to ICs such as the Si5351 but is rarely constructed from individual chips as it once might have been. [fvfilippetti] has revisited this classic circuit by replacing some of its complexity with an Arduino (Spanish language, Google Translate link).

The internals of a PLL frequency synthesiser. Image by Chetvorno – CC0

A PLL is a simple circuit in which one oscillator is locked to another by controlling it with a voltage derived from comparing the phase of the two. Combining a PLL with a set of frequency dividers creates a frequency synthesiser, in which a variable frequency oscillator can be locked to a single frequency crystal with the output frequency set by the division ratios. The classic PLL chip is the CMOS 4046 which would have been combined with a pile of logic chips to make a frequency synthesiser. The Arduino version uses the Arduino’s internal peripherals to take the place of crystal oscillator, dividers, and phase comparator, resulting in an extremely simple physical circuit of little more than an Arduino and a VCO for the 40 metre amateur band. The code can be found on GitLab, should you wish to try for yourself.

It would be interesting to see how good this synthesiser is at maintaining both a steady frequency and minimal phase noise. It’s tempting to think of such things as frequency synthesisers as a done deal, so it’s always welcome to see somebody bringing something new to them. Meanwhile if PLLs are new to you, we have just the introduction for you.

Hack a Day 24 May 00:01

Pinball Machine Needs No Wizard

Ever since he was a young boy, [Tyler] has played the silver ball. And like us, he’s had a lifelong fascination with the intricate electromechanical beasts that surround them. In his recently-completed senior year of college, [Tyler] assembled a mechatronics dream team of [Kevin, Cody, and Omar] to help turn those visions into self-playing pinball reality.

You can indeed play the machine manually, and the Arduino Mega will keep track of your score just like a regular cabinet. If you need to scratch an itch, ignore a phone call, or just plain want to watch a pinball machine play itself, it can switch back and forth on the fly. The USB camera mounted over the playfield tracks the ball as it speeds around. Whenever it enters the flipper vectors, the appropriate flipper will engage automatically to bat the ball away.

Our favorite part of this build (aside from the fact that it can play itself) is the pachinko multi-ball feature that manages to squeeze in a second game and a second level. This project is wide open, and even if you’re not interested in replicating it, [Tyler] sprinkled a ton of good info and links to more throughout the build logs. Take a tour after the break while we have it set on free play.

[Tyler]’s machine uses actual pinball machine parts, which could quickly ramp up the cost. If you roll your own targets and get creative with solenoid sourcing, building a pinball machine doesn’t have to be a drain on your wallet.

Piston-Powered Pellet Pusher for Peckish Pets

We all have our new and interesting challenges in lockdown life. If you’ve had to relocate to ride it out, the chances are good that even your challenges have challenges. Lockdown left [Kanoah]’s sister in the lurch when it came to feeding her recently-adopted pet rat, so he came up with a temporary solution to ensure that the rat never misses a meal.

Most of the automated pet feeders we see around here use an auger to move the food. That’s all fine and good, but if you just need to move a singular mass, the screw seems like overkill. [Kanoah]’s feeder is more akin to a pellet-pushing piston. It runs on a Metro Mini, but an Arduino Nano or anything with enough I/O pins would work just fine. The microcontroller starts counting the hours as soon as it has power, and delivers pellets four times a day with a servo-driven piston arm. [Kanoah] has all the files up on Thingiverse if you need a similar solution.

There many ways of solving the problem of dry pet food delivery. Wet food is a completely different animal, but as it turns out, not impossible to automate.

Alexa, Shoot Me Some Chocolate

[Harrison] has been busy finding the sweeter side of quarantine by building a voice-controlled, face-tracking M&M launcher. Not only does this carefully-designed candy launcher have control over the angle, direction, and velocity of its ammunition, it also locates and locks on to targets by itself.

Here comes the science: [Harrison] tricked Alexa into thinking the Raspberry Pi inside the machine is a smart TV named [Chocolate]. He just tells an Echo to increase the volume by however many candy-colored projectiles he wants launched at his face. Simply knowing the secret language isn’t enough, though. Thanks to a little face-based security, you pretty much have to be [Harrison] or his doppelgänger to get any candy.

The Pi takes a picture, looks for faces, and rotates the turret base in that direction using three servos driven by Arduino Nanos. Then the Pi does facial landmark detection to find the target’s mouth hole before calculating the perfect parabola and firing. As [Harrison] notes in the excellent build video below, this machine uses a flywheel driven by a DC motor instead of being spring-loaded. M&Ms travel a short distance from the chute and hit a flexible, spinning disc that flings them like a pitching machine.

We would understand if you didn’t want your face involved in a build with Alexa. It’s okay — you can still have a voice-controlled candy cannon.

Nightmare Fuel Telepresence ‘Bot May Become Your Last Friend

After this pandemic thing is all said and done, historians will look back on this period from many different perspectives. The one we’re most interested in of course will concern the creativity that flourished in the petri dish of anxiety, stress, and boredom that have come as unwanted side dishes to stay-at-home orders.

[Hunter Irving] and his brother were really missing their friends, so they held a very exclusive hackathon and built a terrifying telepresence robot that looks like a mash-up of Wilson from Castaway and that swirly-cheeked tricycle-riding thing from the Saw movies. Oh, and to make things even worse, it’s made of glow-in-the-dark PLA.

Now when they video chat with friends, TELEBOT is there to make it feel as though that person is in the room with them. The Arduino Uno behind its servo-manipulated vintage doll eyes uses the friend’s voice input to control the wind-up teeth based on their volume levels. As you might imagine, their friends had some uncanny valley issues with TELEBOT, so they printed a set of tiny hats that actually do kind of make it all better. Check out the build/demo video after the break if you think you can handle it.

Not creepy enough for you? Try building your own eyes from the ground up.


Touch-Typing On Fingertips? Prototype Says It Could Work

The fingertips are covered in touch sensors, each intended to be tapped by the thumbtip of the same hand.

Touch-typing with thumbs on a mobile phone keyboard is a pretty familiar way to input text, and that is part of what led to BiTipText, a method of allowing bimanual text input using fingertips. The idea is to treat the first segments of the index fingers as halves of a tiny keyboard, whose small imaginary keys are tapped with the thumbs. The prototype shown here was created to see how well the concept could work.

The prototype hardware uses touch sensors that can detect tap position with a high degree of accuracy, but the software side is where the real magic happens. Instead of hardcoding a QWERTY layout and training people to use it, the team instead ran tests to understand users’ natural expectations of which keys should be on which finger, and how exactly they should be laid out. This data led to an optimized layout, and when combined with predictive features, test participants could achieve an average text entry speed of 23.4 words per minute.

Judging by the prototype hardware, it’s understandable if one thinks the idea of fingertip keyboards may be a bit ahead of its time. But considering the increasingly “always on, always with you” nature of personal technology, the goal of the project was more about investigating ways for users to provide input in fast and subtle ways. It seems that the idea has some merit in principle. The project’s paper can be viewed online, and the video demonstration is embedded below.

One interesting thing is this: the inertia of users being familiar with a QWERTY layout is apparent even in a forward-thinking project like this one. We covered how Dvorak himself struggled with people’s unwillingness to change, even when there were clear benefits to doing so.

[via Arduino Blog]