Posts with «arduino hacks» label

Gigantic Working Arduino Uses 1/4″ Cables

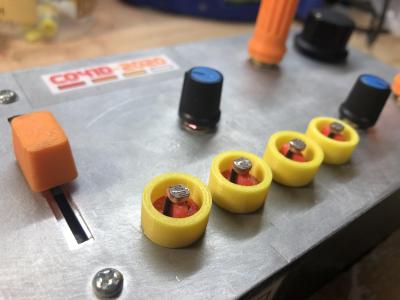
What is it about larger-than-life versions of things that makes them so awesome? We’re not sure exactly, but this giant working Arduino definitely has the ‘it’ factor, whatever that may be. It’s twelve times the size of a regular Uno and has a Nano embedded in the back of it. To give you an idea of the scale, the reset button is an arcade button.

The Arduino Giga’s PCB is made of 3/4″ plywood, and the giant components represent a week and a half of 3D printing. The lettering and pin numbers are all carved on a CNC and filled in with what appears to be caulk. They didn’t get carved out deeply enough the first time around, but [byte sized] came up with a clever way to perfectly re-register the plywood so it carved in exactly the same places.

Although we love everything about this build, our favorite part has to be the way that [byte sized] made the female headers work. Each one has a 1/4″ audio jack embedded inside of it (a task which required a special 3D printed tool), so patch cables are the new jumper cables. [byte sized] put it to the test with some addressable RGB LEDs on his Christmas tree, which you can see in the build video after the break.

You can buy one of those giant working 555 timer kits, but why not just make one yourself?

Easy Frequency Counter Looks Good, Reads To 6.5 MHz

We were struck by how attractive [mircemk’s] Arduino-based frequency counter looks. It also is a reasonably simple build. It can count up to 6.5 MHz which isn’t that much, but there’s a lot you can do even with that limitation.

The LED display is decidedly retro. Inside a very modern Arduino Nano does most of the work. There is a simple shaping circuit to improve the response to irregular-shaped input waveforms. We’d have probably used a single op-amp as a zero-crossing detector. Admittedly, that’s a bit more complex, but not much more and it should give better results.

There was a time when a display like this would have meant some time wiring, but with cheap Max 7219 board available, it is easy to add a display like this to nearly anything. An SPI interface takes a few wires and all the hard work and wiring is done on the module.

The code is short and sweet. There are fewer than 30 lines of code thanks to LED drivers and a frequency counter component borrowed from GitHub.

If you add a bit more hardware, 100 MHz is an easy target. There are at least three methods commonly used to measure frequency. Each has its pros and cons.

Mind-Controlled Beer Pong Gets Easier as You Drink

Wouldn’t it be nice if beer pong could somehow get easier the more you drink? You know, so you can drink more? [Ty Palowski] has made it so with automated, mind-controlled beer pong.

[Ty] started by making a beer pong table that moves the cups back and forth at both ends. An Arduino Nano controls a stepper that controls a slider, and the cups move with the slider through the magic of magnets. The mind control part came cheaper than you might think. Back in 2009, Mattel released a game called Mind Flex that involves an EEG headset and using brain waves to guide a foam ball on a stream of air through a little obstacle course. These headsets are available for about $12 on ebay, or at least they were before this post went up.

[Ty] cracked open the headset added an HC-06 Bluetooth module to talk to the Arduino. It’s using a program called Brainwave OSC to get the raw data from the headset and break it into levels of concentration and relaxation. The Arduino program monitors the attention levels, and when a certain threshold of focus is reached, it moves the cups back and forth at a predetermined speed ranging from 1 to an impossible-looking 10. Check out the two videos after the break. The first one covers the making of the the automatic beer pong part, and the second is where [Ty] adds mind control.

We’ve seen a different headset — the hacker-friendly NeuroSky Mindwave — pop up a few times. Here’s one that’s been hacked to induce lucid dreaming.

Via r/duino

Slot Machine Has a Handle on Fun

For some reason, when slot machines went digital, they lost their best feature — the handle. Who wants to push a button on a slot machine, anyway? Might as well just play video poker. [John Bradnam] seems to agree, and has built an open-source three-color matrix slot machine complete with handle.

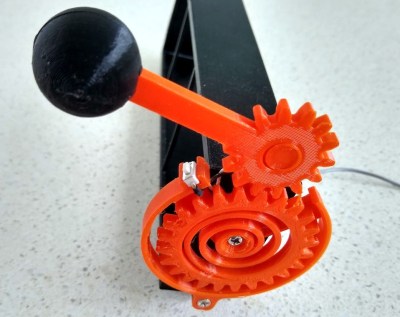
In this case, you’ll be losing all of your nickels to an Arduino Pro Mini. The handle is an upgrade to an earlier slot machine project that uses three 8×8 matrices and a custom driver board. When the spring-loaded handle is pulled, it strikes a micro switch to spins the reels and then snaps back into place. Between each pull, the current score is displayed across the matrix. There’s even a piezo buzzer for victory squawks. We only wish the button under the handle were of the clickier variety, just for the feels. Check out the short demo video after the break.

If you’re not a gambler, you could always turn your slot machine into a clock.

Flipbook Automation Saves Your Thumb

You’ve probably seen a flipbook. That’s a book with pictures on each page. Each picture is slightly different than the last one so if you flip rapidly through the book you get a little animation. We like the German word, Daumenkino, which translates as “thumb cinema” and that seems appropriate. [Barqunics] put a decidedly new twist on this old technology. His flipbook senses a viewer and automatically flips the pages using a motor. You can see the Arduino-controlled device in the video below.

The presence detection is a ubiquitous sonar sensor. The frame is easy to make since it uses cardboard and hot glue. A DC motor like you find on many toy cars or robots provides the rotation. No 3D printing needed, but we did think it would be easy to 3D-print or laser-cut the pieces.

You’d think the flipbook would date back to antiquity, but apparently, the earliest known ones are from the mid-1800s. However, the idea isn’t that different from a phénakisticope or a zoetrope other than those devices use a disk or drum that would be easy to rotate. Something to consider if you plan to recreate this project.

We should have guessed there would be automated ways to generate images for a flipbook. That opens up a lot of interesting ideas for projects, too.

Hack a Day 04 Dec 16:00

Bet You Didn’t Know Arduinos Are Psychic

Are you running out of ways to entertain yourself and your family? If you’ve read all the books and watched all the movies, it might be time to explore the psychic abilities of silicon. [Hari Wiguna] has just the trick to keep them guessing for a good long time.

This trick doesn’t take much, just a couple of Arduinos, some momentary buttons, a number pad, and a large helping of math. As you can see in the demo after the break, there is nothing connecting the two, not even 802.11(n). On the randomizer Arduino, [Hari] generates random numbers with the push of a button until the audience sees one they like. Then [Hari] locks in the number with the other button.

What happens next is key: the randomizer generates another random number, but uses it as a hint to set a sentinel digit. The randomizer Arduino subtracts the larger of the two digits in the number from nine and stores the result as the flag. When the next number comes up that has the flag digit in the correct place, the number after that will be the random number chosen at the beginning.

The psychic Arduino’s secret is that it knows the first guess it receives is special. It does the same sentinel digit math as the randomizer, so when the guesser enters the guess with the sentinel digit, it knows the next number entered is the winner. Clear as mud? Check out the second video below where [Hari] explains the trick, a new take on a magic classic.

Looking for a more exciting way to generate random numbers? Try using fish tanks, lava lamps, or muons from outer space.

Gyroscope Level is Digital

A spirit level, you know the kind of level with a little bubble in a tube of fluid, is a basic construction tool. [DesignBuildDestroy] took an Arduino, a gyroscope chip, and an OLED, and made a 3D printed level with no bubble, but it does have a nice digital display.

It is funny when you realize that at one time a gyroscope was a high tech item reserved for missiles and aircraft. Now you can grab a six-axis sensor for pennies. Even, better, the code used in the project can offload the Arduino for a lot of processing.

Initially, the device lived on a breadboard, which is always a good idea to get the kinks out of things. Thanks to the OLED, the Arduino can calibrate itself without a PC and do other tricks. The display is easy to read, but we thought there should be a mode that shows a little bubble made with an O character. Seems like that would be a fun rainy day project. We did like the automatic screen rotation, though.

We’ve seen a nice level done with a Raspberry Pi before. If you need something smaller, how about something the size of a dime?

Dad Scores Big with DIY Indoor Hockey Game

We suppose it’s a bit early to call it just yet, but we definitely have a solid contender for Father of the Year. [DIY_Maxwell] made a light-up hockey game for his young son that looks like fun for all ages. Whenever the puck is hit with the accompanying DIY hockey stick (or anything else), it lights up and produces different sounds based on its acceleration.

Inside the printed puck is an Arduino Nano running an MPU6050 accelerometer, a 12-NeoPixel ring, and a piezo buzzer. [DIY_Maxell] reused a power bank charging circuit to charge up the small LiPo battery.

The original circuit used a pair of coin cells, but the Arduino was randomly freezing up, probably because of the LEDs’ current draw. Be sure to check out the video after the break, which begins with a little stop motion and features a solder stand in the shape of a 3D printer.

Got a house full of carpet or breakables? You could always build an air hockey table instead.

Mix It Up with a Multi-Volume Controller

What’s the use of waiting around for something to break in order to hack into something else? As long as it’s just sitting around not being used, who cares? [OmniSaiRen] had a  Behringer MIDI controller just taking up space. Instead of selling it, they decided to build it into something they would definitely use — a multi-volume controller with mute keys and other useful macros.

After gutting the case, [OmniSaiRen] gave it a couple coats of glossy white paint that looks really nice with the black keycaps and knobs. The plan was to use the original encoders, but [OmniSaiRen] replaced them with potentiometers when they couldn’t get the encoders working with the Arduino Nano. We are sad to report that Cherry Blues only made it to the build because they have all black housings and were also lying around taking up space, but maybe [OmniSaiRen] will grow to love them.

If you’re tired of all the mousing and clicking it takes to turn down this or that volume, you need to build one of these things. It runs on deej, an open source volume mixer that works with Linux and Windows, so what are you waiting for? If you only want a single hardware volume knob, you can’t go wrong dialing it in rotary style.

Via r/duino

Quick and Simple Milliohmmeter

User [mircemk] presents his “MiliOhm Meter” project which you can build with an Arduino, a handful of common parts from your lab, and a cigar box.  It doesn’t get much simpler than this, folks.  While this is something you won’t be getting calibrated with NIST traceability, it looks like a fun and quick project that’s more than suited for hobbyist measurements.  It’s not only easy to build, the Arduino sketch is less than thirty lines of code.  This is a great learning project, plus you get something useful for your lab when its finished.

We like the creative use of colored tape instead of paint on the project’s box.  If this style suits you, [mircemk] has published several other similar lab instrument projects on his Hackaday.io page, including a frequency meter, an audio spectrum analyzer, and an auto-ranging capacitance meter to name a few.  You might recognize him from some other projects we’ve featured, such as the crazy kinematic arms that set a clock’s hands every minute.