In this project, I have connected an Arduino to my computer and used a photoresistor to control an animation on the screen. Other sensors could have been used, but I chose a photoresistor because it feels like magic!!
The photoresistor responds to changes in ambient light as my hand moves up and down. The Arduino sends the reading to a Processing sketch on the computer via a Serial command (through the USB cable). The processing sketch interprets the signal from the Arduino and selects the appropriate picture to display.
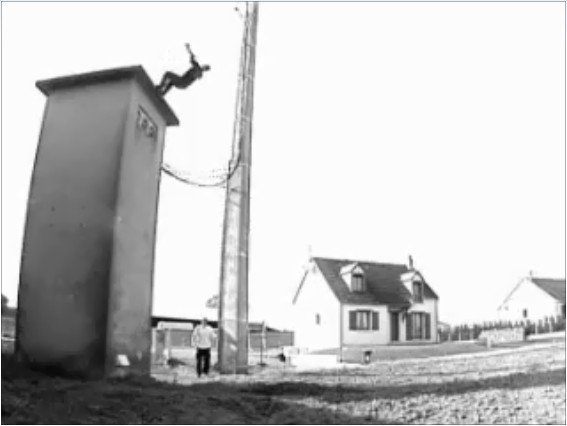
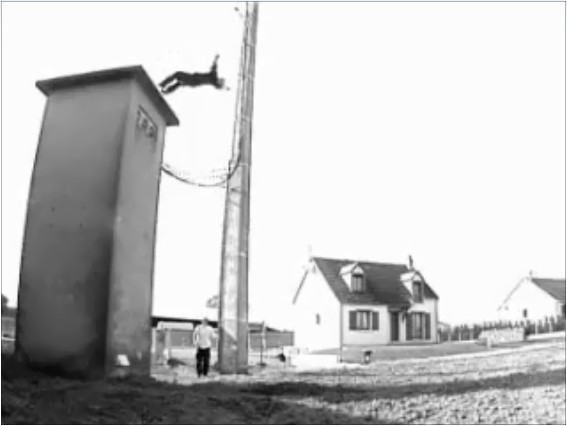
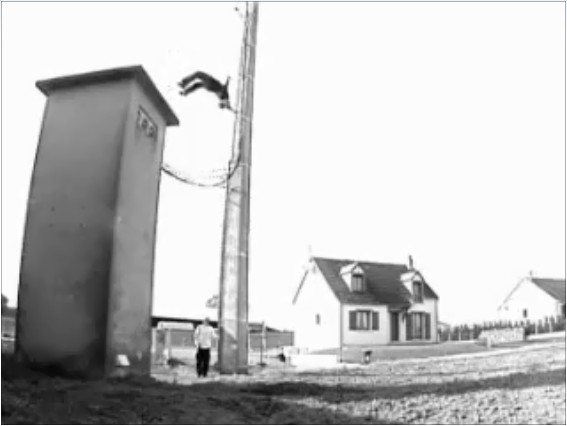
I took a series of screenshots from the following YouTube video:
http://www.youtube.com/watch?v=h6nE8m74kDg And after borrowing a bit of code from these sites (
1,
2), the project was born.
This idea is not new, nor my own. There are many people who have done this project before, but I thought to blog about how I have done it, just for fun.
The Project Movie
Components Required
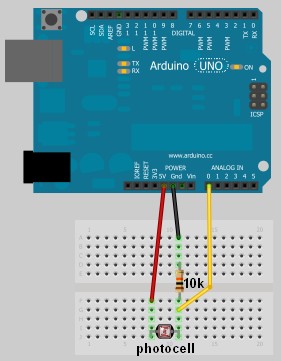
- Arduino Uno (and associated software), and USB cable
- Photoresistor or Photocell
- 10K resistor
- Wires to put it all together
- Processing IDE from http://processing.org
- Computer/laptop
The Arduino Sketch
The Arduino Code:
You can download the Arduino IDE from
this site.
 1
 2
 3
 4
 5
 6
 7
 8
 9
10
11
12
13
14
15
16
17
18
19
20
21
22
23
24
25
26
27
28
29
30
31
32
33
34
35
36
37
38
39
40
41
42
43
44
45
46
47
48
49 | /* Jumper: Using an Arduino to animate:
Written by ScottC on 02/06/2012 */
int photoRPin = 0;
int minLight;
int maxLight;
int lightLevel;
int adjustedLightLevel;
int oldLightLevel;
void setup() {
Serial.begin(9600);
//Setup the starting light level limits
lightLevel=analogRead(photoRPin);
minLight=lightLevel-10;
maxLight=lightLevel;
oldLightLevel=lightLevel;
}
void loop(){
lightLevel=analogRead(photoRPin);
delay(10);
//auto-adjust the minimum and maximum limits in real time
if(minLight>lightLevel){
minLight=lightLevel;
}
if(maxLight<lightLevel){
maxLight=lightLevel;
}
//Map the light level to produce a result between 1 and 28.
adjustedLightLevel = map(lightLevel, (minLight+20), (maxLight-20), 1, 28);
adjustedLightLevel = constrain (adjustedLightLevel, 1,28);
/*Only send a new value to the Serial Port if the
adjustedLightLevel value changes.*/
if(oldLightLevel==adjustedLightLevel){
//do nothing if the old value and the new value are the same.
}else{
//Update the oldLightLevel value for the next round
oldLightLevel=adjustedLightLevel;
/*Send the adjusted Light level result
to Serial port (processing)*/
Serial.println(adjustedLightLevel);
}
}
|
The Processing Code:
You can download the Processing IDE from
this site.
 1
 2
 3
 4
 5
 6
 7
 8
 9
10
11
12
13
14
15
16
17
18
19
20
21
22
23
24
25
26
27
28
29
30
31
32
33
34
35
36
37
38
39
40
41
42
43
44
45
46
47
48
49
50
51
52
53
54
55
56
57
58
59
60
61
62
63
64
65
66
67
68
69
70
71
72
73
74
75
76
77 | /* Jumper: Using an Arduino to animate
Written by ScottC on 02/06/2012
Source code derived from :
http://processing.org/learning/topics/sequential.html
http://processing.org/discourse/beta/num_1267080062.html
Pictures captured from:
http://www.youtube.com/watch?v=h6nE8m74kDg
======================================================= */
import processing.serial.*;
Serial myPort;
String sensorReading="";
// Create the array that will hold the images
PImage[] movieImage = new PImage[29];
/* The frame variable is used to control which
image is displayed */
int frame = 1;
/* Setup the size of the window. Initialise serial communication with Arduino
and pre-load the images to be displayed later on. This is done only once.
I am using COM6 on my computer, you may need replace this value with your
active COM port being used by the Arduino.*/
void setup(){
size(700,600);
myPort = new Serial(this, "COM6", 9600);
myPort.bufferUntil('\n');
for(int i=0;i<28;i++){
movieImage[i] = loadImage("Jumper" + (i+1) + ".jpg");
}
}
// The draw function controls the animation sequence.
void draw(){
//this draws the relevant image to the window
image(movieImage[frame-1],0,0,width,height);
}
void serialEvent (Serial myPort){
sensorReading = myPort.readStringUntil('\n');
if(sensorReading != null){
sensorReading=trim(sensorReading);
if (sensorReading.length()<2){
frame = integerFromChar(sensorReading.charAt(0));
}else{
frame = integerFromChar(sensorReading.charAt(0))*10;
frame += integerFromChar(sensorReading.charAt(1));
}
}
}
/* This function used to convert the character received from the
serial port (Arduino), and converts it to a number */
int integerFromChar(char myChar) {
if (myChar < '0' || myChar > '9') {
return -1;
}else{
return myChar - '0';
}
}
|
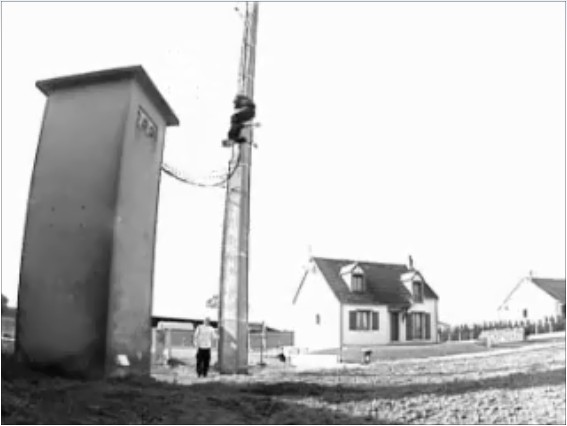
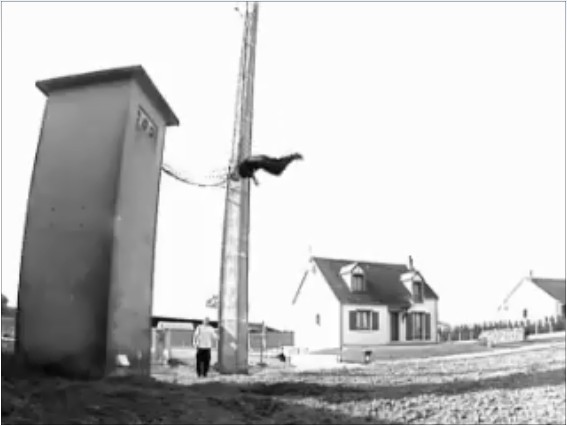
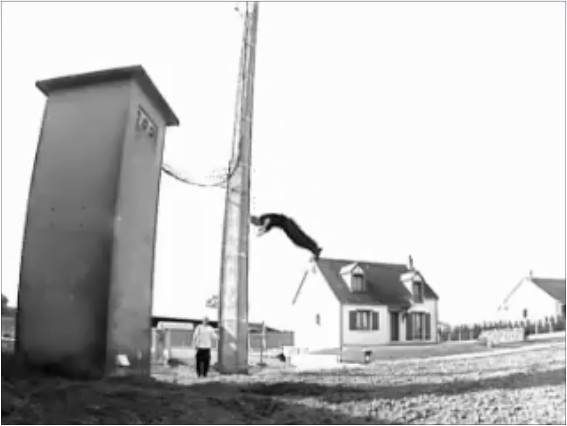
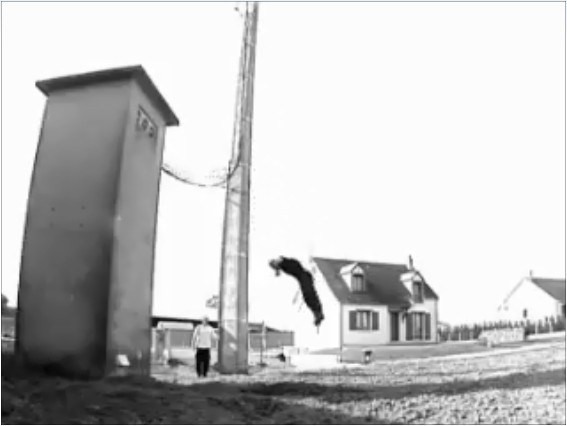
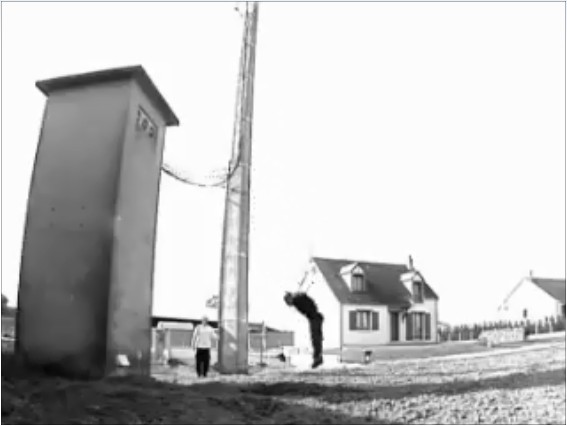
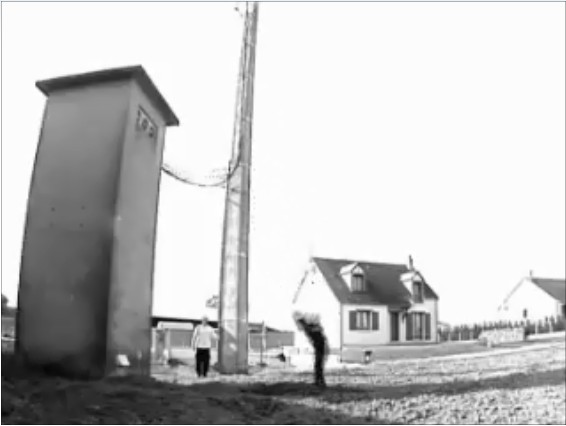
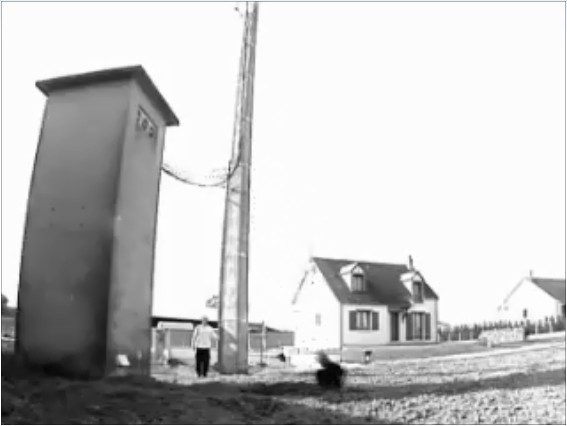
The pictures
Captured from this YouTube Video:
http://www.youtube.com/watch?v=h6nE8m74kDg


 The Tamagotchi is a thing of the past. Bring your virtual pet into the 21st century with LEDs and an Arduino-compatible processor.