Posts with «water» label

Let’s make robots exploring lake depths

Sea Renderings is a water robot made by Geir Andersen in 2010 with the aim of measuring water depths in lakes and running on Arduino Duemilanove:

The purpose of this robot is to have it log water depths along a predefined set of waypoints. It stores its data on memory sticks or on SD cards. The estimated runtime is about 24 hours and with a top speed of 3km/h it will travel roughly 72km. With a log entry for every 10m this would give us over 700 depth measurements with full GPS reference.

Geir’s project page is hosted at Let’s Make Robots,  a free and volunteer based initiative produced and maintained by members of the robot building  community. You can have a look at the documentation and some of the illustrations showing the output of the measurements done at Lake Riskedalsvatnet in Norway.


Arduino Blog 14 Apr 21:50

Simple Photo Flash Trigger for Water Balloon Photography

There have been countless projects to make custom photo flash trigger circuits. Usually the circuits react to sound, triggering the camera flash at the moment a certain sound is triggered. That type of trigger can be used to detect the popping of a balloon or shattering of glass. Other triggers detect motion, like a projectile crossing a laser beam for example. [Udo's] friend had a fun idea to take photos of water balloons popping. Unfortunately neither of those trigger methods would be well suited for this situation. That’s when [Udo] had to get creative.

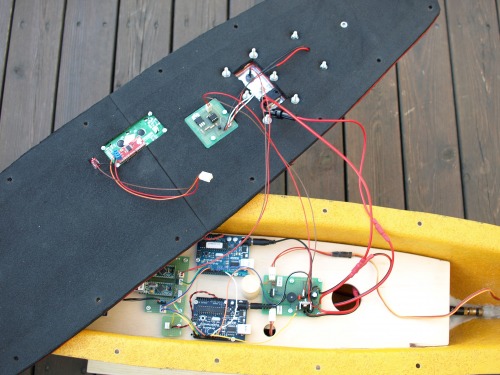
[Udo] built a unique trigger circuit that uses the water inside the balloon as the trigger. The core component of the circuit is an Arduino. One of the Arduino’s analog pins is configured to enable the internal pull-up resistor. If nothing else is connected to the pin, the Arduino will read 5 volts there. The pin is connected to a needle on the end of a stick. There is a second needle on the same stick, just a short distance away from the first. When these needles pierce the balloon’s skin, the water inside allows for a brief moment of conductivity between the two pins. The voltage on the analog pin then drops slightly, and the Arduino can detect that the balloon has popped.

[Udo] already had a flash controller circuit. He was able to trigger it with the Arduino by simply trying the flash controller’s trigger pin to one of the Arduino’s pins. If the Arduino pulls the pin to ground, it closes the switch on the flash controller and the flash is triggered. Both circuits must share a common ground in order for this to work.

All of the code for [Udo's] project is freely available. With such spectacular photographs, it’s only a matter of time before we see more of these floating around.


Filed under: Arduino Hacks
Hack a Day 02 Oct 21:00

Yes, The Drink Up Fountain is talking to you!

The Drink Up Fountain is project created in September 2013 by YesYesNo Interactive studio in collaboration with PHA Honorary Chair First Lady Michelle Obama and dedicated to encouraging people to drink more water more often: “You are what you drink, and when you drink water you drink up!”

The Fountain runs on Arduino Mega  and

dispenses entertaining greetings and compliments intended to entice the drinker to continue sipping. When a drinker’s lips touch the water, the fountain “talks,” completing a circuit and activating speakers. When the drinker pulls his or her head away and stops drinking, the circuit breaks and the fountain stops talking. With hidden cameras set up, Drink Up caught unsuspecting individuals using the fountain in New York City’s Brooklyn Bridge Park


Take a look at the video to see how the fountain interacts the people:

Grove Water Sensor


Connecting a water sensor to an Arduino is a great way to detect a leak, spill, flood, rain etc. It can be used to detect the presence, level, volume and/or the absence of water. While this could be used to remind you to water your plants, there is a better Grove sensor for that. The sensor has an array of exposed traces which will read LOW when water is detected. In this tutorial, we will connect the Water Sensor to Digital Pin 8 on the Arduino, and will enlist the very handy Grove Piezo buzzer and an LED to help identify when the Water sensor comes into contact with a source of water.


Parts Required:

Putting it together


If you have a Grove Base Shield, you just have to connect the Grove Water Sensor to D8 on the shield, and the Buzzer to D12 on the Shield. My Grove base shield obstructs the onboard LED, so I will attach an LED to Digital pin 13. If you do not have a Grove base shield, then you should connect the Sensors as described in the tables below:


Arduino Sketch


  1
2
3
4
5
6
7
8
9
10
11
12
13
14
15
16
17
18
19
20
21
22
23
24
25
26
27
28
29
30
31
32
33


/* 
  Grove Water Sensor sketch 
     Written by ScottC 5th August 2014
     Arduino IDE version 1.0.5
     Website: http://arduinobasics.blogspot.com
     Description: Use Grove Water Sensor to detect leaks, floods, spills, rain etc.
     Credits: This sketch was inspired by this website:
              http://www.seeedstudio.com/wiki/Grove_-_Water_Sensor     
 ------------------------------------------------------------- */
#define Grove_Water_Sensor 8     //Attach Water sensor to Arduino Digital Pin 8
#define Grove_Piezo_Buzzer 12    //Attach Piezo Buzzer to Arduino Digital Pin 12
#define LED 13                   //Attach an LED to Digital Pin 13 (or use onboard LED)
void setup(){
pinMode(Grove_Water_Sensor, INPUT); //The Water Sensor is an Input
pinMode(Grove_Piezo_Buzzer, OUTPUT); //The Piezo Buzzer is an Output
        pinMode(LED, OUTPUT); //The LED is an Output
}

void loop(){
        /* The water sensor will switch LOW when water is detected.
           Get the Arduino to illuminate the LED and activate the buzzer
           when water is detected, and switch both off when no water is present */
if(digitalRead(Grove_Water_Sensor) == LOW){
                digitalWrite(LED,HIGH);
digitalWrite(Grove_Piezo_Buzzer, HIGH);
                delay(2);
                digitalWrite(Grove_Piezo_Buzzer, LOW);
                delay(40);
        }else{
                digitalWrite(Grove_Piezo_Buzzer, LOW);
                digitalWrite(LED,LOW);
        }
}


The Video


If you liked this tutorial - please show your support :

ScottC 05 Aug 16:38

Solar Powered DIY Plant Watering System

It’s great having fresh vegetables just a few steps away from the kitchen, but it takes work to keep those plants healthy. [Pierre] found this out the hard way after returning from vacation to find his tomato plant withering away. He decided to put an end to this problem by building his own solar-powered plant watering system (page in French, Google translation).

An Arduino serves as the brain of the system. It’s programmed to check a photo resistor every ten minutes. At 8:30PM, the Arduino will decide how much to water the plants based on the amount of sunlight it detected throughout the day. This allows the system to water the plants just the right amount. The watering is performed by triggering a 5V relay, which switches on a swimming pool pump.

[Pierre] obviously wanted a “green” green house, so he is powering the system using sunlight. A 55 watt solar panel recharges a 12V lead acid battery. The power from the battery is stepped down to the appropriate 5V required for the Arduino. Now [Pierre] can power his watering system from the very same energy source that his plants use to grow.


Filed under: Arduino Hacks, green hacks

Lego plant watering robot

Primary image

What does it do?

Watering the plants while you're on holiday

This robot waters the plants while you're on holiday! You have to line up the plants and through a GUI in Microsoft Access you can input the water demands per plant (how many times per week the plant needs water and how much). The water reservoir contains a mixer and an aeration unit (through lego compressors) to avoid dead water. The only thing not lego about it is the water pump and the robot is controlled by an Arduino Duemilanove. I've used a selfmade multipurpose motor driver pcb so all the electronics visisble aren't used ;)

Cost to build

$100,00

Embedded video

Finished project

Complete

Number

Time to build

60 hours

Type

URL to more information

Weight

4000 grams

Arduino Water Thermostat

Arduino is not only for hobby projects, there are also good way to use it to semplify your work. This is a good example, submitted by [sspence65].

This is a project I did at work to control two water baths for a process control. Two custom tanks have to be kept at 180F, using DS18b20 temp sensors, an Arduino 2560, 4 SSR’s, and $15 1500 watt electric elements.

On the [website] you can find all about the project, included the code for the Arduino Mega.

Arduino Blog 22 Dec 10:10

Tropism Well: A Tall Drink of Water

Instead of cricking your neck to drink from a water fountain, what if the fountain cricked its neck for you? Tropism Well is an interactive sculpture that senses when someone is near and bows to pour water into a glass.

Fancontroller

Right, back again with an update on my idea for a kick-ass fanctroller.

So far, I've been coding away and right now, I'm up to the point where the actual fan control is implemented (I've already written the LCD-commands, several input functions, a setup and a menu.) But I'm having some problems.

read more

Let's Make Robots 16 Apr 18:12
arduino  computer  controller  cooling  fan  pc  pump  rpm  speed  water  

Environmental Monitoring With Arduino goes to the Gowanus Canal

Emily Gertz and Patrick Di Justo, authors of Environmental Monitoring With Arduino (available from Maker Shed and O’Reilly), wrote it to let me know that the book got used as a textbook in the recent NYC Water Hackathon. They’ve got the pictures to prove it, too!

Brooklyn, NY, March 25 — Patrick and I went to the Gowanus Canal to observe the testing of prototype water monitoring devices created at the weekend Water Hackathon. The Gowanus is one of Brooklyn’s more notorious Superfund sites.

We were excited to see that the device being developed by Leif Percifield and the citizen sensor group Don’t Flush Me is based on the water conductivity gadget we devised for Environmental Monitoring With Arduino.

We designed our gadget to test water samples in a controlled setting, such as sitting at your desk with the samples in flasks. They’ve adapted our water probe with little spade terminals, to be more durable in the field. Brilliant!

Slideshow: “Environmental Monitoring With Arduino” goes to the Gowanus Canal!


MAKE » Arduino 29 Mar 23:30