Posts with «uno» label

Moodbox makes you play with emotions for perfect ambience

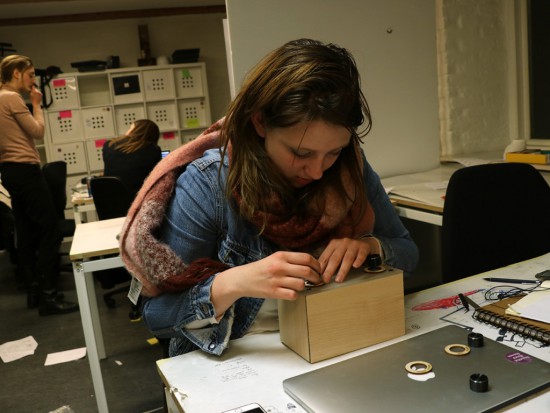
Moodbox is a musical device created by a group of students (Iskra Uscumlic, Cyrus Kamath, Luca Mustacchi, Dario Loerke) to explore how we might set the mood in a studio space through music. They created it using Genuino Uno during the Interaction Design Programme at CIID with the help of Massimo Banzi and Dario Buzzini.

Moodbox enables you to set the perfect ambience and trigger different emotions:

Taking inspiration from the classic bar jukebox and its ability to influence the mood, we recognized that music and the atmosphere created by it are inextricably linked. When selecting a song to play in a social setting there is always a sense of negotiation involved. The person choosing has to consider the environment, the people around them, the current mood and that they would like to create.

With this in mind we set out to explore new opportunities for interaction in the communal space, using the environment of the studio as the setting.


As you can see in the video above, you can adjust the vibe of any space using four scales of emotions – from love to kill, serious to fun, chill to hype and dreamy to focus:

Emotions may be combined and fine-tuned with retro-style rotary knobs to dial-in feelings and get the perfect song choice. Like a jukebox, songs are queued once the selection is made. To provide visual feedback, lights also respond to the changes in mood, enhancing the overall influence on the space.

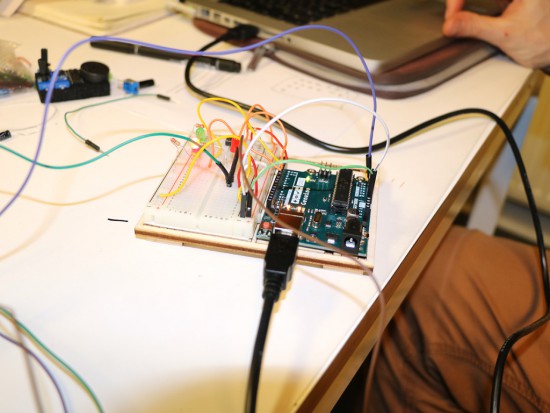
Moodbox connects to your iTunes account, with the rotary knobs sending information via a Genuino Uno and JavaScript to sort through a playlist. Our custom emotional algorithm then picks the right song and triggers mood lighting depending on the selection.

Discover what sound is made of with Sound Blocks

Sound Blocks is a tool to teach children and adults what sound is made of. The project was shortlisted in the Expression category of the IXDA Interaction Awards and it was developed by John Ferreira, Alejandra Molina, Andreas Refsgaard at the CIID using Arduino.

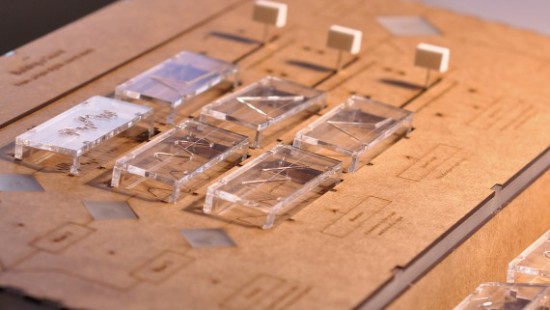
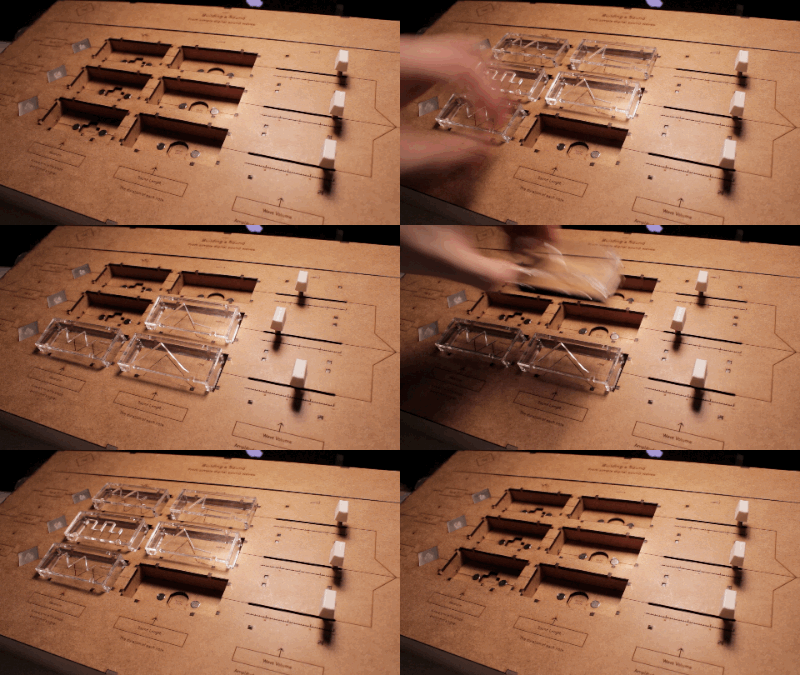
The device allows people to learn how, with a few parameters, it’s possible to create new sounds and, also, imitate real world sounds. Users can control waveform, sound decay or wave length and volume of three channels, all mixed together:

Sound blocks first and foremost was created as a tool to experiment with sound, it is playful and engaging.

Watch the video interview to discover more about the project and hear some noise:

Monitoring Solitary Bees Using Open Technology

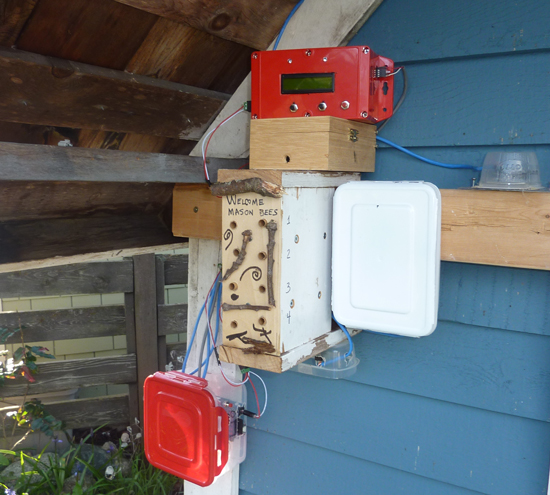
“Bees in the Backyard” is a citizen science technology project to investigate the nesting behavior of Mason bees, created by Mike Teachman, amateur bee enthusiast and Paul Perrault senior field applications engineer.

Mason bees are somewhat unique because, unlike honeybees, they are solitary, every female is fertile, there are no worker bees, they carry pollen on their bellies, they nest in holes and are vital to pollination of many fruit trees.

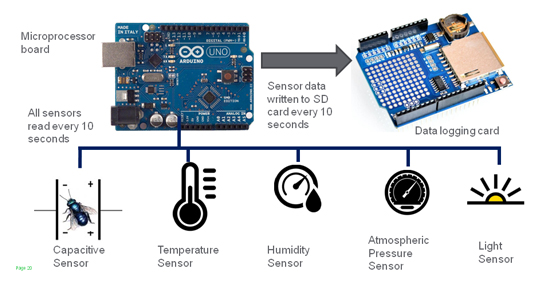
The idea behind the project was to turn each bee’s entire nest into a capacitive sensor with the use of off-the-shelf open source hardware like Arduino Uno:

Following the innovative work of the UPEI in using non-invasive capacitance sensors to detect bees entering and exiting a hive, we decided to extend this study to determine if we could measure not just a bee moving past an opening in a hive, but actually measure bee activity, along with a sense of their deliveries. This involved the invention of a new type of non-invasive sensor, along with the development of a measurement system that would be used to gather large amounts of data.


The plan for the team for 2016 is to improve the project deploying an improved monitoring system at the same site and in particular:
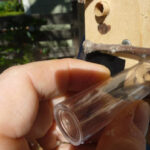
• Develop a new capacitance sensor tube with increased accuracy
• Improve the visual appeal of nesting block and associated electronics
• Develop algorithms to mine the measurement dataset for bee activity patterns

Watch other videos on this youtube channel and read more about the project on Spectrum IEEE.

Arduino Blog 23 Feb 16:21
arduino  bees  featured  projects  science  uno  

Trojan 77: a gamified simulation of the Trojan virus

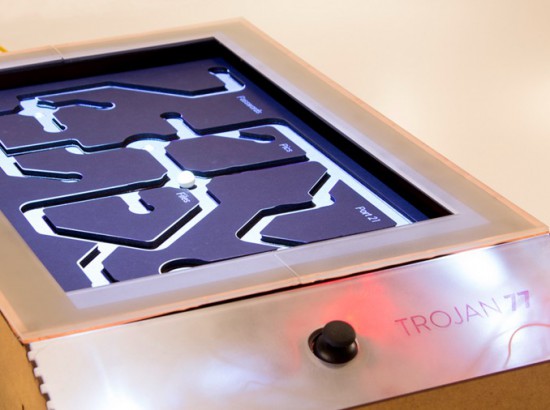
Trojan 77 is a gamified simulation of the Trojan virus running on Arduino Uno. The Trojan is a malware designed to provide unauthorised remote access to a user’s computer amongst other harmful possibilities and this prototype was designed to be exhibited at a technology museum to show the most important effects the virus. Inspired by the tilting labyrinth game, the prototype simulates a few key effects of the Trojan virus like passwords leaking out, files being deleted and culminating in a system crash.

Trojan 77  was created by a team of Physical Computing students (Dhrux Saxena, Gunes Kantaroglu, Liliana Lambriev, Karan Chaitanya Mudgal) at CIID:

The idea of designing something analog to explain a digital construct was an exciting challenge to undertake. The way that computer viruses operate can be very complicated and hard to explain without overloading people with detailed information. Making this information visual via animated projections helped to communicate the effects in a fun and memorable way.

The Trojan moved through several prototyping stages. Initially, the wooden structure was built, followed by the maze. The structure as a whole became functional with the addition of Arduino and Processing. Two servo motors controlled by a joystick enabled the tilt while the movement of the ball triggered distinct light sensors which in turn triggered events in a Processing sketch mapped onto the maze.

The students created also a great video documentary  to explain the project with a style inspired by the work  of Charles and Ray Eames:

Macchina poetica converts sounds into onomatopoeic words


Macchina Poetica is a digital prototype converting sounds into onomatopoeic words and images and it’s inspired by the art of the Futurism movement.

Futurism is a modernist, avant-garde artistic movement originated in Italy in the early 20th century. Thanks to sound representation, Futurism artists aimed to emphasize speed, technology, youth and violence, all concepts arising from industrial innovations and war.

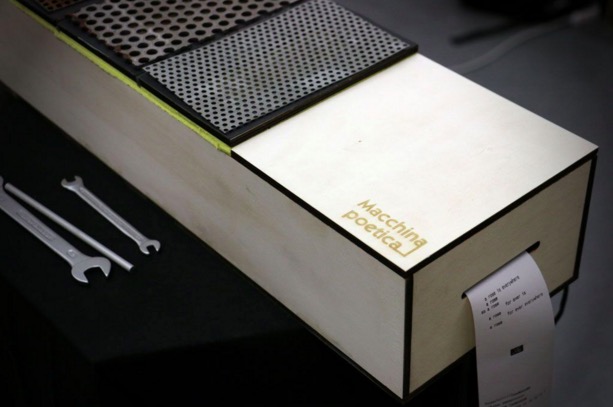
In order to keep continuity with this particular artistic movement, the authors, Alessandra Angelucci, Aris Dotti, Rebecca Guzzo, students at Master of Advanced Studies in Interaction Design SUPSI, decided to design an object that looks like the musical instrument of Futurism movement (precisely a Celesta). The object plays a metallic sounds and the user is facilitated in understanding how to use the object due to a instrument-like interface.

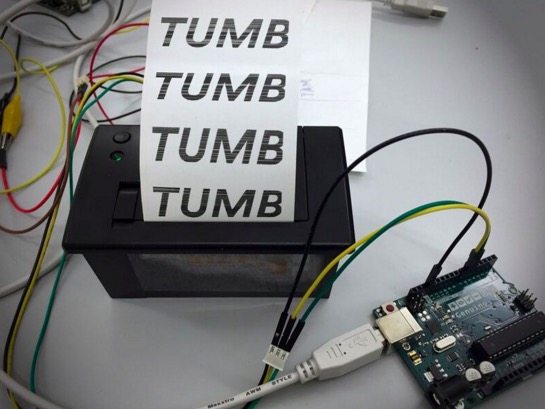
The machine is built using 4 piezo sensors, a thermal printer, a board, electrical cables, 4 resistors (1K), a 6 volt power supply and a Genuino Uno board.

The instrument’s interface is designed with plywood, metal plates and sponge that serves as a shock absorber. Between the metal plates and the sponge there are the piezo sensors along with resistors communicating with the Genuino Uno board every time the user interacts with the metallic plates. Once the Genuino receives the signal, it sends a command to the thermal printer that will print a word or a Futurism poem.

The interaction takes place when the user with the help of a metal tool (for example a screwdriver or a wrench) strikes the metal plates with different pressures. At the end of the performance the user and the viewers can have a clear overview of the produced sounds reviewing the printed paper outputs.

The prototype is the result of two weeks physical computing class Creating Tangible Interfaces held by Ubi De Feo at Maind program SUPSI  in Lugano, the goal of the course is how to make tangible interfaces via learning fundamentals of electronics prototyping and interaction design.  (Applications are open for the next edition 2016/2017 starting in September 2016)

Hear the sound of 300 stars

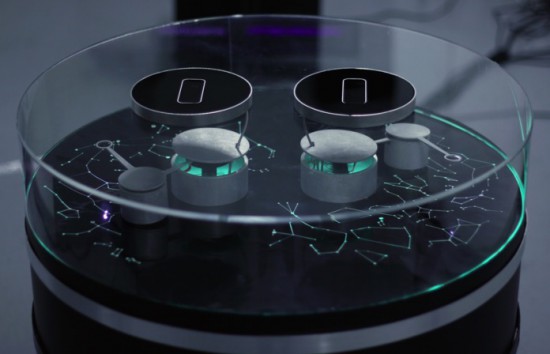
Stellar is an interactive installation by sound artist Francesco Fabris, which aims to create a sonic representation of stars and constellations through a dedicated interface.

The project has been developed using two Arduino Uno, LeapMotion and Max7 software managing data of more than 300 stars and 44 constellations, stored from the open-source software Stellarium, and coded to interact with the robotic arms.

One Arduino Uno board controls four servo motors and a second one controls the led stripes. The motors are controlled with two LeapMotion but since LeapMotion doesn’t support two devices on one computer, he used two miniMac  connected through an Ethernet network.

Since there’s no sound in space, Francesco wanted  to conceptualize a link between electromagnetic and sound waves  to create a minimalistic, interactive device which would allow visitors to learn about specific stars through sound information:

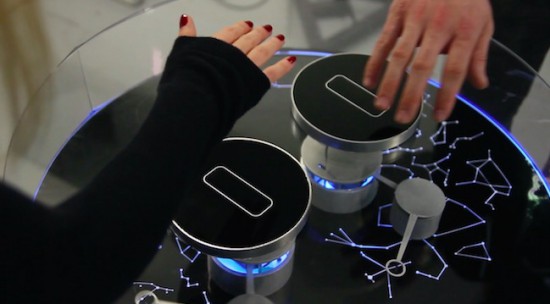
The base of the system is a cylindrical structure, on top of which are displayed the most important constellations of the northern sky. Above this representation are two robotic arms. When the tip of one of the arms aligns with a star, information on the selected star is transformed into simple sine waves, changing the colour the star emanates.

Two players can use the system at the same time, by moving their right hands over the two black, circular sensors. This allows them to move the robotic arm both horizontally and vertically.
The data analyzed for each star are: temperature (color index: red star = old and cold, blue star = hot and young), brightness (as seen from Earth), distance (from Earth) respectively transformed into: frequency (Hz), amplitude (dB), duration (ms).
The colder the star, the lower the pitch; the brighter it appears to us from Earth, the louder the sound; the further from Earth, the longer the duration.
For example, a bright, red star four thousands light years from the Earth would generate a low frequency, loud and long sound. A blue star which is closer to the Earth would generate a high frequency, weaker and shorter sound.

The background drone-sound is white noise (which is a combination of all frequencies, the opposite of space-silence). When a constellation is triggered, the number representing its area (squared degrees), becomes the cutoff frequency of a low-pass filter for the noise signal. In this way, larger constellations will gradually increase their frequency.

Don’t miss the “Making of” video:

Stellar has been produced with the support of the DE.MO./MOVIN’UP I Session 2015 project, and promoted by the Ministry of Cultural Heritage & Activities & Tourism, General Directorate for Contemporary Art, Architecture and Urban Suburbs and GAI – Association for the Circuit of the Young Italian Artists.

Testing riders’ clothing with Arduino

Worse for Wear is a clothing company  for women who ride motorcycles. The fascinating clothing they produce is very fashionable, comfortable, and needs to protect riders from impact and abrasion if they have an accident. Jackets and trousers have knee and hip pads  included to protect the rider when sliding many meters across asphalt. That’s why the fabric must be strong and abrasion resistant because if the fabric wears away too quickly, the rider’s skin will be exposed and injured.

To choose the perfect fabric, Scott and Laura, co-founders of the company, created an Impact Abrasion Resistance Testing Machine running on Arduino Uno to perform tests on different materials like knit fabrics, woven fabrics, and leather, to see how long it takes before the material is sanded completely through. I interviewed them to learn more about it!
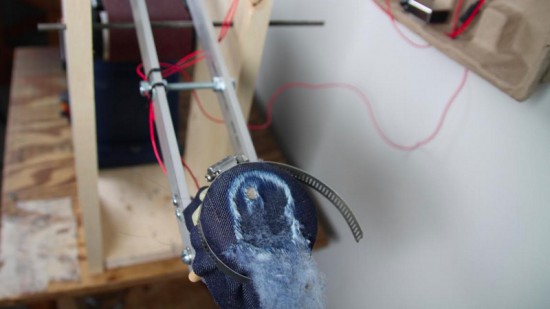
- What is the impact abrasion resistance testing machine and how does it work?

When selecting fabric to use in our clothes, we have to make sure that it is strong and abrasion resistant. We use the impact abrasion resistance test machine to determine which fabrics will withstand abrasion (scraping and sliding) the best. It is important to us to test the fabrics ourselves and not rely solely on the claims of fabric manufacturers.
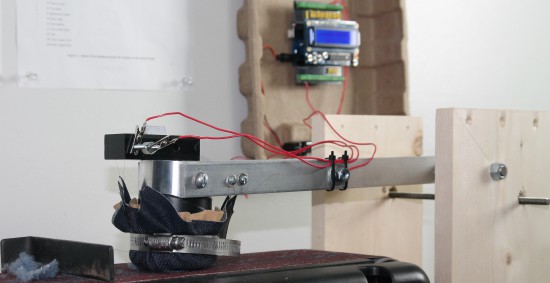
The machine has a weighted arm, like a hammer, suspended above an abrasive belt sander. A sample of the fabric that we want to test is wrapped around the head of the hammer and then dropped onto the moving sanding belt. An Arduino Uno is used to record the amount of time it takes to sand through the fabric sample.

Check the video below to see how it works:

- Why did you decide to use Arduino?

We have used Lilypad Arduino and Arduino Uno before to prototype some e-textile projects, so it was easy for us to get started on this one with our previous experience. The large number of accessory boards available made it simple to add an informational display and user interface to the machine. In just a few hours, we were able to very quickly create a machine to compare the abrasion resistance of a variety of fabric samples. The simplicity of working with Arduino was a very good choice for us, because our real business is creating clothing, not building test machines!

- What does Arduino control in the machine? 

An Arduino Uno is used to record the amount of time it takes to sand through the fabric sample. The method we use is based on European Union standards for motorcycle safety gear testing. To measure the fabric’s abrasion time, we use two thin copper wires (magnet wire). One wire is placed inside and another outside of the fabric sample before everything is wrapped around the head of the hammer. Each wire is then connected to ground on one end and an to input pin on the Arduino on the other end. The pins are in INPUT_PULLUP mode so a current runs through them. The LCD display on the Arduino tells us when both wires are connected properly.

Then, we start the belt sander and drop the hammer onto the spinning sanding belt. The outer wire breaks very quickly, breaking the connection to that pin [ digitalRead(outerWireIn) == HIGH ]. At this point, the Arduino records the start time. When the fabric wears through – usually within a couple of seconds – the inner wire is exposed to the sanding belt and quickly breaks. That marks the end time, which the Arduino records and displays on the LCD shield. A single type of fabric must be tested at least five times in order to make sure our recorded times are accurate.

Explore the details and download the code on Worse for Wear blog.
Monitor your Bonsai with the help of Arduino Uno

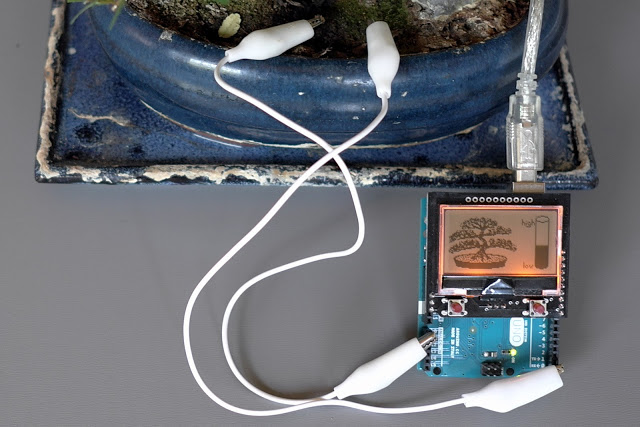
Bonsai trees are not like other plants. There’s no single watering schedule that can be applied to a bonsai and the best way to tell if the bonsai needs water is to touch the soil. Experienced growers know when a tree needs to be watered by observing the foliage or just by the weight of the pot. If you are not used to taking care of this type of tree, Bonsai Watchdog could be the perfect project for you. It runs on Arduino and Genuino Uno and makes it really easy to monitor the moisture level in the soil.

Thomas Baum, created it and shared it some days ago on the Arduino Community on G+ :

Two pencil leads, an Arduino and a 12864 (ST7565) LCD watches out my little bonsai. The filling level shows how often the sapling need to be watered.
source and discription (in german) you can find here:
http://tiny.systems/categorie/lcdProjekt/BonsaiWatchdog.html


The real open source Theremin on Arduino

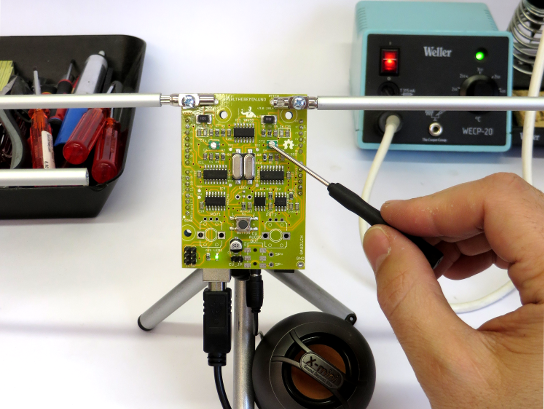
Open.Theremin is an open source hardware and software project by Urs Gaudenz of  Gaudi Lab with the aim of building the next digital generation of the legendary music instrument developed in the ’20s by the Russian inventor professor Leon Theremin. The project is documented under a open license and uses Open.Theremin.UNO, an Arduino  or Genuino Uno shield featuring a digital mixer, combined 12 bit audio and CV out, audio jack on the bottom for more compact design, two completely separate antenna circuits:

The theremin is played with two antennas, one to control the pitch and one for volume. The electronic shield with two ports to connect those antennas comprises two heterodyne oscillators to measure the distance of the hand to the antenna when playing the instrument. The resulting signal is fed into the arduino. After linearization and filtering the arduino generates the instruments sound that is then played through a high quality digital analog audio converter on the board. The characteristics of the sound can be determined by a wave table on the arduino.

Most theremins on the market are either expensive or then not really playable. That’s how I decided to design a playable, open and affordable theremin. The first version was modular and difficult to program. Then I decided to redesign it as a shield to fit on the Arduino.UNO. This was a big success and many people could start using it, change the sounds and adapt it to their own application. The whole design is open source and documented on the website. I produced a small batch of the shield that can be bought through the small batch store on the website.

Watch the video below with Coralie Ehinger, a Swiss theremin player and organizer of the first Swiss theremin festival N / O / D / E, playing the instrument:

Arduino Blog 11 Jan 18:43

EG First 2nd rev bot

Primary image

What does it do?

Modified RC obstacle avoidance Car

Very new to this site. Been playing with this project on and off for 6 months. Completed once then went back to and it wasn't working. Tried to troubleshoot and burnt out the chip. Pulled out the whole circuit board. Then rewired the battery pack. At that point it is just the frame DC motors on front and back(front geared to turn right and left, back left as dc motor for fowards and back) . I pulled an H bridge chip from a motor drive expansion board and breadboarded it .

Cost to build

Embedded video

Finished project

Number

Time to build

Type

URL to more information

Weight

read more