Posts with «uno» label

Vintage Sewing Machine to Computerized Embroidery Machine

It is February of 2018. Do you remember what you were doing in December of 2012? If you’re [juppiter], you were starting your CNC Embroidery Machine which would not be completed for more than half of a decade. Results speak for themselves, but this may be the last time we see a first-generation Raspberry Pi without calling it retro.

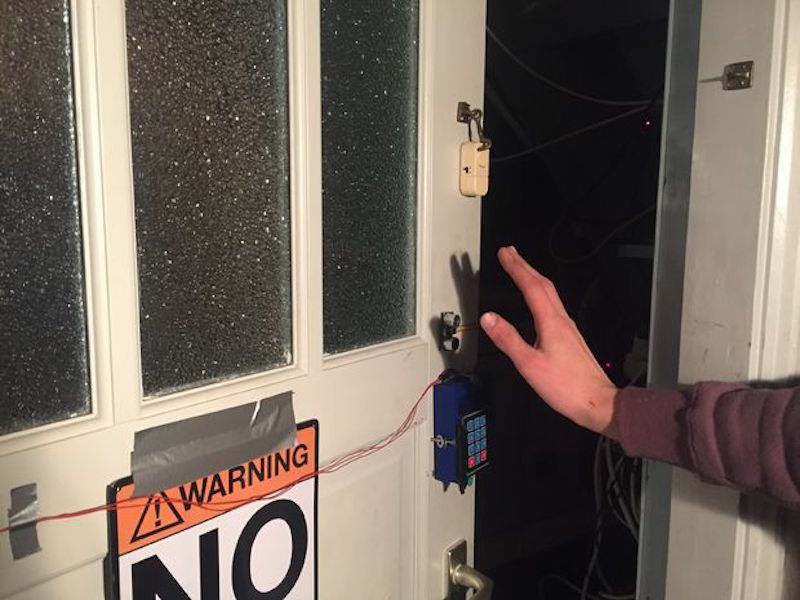
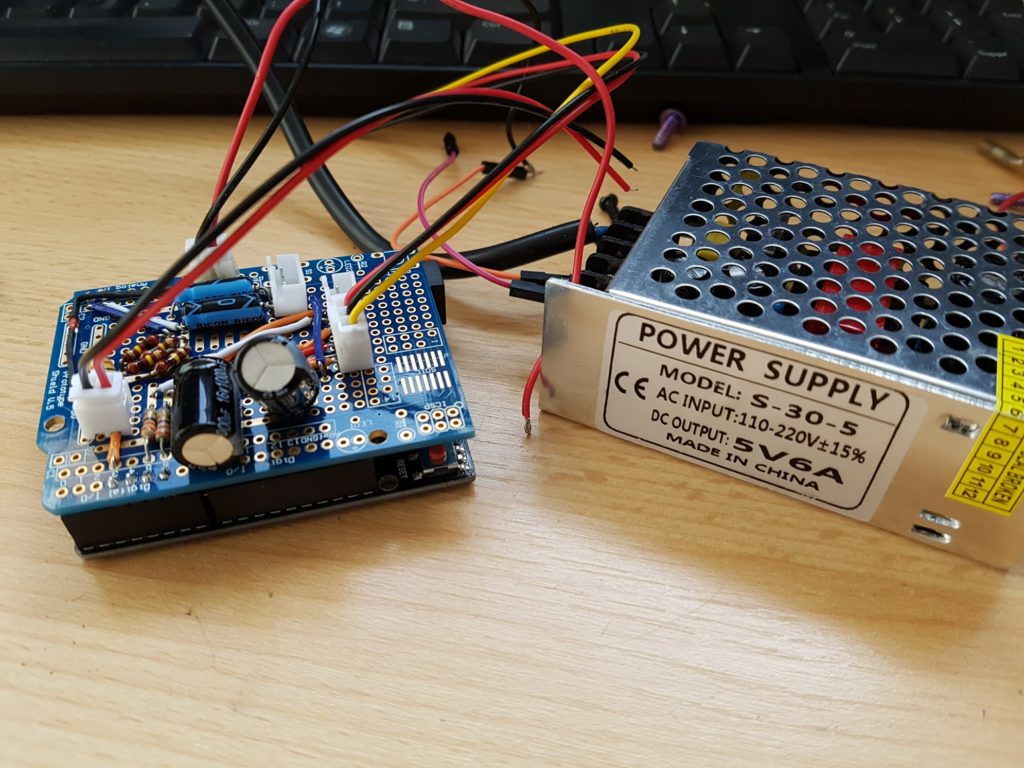
The heart of the build is a vintage Borletti sewing machine, and if you like machinery porn, you’re going to enjoy the video after the break. The brains of the machine are an Arduino UNO filled with GRBL goodness and the Pi which is running CherryPy. For muscles, there are three Postep25 stepper drivers and corresponding NEMA 17 stepper motors.

The first two axes are for an X-Y table responsible for moving the fabric through the machine. The third axis is the flywheel. The rigidity of the fabric frame comes from its brass construction which may have been soldered at the kitchen table and supervised by a big orange cat. A rigid frame is the first ingredient in reliable results, but belt tension can’t be understated. His belt tensioning trick may not be new to you, but it was new to some of us. Italian translation may be necessary.

The skills brought together for this build were vast. There was structural soldering, part machining, a microcontroller, and motion control. The first time we heard from [juppiter] was December 2012, and it was the result of a Portable CNC Mill which likely had some influence on this creation. Between then, he also shared his quarter-gobbling arcade cabinet with us.

Levitate water drops with RGB LEDs and Arduino

Water normally falls from the sky to the ground, the time fountain from hacker isaac879 appears to work much differently. As shown in the video below, water droplets somehow levitate from a circular orange apparatus to a blue one on top.

The trick here is that the water isn’t actually falling up, but appears that way by carefully controlling the flashing of RGB lights using an Arduino Uno. If the lights flash at the same rate as the water drops, they appear to stand still, while if the light is flashed more slowly, they appear to rise.

This is the prototype RGB LED Time Fountain I designed and built. It uses RGB LED strip lights to strobe a stream of water drops to make them appear as if they are levitating. By strobing the different colors out of phase with each other some incredible effects can be created.

An Arduino Uno controls the timing of the RGB strobe and the PWM of the pump. Bluetooth communication was achieved using an HC-05 Bluetooth module and the “Arduino bluetooth controller” app by “Giumig Apps.”

Be sure to check out the video to see it in action, especially the bit around 3:40 where drops appear to rise out of a cup while it’s getting filled with water.

Video game head tracking with Wii Remote camera

While the Nintendo Wii has been on the market for well over 10 years, its controllers continue to provide a variety of tools for hacking. One component you may want to consider for your next hack is the camera from the Wii Remote, which senses the position of nearby infrared light spots and outputs them as X/Y coordinates via I²C.

While that may instantly set off multiple use ideas, if you need inspiration, be sure to check out this setup by Jack Carter. He mounted one of these cameras to the top of a computer screen, and uses it to track an IR LED mounted to the top of his headset.

From there, an Arduino Uno translates this information as joystick inputs to the computer, which is then configured to control an in-game camera as seen in the video here.

Automatic guitar strumming with Arduino Uno and chopsticks

If you like to make music, but don’t consider yourself particularly talented, YouTuber Make It And Fake It has come up with an innovative solution.

Her device uses an Arduino Uno, along with a hobby servo motor to move a pair of chopsticks that holds the pick. This means that the guitar can literally strum itself, and thanks to a small control box, she can even select from one of three rhythm patterns.

If you’re wondering what this could be used for, the answer comes at 1:40 in the demonstration video, where Make It And Fake It is shown drinking tea, playing another instrument, and even texting her mom while still producing music from the guitar. Code for the build can be found on GitHub.

Dotter is an Arduino-powered dot matrix printer

While largely supplanted by more modern forms of printing, dot matrix printers still have their fans. Few, however, are more dedicated than Nikodem Bartnik, who constructed his own model that pulls paper up to 55cm wide and as long as he needs under a gantry that stamps each pixel with a marker.

The device is controlled via an Arduino Uno, which takes input from a Processing sketch running on a computer to obtain the image to be printed.

It uses a pair of stepper motors to advance the paper, as well as a third to position the marker to be stamped. A servo motor pushes the marker down as needed, producing a print that, as seen at 5:15 in the video below, is accurate and stylishly pixellated.

Create a custom Kerbal Space Program cockpit with Arduino

When you play a video game, the controls are normally a compromise between what you have available (a keyboard/mouse) and the actions you’re trying to convey. This, however, wasn’t good enough for Kerbal Space Program enthusiast Hugopeeters, who instead of accepting this limited input method, designed a new control panel using an Arduino Uno as its heart.

Notable features of his build include dual joysticks, a throttle slider, a multi-purpose LCD display, LED bars for fuel gauges, and a beautifully laser-cut enclosure.

Want to construct your own? Find more details on the project in Hugopeeters’ write-up, as well as the Arduino code he used and the KSP plugin necessary to interact with his new hardware.

This Arduino infinity mirror lights up to music

Infinity mirrors, which make light appear to stretch to infinity by bouncing light between two mirrors, are incredible to observe. Hacker “Evocate” decided to go the extra mile and not only illuminate the inside of his mirror arrangement, but used an Arduino Uno and a sound sensor to enable it to react to sound.

In addition to this sound sensitivity, a Bluetooth app controls color and brightness, allowing him to customize the device on the fly.

The mirror also has a built-in microphone which detects sound/music and reacts accordingly by generating eye-catching light strobes on the beat of the music! Simply start up the app, connect to Bluetooth and see the magic happen!

If you’d like to build your own, full instructions along with Arduino and app code are available here. Or you can simply check it out in action below!

Robotic playing card dealer made with cardboard

Ruben, aka “Ruubz0r,” a mechanical engineering student, was tasked with building a smart object. As he enjoys card games, he decided to make a playing card distributor.

The resulting device uses a single servo to slide cards off of a deck, along with a stepper motor and ultrasonic sensor to aim it at the human recipient. An Arduino Uno provides the brains of the operation.

The system is made out of wood and cardboard, and while it may not be ready for casino use, it’s a great example of what can be done with readily available materials. Check it out in action in the video seen here!

Automatically open doors with Arduino!

Tired of doing the mundane task of opening your door? This hack from Sieuwe Elferink takes care of that for you, using an Arduino Uno for control.

When someone comes within 50 cm of an ultrasonic sensor attached to the door, the Arduino uses an H-bridge relay to power a windshield wiper motor, which opens and closes it via a linkage setup. Another sensor is implemented on the opposite side of the door, allowing hands-free travel both ways!

Want to build your own? You can find instructions here, while code is available on GitHub.

Add colorful effects to your ’80s boombox with Arduino and LEDs

While ’80s-style boomboxes have their own unique character, per hacker “Dancorp’s” excellent mod, it’s clear that they could be improved dramatically with programmable LEDs.

This build uses a capacitive filtering arrangement to feed line out signals from the boombox into an Arduino Uno, which then controls three LED strips.

Two of these strips are arranged around the speaker cones, emitting beautiful LED effects to go along with the music playing, while the third can be used to light up the built-in VU meters.

A schematic along with Arduino code are available on Dancorp’s write-up. It looks like a fairly accessible project, especially given the extra space available in electronics from that era.