Posts with «uno» label

A beautifully finished Arduino temperature and humidity sensor
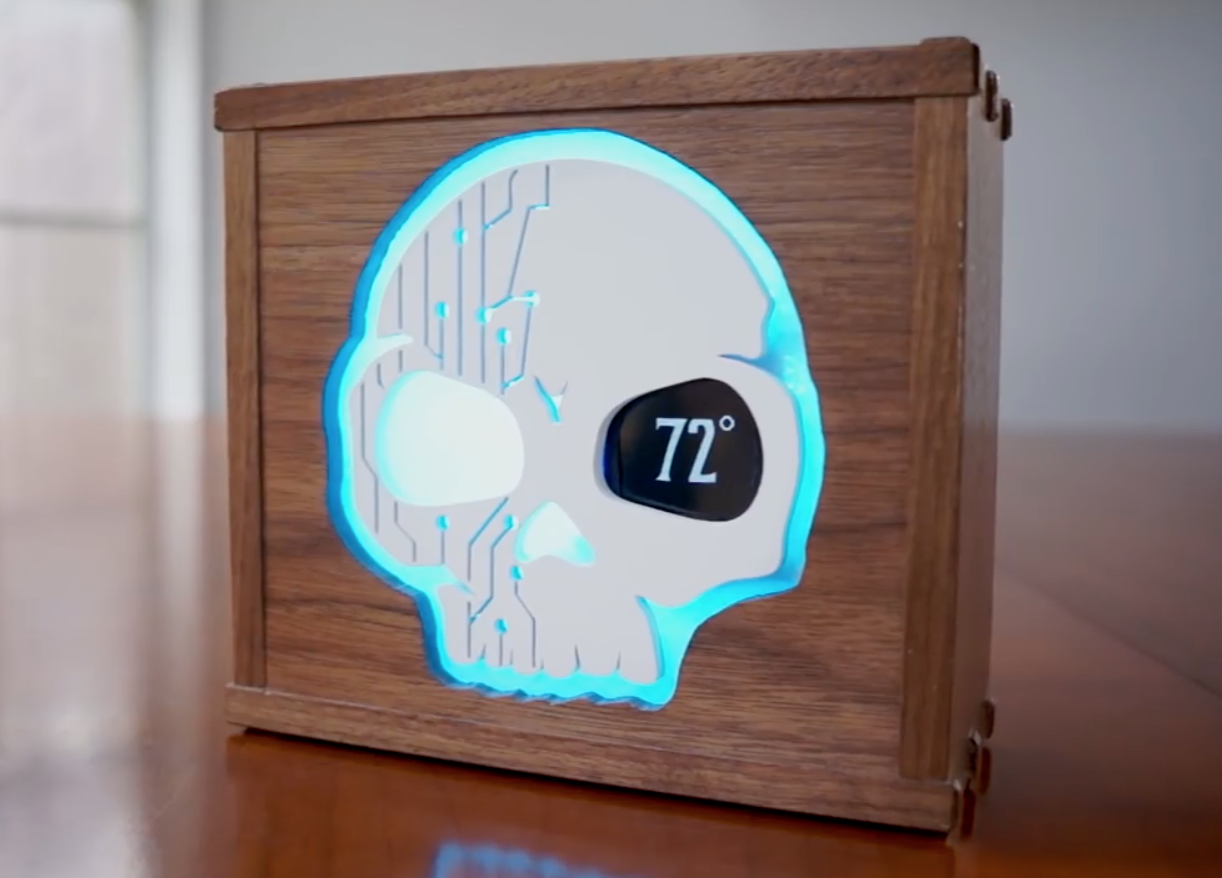
Jay and Jamie wanted a temperature and humidity sensor for their workshop. Instead of buying something off the shelf or hooking up an Arduino with the proper sensor and breadboard, they went the extra mile.

The duo crafted a beautiful walnut enclosure—compete with a 3D-printed logo and a clever opening for the temperature display using an LCD screen. Humidity is indicated by the color of a NeoPixel ring, which shines through the artwork via a frosted plastic as a diffuser.
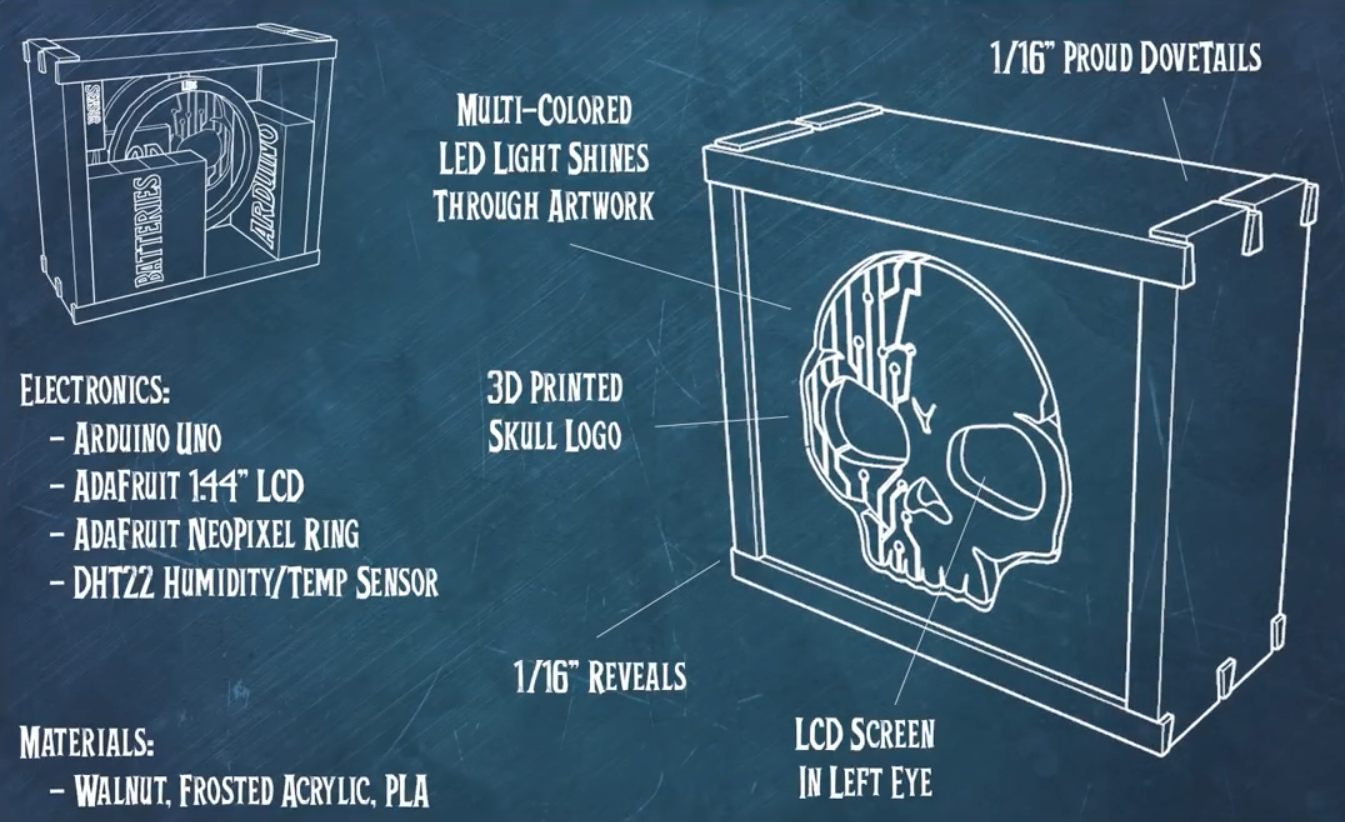
It’s immaculate on the outside, while hot glue is used extensively inside to hold everything in place. An Arduino Uno powers the build, attached by a handy plastic case.

We live in Central Texas where we get massive swings in humidity and temperature in the spring, which can be disastrous for certain woodworking projects. This cool project helps alert us when the humidity is changing or starts to get high so we can take precautions like moving our wood projects into the house, or not doing any milling during the high humidity weather. It also looks awesome and has our sweet logo.

Be sure to check out their entertaining video for lots of tips and tricks to make your project look excellent!

Building interactive plant lamps with Arduino

As part of a physical interaction and realization course at KTH Royal Institute of Technology, a team of students decided to build an interactive installation called “Alone Together

Their setup consists of sensor-equipped, networking artificial plants. The leafy plant model, dubbed “Thorulf,” uses flex sensors to detect leaf movement, while “Svamp” mushrooms employ circular force sensors for interaction.

Arduino Uno boards, along with Bluetooth modules and a computer running an openFrameworks server, allow the plants to communicate. When one plant is bent, it signals its partner to light up with a fun LED pattern as seen in the video below.

We imagine a series of plants all around the Library, assigned to one another to communicate. Our concept could even be applied over the web, so that the plants could be long distances apart, and used to communicate from one country to another, similar to the “friendship lamp” concept. In this case, the light interaction could be changed, so that the plant stays lit up when touched.

More details on the project can be found here.

Access doors with a color card locking system!

When you swipe a card through a reader, you expect it to read a magnetic stripe on one end. In other circumstances cards might contain an RFID chip, but what if the card only had a pattern of colors on it?

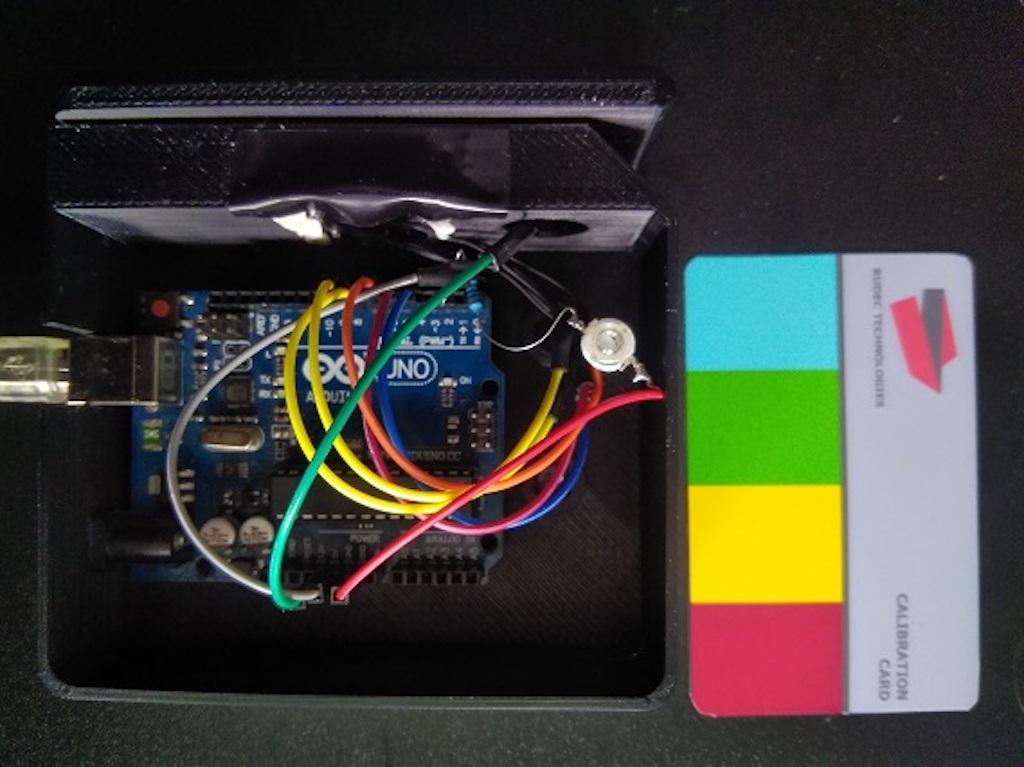
That’s the idea behind the Color Lock system by Rudec Technologies. The cards have a pattern of four colors printed on one side, which are read by an array of LEDs and a TCS230 color sensor when pulled through a slot. An Arduino Uno then takes this information and lights up an LED if the correct sequence is recognized.

This is a door locking system that uses a card with a preset color sequence printed on it to unlock the door. The system is still in the prototyping stage, i’m waiting for the actual lock part to arrive in mail to continue developing this. The idea behind this system is to avoid using RFID authentication, as it can be ‘stolen’ without contact, and this system offers a simple physical object that you use to authenticate yourself – think of it as an updated physical key. The system can offer much more than the conventional keys: if you lose your key, you simply print a new one, you can use a number of different keys for the same lock (or just one if you choose), the system logs all entries with timestamps (useful for tracking access), you can use your regular printer to print new keys, you can unlock it via Wi-Fi when paired with your phone or another device, the system can be used to authenticate in various situations (doors, cabinets, computers, entry points etc.

It’s an interesting concept that could be taken in a variety of directions depending on security needs. A clip of the prototype can be seen below!

Steve Grand’s "Creatures" Neurons simulated on Arduino Uno

Hey everyone, it’s me again.

So today I’ve been working on a project: recreating Steve Grand’s artificial neural networks from the old “Creatures” games on Arduino. Why, you ask?

read more

Let's Make Robots 09 Mar 03:38

Steve Grand’s Neurons simulated on Arduino Uno

Hey everyone, it’s me again.

So today I’ve been working on a project: recreating Steve Grand’s artificial neural networks from the old “Creatures” games on Arduino. Why, you ask?

read more

Let's Make Robots 09 Mar 03:38

Connect Pour!

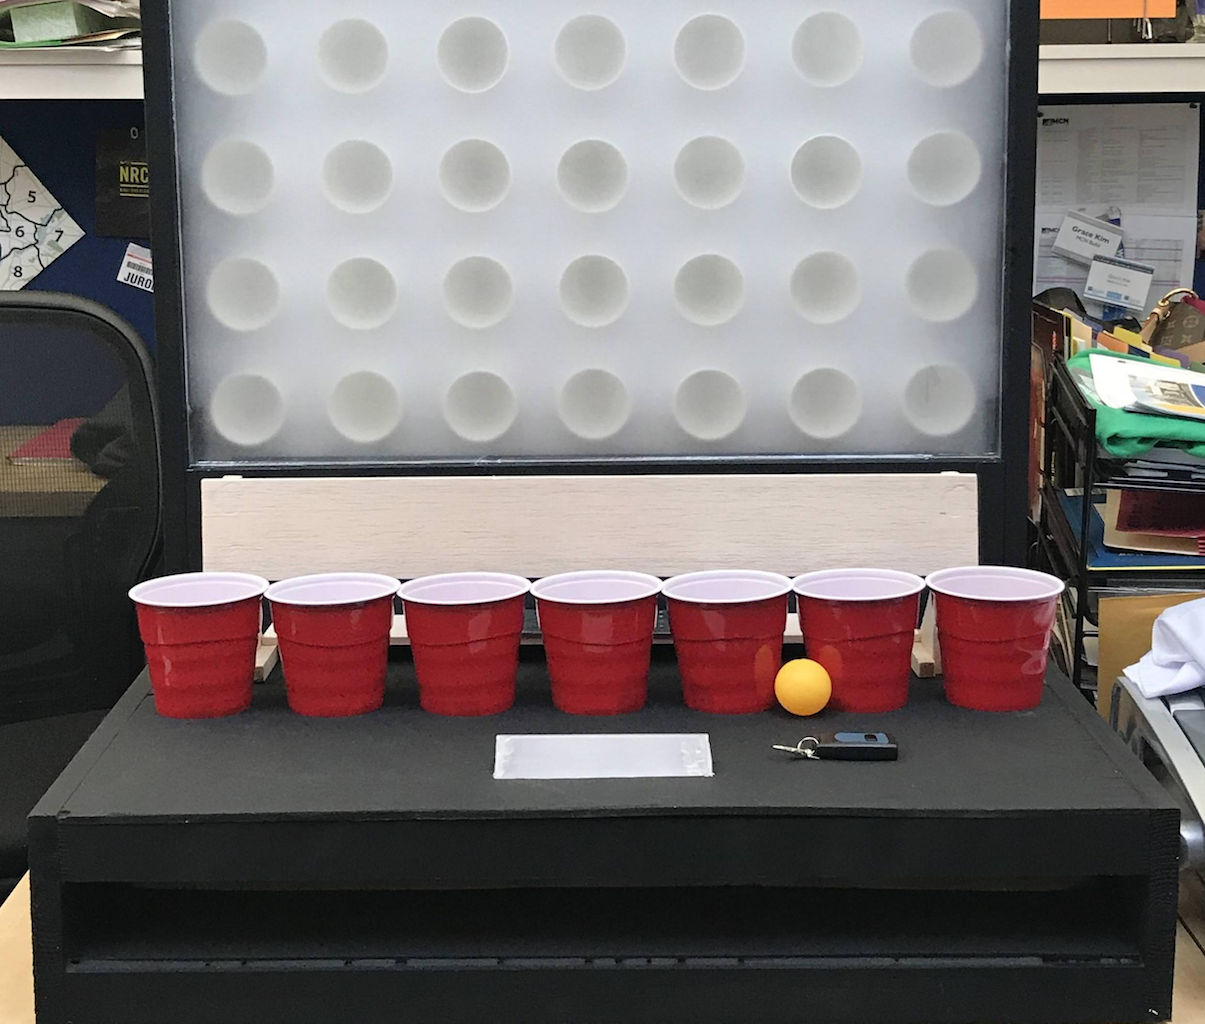
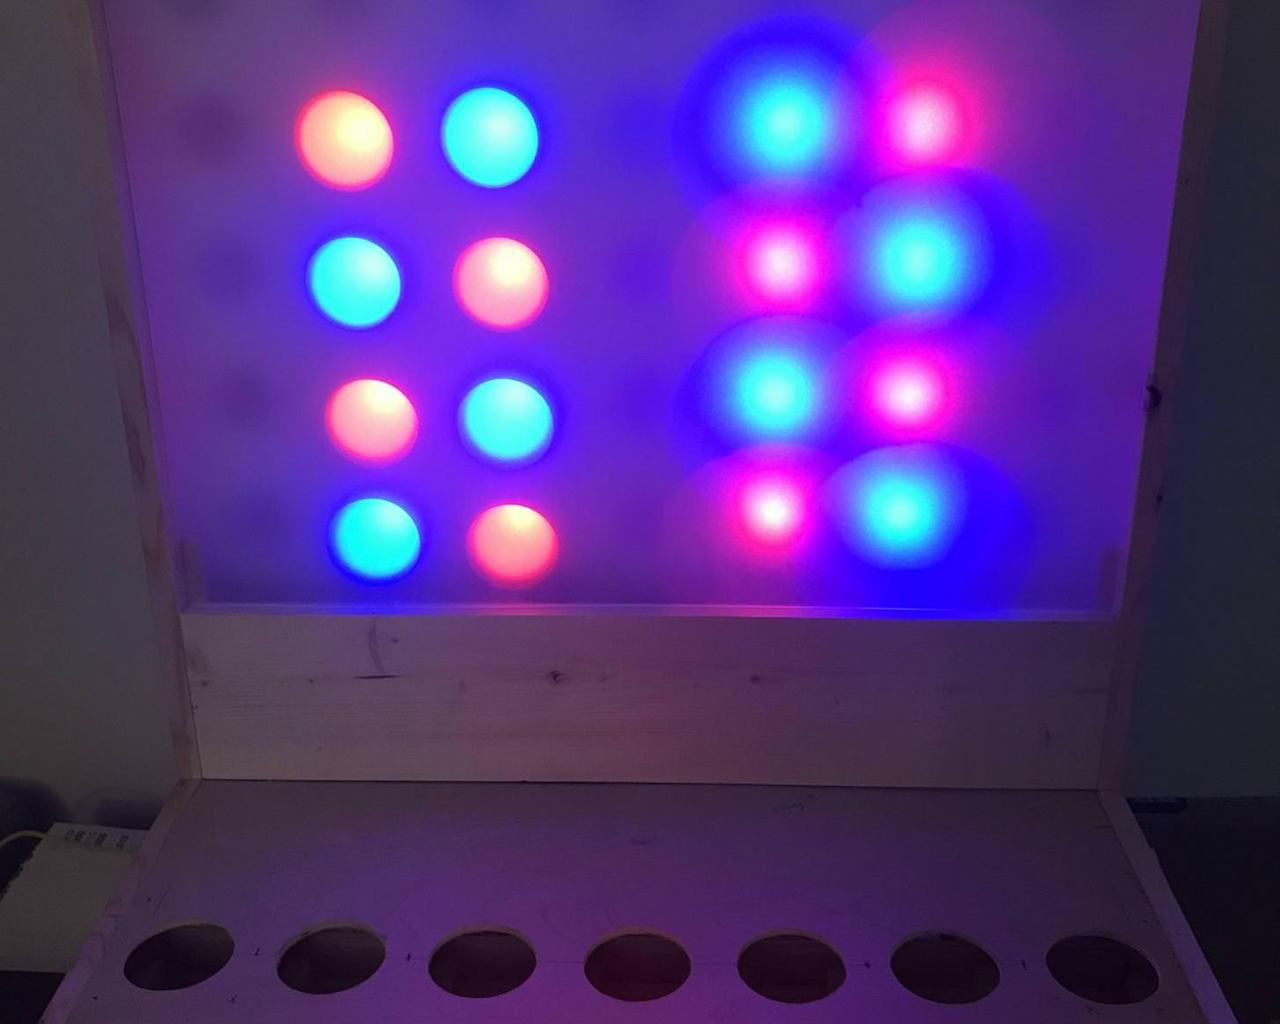
What do you get when you combine Connect Four with beer pong? Connect Pour, of course! After inspiration from a much larger basketball version, this hacker decided to make a device that allows you to throw ping pong balls into Solo cup targets. When one is hit, a vertical board stacks a light to represent a stacked checker above the cup in question.

An Arduino Uno powers the device, and lighting is provided by an RGB LED strip. Scores are tracked using an IR break beam sensor, and a button or RF remote can alternate player turns if you don’t hit anything.

I wrote the code of the game myself  and works basically as follows:

— the Arduino checks infrared beam break sensors under the plastic cups and a “pass button”

— if the state of the sensors/button changes from no beams being broken or buttons being pushed to a beam being broke or  a button being pushed

— the Arduino updates the game state updates the LEDs including the bar in the front (which indicates which player’s turn it is)

— repeat

The game looks like a lot of fun, though you may need some extra cups, as those on the machine no longer have bottoms! You can find more details on the build here.

A DIY hardware watchdog for your mining rig

Vadim Panov wanted a way to automatically restart a PC that was simple and cheap to make.

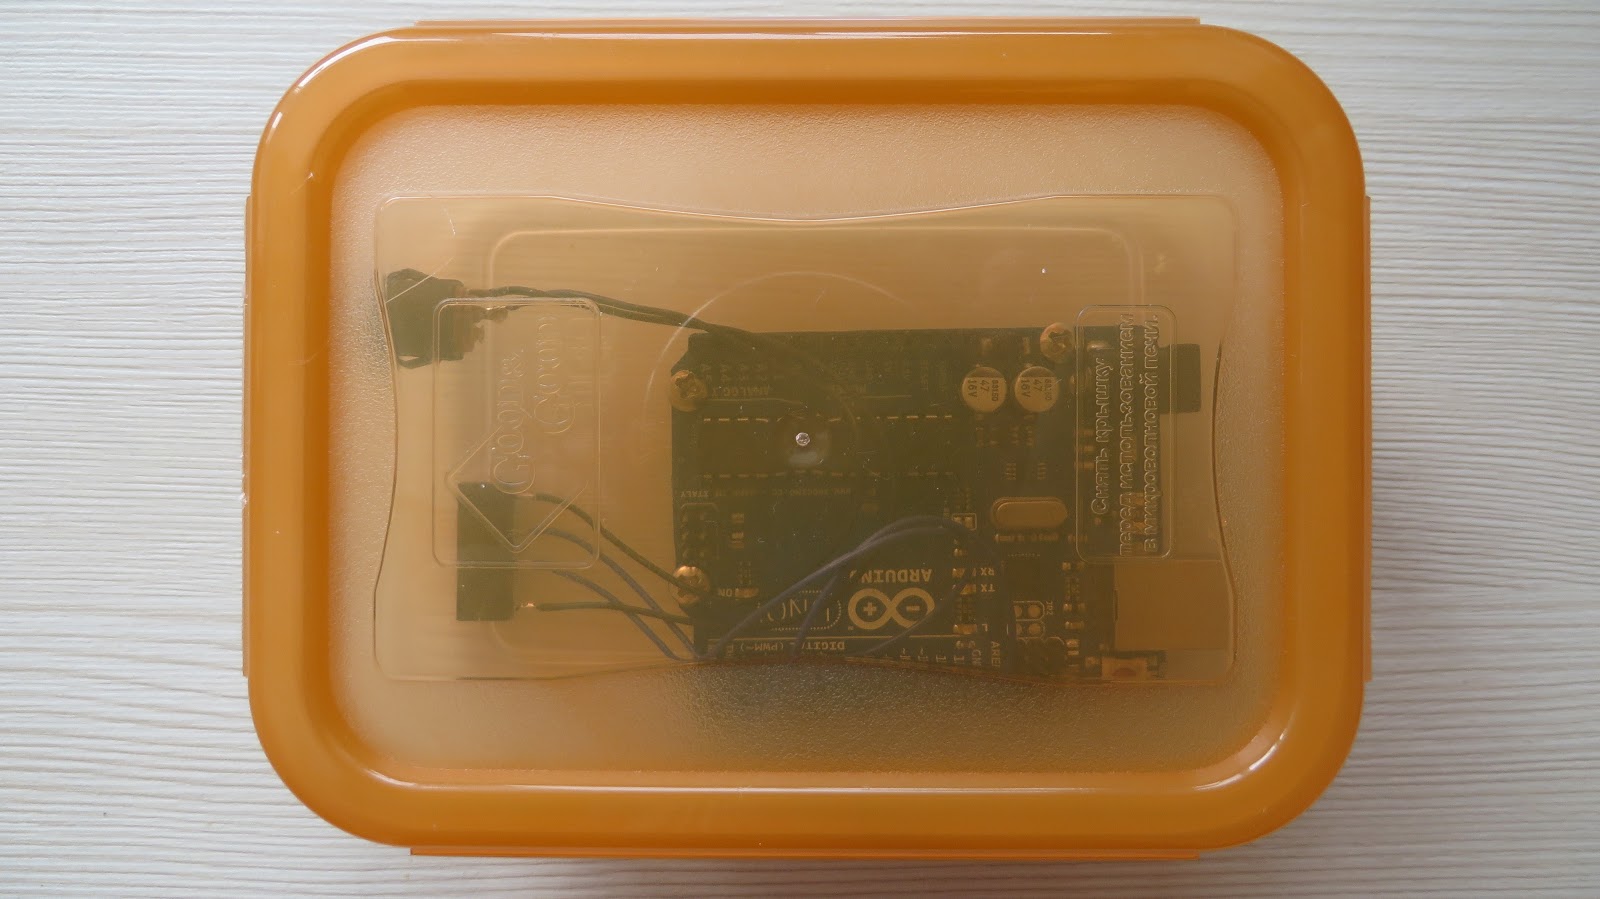
For this task, he turned to an Uno due to its wide availability; however, any Arduino board with at least one digital I/O pin and a USB-enabled serial port will work.

The device sends a “hello” string to the PC, to which it expects a “HELLO” back from the PC—running its own corresponding Java program—within 10 seconds. If it doesn’t receive this string, it assumes that the computer is frozen, and uses a reed relay to trigger the motherboard reset pin.

Panov’s idea could be used to monitor and reset cryptocurrency rigs, but could be adapted to other PC setups as needed.

Here’s how it works: the PC-side program tries to connect to every single serial port in your system within a period of 30 seconds (including the ports that appear during this process). To each port it’ll send the handshake string “hello” and monitor the input, expecting to receive uppercase “HELLO” back. When the handshake is finished, it’ll send ping strings once each five seconds.

The watchdog program on Arduino scans the input for “ping” strings. If no such string has been received within 10 second period, the watchdog will forcibly restart your PC.

Therefore, this scenario where you manually run it will be “one-off”, i.e. once the PC has been restarted, the watchdog will be stuck in the pre-handshake state. To make it work all the time, add the Java program to the startup list of your operating system of choice.

You can read more here and check it out in action below!

Test your aim in this carnival-style IR target game

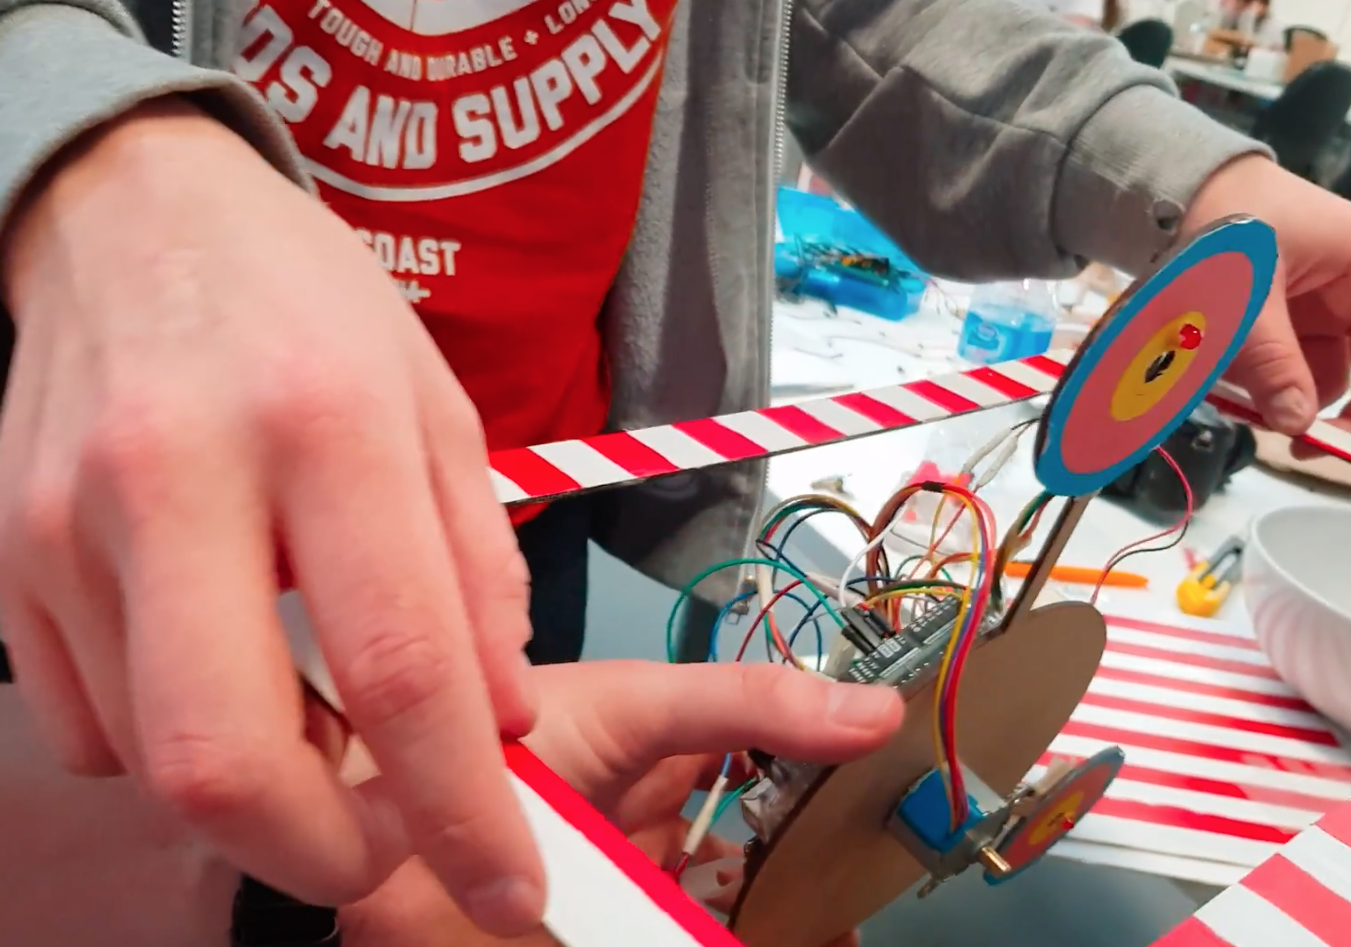
For a class assignment, Matt Robb along with teammates Kara and Andrew needed to make a project using an Arduino and various other components. What they came up with was a carnival-style game that uses a stepper motor to rotate three targets containing IR sensors out of a nicely-painted cardboard box.

An Arduino Uno provides control for the game. When hit with a signal from an IR remote, an LED on the target goes out, a buzzer beeps, and it momentarily stops spinning.

It looks like it was a lot of fun to build and play, so be sure to check it out in the video seen here!

Strange vocal interactions with ‘you, me and all these machines’

Moscow-based artist ::vtol:: is back again with an interesting interactive exhibit entitled “you, me and all these machines.” His latest work, a collaboration with Lovozero, allows two participants to produce otherworldly vocals together.

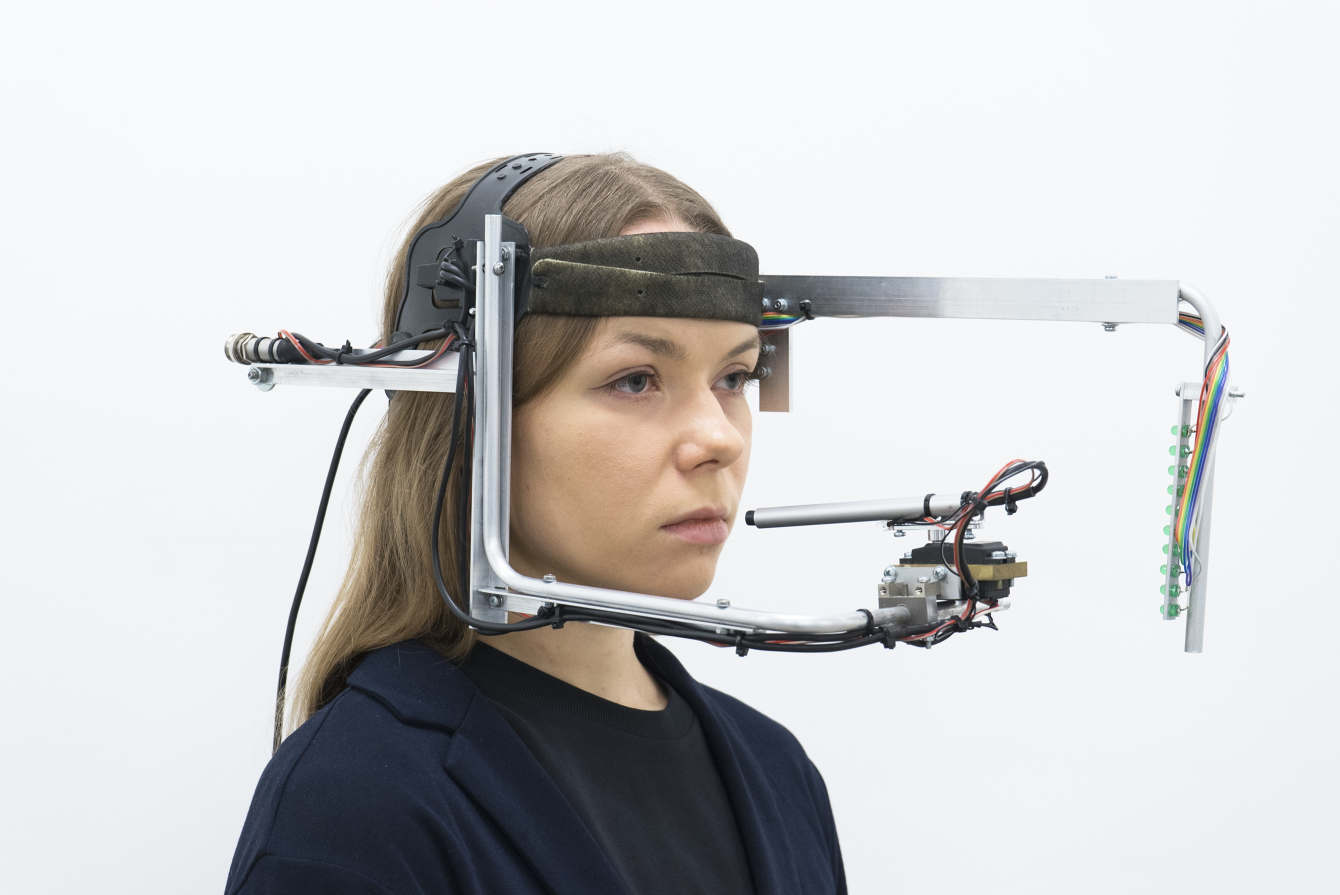
One participant wears the device, which points a directional microphone under the control of the other participant at her mouth using a servo motor. An array of LEDs signal the vocalist in a manner agreed upon before the performance.

The head-mounted system is controlled by an Arduino Uno, and is meant to display the subtle interaction between two participating artists, as they must work together to produce the desired output.

“You, me and all these machines” is a performance for voice and electronic devices. The vocalist puts on his or her head a specially designed wearable interface tool to interact with the voice and display a visual score. Technically, the device consists of several elements: a narrowly directional microphone driven by a motor; an LED strip that shows the vocalist score; remote control with a joystick used by the second participant to control the interface.

Shifting the microphone against the mouth makes it possible to achieve interesting sound effects, and makes it easier to manipulate the vocalist’s voice. The LED line consisting of 10 diodes is a very primitive, but effective and convenient way of interacting with the vocalist, and the way of interpreting the values is predetermined before each performance. During the performance, a sound canvas is formed, thereby changing the dynamics, consisting of a set of looped fragments created within voice and interface processing elements, without using other methods to generate sounds.

Check out “you, me and all these machines” in the video below!

Designing an Arduino-powered split-flap display

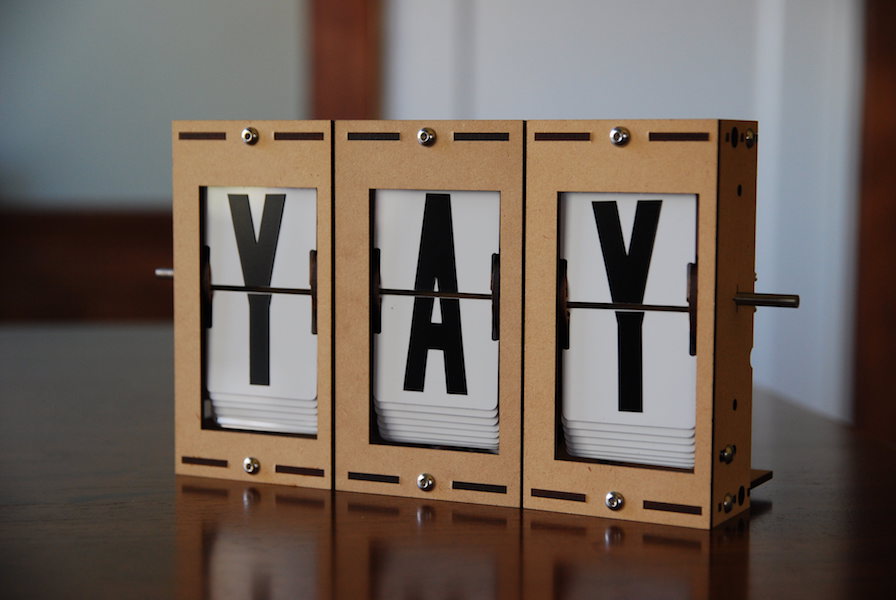
If you’d like a split-flap display with numbers and letters, options tend to be quite expensive. This though was no problem for hacker “scottbez1” who reports that after “only” two-plus years of work, he has produced a split-flap assembly that plugs into an Arduino Uno as a sort of external shield.

The device employs inexpensive stepper motors to click through letters, numbers, and even some punctuation, using cutout PVC ID display stock to show the characters. Cleverly, the PCB he designed for it can function as a motor driver or be split in two to function as a sensor board.

I’ve always loved these electro-mechanical displays, but you can’t buy them for a reasonable price, so I figured I’d try making them myself (plus it’s more fun that way!). Ultimately I wanted to design a split-flap display that can be built at home in small/single quantities and can be customized and put together by an intermediate hobbyist for not too much money.

The design I settled on uses PVC ID badge cards for the flaps, store-bought vinyl stickers for the letters, and is driven by a cheap 28BYJ-48 stepper motor. The enclosure and moving parts are all made from laser-cut MDF, which can be easily ordered online. To control them, I designed a driver board that can be hand-soldered and plugs into an Arduino like a shield.

The entire build story can be found here and more details including Arduino code are available on GitHub. If you’d just like to see and hear it flapping away, check out the video below!