Posts with «uno» label

Stream weather conditions to the cloud!

Weather reports on the news, your computer, or smartphone are very good—something that people 100 years ago could only dream of—but what if you want to know the exact weather in a fixed location from anywhere in the world? One solution would be Jakub Nagy’s excellent cloud-connected station.

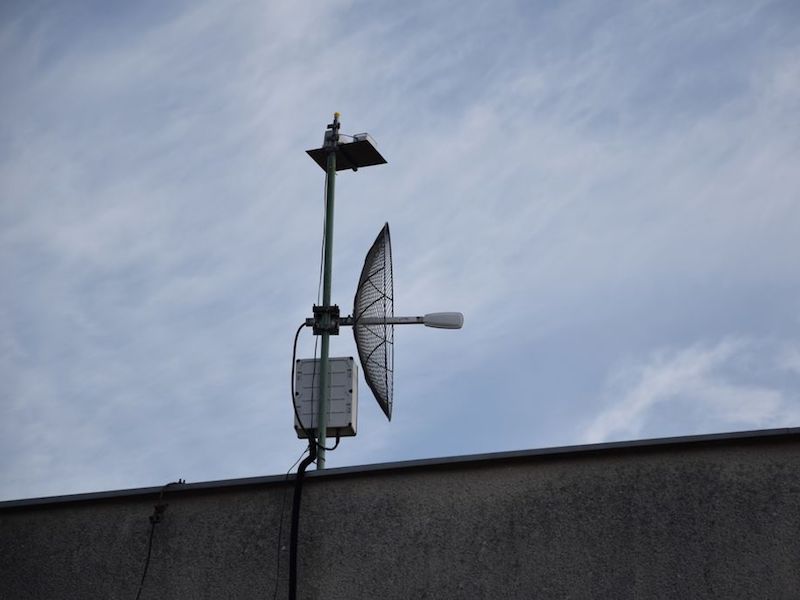
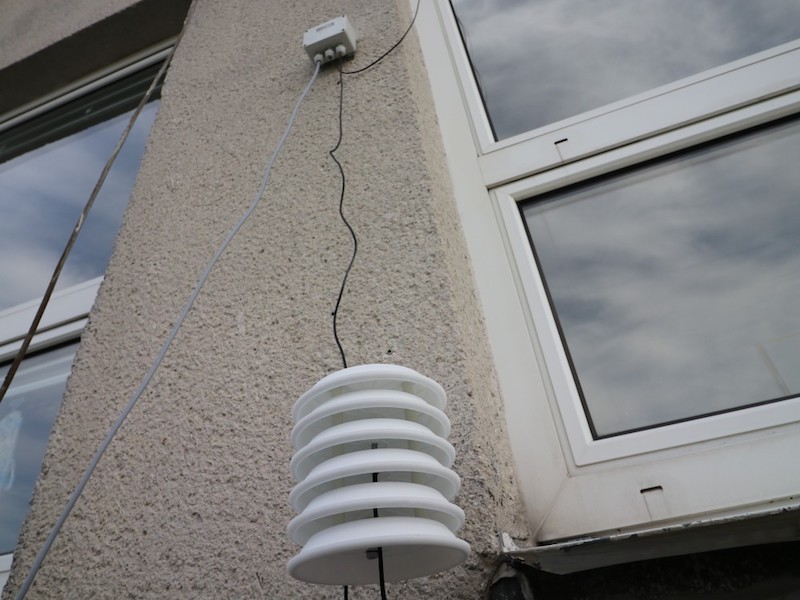
It uses an Arduino Uno to collect data from temperature, humidity, pressure, and UV index sensors, along with a Nano to read a rain gauge. The data, with images from a webcam, are passed along to a service called Weathercloud, where this report out of the Slovak Republic can be viewed remotely. 

If you’d like to assemble a similar device to measure conditions in your area, instructions are available in his write-up, including a parts list that will run around $130.

Upgrade a sewing machine into an automatic embroidery rig

A needle and thread is extremely useful if you need to fasten a few pieces of fabric or sew on a button, and a sewing machine takes things up several notches in speed an accuracy. This venerable machine, however, can now be enhanced with a trio of stepper motors under Arduino Uno GRBL control to take things to an entirely new level.

The “Self-Made Embroidery Machine” employs a setup very similar to a 3D printer or CNC router. Two steppers move the fabric around, while a third actuates the needle. This allows the user to program in decorative shapes and patterns as shown in the video below, and the build process is well documented if you’d like to build your own!

Sewing machine part is any old or new sewing machine. Only change for original is stepper motor with synchronised pulley system (chain/belt drive) and more embroidery friendly presser foot. It is recommended to use older sewing machine, way more convenient to mount stepper motor to cast iron and prices are relatively cheap.

XY movement consists mainly 3D printed parts, 12 pcs and similar parts known from self build 3D printers. Both axes use GT2 belts, NEMA 17 steppers and both directions are fully scalable.

Synchronous movement comes from Arduino powered GRBL G-code interpreter, it is mouthful, but basically machine moves using G-code send to Arduino. It is not that complicated and it is only carrier like any other one when going from system to another one.

Now we have movement and code, but how to make nice shapes and export to G-code. It is nothing to do with medieval sorcery, it is a matter of downloading Inkscape and extension called Inkstitch.

Help and examples how to use Inkstitch extension can be found address above. End result should be really close to hobby level embroidery machines, just slower speed. After all, embroidery machine is nothing more than overgrown sewing machine.

Convert a Dremel tool into an Arduino-controlled CNC machine

3D printers get most of the attention in maker-fabrication news, but other computerized tools, like laser cutters and CNC routers, can also be extremely useful. In fact, Nikodem Bartnik decided to create his own Dremel-based machine constructed out of 3D-printed parts and aluminum profiles. 

Electronics include an Arduino Uno and CNC stepper shield running GRBL for control, along with some NEMA 17 steppers and motor drivers, a relay for the Dremel, and a 12V / 30A power supply.

As with many other projects, his build went through several iterations, but the final results—seen in the video below—are quite good. The machine, which only cost him around $300, is able to mill MDF and acrylic.

If you’d like to make your own, Bartnik outlines his design in the first video below, then shows how to use it in the second. 

Creep out guests with an Arduino-controlled teddy bear

Halloween has become something of a hacker holiday, giving creative people the world over a chance to show off their spooky animatronic inventions outside without neighborhood scrutiny. This year, Instructables user “gocivici” created a display inspired by the doll in a rocking chair featured in the movie Anabelle, but decided to use an Arduino-infused teddy bear instead. 

The setup is simple but effective, using an Arduino Nano and solenoid to rock the chair. The bear’s head rotates using another Arduino board—an Uno this time—along with a second solenoid and 3D-printed assembly stuffed inside. Control is accomplished via a small wireless remote, though a motion sensor could also be employed.

Arduino Gets a Command Line Interface

When using an Arduino, at least once you’ve made it past blinking LEDs, you might start making use of the serial connection to send and receive information from the microcontroller. Communicating with the board while it’s interacting with its environment is a crucial way to get information in real-time. Usually, that’s as far as it goes, but [Pieter] wanted to take it a step farther than that with his command line interpreter (CLI) for the Arduino.

The CLI allows the user to run Unix-like commands directly on the Arduino. This means control of GPIO and the rest of the features of the microcontroller via command line. The CLI communicates between the microcontroller and the ANSI/VT100 terminal emulator of your choosing on your computer, enabling a wealth of new methods of interacting with an Arduino.

The CLI requires a hex file to be loaded onto the Arduino that you can find at a separate site, also maintained by [Pieter]. Once that’s running, you can get all of that sweet command line goodness out of your Arduino. [Pieter] also has some examples on his project page, as well as the complete how-to to get this all set up and running. There’s a lot going on in the command line world, in Linux as well as windows. So there’s plenty to explore there as well.

Hack a Day 11 Nov 03:00
arduino  cli  command line  gpio  i2c  microcontrollers  serial  shell  unix  uno  

Linear movement with Arduino and 3D printing

Arduino boards are great for controlling small servo motors, but what if you need something to provide linear travel? As spotted on Reddit, while the answer here is a little less straightforward, YouTuber Potent Printables has a great solution. It uses 3D-printed components, along with a dab of epoxy and fastener hardware to convert either a micro or standard continuous rotation servo into a rack-and-pinion mechanism.

The project can be seen in the video below with an Arduino Uno and motor shield, though any Arduino capable of PWM output should have no problem with this setup. Since the servos used here are meant for continuous rotation, travel distance is based only on timing. Depending on the application, you may want add a simple microswitch or other sensing mechanism for feedback.

This is a general purpose linear servo actuator (pusher style). Two sizes have been designed, for different space constraints and force outputs.

These use continuous rotation servos which helps keep the cost very low. Off the shelf actuators of this type can cost around $70 USD.

The “mini” version will fit in smaller spacers, but has a much lower force output. The “large” version has a higher force output, but is…larger in size than the “mini.”

Create shapes over and over with the Dynablock 3D Printer

3D printing, while revolutionary in many aspects, generally means you’re stuck with what you print. Researchers at the University of Colorado Boulder and the University of Tokyo, however, have created a printing system called Dynablock, which attaches specialized magnetic blocks together that can used over and over.

The system uses an array of 24 x 16 motors to push the blocks into position one layer at a time, giving a possible “print” resolution of 384 blocks per layer. An Arduino Uno, along with shift registers and motor drivers are used to directly control the block placement motors, and user interface is handled by a JavaScript-based application.

Dynamic 3D Printing combines the capabilities of 3D printers and shape displays: Like conventional 3D printing, it can generate arbitrary and graspable three-dimensional shapes, while allowing shapes to be rapidly formed and reformed as in a shape display. To demonstrate the idea, we describe the design and implementation of Dynablock, a working prototype of a dynamic 3D printer. Dynablock can form a three-dimensional shape in seconds by assembling 3,000 9 mm blocks, leveraging a 24 x 16 pin-based shape display as a parallel assembler. Dynamic 3D printing is a step toward achieving our long-term vision in which 3D printing becomes an interactive medium, rather than the means for fabrication that it is today. In this paper, we explore possibilities for this vision by illustrating application scenarios that are difficult to achieve with conventional 3D printing or shape display systems.

More info can be found in the project’s research paper here, or check it out in action in the video below:

A linear actuator that won’t break the bank

Extremely good linear actuators can be expensive and heavy, but what if you need something for relatively light applications? In the video below, James Bruton explains how you can make one using parts including a DC motor with a quadrature encoder, 3D-printed mounting, and a lead screw assembly.

His device uses an Arduino Uno for control, using pins 2 and 3 as interrupts to ensure correct rotation—and thus linear travel—sensing. Proper movement is facilitated with a pair of PID loops to regulate both the position and velocity, even under differing load and battery conditions. 

Arduino code and CAD information can be found on GitHub, while an explanation of the project is seen in the video below. 

Arduino Blog 19 Oct 15:32

Arduino Uno controls a trio of singing pumpkins

Halloween is just around the corner, and to celebrate, fadecomic decided to set up a trio of singing animatronic pumpkins to belt out scary songs. 

The project uses a Raspberry Pi for high level control and browser interface, and sends animation commands to an Arduino Uno via USB serial.

The Uno takes this data and translates it into actual pumpkin movements coordinated with music. The resulting trio of pumpkins each use their own servo to lift the top of the foam gourd up like a gigantic mouth, and also feature PWM-driven LED eyes. A light show controlled by SSRs completes the spooky musical effect. 

Build info is available here and the Arduino code can be found on GitHub.

FacePush adds extra realism to your VR experience

Haptic feedback is something commonly used with handheld controllers and the like. However, in a virtual reality environment, it could also be used with the other interface surface attached to your body: the VR headset itself.

That’s the idea behind FacePush, which employs an Arduino Uno-powered pulley system to place tension on the straps of an HTC Vive headset. A corresponding pushing force is felt by the wearer through the headset in response to this action, creating yet another way to help immerse users in a virtual world. 

Applications tried so far include a boxing game, dive simulator, and 360-degree guidance You can check it out in a short demo below, and read more about it in the full research paper here.