Posts with «uno» label

CasioKeyBot plays electronic keyboard with automated fingers

Electronic keyboards have been around for many years, taking human input and translating it into a variety of sounds. In a strange twist on this technology, Igor Angst has decided to substitute a robot in to push the synthesizer’s keys, using a laser-cut finger setup controlled by an Arduino Uno.

The MIDI sequence/notes to be played are provided by a computer running ALSA (Advanced Linux Sound Architecture), and interpreted by a C program that translates it into USB serial signals that the Uno can use. It then actuates its wooden fingers, playing a pleasing tune along with apparently keyboard-provided accompaniment in the video below.

I really like the crappy sound of those ‘80s toy keyboards. Unfortunately, I am a lousy live keyboarder and I only have so many hands. So I thought about adding MIDI capability to my good old Casio SA-21. The simplest way to do this is obviously building a robotized hand with 8 servo motors controlled by an Arduino microcontroller, which in turn receives its commands through the serial-over-USB interface sent by a tiny C application that connects to the ALSA sequencer world of my Linux live music setup.

Laser cutter files are available on the project’s write-up and code can be found on GitHub.

Talking Baymax inflatable robot greets kids at the pediatrician’s office

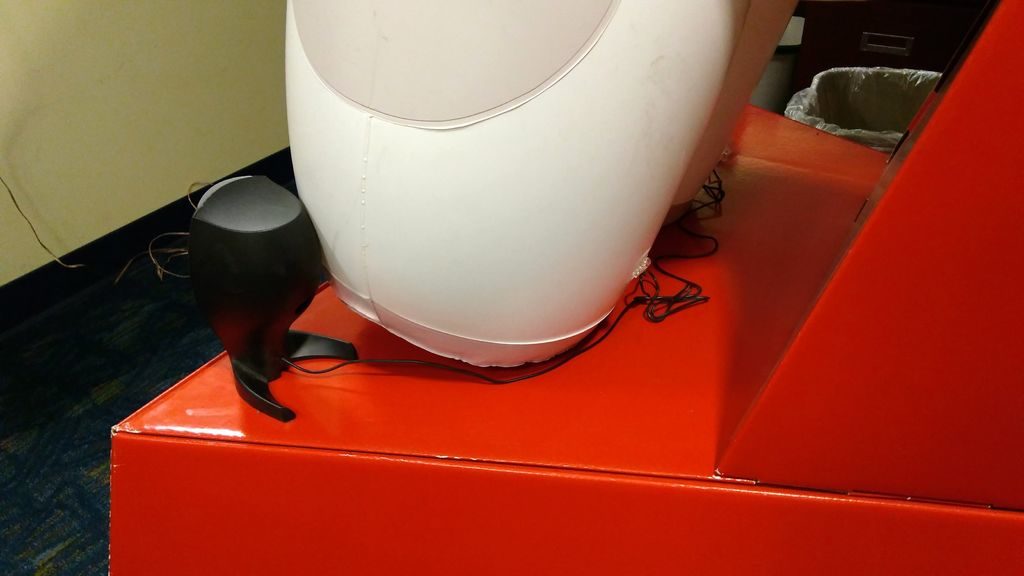
At Jason Poel Smith’s local pediatrician’s office, they have a variety of movie posters and displays to help make the environment more welcoming to kids. The most popular of them all is a huge inflatable Baymax robot character from the Disney movie Big Hero 6. 

While a beautiful display, Smith decided that what would make it even better is if it could talk, and went to work adding this functionality with an Arduino Uno, an MP3 shield, and a very large button. 

Now when kids arrive, they can hit the button to hear Baymax welcome them to the office as their “personal healthcare companion” via a pair of powered speakers. 

Arduino code and more info is available here, if you’d like to build something similar!

Arduino Blog 02 Oct 13:56

Vintage ham radio transformed into epic party game prop

Maker Thomas Meston needed a “mysterious looking device” that allows players to enter codes obtained via an original party game. What he came up with is entitled “Dr. Hallard’s Dream Transmission Box,” and consists of an Arduino, a party light, a smoke machine, and other components stuffed into a broken National NC-33 ham radio.

This radio makes a really excellent enclosure for the electronics inside, and when the device is properly activated the winning team hears a special message via an Arduino Uno-controlled MP3 shield, accompanied by laser lights and smoke. 

How it works:

  • When the box is switched on you hear static and see a yellow light. The device is ready for the codes to be entered.
  • Once all three dials have been set, the player switches the bottom toggle to “send” state, the box will message back whether team blue or team red has entered any codes with a quick flash of either a red or blue led.
  • If all three dials are set to red codes, the red team wins and hears a special message through the speaker just for them. The laser lights and smoke machine will be activated at the same time.
  • If all three dials are set to blue, a different message will play as well as activating the smoke machine and laser lights.

More info on the project can be found here, and while it might seem like a shame to modify this kind of vintage equipment, Meston notes that he sees this as giving it a nice second life since it was previously non-functional.

Arduino Blog 02 Oct 13:30

Three-axis rotary machining with Arduino

For many years CNC machining was the purview of well-equipped shops and manufacturing facilities. With the availability of inexpensive control hardware, such as Arduino-based GRBL packages, this type of control has come to the (technically inclined) masses, enabling us to create complicated 2D and 3D shapes automatically.

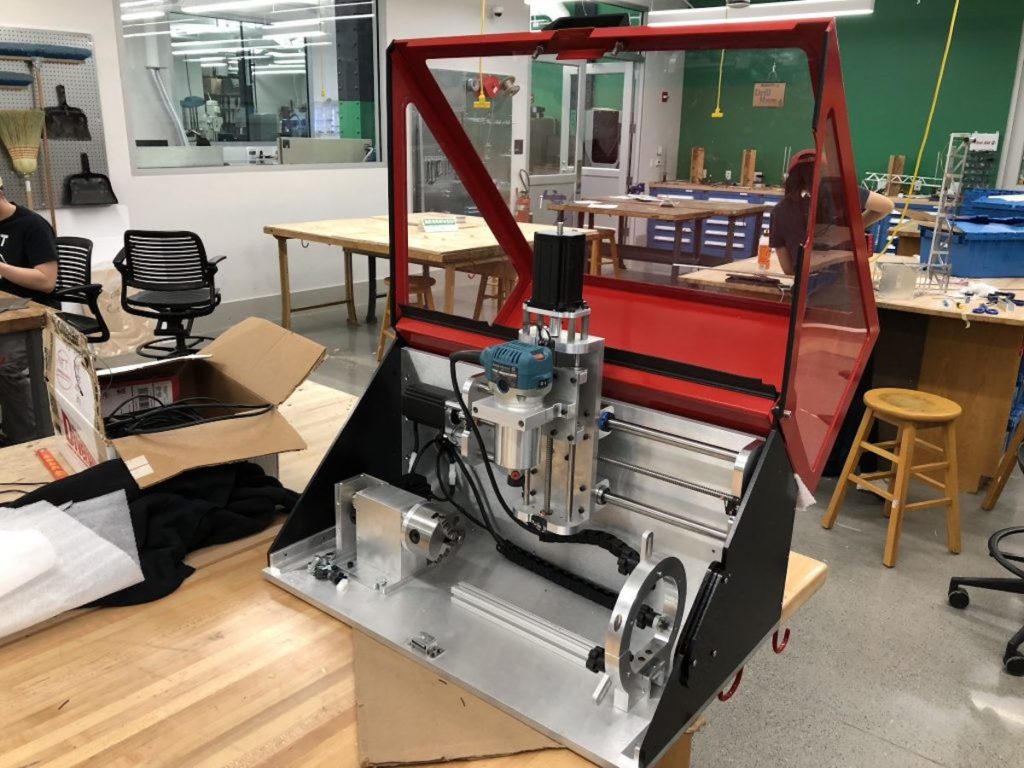
Normally, this means X, Y, and Z axes that control a cutting head, and if you wanted to much further in complexity and cost, you could add a fourth or even a fifth axis to tilt things as needed. The RotoMill, however, seen at World Maker Faire in New York, puts a different “spin” on things, substituting a stepper-controlled spindle for the Y axis. The result is a machine with unique machining capabilities, driven by an Arduino Uno running custom GRBL firmware.

As for now, the CNC can easily mill parts out of softer materials like plastic, wood, and foam, although it is designed to cut aluminum as well.

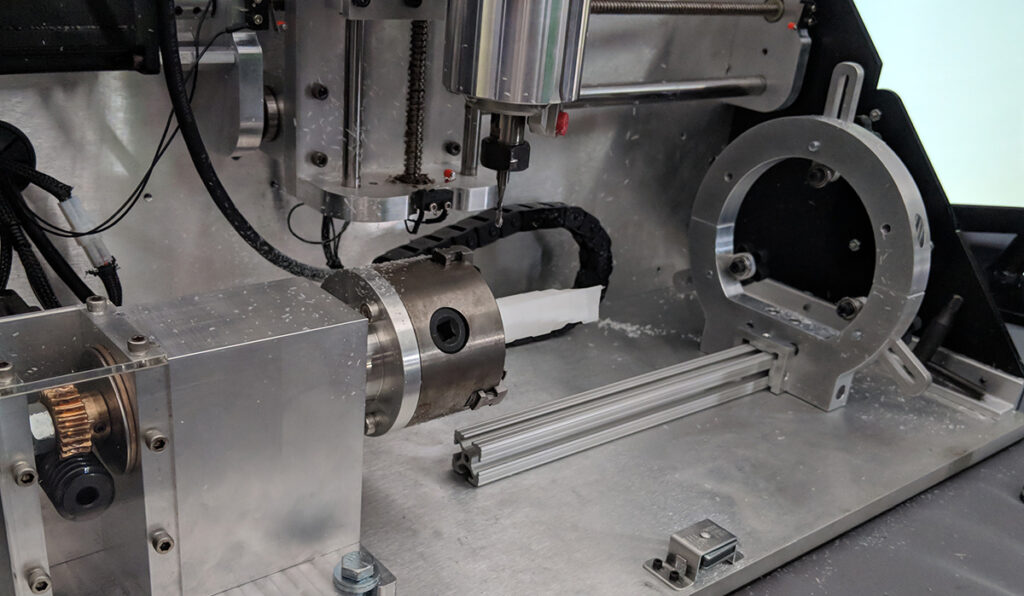
A three-axis rotary CNC built for the Mechanical Engineering senior design capstone course at Carnegie Mellon University by a team of engineering students. The CNC uses NEMA24 motors for each of the axes, with the X and Z axes actuated by lead screws, and the A (rotary) axis actuated by a worm gear. The spindle is an off-the-shelf Makita hand router, which allows for any router bit to be used.

Each motor is controlled by a stepper motor driver, which are all coordinated by an Arduino Uno running a customized version of the GRBL firmware. This is in turn controlled by a laptop running open-source GCode sending software.

To generate the GCode, we would create a 3D model of the part that we wanted to machine. We then “unwrapped” about the A axis. This basically takes the part and converts it from Cartesian coordinates to Cylindrical coordinates.

To generate the GCode, we would create a 3D model of the part that we wanted to machine. We then “unwrapped” about the A axis. This basically takes the part and converts it from Cartesian coordinates to Cylindrical coordinates.

At this point, we could take the unwrapped part and load it into Autodesk HSM, a popular industrial CAM package. This allowed us to generate a toolpath for machining the part. We basically “fooled” the CNC into thinking that it was a normal, three-axis Cartesian CNC. The trick, however, is that the Y axis is wrapped around and becomes the A axis.

Additional information and photos can be found on RotoMill’s page or Hackaday’s recent write-up.

Star Wars mouse droid reveals hidden scrolling LED display

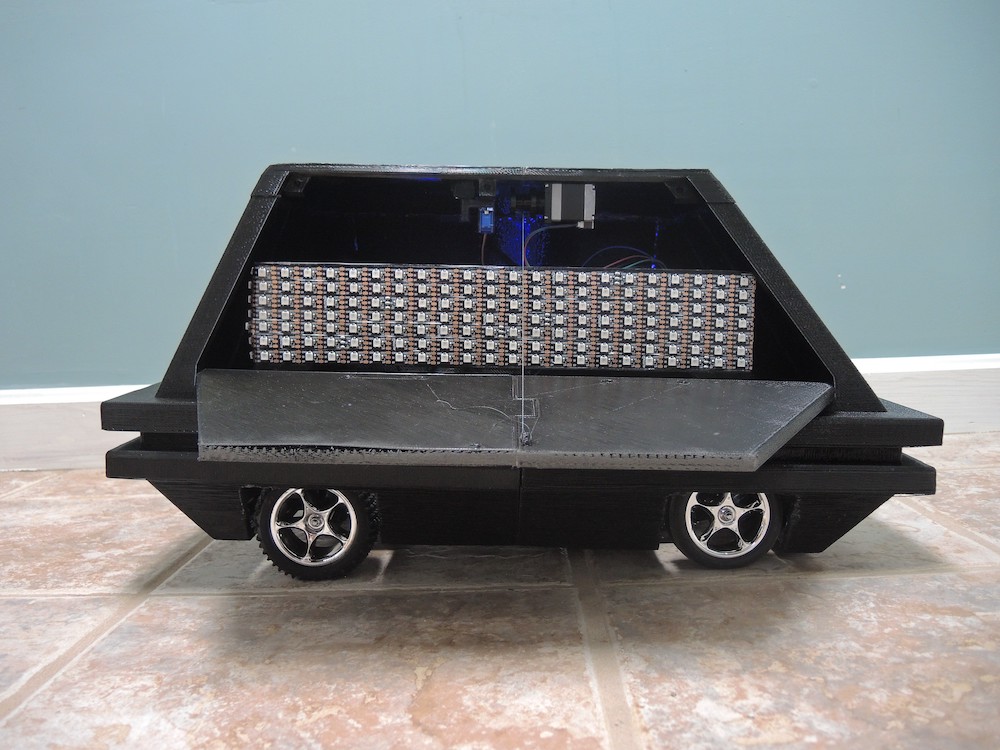
In several iterations of the Star Wars saga, small black droids can be seen scurrying around imperial installations. While they tend to fade into the background or provide a fun distraction in the movies, the mouse droid by Potent Printables acts as a sort of physical messaging app. It’s able to travel to the correct location, then pop open to unveil a scrolling LED sign.

Potent Printables can trigger the side door using a Bluetooth app on his phone. On command, an RC servo pushes it open, and lowers it down using a stepper motor/reel setup. An Arduino Uno along with an Adafruit Motor Shield are used for control, while an HC-05 module enables communication with the system.  

Check out the latest video in this build series below!

Let this Arduino robotic bartender mix you a drink

We’ve seen different versions of robotic bartenders over the last few years, but this one by DIY Machines looks quite clean, and because of its battery-powered operation can be taken anywhere.

The device works like a simple CNC machine, using a stepper and pulley setup to transport a glass between one of six upside down bottles. When it’s in the correct position, two more stepper motors push a lifting assembly into the selected bottle’s dispenser valve, emptying the correct amount of liquid into the glass. An Arduino Uno is used for control, with user interface provided via a Bluetooth module and smartphone app. 

More videos and build instructions can be found in the project’s write-up, while Arduino code is available here.

The Airdrum plays music with Arduino and six sensor PCBs

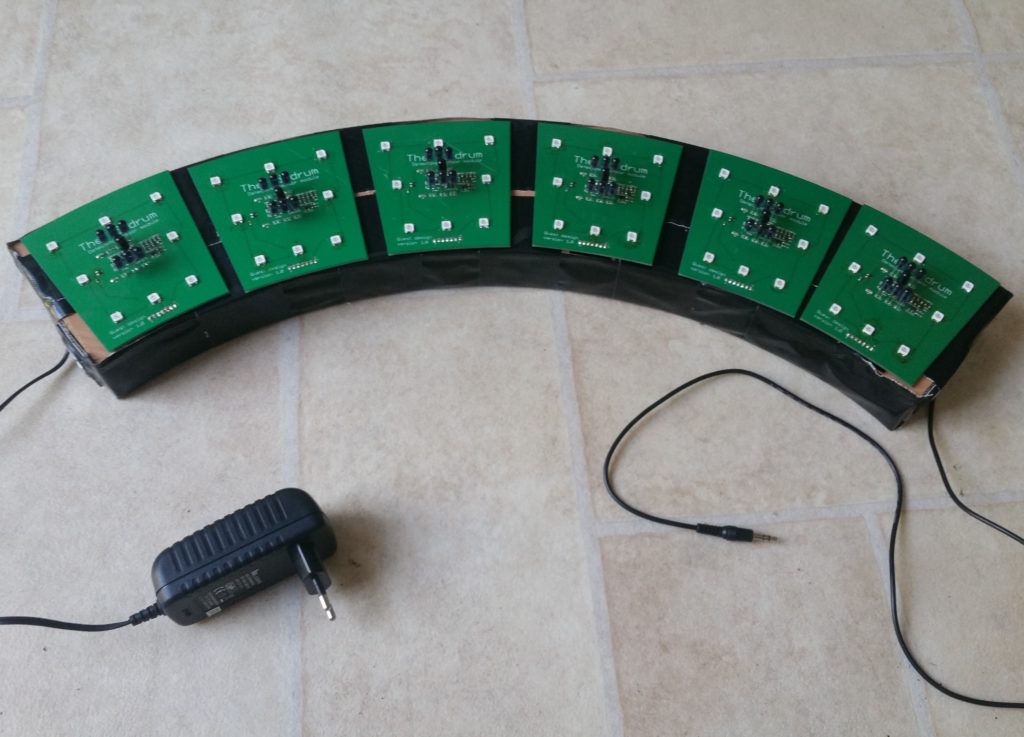
Playing music well can be difficult for anyone, especially those with certain disabilities. To make this form of self-expression easier for everyone,  Alessandro Verdiesen and Luuk van Kuijk built the Airdrum—an IR sensor-based instrument that is played simply by the wave of a hand.

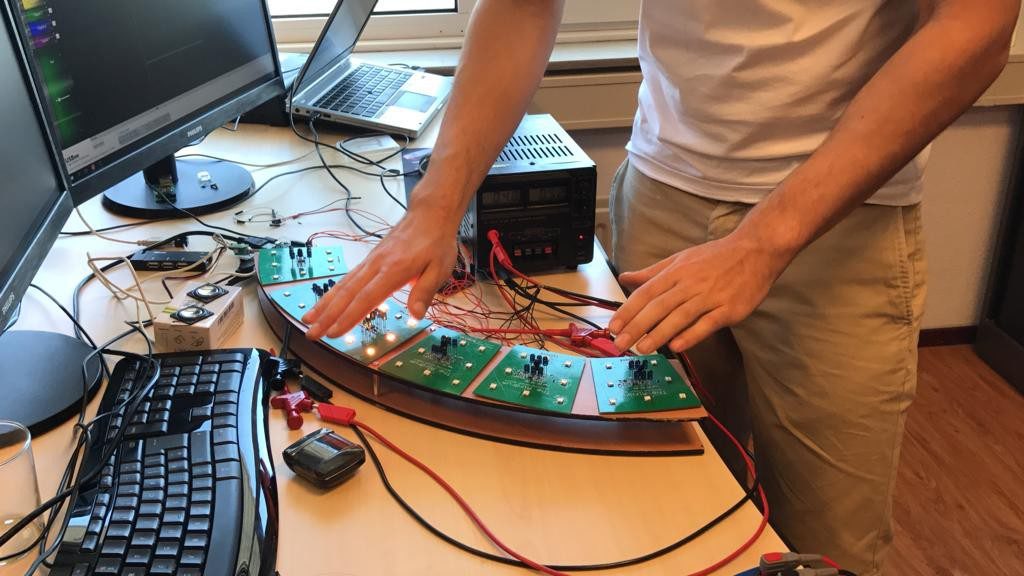
The Airdrum uses six individual sensor boards to detect when a hand is present. This input is then processed via an Arduino Uno and passed along to a Raspberry Pi to produce individual tones.

People with multiple severe disabilities often encounter the difficulties of playing a music instrument due to their mental and physical deficits.

Health care institutions which facilitate housing, learning opportunities and day care for these people often encounter the difficulties of communicating with their clients. These institutions experienced that making music together is a great way of communicating and therefore many institutions offer music therapy. According to music therapists, the main goal is having fun. It is proven that people learn more when having fun. When playing an instrument, clients can share emotions and practice their motor skills.

We have designed a musical instrument which is easy and fun to play, not just for people with severe disabilities, but for everyone: the Airdrum. The Airdrum is a small device containing panels with motion sensors and colored lights. When somebody moves their hand or head above the panels, they light up and they play sound.

The device, as shown in the demo video, appears to still be a work-in-progress, but has all the functionality needed to play a simple tune with RGB LED feedback.

Shy robotic sculpture imitates nature

In nature, animals often are sensitive to the outside environment, retreating into a hole, shell, or other protective structure upon sensing sudden movements. If you were to envision this kind of behavior in robot form, you might come up with something like “The Shy Machine” from Daric Gill Studios.

When it detects motion via a PIR sensor, the shell-like robot takes a reading of the ambient sound level using an internal microphone. If things are sufficiently quiet, it opens up using a stepper motor and lead screw, revealing a rainbow of colors provided by an array of RGB LEDs inside.

Its construction and a demo video are shown below, and you can see more about how this Arduino-powered robot was built and the results on Gill’s website.

Wheatley from Portal 2 comes to life with Arduino

If you’re a fan of Portal games, you’d probably like nothing more than to have your own Wheatley Personality Core to accompany you on real-life adventures. While that would be a passing thought for most, Luke Albertson has created his own amazing replica of the Portal 2 character. 

The device not only can say over 40 phrases from the game via an Adafruit soundboard, but contains a glowing blue eyeball that can pan, tilt, twist, and blink to help express what it’s thinking. It even has handles that move up and down, adding a kind of “flailing arms” effect to convey its emotions. 

Albertson’s animatronic project is controlled by an Arduino Uno, along with a Bluetooth shield and PS3 controller for user interface. It’s shown off quite nicely in the video below, and more info and clips are available here.

Blow out this Arduino LED candle!

LED candles can provide a nice sense of ambiance, without the inherent associated risk of fire. For better or worse, however, they don’t normally respond to air currents. 

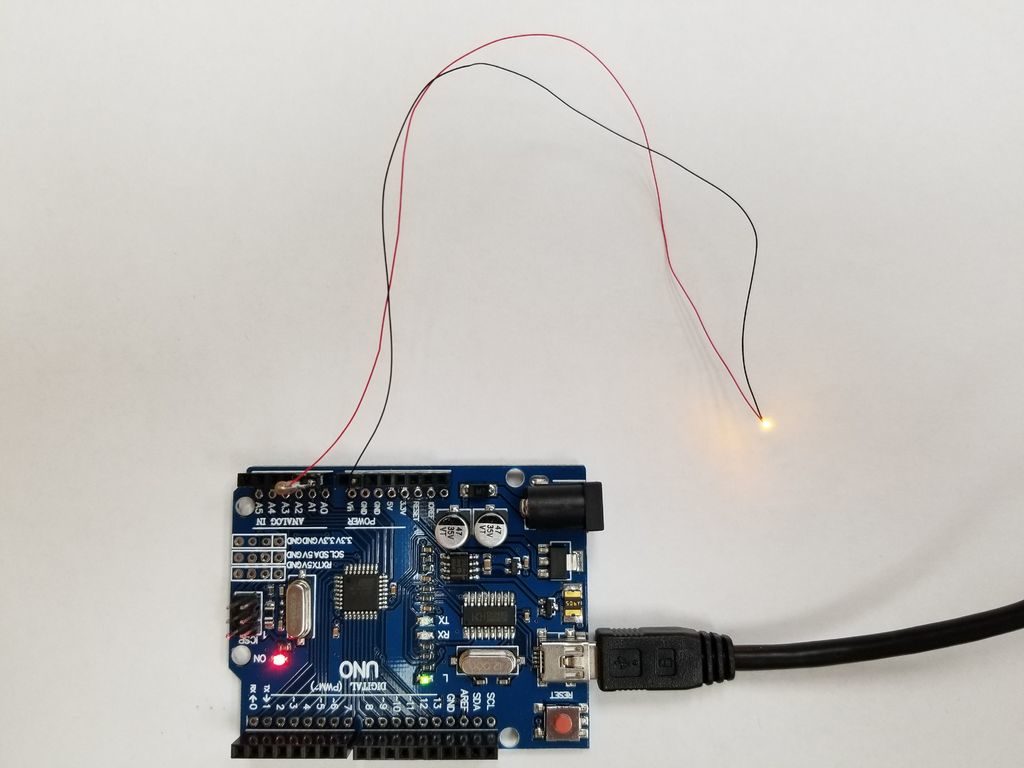
Paul Dietz, however, shows that this kind of response is actually possible, as an LED’s forward voltage drop is affected by how well it dissipates heat due to ambient air conditions.

This means that when you puff on an LED, the resulting voltage changes can be picked up by an Arduino Uno.

LEDs are designed to emit light, but they also make surprisingly capable sensors. Using only an Arduino UNO, an LED and a resistor, we will build a hot LED anemometer that measures wind speed, and turns off the LED for two seconds when it detects you are blowing on it. You can use this to make breath controlled interfaces, or even an electronic candle that you can blow out!

How Does This Work? 

When you run current through an LED, its temperature rises. The amount of rise depends on how effectively you are cooling it. When you blow on a hot LED, the extra cooling lowers the running temperature. We can detect this because the forward voltage drop of an LED increases as it gets cooler.

The circuit is very simple and looks much like driving an LED. The only difference is that we will add an extra wire to measure the voltage drop of the LED while it is on. To work well, you want to use a very small LED (I suggest using an 0402 surface mount LED) connected by the thinnest possible wires. This will allow the LED to heat and cool very quickly, and minimize the heat lost through the wires. The voltage changes we are looking for are just millivolts – at the very edge of what can be reliably detected via the UNOs analog pins. If the LED is resting on something that conducts heat away, it may not be able to get hot enough, so it works best if it is up in the air.

As shown in the video below, he turned this concept into a novel “candle” setup, blowing his tiny 0402 SMD-format LED out over and over—like a trick birthday candle!

Arduino Blog 21 Aug 18:48