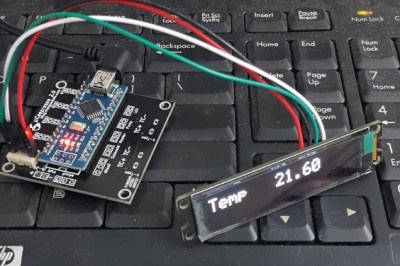
Posts with «thermocouple» label

Reflow Rig Makes SMD Soldering a Wok in The Park

For a DIY reflow setup, most people seem to rely on the trusty thrift store toaster oven as a platform to hack. But there’s something to be said for heating the PCB directly rather than heating the surrounding air, and for that one can cruise the yard sales looking for a hot plate to convert. But an electric wok as a reflow hotplate? Sure, why not?

At the end of the day [ThomasVDD]’s reflow wok is the same as any other reflow build. It has a heat source that can be controlled easily, temperature sensors, and a microcontroller that can run the proportional-integral-derivative (PID) control algorithm needed for precise temperature control. That the heating element he used came from an electric wok was just a happy accident. A laser-cut MDF case complete with kerf-bent joints holds the heating element, the solid-state relay, and the Arduino Nano that runs the show. A MAX6675 thermocouple amp senses the temperature and allows the Nano to cycle the temperature through different profiles for different solders. It’s compact, simple, and [ThomasVDD] now has a spare wok to use on the stove top. What’s not to like?

Reflow doesn’t just mean oven or hotplate, of course. Why not give reflow headlights, a reflow blowtorch, or even a reflow work light a try?

PID Controlled Charcoal BBQ – Put an Arduino on it!

At Maker Faire Milwaukee this past weekend, [basement tech]  was showing off his latest build, a PID controlled charcoal grill. While it hasn’t QUITE been tested yet with real food, it does work in theory.

PID (a feedback loop with some fancy math used to adjust the input to get a consistent output) controlled cooking is commonly used for sous vide, where one heats up a water bath to a controlled temperature to cook food in plastic bags. Maintaining water temperature is fairly easy. Controlling a charcoal barbecue is much more difficult. [basement tech] accomplishes this with controlled venting and fans. With the charcoal hot and the lid on, there are two ways to control temperature; venting to let hot air out, and blowing air on the coals to make them hotter. A thermocouple sensor stuck through the grill gives the reading of the air inside, and an Arduino nearby reads that and adjusts the vents and fans accordingly.

The video goes into extensive detail on the project, and describes some of the challenges he had along the way, such as preventing the electronics and servos from melting.

There’s not a lot of time left in the grilling season, so we hope [basement tech] gets an opportunity to enjoy the meats of his labor. Maybe he can trade food with [Jason] and his PID controlled meat smoker.


Filed under: cooking hacks

Brasilia Espresso Machine PID Upgrade Brews Prefect Cup of Energy

Coffee, making and hacking addictions are just bound to get out of control. So did [Rhys Goodwin’s] coffee maker hack. What started as a little restoration project of a second-hand coffee machine resulted in a complete upgrade to state of the art coffee brewing technology.

The Brasilia Lady comes with a 300 ml brass boiler, a pump and four buttons for power, coffee, hot water and steam. A 3-way AC solenoid valve, wired directly to the buttons, selects one of the three functions, while a temperamental bimetal switch keeps the boiler roughly between almost there and way too hot.

To reduce the temperature swing, [Rhys] decided to add a PID control loop, and on the way, an OLED display, too. He designed a little shield for the Arduino Nano, that interfaces with the present hardware through solid state relays. Two thermocouples measure the temperature of the boiler and group head while a thermal cut-off fuse protects the machine from overheating in case of a malfunction.

Also, the Lady’s makeup received a complete overhaul, starting with a fresh powder coating. A sealed enclosure along with a polished top panel for the OLED display were machined from aluminum. [Rhys] also added an external water tank that is connected to the machine through shiny, custom lathed tube fittings. Before the water enters the boiler, it passes through a custom preheater, to avoid cold water from entering the boiler directly. Not only does the result look fantastic, it also offers a lot more control over the temperature and the amount of water extracted, resulting in a perfect brew every time. Enjoy [Rhys’s] video where he explains his build:

Thanks to [Pirate14] for the tip!


Filed under: cooking hacks, home hacks