Posts with «robots hacks» label

Open Source Hackable Robot

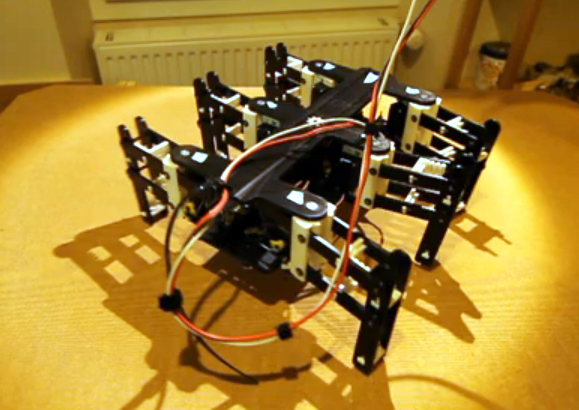
The world of robots is an interesting place, and it’s an even better place for children to get started in electronics. To that end, [Richard Albritton] has created a low-cost, open source robotics platform called the Hack-E-Bot specifically tailored to make it as easy as possible to get started.

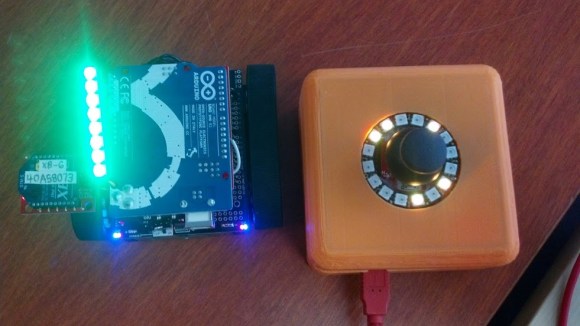
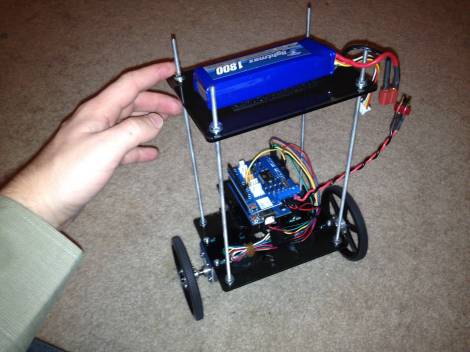
The goals for the robot kit were to spark curiosity for electronics and programming, to be easy to assemble and program, to be scalable, and to be as easy on the wallet as possible. This was accomplished by using the familiar Arduino microcontroller on an intuitive platform. The robot uses an ultrasonic rangefinder to navigate as well, and can support a wide range of other sensors. The kit comes in at just under $50, making it a great option for an entry-level robot.

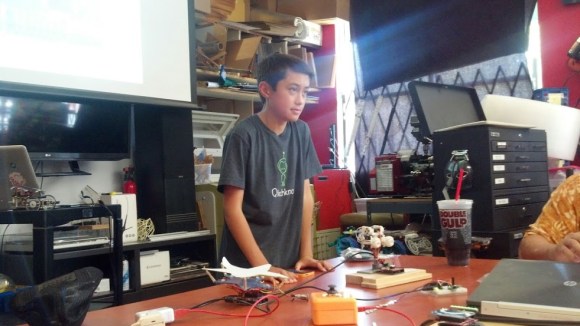
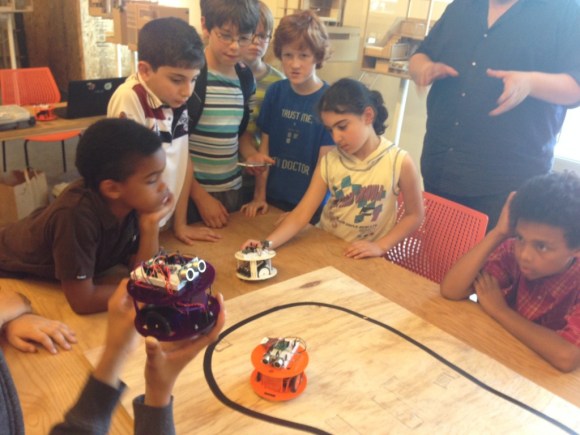
The project is currently seeking crowd funding and [Richard] is also seeking educators to get involved. Currently the only kits available are at fairs and other conventions but they should be able to start producing them in greater quantities in the future. The Arduino libraries are a work in progress but they are available on the project site, as well as several instructional videos and other information about the project.


Filed under: robots hacks

Stewart Platform Ball Bearing Balancer

For their Mechanical Engineering senior design project at San Jose State University, [Tyler Kroymann] and [Robert Dee] designed and built a racing motion simulator. Which is slightly out of the budget of most hackers, so before they went full-scale, a more affordable Arduino powered Stewart platform proof of concept was built. Stewart platforms typically use six electric or hydraulic linear actuators to provide motion in six degrees of freedom (6 DOF), surge (X), sway (Y), heave (Z), pitch, roll, and yaw. With a simple software translation matrix, to account for the angular displacement of the servo arm, you can transform the needed linear motions into PWM signals for standard hobby servos.

The 6 DOF platform, with the addition of a resistive touch screen, also doubled as a side project for their mechatronic control systems class. However, in this configuration the platform was constrained to just pitch and roll. The Arduino reads the resistive touch screen and registers the ball bearing’s location. Then a PID compares this to the target location generating an error vector. The error vector is used to find an inverse kinematic solution which causes the actuators to move the ball towards the target location. This whole process is repeated 50 times a second. The target location can be a pre-programmed or controlled using the analog stick on a Wii nunchuck.

Watch the ball bearing seek the target location after the break.

Thanks to [Toby] for sending in this tip.

We at Hackaday look forward to the real life implementation of Marble Madness!

Need help Demystifying PID Control? Or perhaps you would like to build your own Stewart Platform?


Filed under: Arduino Hacks, robots hacks

The Berlin Cyberbeetle with Its Own TV

The evolution of the mere beetle has transformed from organic matter into robotic gears, circuits, and wires. This Cyberbeetle project was born during an open culture hackathon in Berlin throughout a few months time period. The event was called Coding for Vinci and was held from April into July 2014. The project used an Arduino and combined openly licensed biology related pictures and sounds from the museums in the area in a fun and playful way.

[Tomi] based the design on a gorgeous Chalcosoma atlas beetle species which was found in insect box scans that were taken from a nearby museum. The cool thing about this project is that the Cyberbeetle that [Tomi] created has its own hi-tech insect box with various special features. For instance, when the box was rotated on its side, small doors were revealed that when opened unveiled a tiny home theater system with a hi-definition flat screen, audio system and infrared communication. Inside the horn of the Cyberbeetle was an infrared receiver, which allowed the creature to interface with its TV program when it started. Music videos as well excited the robotic insect.

The project was awarded the “Funniest hack” prize during the hackathon. And a video of it can be seen after the break:


Filed under: robots hacks

The RC White House Robot

This remote controlled, Arduino-based robot was created by a young student named [Quin] who likes to teach electronics classes at hackerspaces. It is an adaptation of this awesome, fast, fully autonomous mini Roomba that has since driven its way into the Presidential building during the 1st ever White House Maker Faire.

The quick, little device uses a robot chassis kit with an XBee wireless module so that the controller and the robot can be connected together. An NFC Shield was hacked and split in half so that the wires could be soldered in place.

[Quin]‘s goal was to develop a fun game that records the number of times the robot drives over NFC tags laid across a flat surface. Points are shown in the form of blinking lights that illuminate when the device goes over the sensors, keeping track of the score.

The controller container was made with an open source 3D printer called a Bukobot. The enclosure holds an Arduino and another XBee shield along with a joystick and a neopixel ring, giving it a nice polished look complete with a circle of beautiful, flashing LED’s.

We saw the robot in action during an Arduino workshop at a local 3D printing store/makerspace in Pasadena called Deezmaker. [Quin] told us that will.i.am, the musician, tried it out during the Maker Faire in Washington DC. He also said that he met Bill Nye the Science Guy there as well.

This simple project, and more inventions of his, has opened up many doors in the maker community. And yet [Quin] seems unphased by all the attention, staying very focused on teaching his skills to anyone who is eager to learn.

Documentation of the project is on his website (Qtechknow) along with this color-changing Christmas star; which is perfect for sprucing up a holiday Christmas tree. Another project is this methane sensing fart cap. All 3 can be seen in the photo below.

A video with the robot being demoed comes next. In it, [Quin] talks about what it was like to be invited into the White House.

Also, check out this spectacular video about the Maker Movement with [Quin] in it.

In addition, here is a Popular Science article and this feature in Make Magazine about him.


Filed under: robots hacks

3d printed hexapod robot

This hexapod was made almost entirely via 3d printing (translated). The parts that you need to supply include a few fasteners to make connections, twelve servo motors, and a method of driving them. As you can see in the video after the break, all those parts come together into a little robot that functions quite well. The only thing that we think is missing are some grippy feet to help prevent slipping.

[Hugo] calls the project Bleuette. It is completely open source, with the cad files and source code available on his Github repository. There is additional information in the wiki page of that repo. This gives us a good look at the electronic design. He’s controlling the legs with an Arduino, but it’s all dependent on his own shield which features a PIC 18F452 to take care of the signals used to drive all of the servo motors. The board also has some peripherals to monitor the current draw and regulate the incoming power.


Filed under: robots hacks
Hack a Day 30 Jan 20:01

Robot can barely move with so much hardware strapped to it

We think that [Andrej Škraba] needs to start looking for a beefier motor platform. This little robot has so much hardware strapped to it the motors can barely keep up. But with a little help it can make its way around the house, and it takes a whole lot of connectivity and computing power along for the ride.

The white stick on the top is a single-board computer. The MK802 Mini sports an A10 processor and up to a gig of ram. Just below that is a USB hub which is sitting on top of a USB battery pack. This powers the computer and gives him the ability to plug in more than one USB device. The robot chassis is from Pololu. It uses an Arduino and a motor shield for locomotion, with commands pushed to it via USB.

This setup makes programming very easy. Here [Andrej] has a keyboard and HDMI monitor plugged in to do a little work. When not coding it can be disconnected and driven over the network. He makes this happen using an Apache server on the MK802 and node.js. See a demo of the system in the clip after the break.


Filed under: robots hacks
Hack a Day 24 Dec 20:01

Pixar-style lamp project is a huge animatronics win

Even with the added hardware that lamp still looks relatively normal. But its behavior is more than remarkable. The lamp interacts with people in an incredibly lifelike way. This is of course inspired by the lamp from Pixar’s Luxo Jr. short film. But there’s a little bit of most useless machine added just for fun. If you try to shut it off the lamp shade is used to flip that switch on the base back on.

[Shanshan Zhou], [Adam Ben-Dror], and [Joss Doggett] developed the little robot as a class project at the Victoria University of Wellington. It uses six servo motors driven by an Arduino to give the inanimate object the ability to move as if it’s alive. There is no light in the lamp as the bulb has been replaced by a webcam. The image is monitored using OpenCV to include face tracking as one of the behaviors. All of the animations are procedural, making use of Processing to convey movement instructions to the Arduino board.

Do not miss seeing the video embedded after the break.

[via Gizmodo]


Filed under: robots hacks

High tech tagging adds graffiti to poles

[Akira] looks to increase his urban canvas by tagging poles which some custom hardware. If you’re looking to add some art to a lamp post, height becomes a problem. That’s where this little guy comes in. The remote-controlled pole climber includes a marker that leaves a trail as the device climbs and descends.

The rig clamps around a pole, with omnidirectional bearings on three sides of the four-sided frame. That last side is occupied by a rubber wheel mounted at a bit of an angle. When the motor turns the angle of the wheel causes the jig to rotate around the pole and climb at the same time. To come back down the motor is simply reversed. Xbee modules are used to make a rudimentary wireless control with a button for up and another for down. It looks like the marker is also mounted on a servo but we didn’t see a way to control when it is actually touching the pole. Perhaps you can figure it out by studying the clip after the jump.

We’ve seen projects that climb poles before. Among our favorites is the one that takes your bicycle with it.


Filed under: robots hacks
Hack a Day 23 Nov 19:01

Wii Nunchuck controlled robot exhibits rock solid balancing

[Willy Wampa] is showing off his self-balancing robot. What strikes us about the build is how well tuned his feedback loop seems to be. In the video after the break you will see that there is absolutely no visible oscillation used to keep its balance.

The parts used are quite easy to obtain. The acrylic mounting plates are his wife’s design and were custom cut through the Pololu service. They were also the source of the gear motors. He’s using a SparkFun IMU with an Arduino and a motor shield. He first posted about the build about a month ago, but the new revision switches to a Pololu motor driver shield which he says works much better, and adds control via a wireless Wii Nunchuck.

The PID loop which gives it that remarkably solid upright stance is from a library written by [Brett Beauregard]. Once again the concept of open source lets us build great things by standing on the shoulders of others.

[via Reddit]


Filed under: robots hacks
Hack a Day 25 Sep 18:01

Qube robots use well-designed laser-cut acrylic

These robot cubes, called BOXZ, use an interesting interlocking part design to mount and protect the parts within. But to really make them pop you need to color and apply your own papercraft skins.

The actual hardware is quite simple. They’ve used an Arduino, along with motor driver and Bluetooth shields, to control a set of geared DC motors. There’s a battery pack which holds four AA cells and a pair of servo motors which seem to be there to act as arms. This base can then be adorned with sensors to add functionality (line following, wall following, obstacle avoidance, etc.).

Despite the simple appearance of the cube, the chassis is the most complicated part. It uses sixteen pieces of acrylic, but they may also be hand cut from cardboard by printing out templates and gluing them onto the material. The parts are designed with interlocking tabs which we often see used on laser-cut wooden box parts.

We’ve embedded the video presentation of BOXZ after the break.


Filed under: robots hacks